"Boden Gate 3" full task strategy, the main line of the main process of the whole branch partner task strategy (including "plot process", "main/branch line/partner task", "process points", "decryption")."Bodate 3" is by Larian A magic adventure RPG produced and distributed by Studios is also the latest masterpiece of a series of legendary "The Gate of Bude" series. As one of the earliest RPG games, "The Gate of Bade" has a huge impact and milestone significance in the world, and has set a benchmark for the entire RPG game industry. More than 20 years have passed since the previous work "Borders 2", the latest sequel of this legendary series once again provided us with the epic adventure chapter of the Ferun World, let us work together to enter the new legendary journey!

Strategy description
At the same time, this strategy will provide a reference for the completion of the mission, partnership tasks and hidden content in various regional branch mits, and point out the impact of key tasks and items on the main plot of the main plot.
Finally, a full-task and full process will be sorted out for your reference.
Configuration requirements
Minimum configuration
Require 64 -bit processor and operating system
Operating system: Windows 10 64-BIT
Processor: Intel i5-4690 / AMD FX 4350
Memory: 8 GB RAM
Graphics card: NVIDIA GTX 780 / AMD Radeon R9 280X
DirectX version: 11
Storage space: 150 GB available space

Recommended configuration
Require 64 -bit processor and operating system
Operating system: Windows 10 64-BIT
Processor: Intel i7 4770K / AMD Ryzen 5 1500X
Memory: 16 GB RAM
Graphics card: NVIDIA GTX 1060 6GB / AMD RX580
DirectX version: 11
Storage space: 150 GB available space
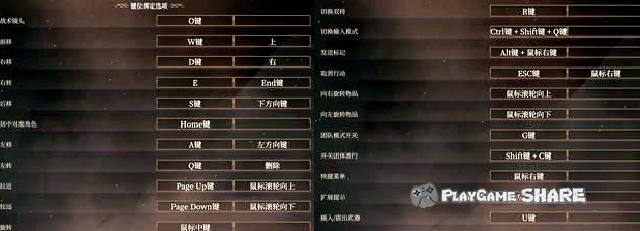
Button configuration
Remark
Because this site has previously available EA version of Raiders, the first chapter of this strategy will be carried out in the form of reference to the old strategy and supplement the detailed content of the official version.
Original sticker link
- Mainline process: Prologue (1)
- Mainline process: Prologue (2)
- Chapter 1: Common part
- Chapter 1: The help of the doctor Ney (1)
- Chapter 1: The help of the doctor Ney (2)
- Chapter 1: Seeking help from the priest of the ground (1)
- Chapter 1: Seeking help for the Earthy Women’s Festival (2)
- Chapter 1: Seeking help from the priest of the ground (3)
- Chapter 1: Find the Geis Yanji Nourishment
- Chapter 1: Other parts
- Chapter 1 -Go to the Tower of the Monthly
- Chapter 2: Step into the Tower of the Month (1)
- Chapter 2: Sneak into the Tower of the Month (2)
- Chapter 2: Step into the Tower of Monthly (3)
- Chapter 2: Geis Yanji Nourishing Breeding (1)
- Chapter II: Geis Yanji Nourishing Room (2)
- Chapter 2: Looking for Catherine’s relics (1)
- Chapter 2: Looking for Catherine’s relics (2)
- Chapter 2: Looking for Catherine’s relics (3)
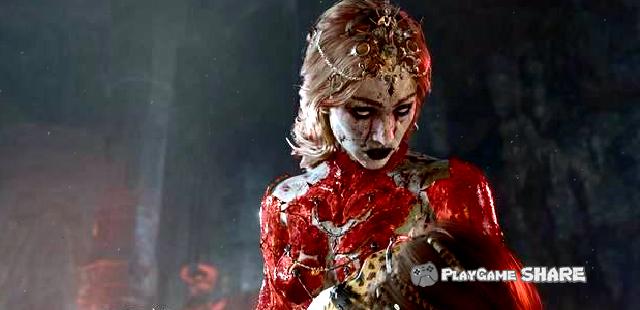
- Chapter 2: Defeat Catherine (1)
- Chapter 2: Defeat Catherine (2)
- Chapter 2: Go to the Gate of Bade (1)
- Chapter 2: Go to the Gate of Bade (2)
- Chapter III: Flying Dragon Fortress outside
- Chapter 3: Raphael’s Proposal
- Chapter III: Gotash’s Poor Stone (1)
- Chapter III: Gotash’s Poor Stone (2)
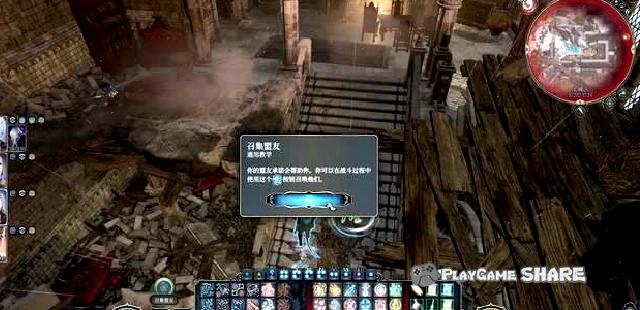
- Chapter III: Calling Allies (1)
- Chapter III: Calling Allies (2)
- Chapter III: Calling Allies (3)
- Chapter III: Balin’s Polygish Stone
- Chapter III: Fighting Main Brain (1)
- Chapter III: Fighting Main Brain (2)
- Regional Total Observatory: An nautilus crash area
- Line task: Explore the ruins
- Triggering event: Nautilus crash area
- Regional general view: green forest land
- Branch task: rescue Di Jing Saza
- Line task: rescue refugees
- Triggering event: Druidi Land
- Regional general view: infection village
- Line task: Search the cellar (1)
- Line task: Search the cellar (2)
- Regional general view: the road to promotion
- Line task: hunting the devil
- Branch task: find the lost goods
- Regional general view: Wojin dormant land
- Side task: rescue the trapped person
- Branch task: rescue consultant
- Line task: San Talin hiding point/rescue artist
- Regional General Examination: Tea Room on the River
- Line task: Rescue Melena (1)
- Line task: Rescue Melena (2)
- Regional Total Land: Earth Camping Land
- Regional general view: dark area
- Line task: the dark area entrance
- Line task: Lost boots (1)
- Line task: Lost boots (2)
- Line task: find mushroom hunters
- Line task: light language bark
- Triggering event: Exploring the Olympic Tower
- Regional Total: The Furnace of Revenge
- Branch task: fine gold furnace (1)
- Line task: fine gold furnace (2)
- Line task: cursed monk
- Line task: True Soul Nayle
- Regional general viewing: cover shadow battlefield
- Line task: punish evil
- Triggering event: extinguishing the fire handle
- Line task: save refugees
- Branch task: Wake up Alder Kura (1)
- Line task: Wake up Alder Kura (2)
- Line task: the curse of the shadow to remove the shadow
- Regional General Examination: Leswen Town
- Line task: Carenie’s resistance forces
- Triggering event: winery poison, mortar room, Murloc Bay
- Triggering event: taxation office, the temple of Shar
- Regional general view: Geis Yanji Nurtarians
- Regional general view: Georai Monastery Courtyard (internal)
- Line task: Luoshan Da’s blood
- Regional general view: Georai Monastery (external)
- Regional Overall: Sar’s trial
- Line task: Raphael’s enemies
- Triggering event: Rat group, Shar Endi
- Triggering event: The Tower of the Monthly Out of the Monthly
- Regional general view: seizing the nest of the heart
- Line task: Mizola’s property
- Regional Total Observatory: Levonton
- Line task: The revenge of the iron hand dwarf
- Line task: The revenge of the iron hand dwarf (2)
- Line task: The revenge of the iron hand dwarf (3)
- Line task: The revenge of the iron hand dwarf (4)
- Branch task: investigation murder (1)
- Branch task: investigation murder (2)
- Line task: Balt Music Referee
- Line task: Suspicious toys (1)
- Line task: Suspicious toys (2)
- Line task: Find a clown Deri Person (1)
- Line task: Find a clown Deri Person (2)
- Line task: Find a letter of loss
- Branch task: Assist underground forces (1)
- Branch task: Assist underground forces (2)
- Line task: Find “Library”
- Branch task: High -level harmonicaist (1)
- Side task: high -level harmonies (2)
- Branch task: high -level harmonicaist (3)
- Triggering event: Levonton
- Regional General Examination: Xiacheng District (East)
- Regional General Examination: Xiacheng District (West)
- Line task: Book of Dead Spirit/Master Deep Water City
- Line task: Anti -ghost Mutual Aid Group (1)
- Line task: Anti -ghost -in -law mutual assistance group (2)
- Line task: Lord Mumini (1)
- Branch task: Lord Mumini (2)
- Line task: Lord Mumini (3)
- Branch task: stop publishing
- Line task: the residence of hope (1)
- Line task: the residence of hope (2)
- Line task: the residence of hope (3)
- Line task: Dragon Ansu
- Line task: Save the artist
- Regional Total Examination: Lower Waterway
- Partnership task: Asleen (1)
- Partner task: Astai Lun (2)
- Partner task: Shadow Heart
- Partner task: Will
- Partner task: Kakak
- Partner task:
- Partnership task: Leezel
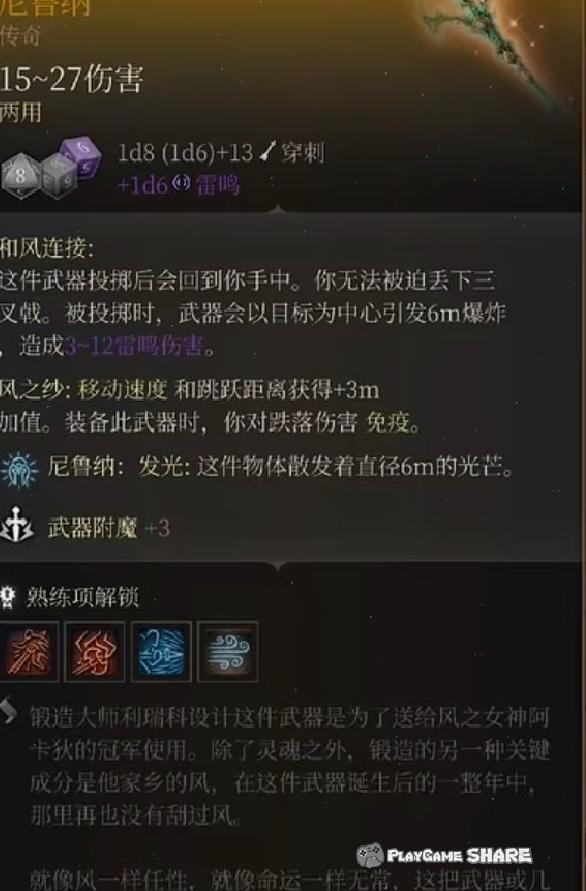
- Summary of legendary equipment
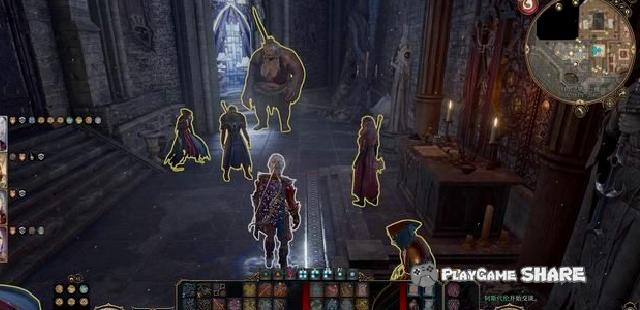
Mainline process: Prologue (1)
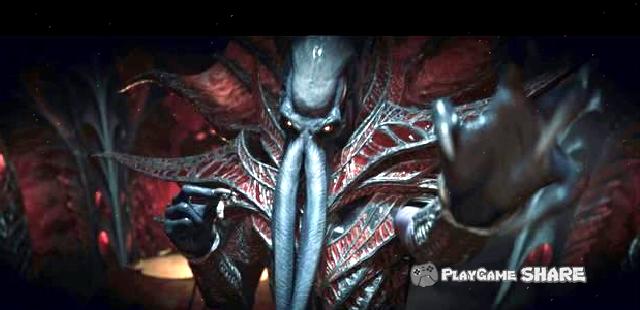
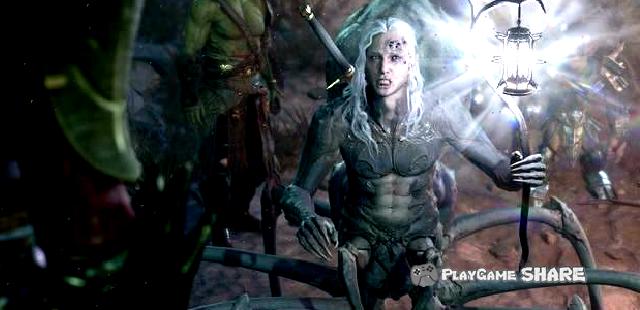
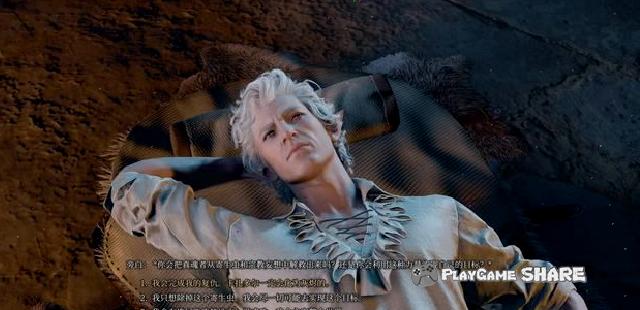
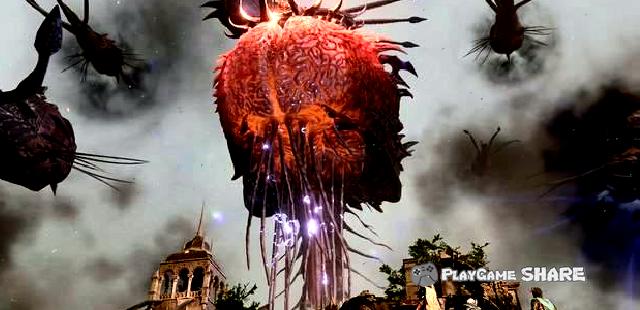
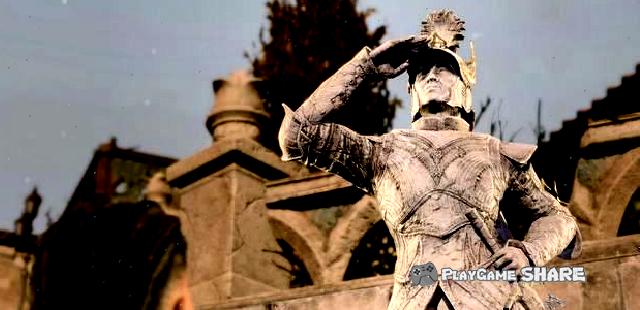
1. Prologue
The story starts from a snail-shell spacecraft, and the player wakes up as a parasitic host.
After watching the opening plot, you can move freely. The goal is to go to the bridge, try to escape the nautils, and leave the devil’s territory.
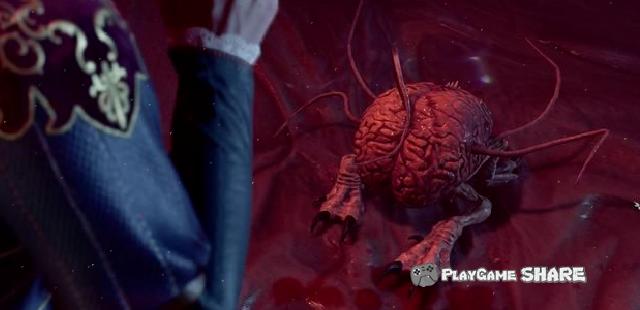
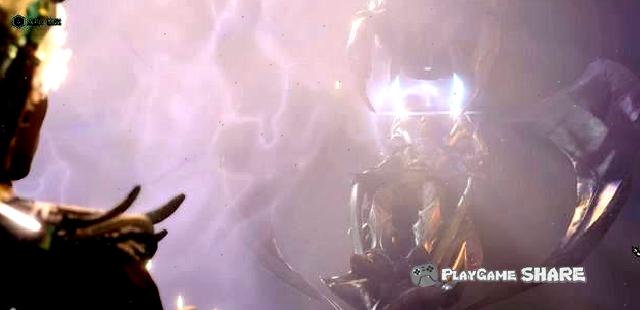
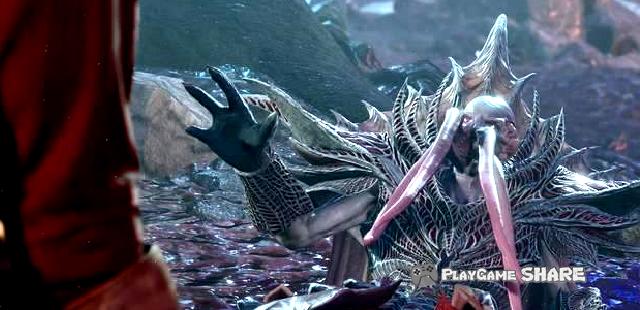
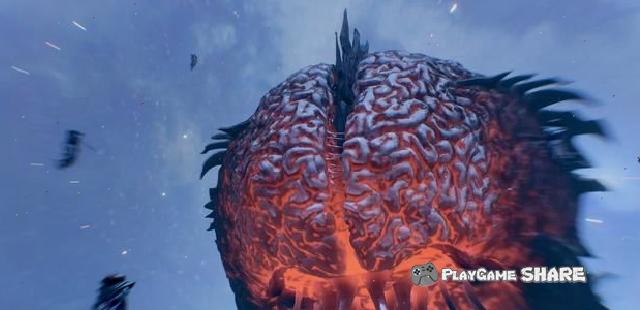
After moving to the first room, you can control the elevator to rise and observe the victim’s brain.
This is obviously a kind of mature magic body that has always been mature, but because the player also has a parasitic body in the mind, there is no need to be hostile.
Through a DC10 judgment (strength, agility), the larvae can be removed. If the agility is high enough, you can also use the judgment of DC15 to reduce its attributes.
Because before getting rid of parasites, we all belong to the friends who seize the magic forces, and we can let it follow and help the battle.
If you choose to hurt it, it will escape directly without entering the battle round.
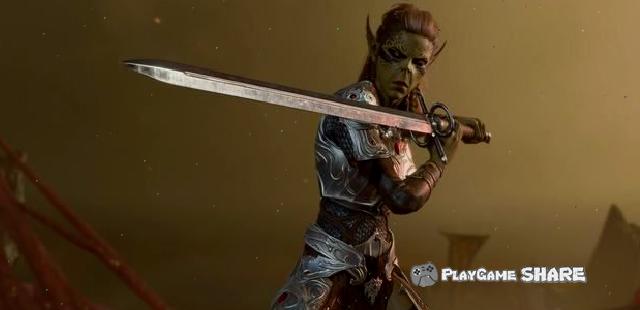
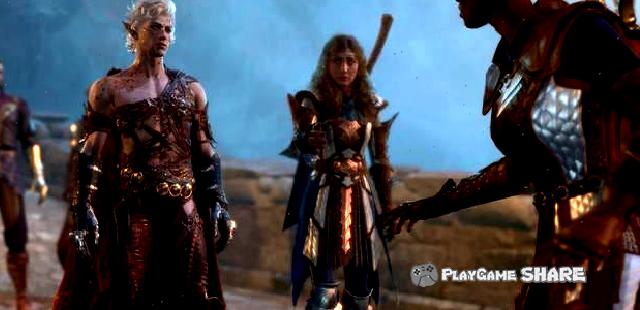
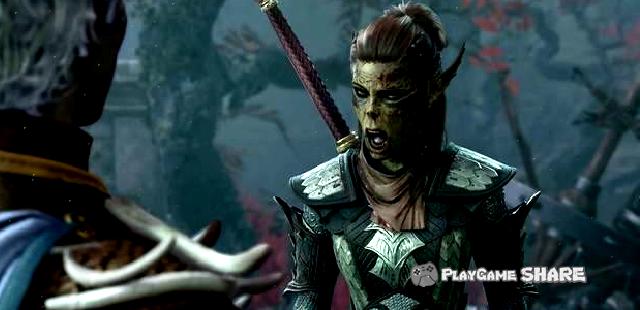
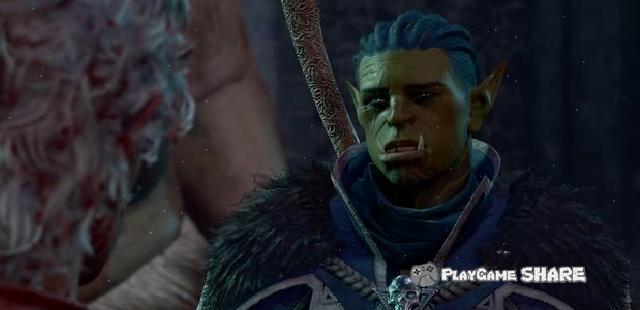
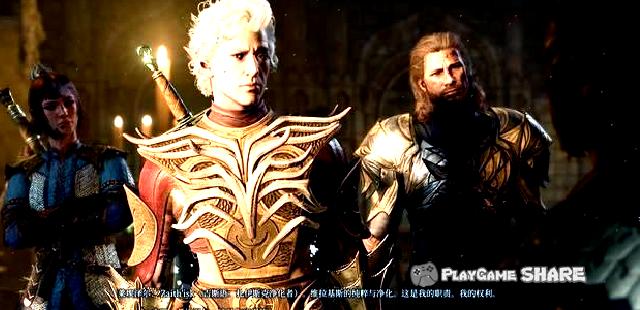
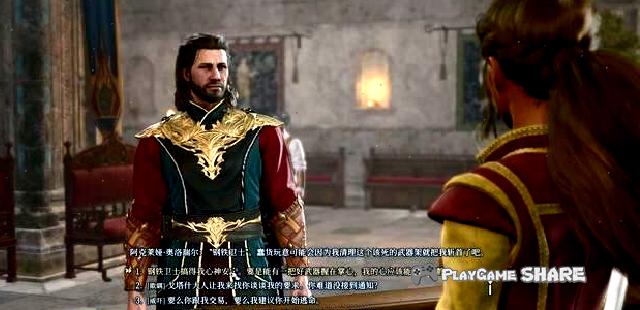
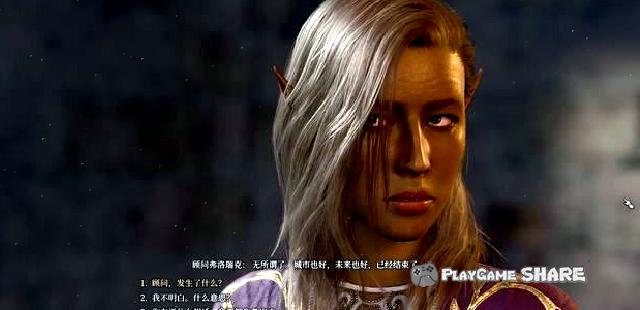
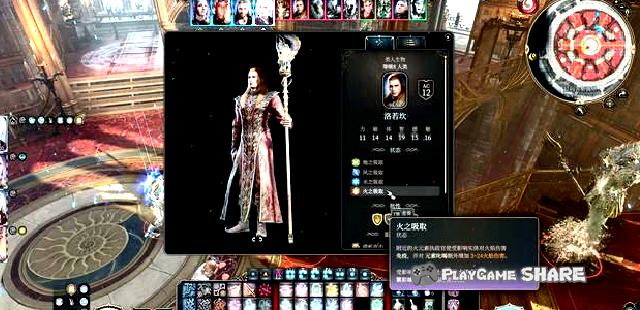
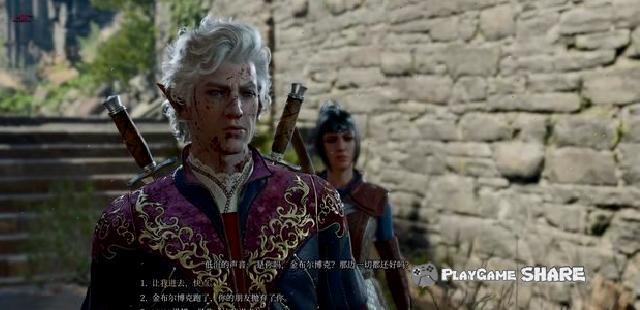
Continue to move forward, you will encounter Geisia Ms. "Ledezel", and you can join the team through the induction ability of the magic magic.
Mainline process: Prologue (2)
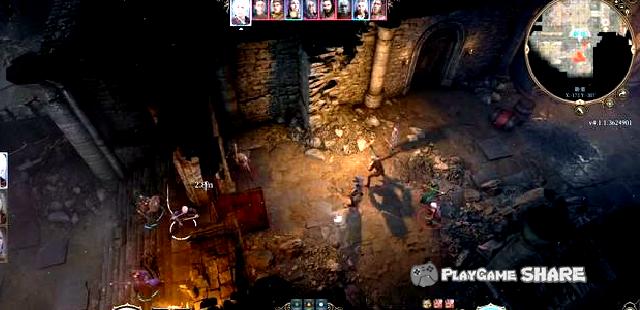
Continue to move forward is the first battle. Several little devils can be broken one by one.
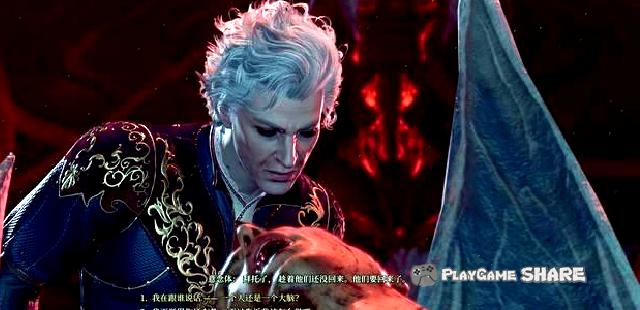
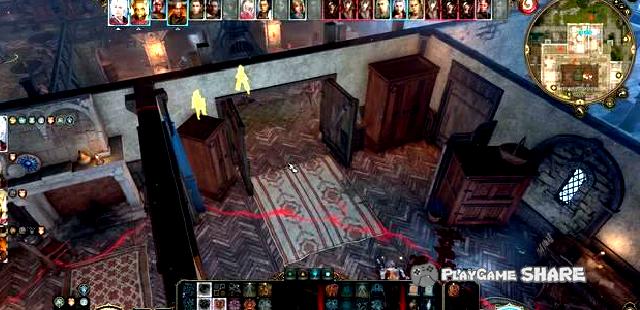
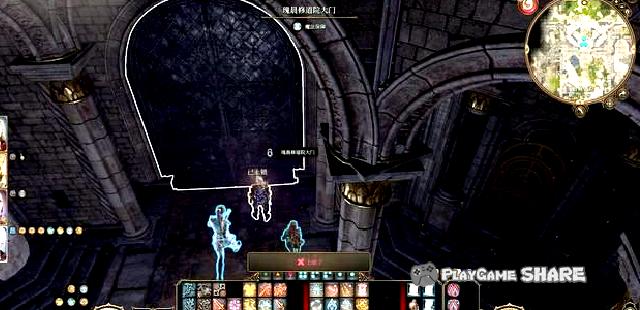
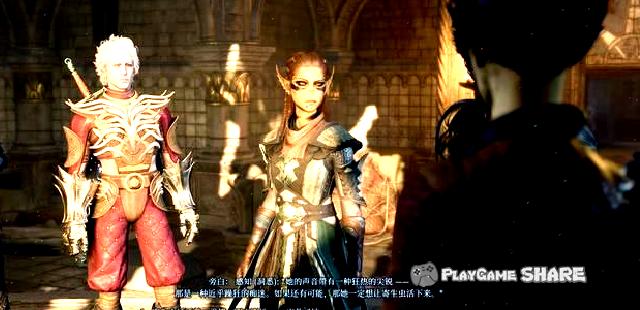
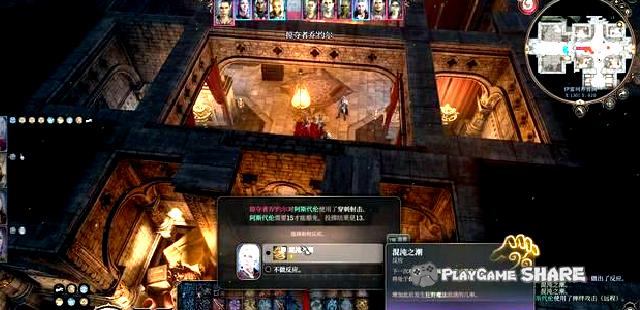
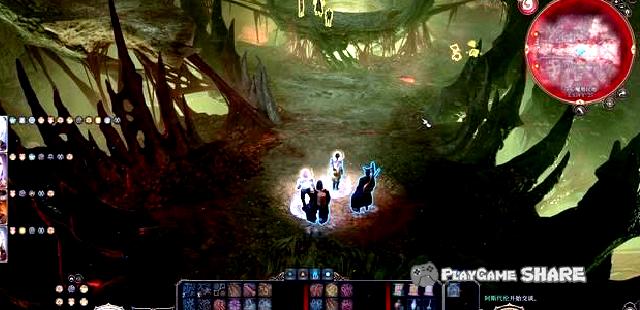
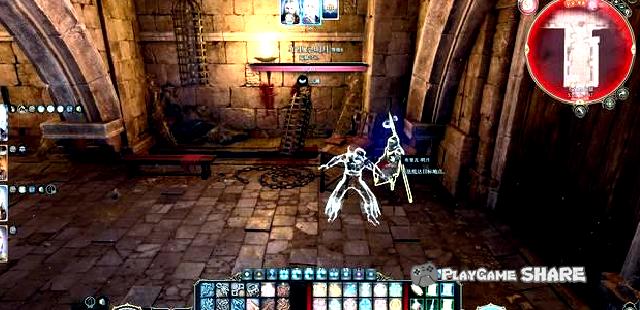
After climbing to the top, entering the cultivation room, you can see a trapped person and two victims who have basically completed the transformation.
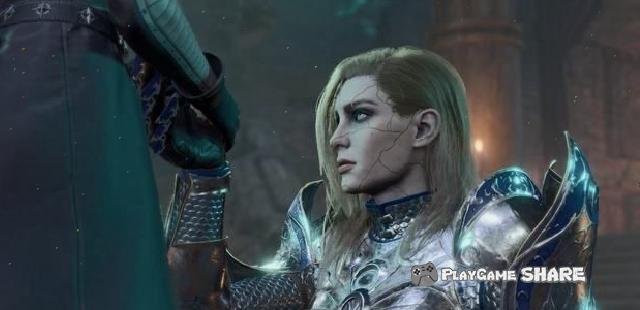
The trapped person is called "Shadow Heart", and this person is also one of the companions.
Whether you choose to leave directly, you can meet her since then, but it is recommended to save it (add some goodness by the way).

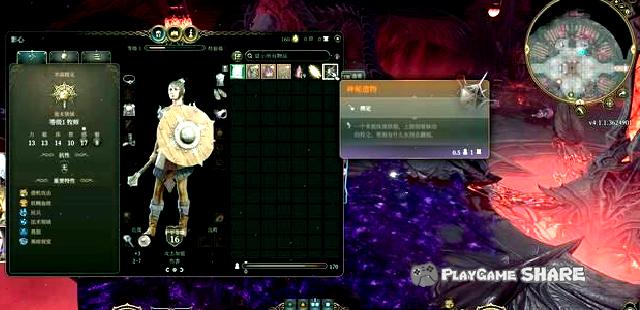
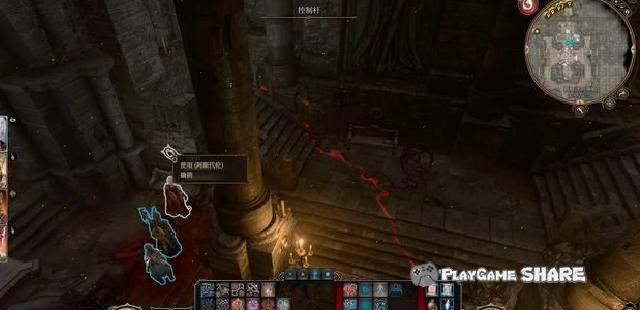
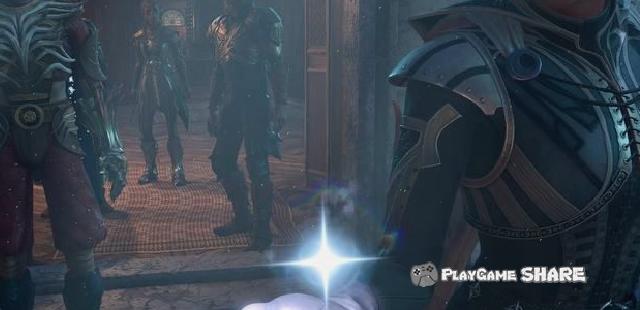
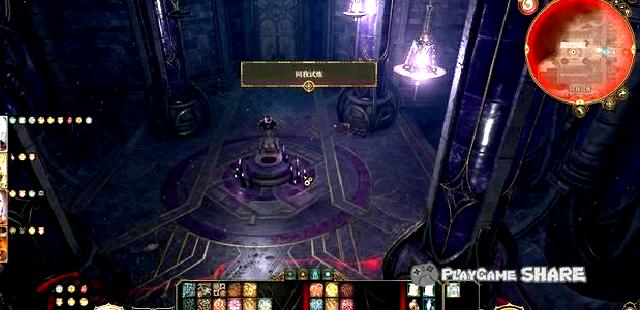
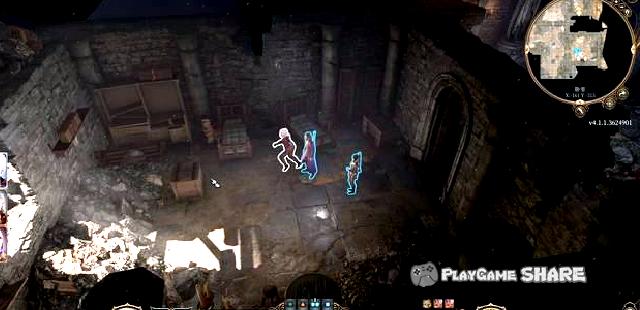
Interacting with the console on the side, you can find the slot after selecting the investigation.
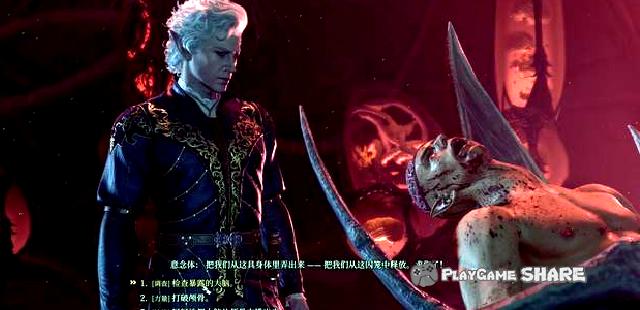
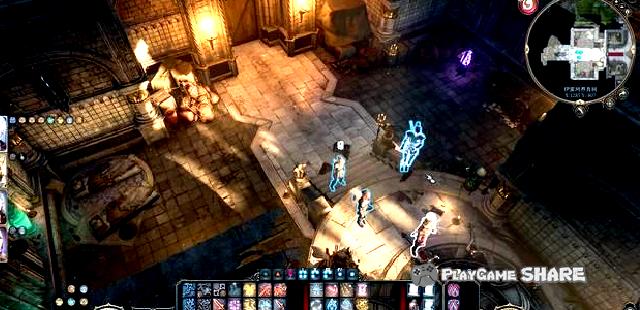
The console in the center of the room manipulated two victims, and the switch was "released", "transformation" and "annihilation" from left to right.
Because they have been controlled by the magic magic, they release them to trigger the battle. It is recommended that they rescue the shadow heart and forcibly kill them (experienced value) with an attack instruction.
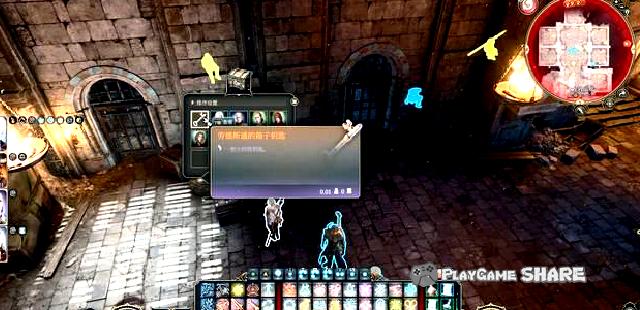
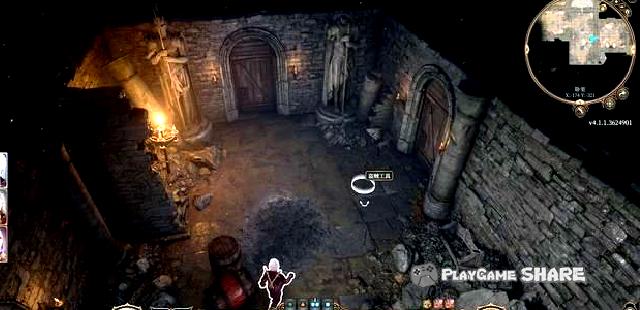
The key "Strange Rune" required to rescue Yingxin can be found in the two rooms where the magic bodies seized.
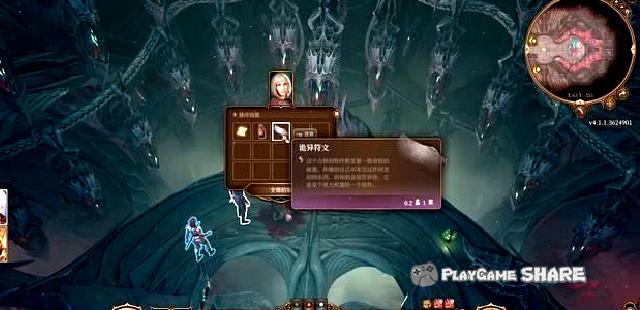
Yingxin is carried on the items called "Mysterious Relics". Double-click use can trigger a partner mission plot.
Through DC10’s intelligence judgment, we can know that the text on the relic was ancient Geisyus, but there is no special effect for the time being.
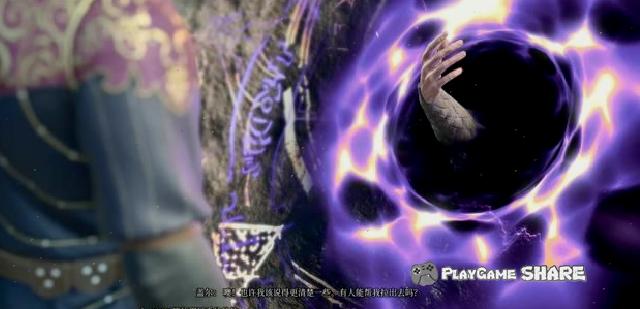
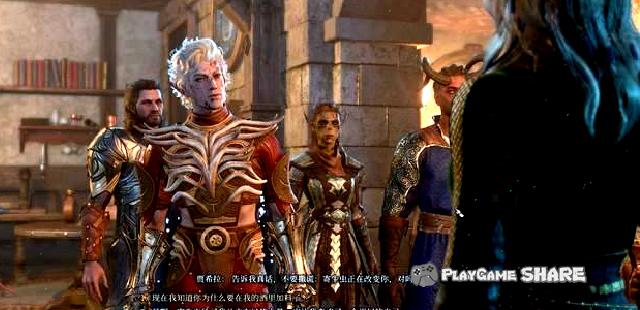
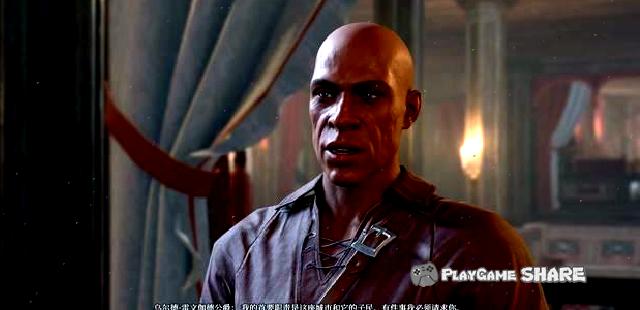
After entering the bridge, the plot triggered the plot. The seize the magic has not realized that the three were not controlled, and they ordered the three to manipulate the console to escape from this place.
[Remarks] The difference between the EA version is that there is a missing scene.
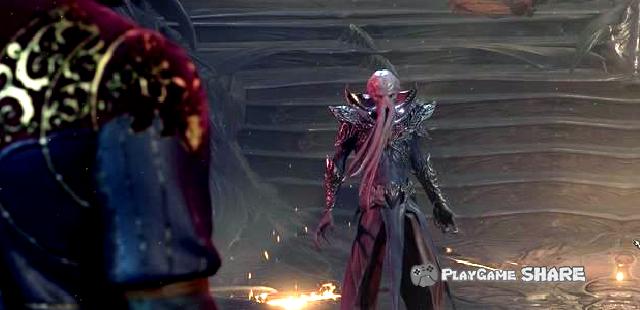
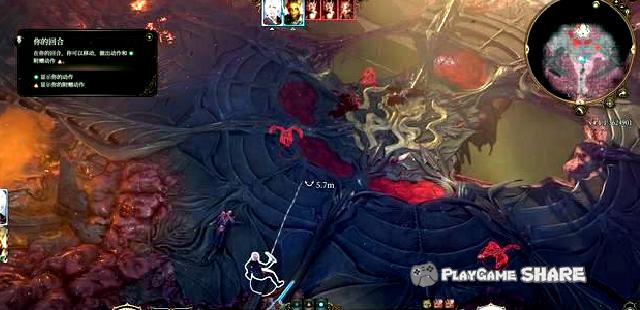
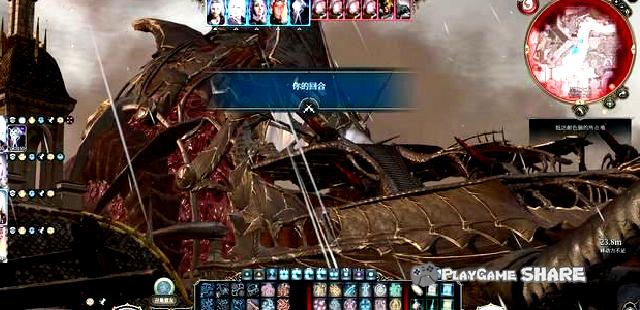
Then entered the battle, and the strongest demon commander on the court would fight with the devil. We only needed to reach the console to forcibly end the battle.
[Remarks] The combat restriction is completed within 15 rounds, and you need to pay attention to time.
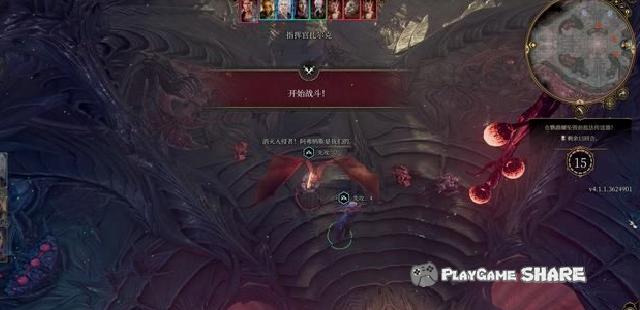
The blood volume of the commander is very high, but he can also get involved in him when he and the heart of the heart of the heart (it is recommended to use it when he is below 30 blood volume, and if he is attacked, he will usually be killed in spike).
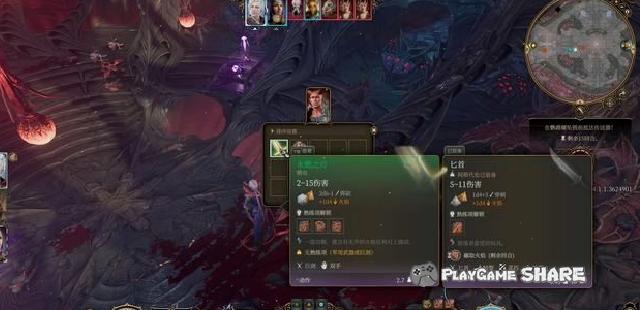
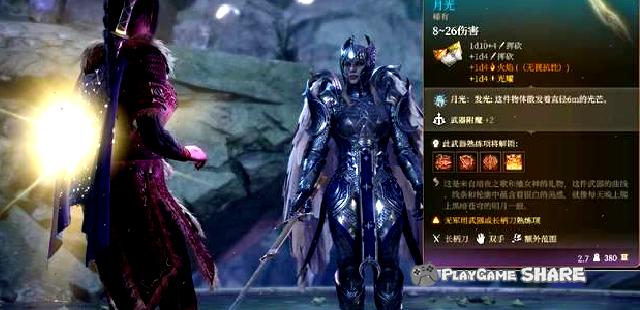
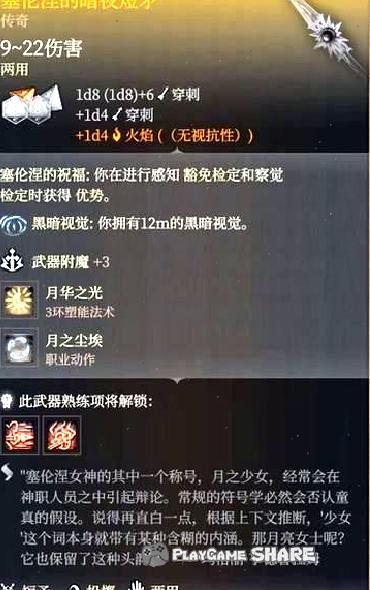
Killing his reward was the "Blade of Yong Ran" by the giant sword.
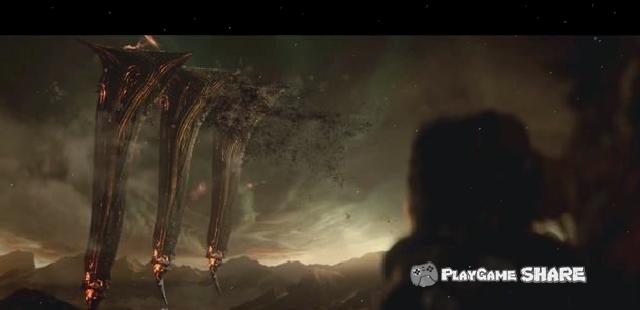
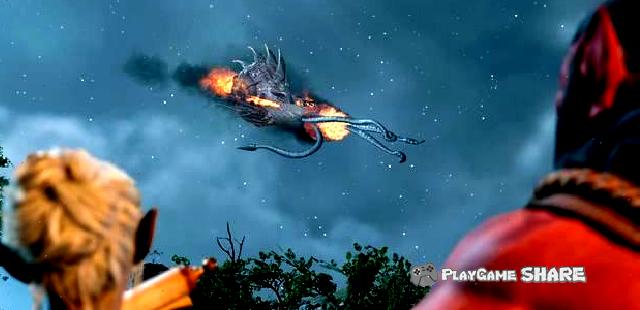
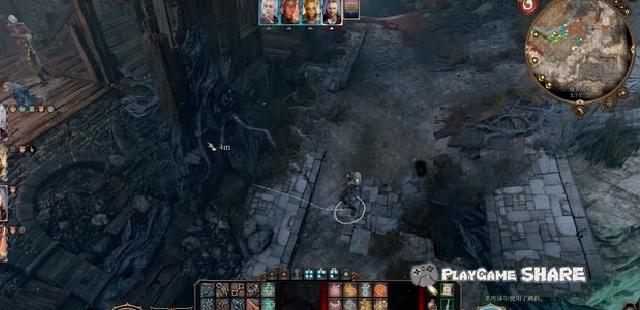
After completing the battle, the plot triggered the plot, and the snail shell that escaped from the devil’s territory crashed in the wild.
Chapter 1: Common part
2. Chapter 1
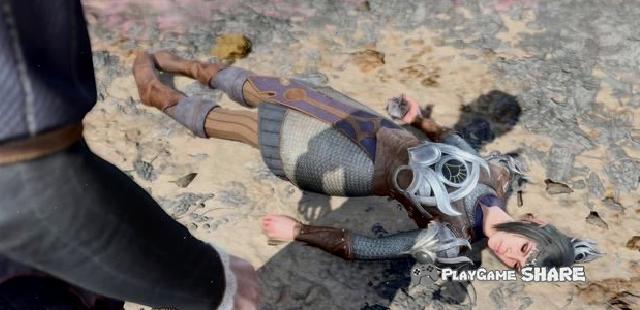
The protagonist under the mysterious power was escaped and woke up on the beach.
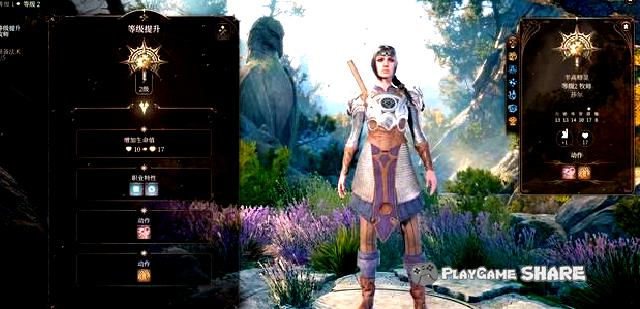
If you have rescued Yingxin before, we can find her unconscious on the beach.
Choosing to touch the relics will reduce her favor, it is recommended to wake up directly.
Yingxin is a priest. She has the degree of proficiency in Zhongjia.
If the occupation selected by the player does not have a treatment method, her auxiliary spell is basically indispensable in the battle.
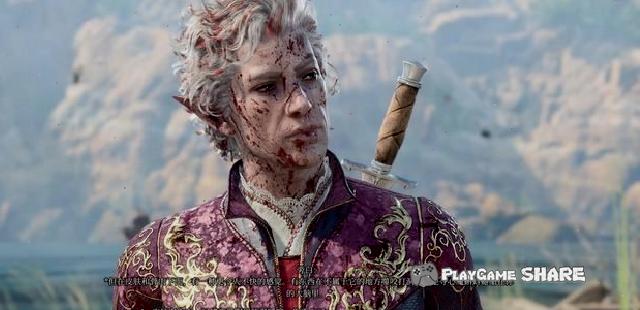
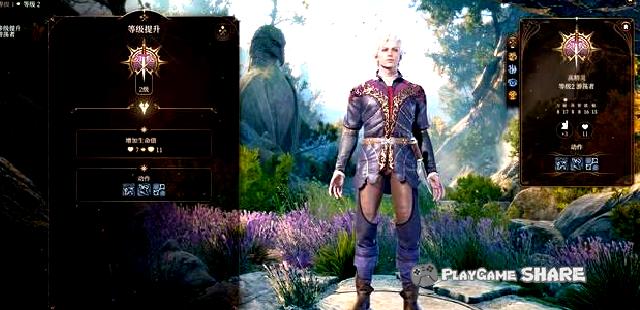
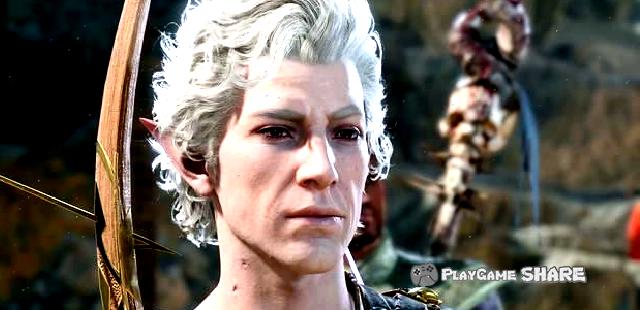
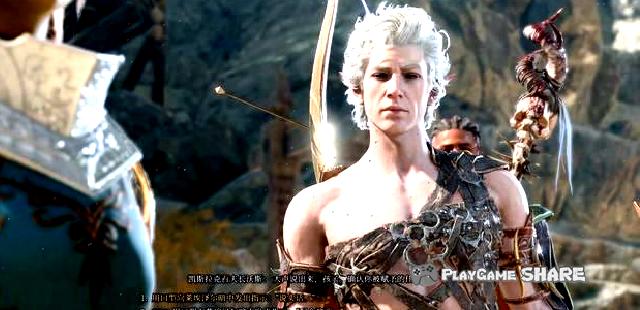
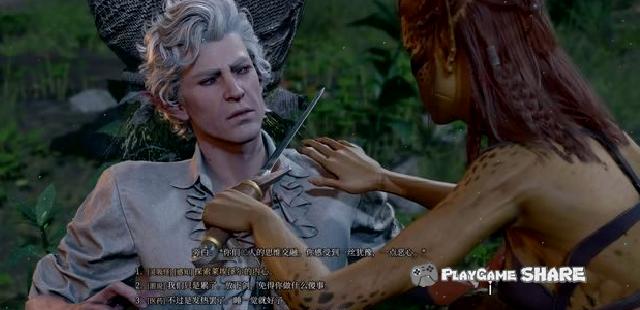
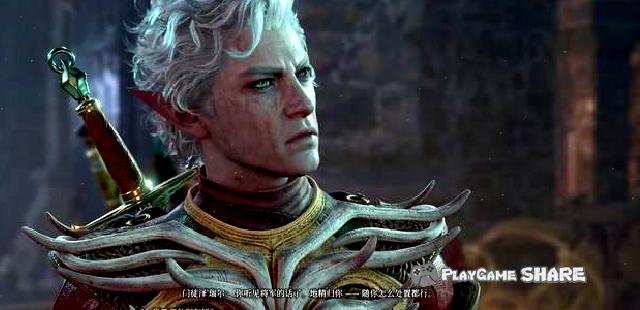
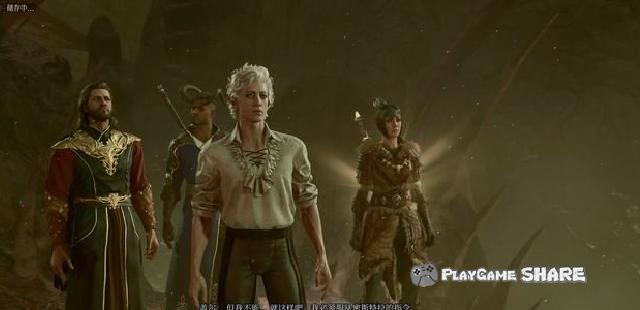
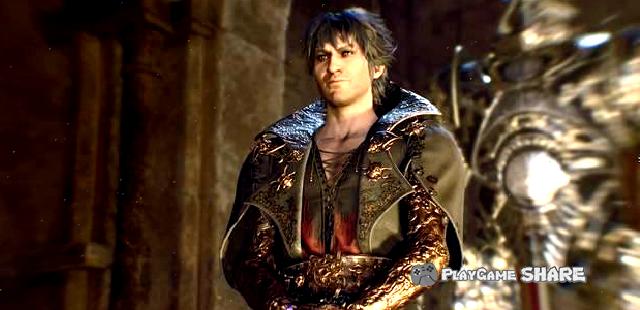
Because the author chose Astai Lun’s start, if the player chose other characters to start (or custom character), he will meet him in the figure below.
After all, it is one of the companions. No matter whether the judgment of triggers is successful, he can pull him into the team.
Asdon is a wander. As agile, he is good at using stealth and various plays. He can also use the deputy to learn magic or strengthen the ability to sneak attack/sneak.
When you encounter an unable to obtain it, he can use him to pick up or steal.
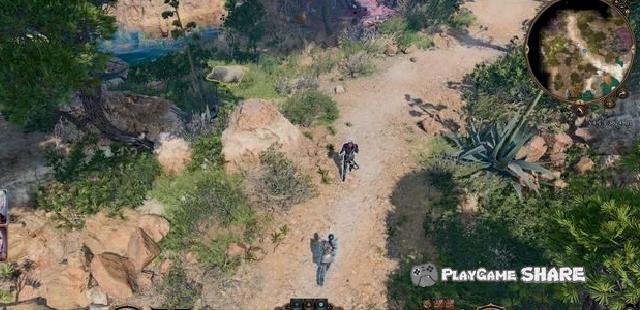
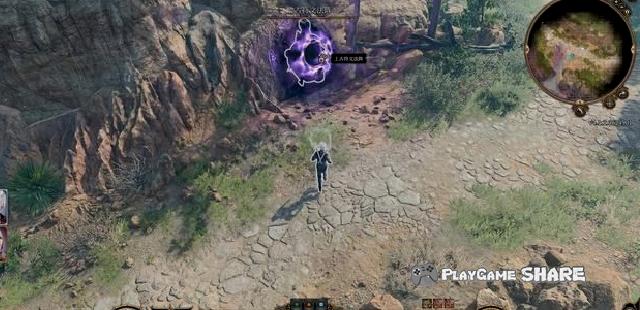
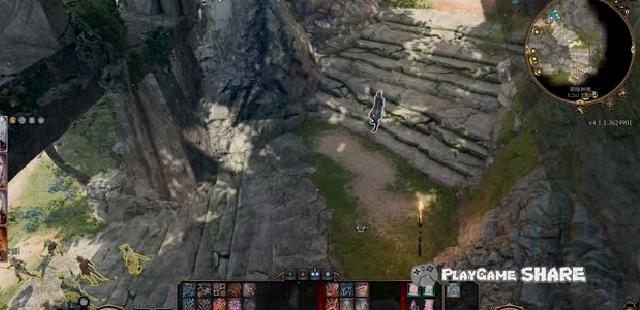
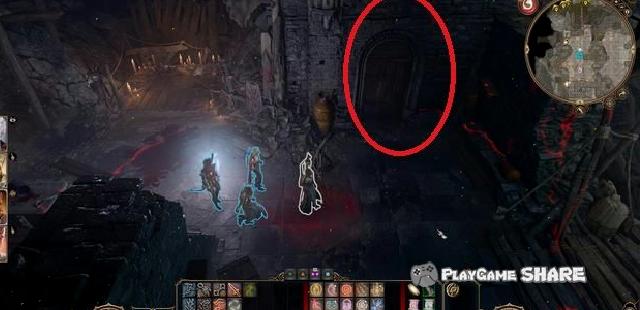
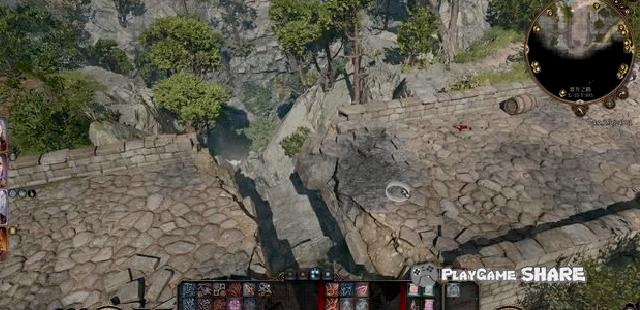
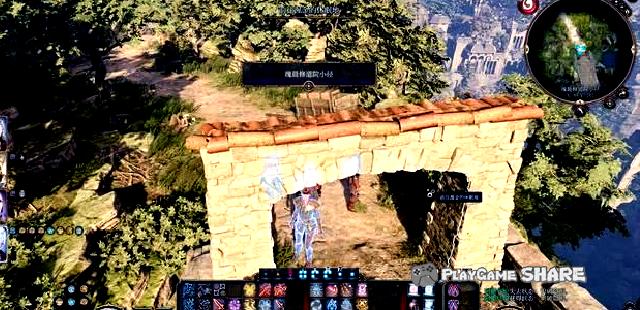
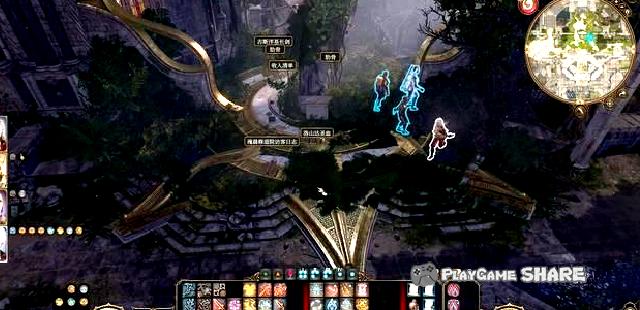
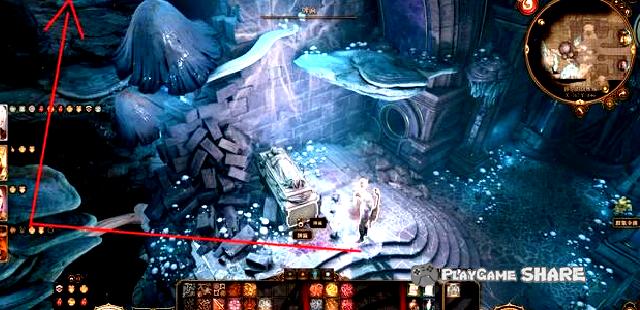
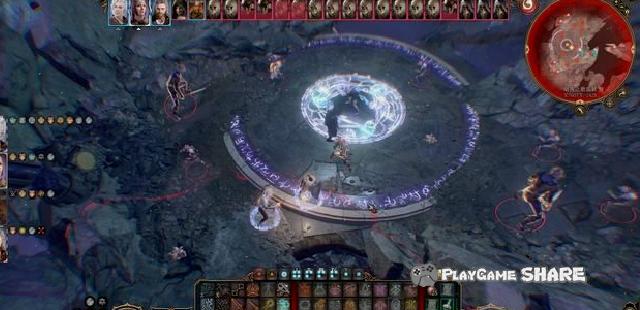
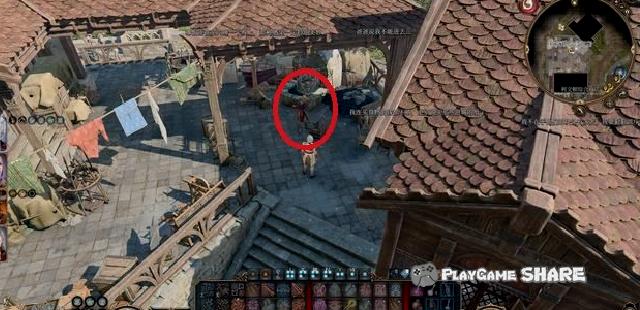
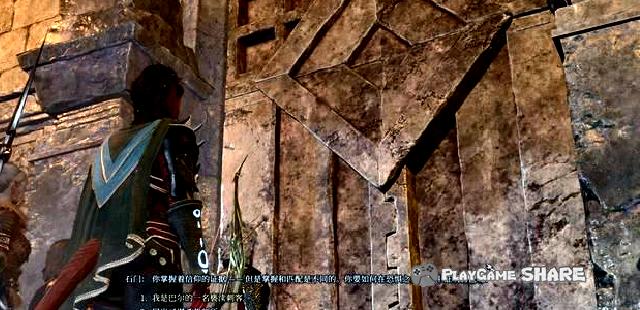
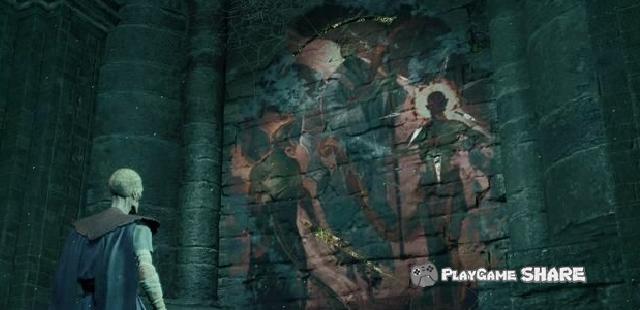
After completing the exploration of the beach, pass through the wreckage of the snail shell. Interacting with the "Ancient Rune Array" in the figure below can trigger the plot and meet a third companion.
[Remarks] This kind of legal formation is also the transmission point on the map.
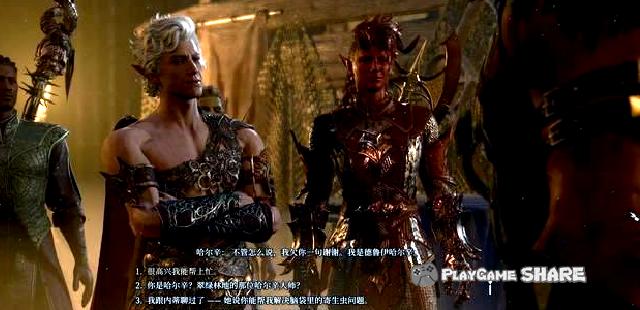
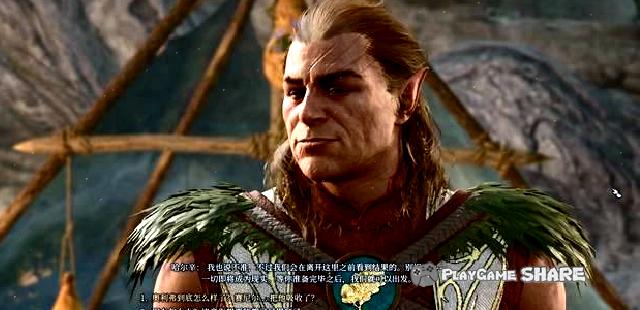
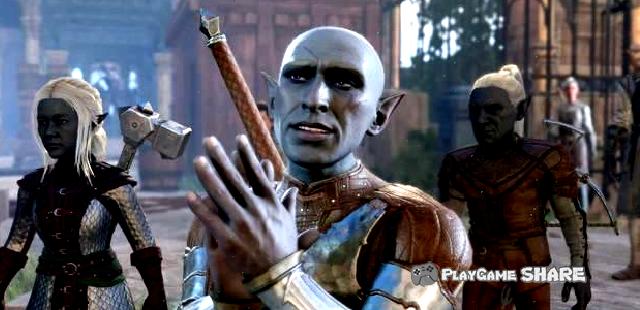
This person is called Gall, and he needs to be pulled out of the French array by judging (DC7 power or DC10 agile).
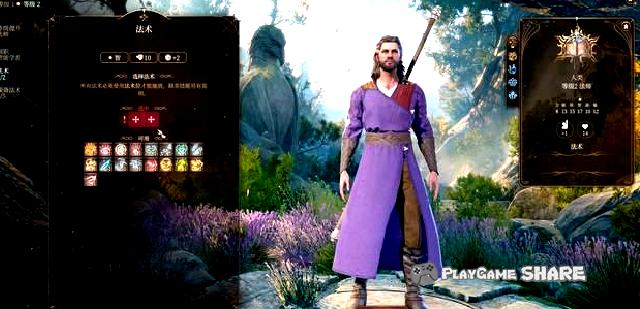
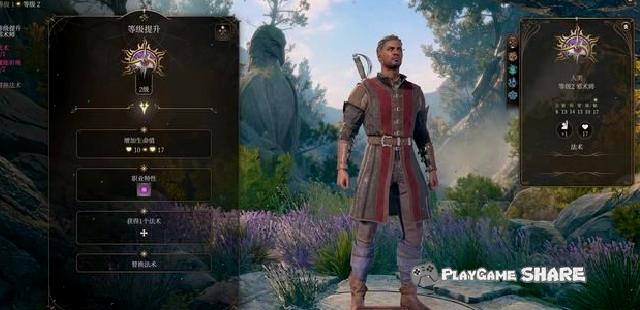
Gall is a mage who can choose various schools after rising to level 2.
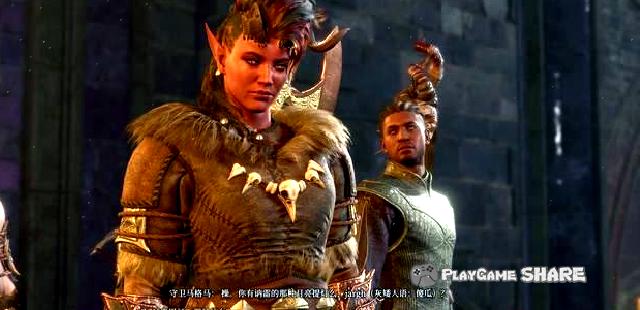
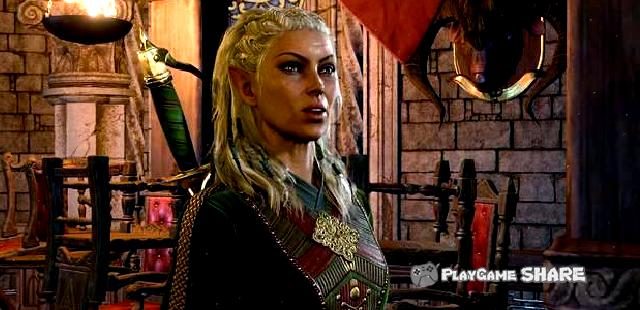
Continue to move forward, you can see the trapped Leezel.
Close and trigger the dialogue, using bullying (DC10 charm) can let the Tifillin leave, lobbying (DC10 charm) allows Tifillin to help kill her. Essence
【Remark】
① After choosing to deceive, you can use the charm of DC5 to learn about their camp position.
② Choosing to kill her cannot trigger the relevant plot of the Gis Yanji people (including the story of Ledizel’s companion).
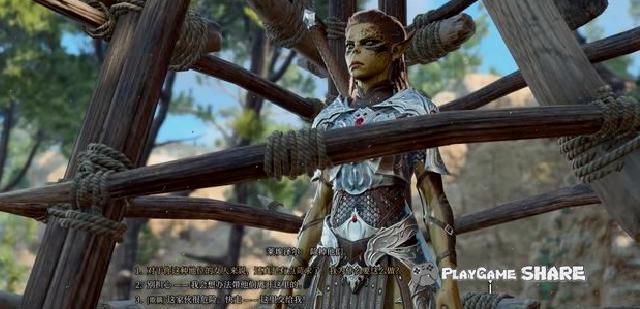
If you choose to rescue her, use a remote weapon to attack the bottom of the cage after killing Toflin (or drive them away).

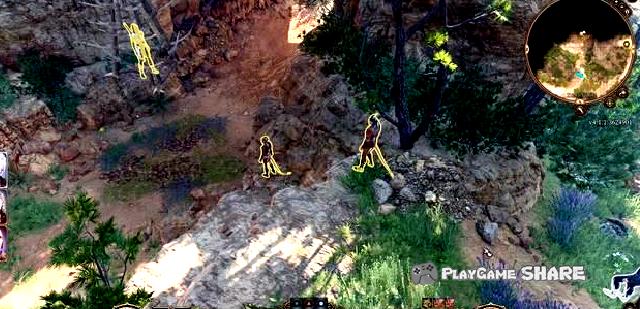
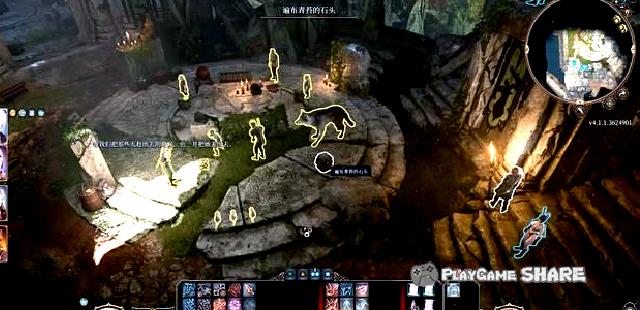
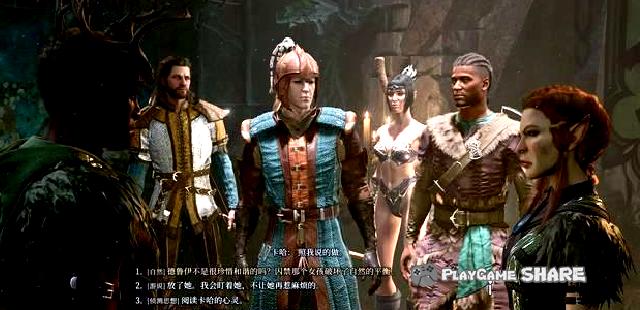
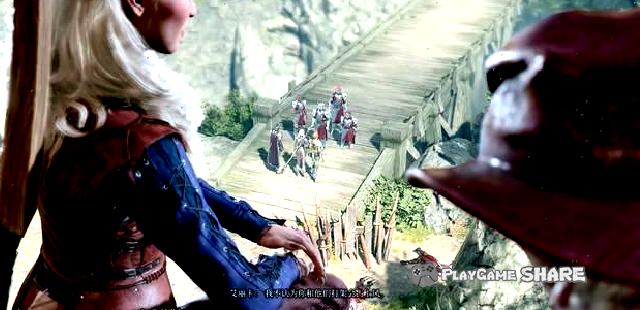
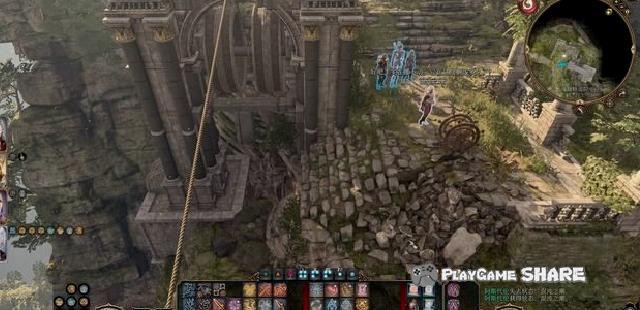
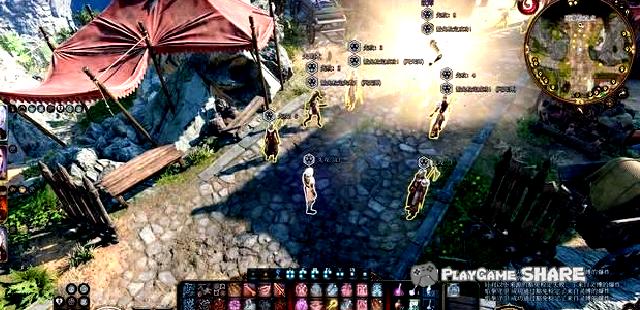
Following the clues that Toflin told us, after going to the camp (location below), we will enforce the battle and resist the impact.
It is recommended to let the team dispersed before approaching, good at remote uphill, and go to the right downhill to go close to the gate in my melee.
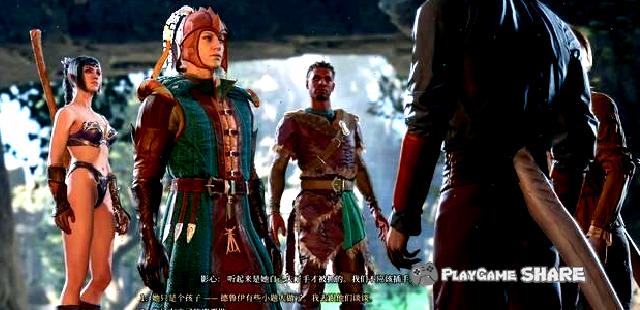
In the plot, our fourth companion Will also appear, but we need to enter the team after completing the battle.

The picture below shows the situation at the beginning of the battle. Directly killing the long-range enemy of the highland can relieve stress.
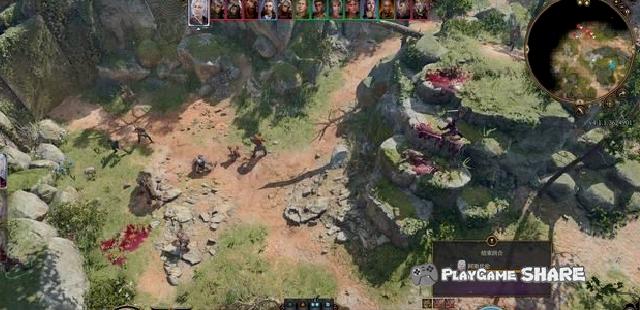
After that, the allies below can clean up the enemy.
After that, the mainline task is divided into four parts. Some tasks require a specific role in the team to advance.
Chapter 1: The help of the doctor Ney (1)
3. Chapter 1 -Get the help of the physician Needi
After entering the forest land, he found the young people who were training to trigger the plot with the people around him.

Later, it triggered the mind, and after completing the dialogue, Will will join the team.
Well’s occupation is "evil surgeon" and can learn all kinds of magic. According to the specialty selected by the player, he can also serve as a mage position and travel position to a certain extent.
Then walk down the steps to trigger the plot.
Knowing that a little girl in the residents made a big mistake-the theft ceremony will be used.
Choosing to try to rescue her can enhance the favor of Will.
Through the guard of the road, he entered the temple and joined the dialogue.
Choose Nature (DC15) or lobby (DC12) judgment can rescue the girls and gain the favorability of shadow and Will.
Other options have little effect.
Later, I talked to Las aside, and learned that Harxin, who was the leader of the camp, disappeared after going to the ground camping site, and Halxin had the ability to change bear.
Choose to take the task to get the relevant tasks of "Rescue the Chief Druid".
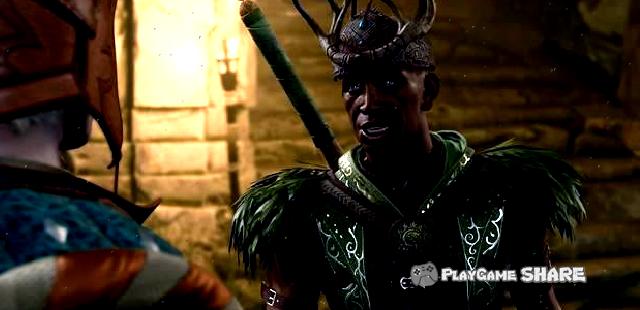
After talking with the acting leader, you can learn the position of the doctor Needi, and also unlocks another Druid with another Druid
Some dialogues of "Saifelo".
Chapter 1: The help of the doctor Ney (2)
[Remarks] Investigation of the book "Thorns" in the inner house can get some understanding of Kaha.
After that, she followed the guidelines to find Needi, and she was shocked after learning that we had a magic magic in our heads.
It should be noted that the conversation with Nete after entering the compartment needs to be completely cooperated with her. If she fails to get her newcomer, she will directly attack the player.
Obviously, Needi does not have the ability to stripping away the magic magic, but according to what she refers to Halxin, it seems that there is a way, which is reunited with the task "save Druid" that Elder Druid gave us.
Regarding the stone statue in the compartment, the task process will be obtained for unlocking, or it can be directly stolen before completing the task (not recommended).
Chapter 1: Seeking help from the priest of the ground (1)
4. Chapter 1 -Seeking help from the priest of the ground to the ground.
This task is associated with the branch of Druidi Land "Satta Saza".
Because before completing the task, the excellent forces will be hostile to players, and it is recommended to complete this part before going to the ground camp.
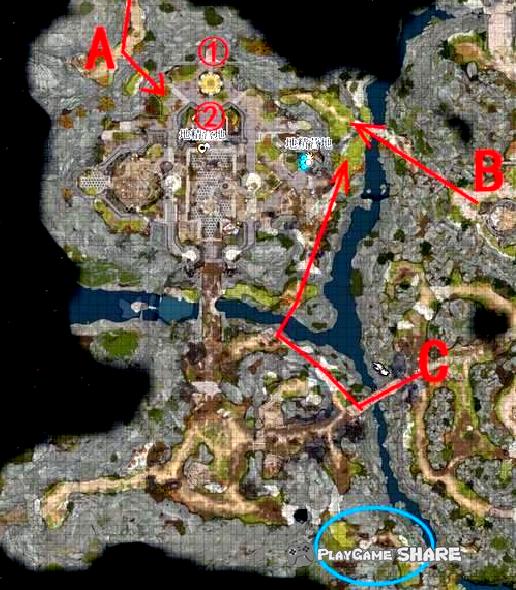
If the prisoner is not rescued, the route entering the camp is mainly the following three:
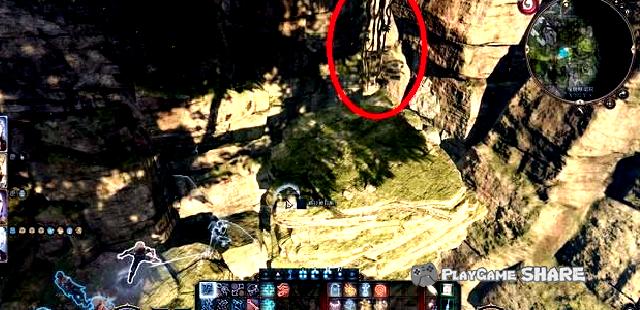
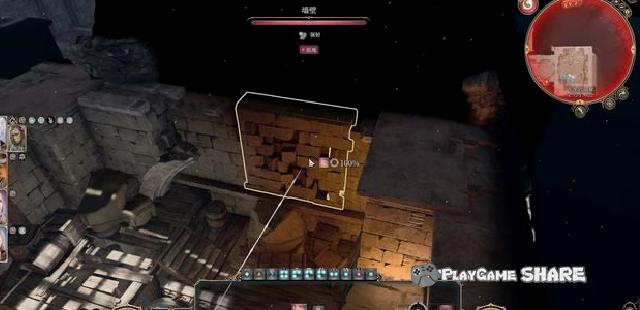
A: Complete the front part of the main task "Find the Geis Yanji Nourishing Room" and jump from the north trail to the mountain road.
Later, he jumped to the upper platform with light feathers (no fall damage) to break the stone wall entry, and there were enemies near the entrance.
B: Jumping from the fork of the epidemic village to the gap to the gap, you will encounter some goblins.
C: It jumps to the side from the entrance of the camps on the south. In fact, it is not much different from route B.
The premise of saving the earth can better promote this task.
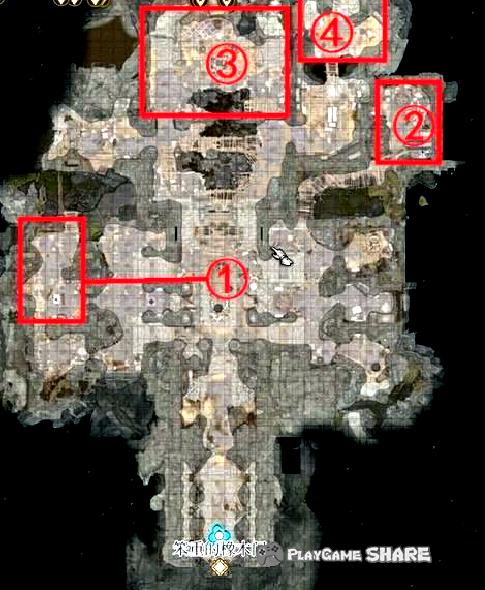
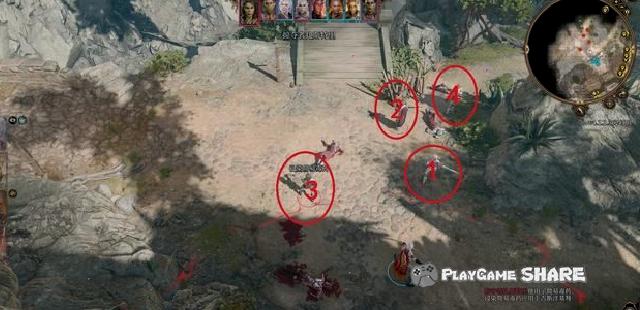
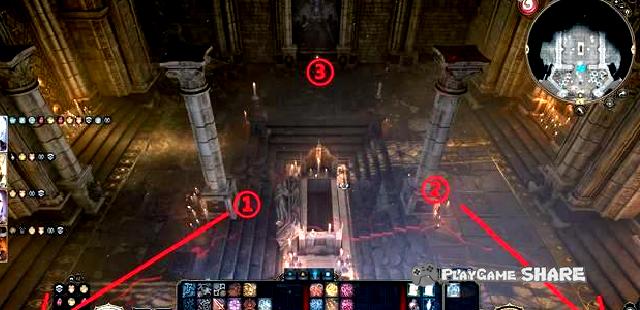
The picture below is a list of maps of the broken sanctuary.
① Di Jing Girl Priest
② Watchman Ming Sara
③ Goblin Leader
④ Keeping Druid’s cell
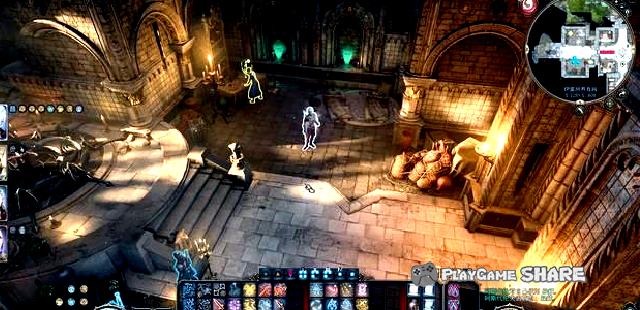
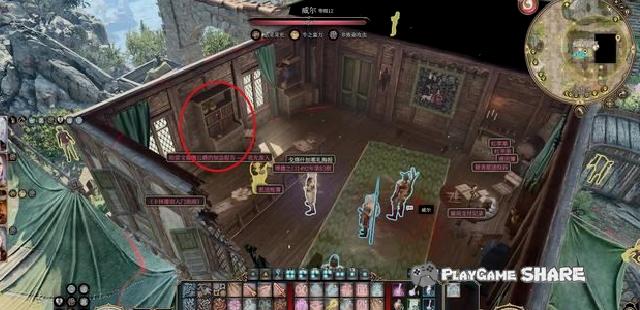
After entering the inner hall’s "Broken Holy House", a female priest triggered a dialogue in the lobby.

After completing the conversation, she will go to her room. The player needs to temporarily leave the team and talk to her in a single person (just keep the teammate at the door).
After the dialogue, if you pass the mystery judgment, you can know that it is a bottle of sleepy medicinal water, and then fight with her.
[Remarks] It is not recommended to let teammates outside the door come in to assist. Such a can easily alarm the goblins outside and cause all hostility.
If she can get the larvae on her, if the guardian plot has been unlocked before, it can be used directly.
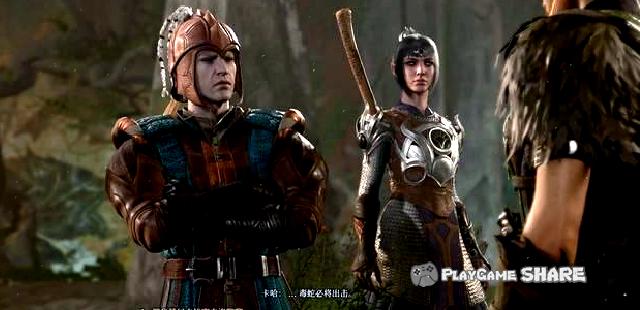
The watcher of the two giants of the Earth Square, Mingsara, was northeast of the map.
After the dialogue, it will trigger the life and death of Sara, and choose to keep silent. Sara is executed, so that we can kill the first leader (but cannot complete the achievement of "three savings Sara").
If she chose to assist her, she would leave her current position and convene her goblins, and triggered the siege of the Druidi Land after a long break.
In addition, she also proposes to let the player lead the team of Druid, which belongs to the evil route, and we come again for two weeks (there is a plot related to her).
[Remarks] Even if she chose to assist her, she can choose "else to complete", rescue Halxin and inform the truth, and return to the forest land to assist Druid to fight defense.
Regarding the "death Sara" mentioned above, she allowed her to feed the spiders to leave the two guards at the door of the Earth’s leader to leave, so that the enemy reinforcement was reduced when the leader was handled.
Chapter 1: Seeking help for the Earthy Women’s Festival (2)
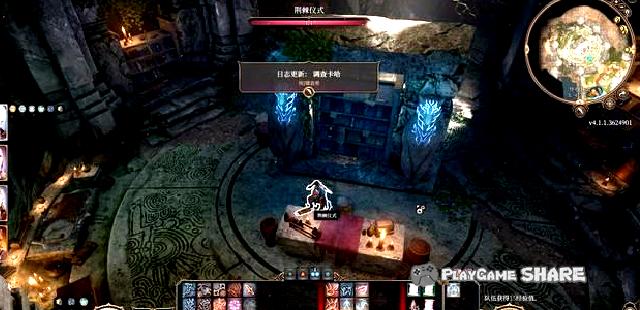
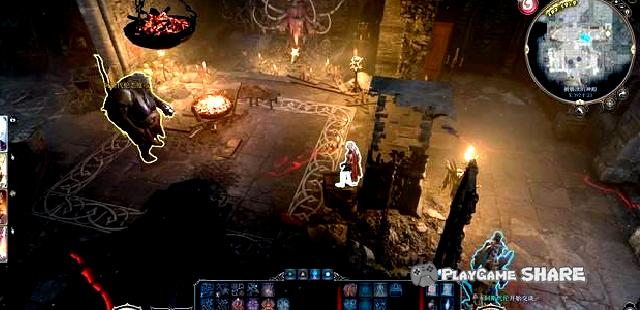
The two of the Giants of the Earthly Three were rituals in the room in the picture below.

After approaching, the plot will be triggered. There are three parts in the ceremony, which can only interfere with the two parts without discovery.
[Remarks] After interference twice, the last Dead Spirit dialogue has a certain chance that it will not be exposed. It is recommended to read the file if you want to get the leader first.

It is recommended to let the leader sit back to the throne through the interference ceremony, and the two patrol soldiers behind him can sneak.
The direct switch on the left side of the figure below sneaks and kills. Climbing to the roof of the right side (there are ladders by the wall in the inner wall of the room).
After that, concentrate on the leader. You can first throw the throw of the enemy within the top of the building, and then shoot the pioneer in the flame.
Note that the "war drum" in the icon below must be destroyed in the first round, otherwise, the essence will try to hit the drums in the past to attract a lot of reinforcements.
[Remarks] Regardless of whether the two leaders were discovered before they were killed, the entire camp (inner and outer camps, no epidemic villages) will be triggered after the leader of the ground is killed. Therefore, it is recommended to complete the exploration and event trigger in the site of the ground camp.
After killing the leader, you can get the key and open the iron door behind the throne (you can also pry the lock directly).
If you have no confidence in your strength, you can first do not trigger the leader battle, enter the cell from the area below to find the trapped Druid.
There are keys on the table and guards on the signs below, but you can secretly open the door to rescue Druid (the author is finally rescued, so it is a combat state).
After rescing Druid, he talked to him. If he did not kill the three leaders before, Harmesons would propose to fight side by side and clean up the ground camp. On the contrary, he would return directly to Druidin.
If the goblin leader has been killed, you can see the corpse on the right side of the figure below in the cell in the ladder. If you pull it out and destroy the hole, you can leave directly.
In addition, when cleaning up the site, you can use the "animal dialogue" to lobby the two spiders in the lower layer to pry the door open the door to help us fight.
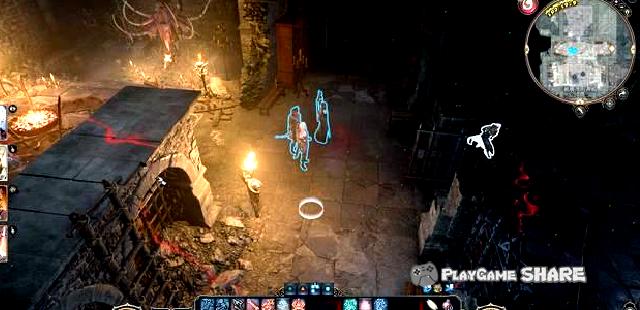
Chapter 1: Seeking help from the priest of the ground (3)
Finally, find the picture below in the area where Minda is located, and you can enter the compartment.
The compartment belongs to the area where it is forbidden, but at this time we have solved all three leaders, and just break through.
If you are not sure about the people of the people, you can also lead her to the right room, and then escape the detonation floor and let it fall.
In addition, you can also use the "oil barrel room" in the lobby to use reduction or converting into a gas form through the narrow seam.
[Remarks] The room where the businessman guards the guards, remember that the fireworks are prohibited in it. You can use flight or teleportation to sneak in from the next room.

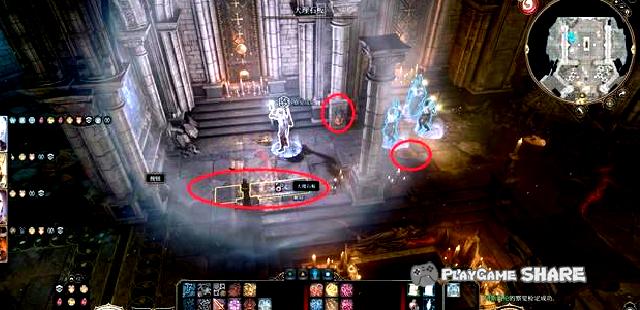
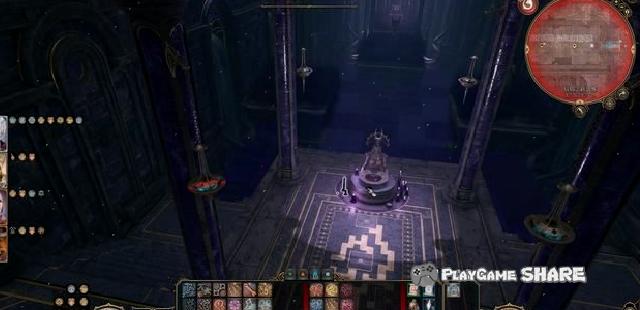
After the area, the area needs to be solved, and the dark label in the center of the hall can be put on the four grid positions that are light up.
After unlocking, the control rod is unlocked to enter the "dark area" in the area.
[Remarks] If there is a unlocking tool, pry the lock faster.
Chapter 1: Find the Geis Yanji Nourishment
6. Chapter 1 -Find the Geis Yankelu Radio
This task requires Leezel to advance in the team.
From Wakin’s dormant place to the west, you can encounter Titrin named "Elika" near the wooden bridge. After completing the conversation, she will leave.
[Remarks] You can also go to the forest land to find Su Luo, but in the end you will point to the place.
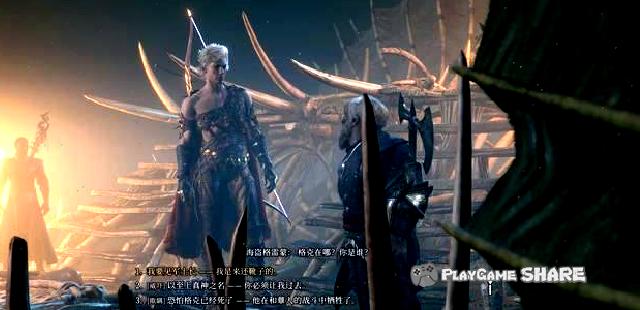
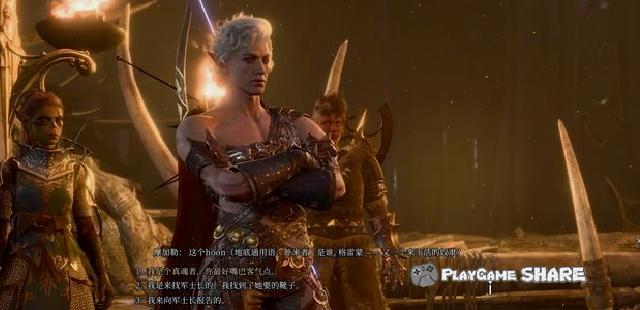
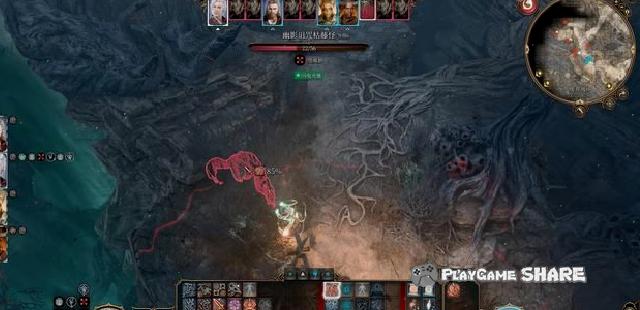
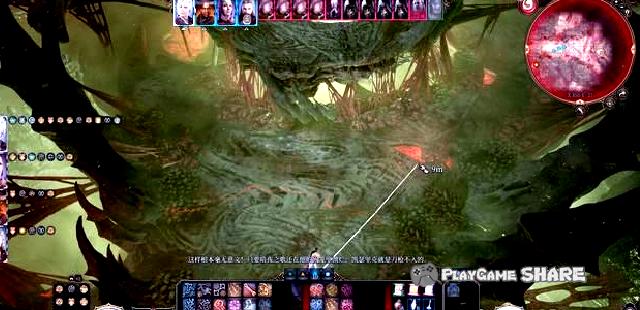
After seeing the long-distance Gexi -Gengjie talked with his subordinates in the distance, he approached and triggered the plot directly.

If the "strange relics" have been obtained from the heart of the shadow, the relics will respond.
Select the lobbying judgment (DC10) in the dialogue, and you can avoid fighting with the Geis Yanji team after passing.
Conversely, it will enter the battle directly.
The proposed strategy order is 3 → 2 → 4 → 1. The captain level is high, and the fight rate and blow rate are high. It is recommended to use auxiliary spells to restrain her.
After completing the battle, you can get special items from the captain, and learn about the general orientation of the nursery after use.
If peaceful solution, you can know the position from the centurion’s mouth.
After that, you have left the pass from the side (can be returned to trigger some partners’ plots).

Chapter 1: Other parts
7. Chapter 1 -Other parts
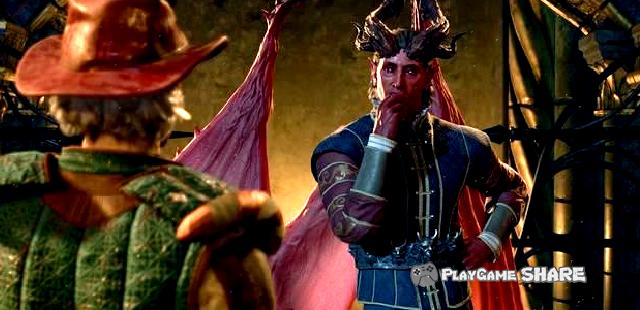
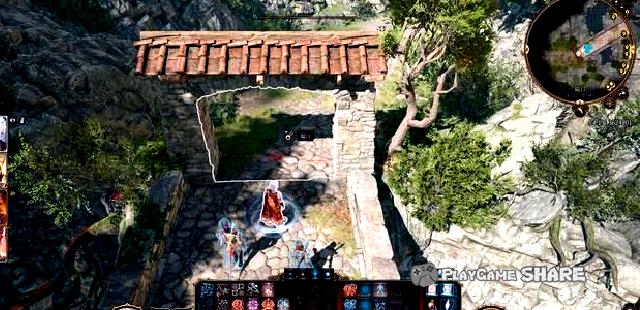
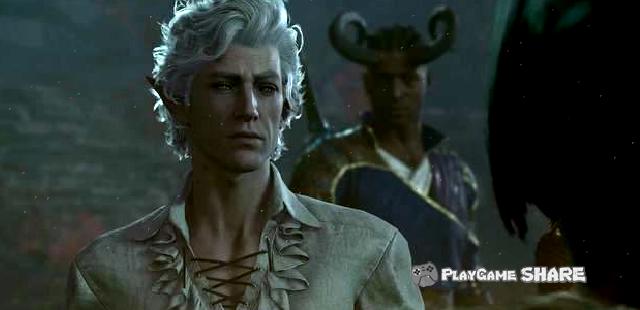
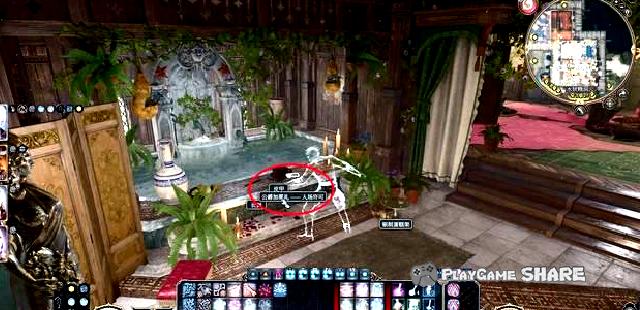
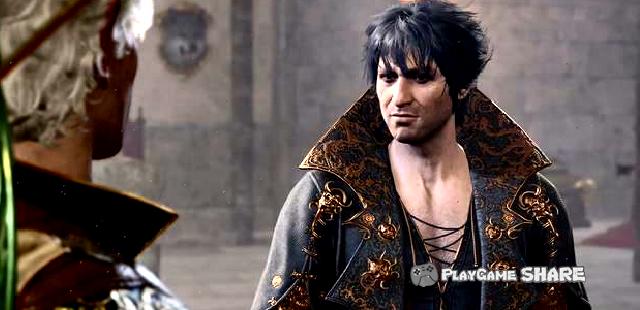
The plot can be triggered at the broken bridge near the forest land.
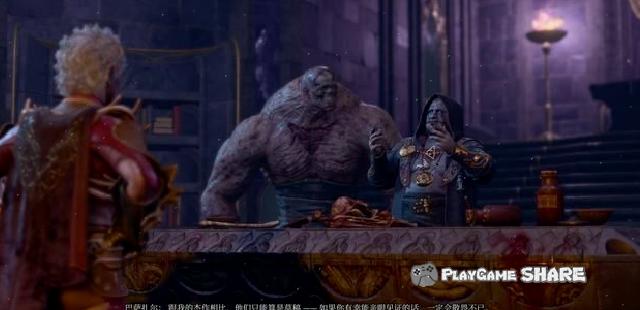
When he meets the weirds dressing, he will entertain players to other places.
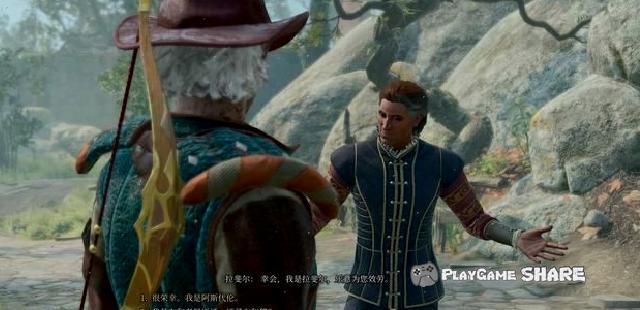
Obviously this "noble guest" is a demon, which claims to help us solve the problem of larvae, but it is best not to trust him (other routes) (other routes)
After three long breaks in the camp, the plot will be triggered at night (the favorability of Lyerzel needs to reach the general level).
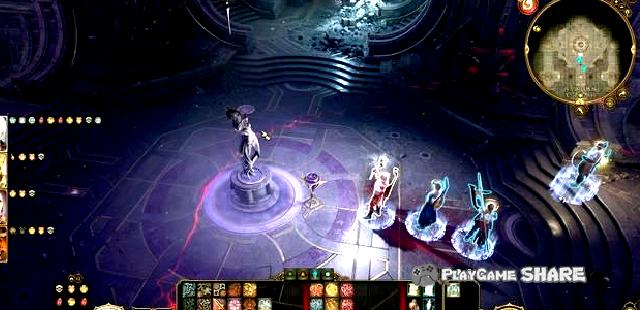
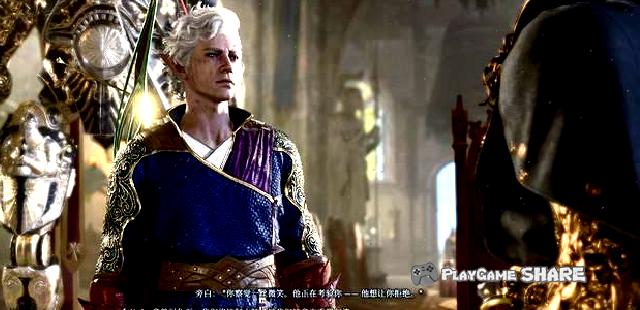
In the plot, Ledezel will attack the players who are almost unable to maintain themselves, and can resolve the crisis by judging.
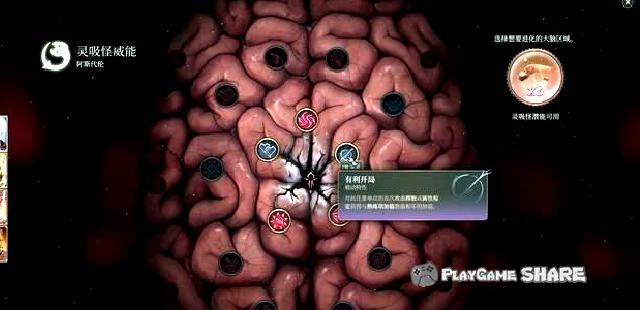
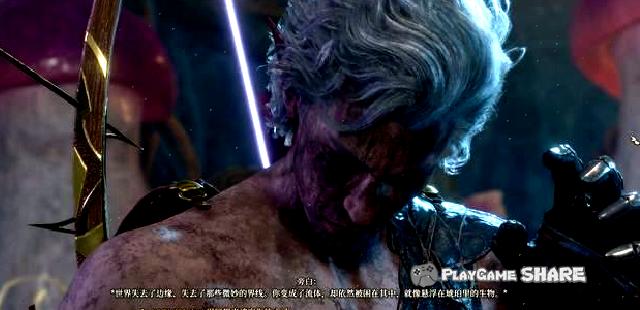
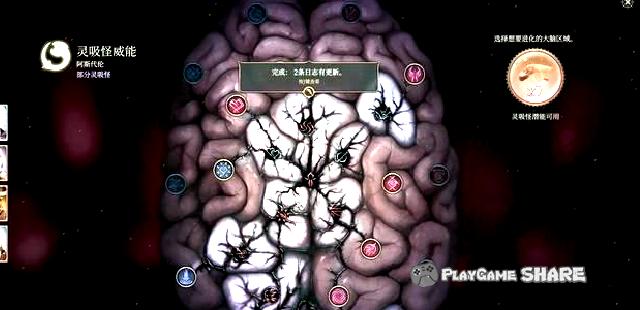
After that, you can see that the player is creating the "Guardian" of the setting, and learns the background of the relevant story.

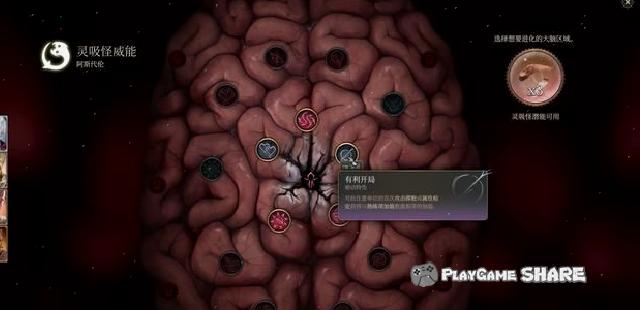
After that, the larvae host can be unlocked when the larvae host is killed again, and the larvae consumed to obtain a ability.
[Remarks] If you want other characters to obtain the ability, you need to judge the dialogue. The larvae are shared by the team and need to be used carefully.
Chapter 1 -Go to the Tower of the Monthly
8. Chapter 1 -Find Essels to help
This task is related to the "rescue of Melina" on the sidelines of the tea room of the river bank. For details, please refer to the related page of this strategy.
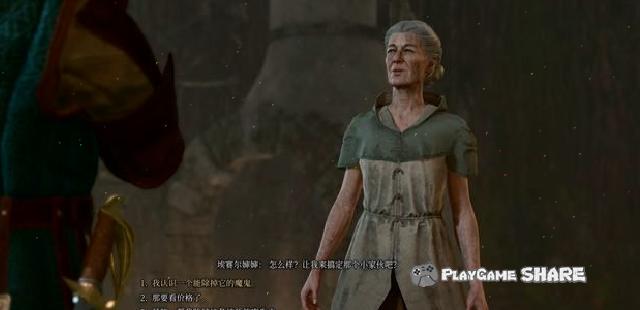
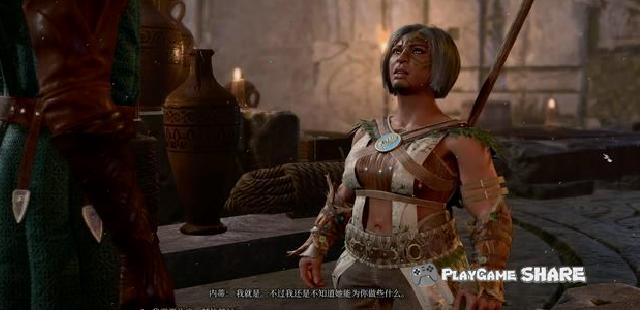
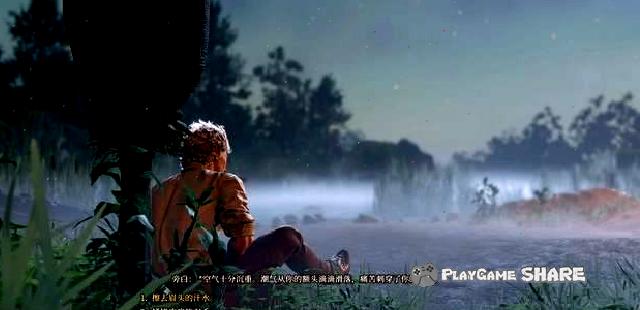
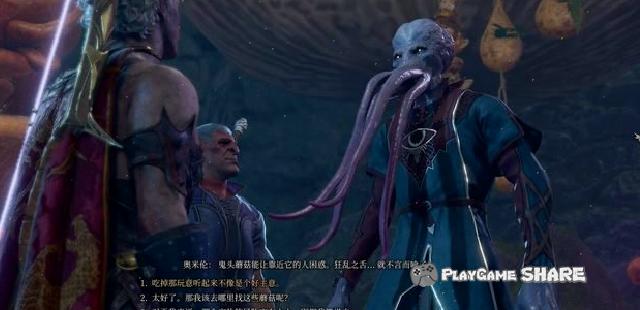
9. Chapter 1 -Survey Parasites
This task triggers the location of the village in the dull region (Xun4).
After talking to NPC, he can tell him the truth, he will call a friendly demon.
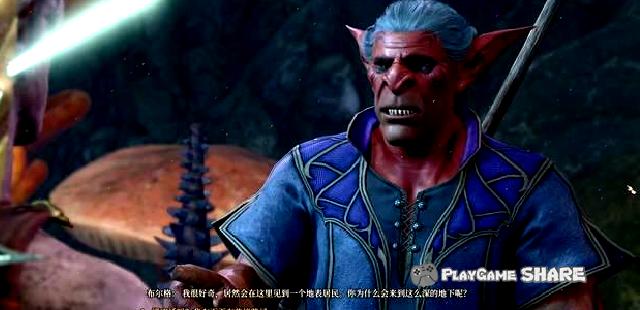
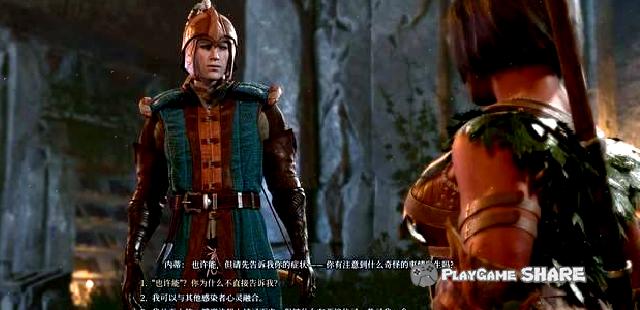
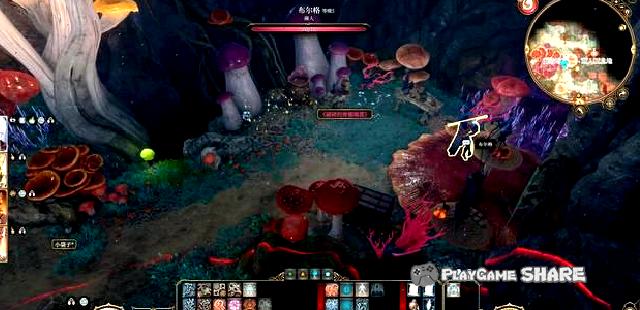
Getting the heart demon claims that he can try to heal us.
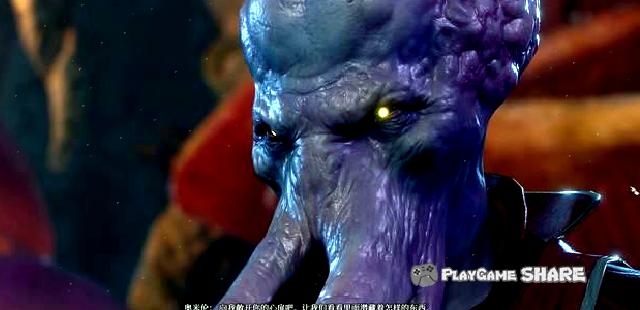
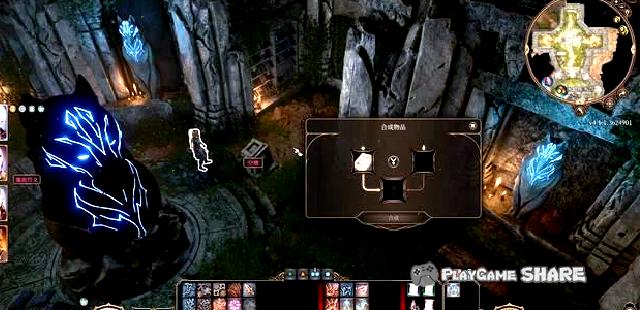
The need to make a drug with "ghost head mushroom" and "mad tongue" can be found in this area.
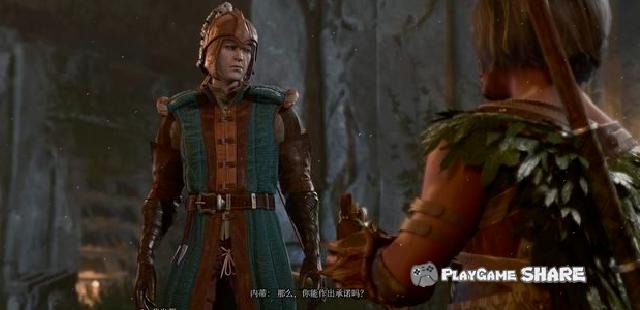
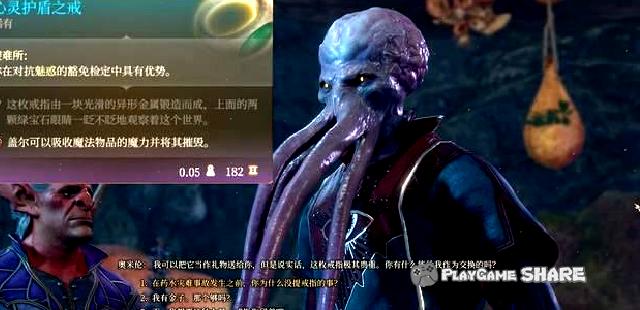
If you choose to take the medicine, it will trigger the judgment of multiple DC10 ~ 15, and you can get nothing to each other after passing.
Despite the failure to cure us, he still expressed sorry and unlocked a special equipment for sale.
10. Chapter 1 -Go to the Tower of Monthly
There are two ways to go to the tower of the month.
The first is to complete the front part of the main task "Geis Yanji Nourishing Room", from the passing of the pass.
The second is to go underground and pass through the dark region and revenge furnace (gray dwarf camp).
The two routes entering the dark area are mentioned in the main line "Earth Girl Priest" and "Essel".
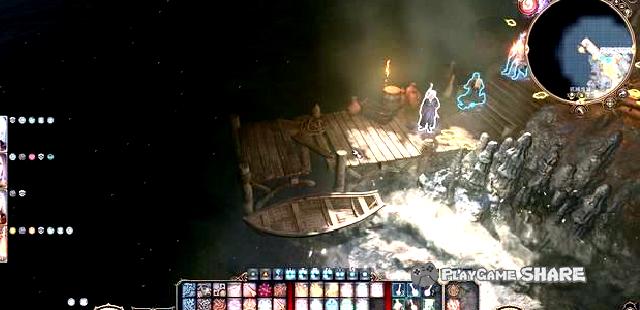
After arriving at the dark area, go to the vengeful furnace through the boat on the shore, and you will encounter a whistle with a whistle on the way.
[Remarks] There are also lifting ladders on the back of the gloomy area, but it cannot be used for the time being.
If you get the boots in the "Lost Boots" of the branch mission, you can enter the furnace of revenge friendly through dialogue.
Although it will be a little money after landing.
After arriving at the revenge furnace, turning all the way to find the route to the tower to the moon all the way, the dwarves will need a specific lamp to prompts through the dialogue.
The part of the obtaining lamp is related to the branch mission "Send Naya’s Head" and "Save the True Soul Nayle". Please move to the corresponding part to view.
Chapter 2: Step into the Tower of the Month (1)
11. Chapter 2 -Sneak into the Tower of the Moon (Dark Geosterity route)
This task is to accept the suggestions of Druid, from the secret roads in the dark area to the tower of the month.
After leaving the dark area, you can see a mage at the entrance of the next area.
After recognizing that he was the master "Ilminster Aimo", he could trigger Gal’s relevant partner plot in the camp.
[Remarks] Whether you walk first or underground or nurturing, you will encounter Aimo at the entrance to the "Film Battlefield" area.

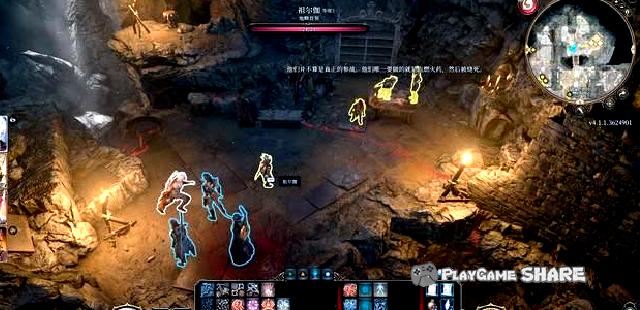
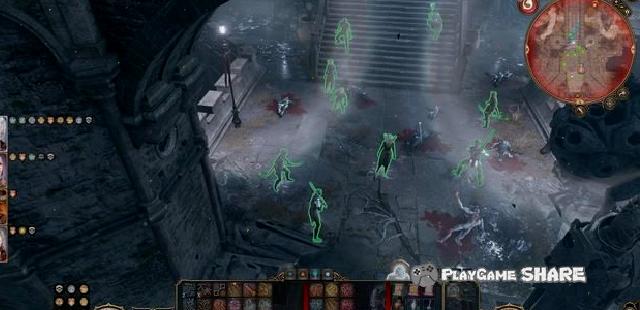
After entering the "abandoned battlefield", it is important to note that after passing the position below, you need to light up the light source, otherwise you will enforce the round mode and have rounds of damage.
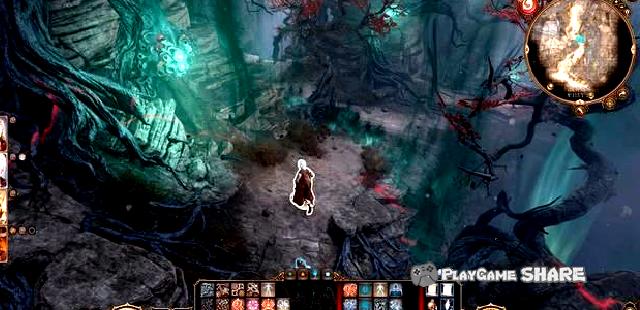
There are some hidden enemies in the area. It should be noted that the "withered needle" has an explosion after death and is defeated remotely.
Several NPCs who can see the torch can trigger the plot after approaching.
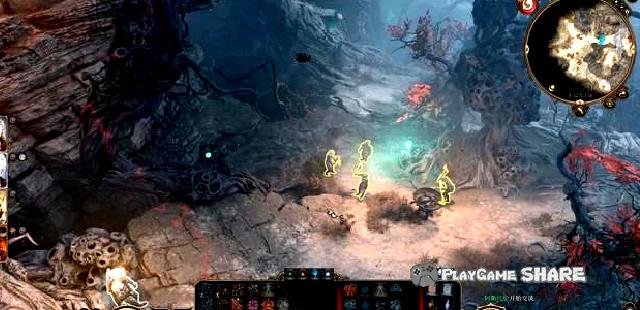
In any case, they will be interrupted by the shadows.
These shadows are resistant to physical attacks, and fortunately, the hammer can be hammered directly with a fire handle (?).
After that, the zero Lan Sandra will indicate us the direction of the safe area-the hotel.
[Remarks] If you stand on Druid on Druidi, you can meet some survivors over there.

Go all the way to the hotel. Do not touch the crow bodies passing by on the way, which will trigger a group of crow monsters.
After approaching the hotel, it will trigger the guardian plot. If Lan Sandra and others were rescued before, it can be exempted from entering the tongue directly.
Whether or not the first level is passed, it will be stopped afterwards.

In the subsequent dialogue, if the following incidents were completed in the previous Druidi Land, and the refugees finally chose to leave, someone would come over to speak for us:
① Complete the "investigation beach", "rescue refugees" and the incident "looking for the dragon hole", and obtained the favor of the little thief’s leader "Moore".
② Talk to the mage "Roland" and others in the camp, and persuaded them to stay together.
[Remarks] Even if no one speaks for us, it can promote the plot through dialogue or judgment, so as not to slaughter the village.
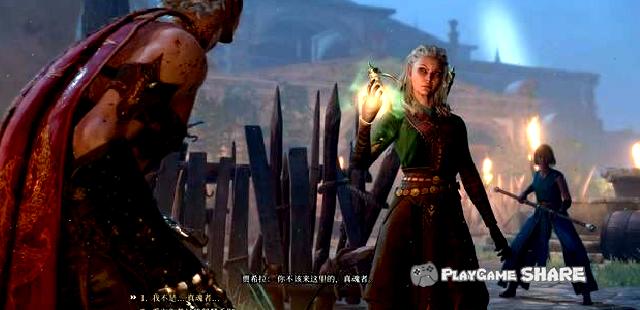
After showing the identity, if the relic that had been obtained before, he could directly display it to Jahila to see the suspicion of washing, and he could also persuade her through the charm of DC21.
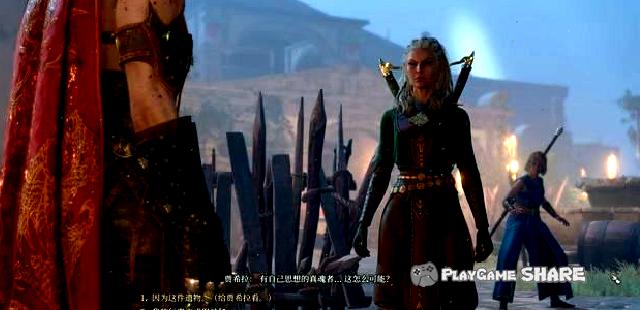
Chapter 2: Sneak into the Tower of the Month (2)
Later, when I met in the tavern, I could know that there were self-confidence in the wine (not) through the DC10 medicine judgment.
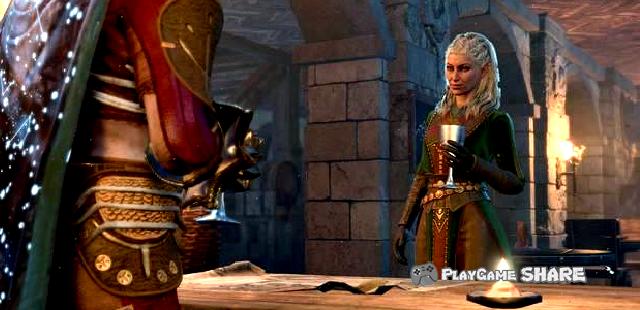
It doesn’t matter if you drink it. There is only a physical judgment of DC6 poison, which can increase her trust in us.
After that, he started to talk about the business. If you want to be affected by the shadow and reach the tower of the moon, you need the assistance of a local pastor "Issobell".

The Issobar people on the second floor of the terrace will trigger the plot after approaching.
[Remarks] Because she will return to the house after the plot, it is recommended to peek at the document on the table first.
After watching the plot, you can talk, but she will trigger a new battle after she finished BUFF.

One member of the Yan Boxing, who had been arrested, Mars Cusz, after being transformed, hit the battle with the fear of the devil and entered the battle forcibly.

In the battle, almost everyone in the hotel area will join the battle.
Before triggering Issobell’s dialogue, the teammates will be distributed with the configuration distribution of "two people on the first floor lobby, one person on the second floor, trigger a dialogue" to ensure that some NPCs that can trigger the event are not harmed.
After completing the battle again, she also had a conversation with Issobell again. She seemed to know the other party’s "arrest" instead of "assassination", but at present we cannot know the details.

Chapter 2: Step into the Tower of Monthly (3)
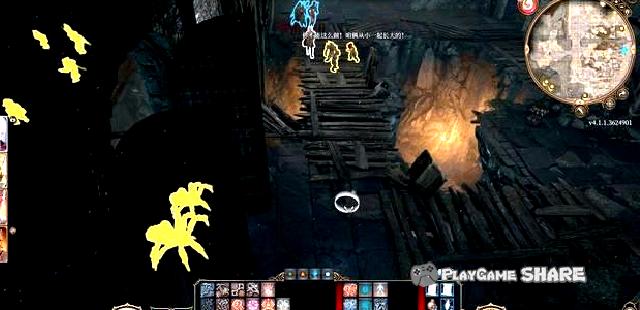
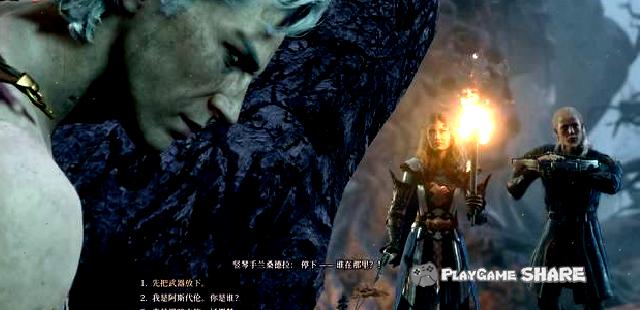
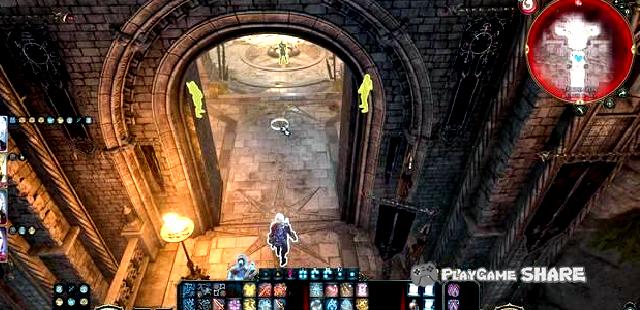
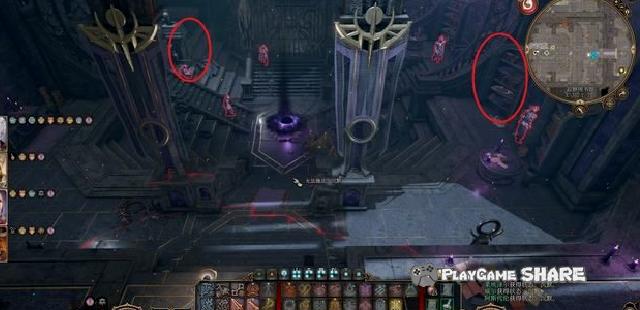
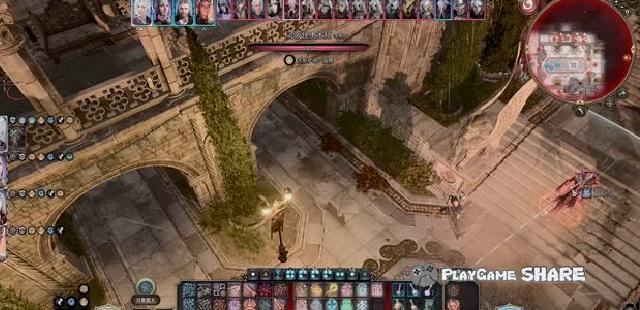
After leaving the hotel, he went to the tower of the month.
Several harpists will meet on the bridge that goes out, and they propose to ambush the enemy patrol with us.
After arriving at the target location, it is recommended that one person sneaks to hide in the distance. The two go to the roof, and the last person triggers the dialogue.
When encountering a patrol team, you can force the lamp through DC14’s intimidation judgment and leave the patrol team.
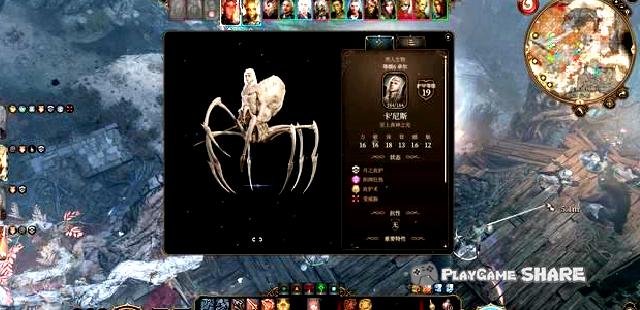
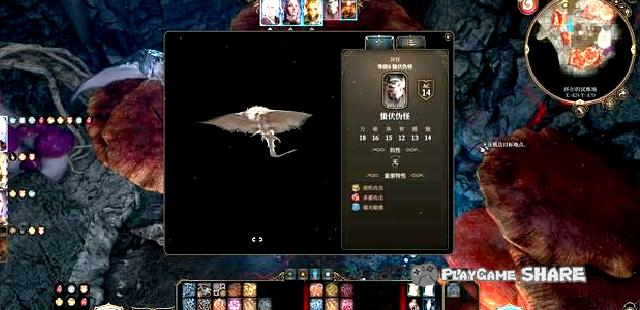
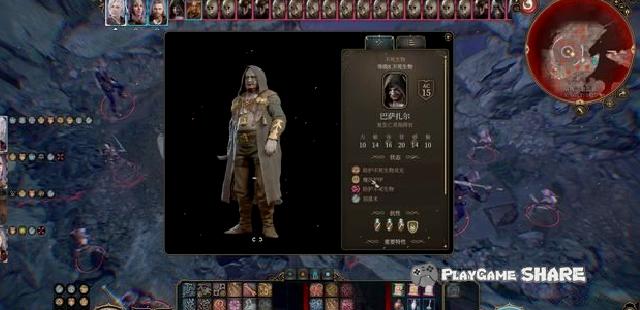
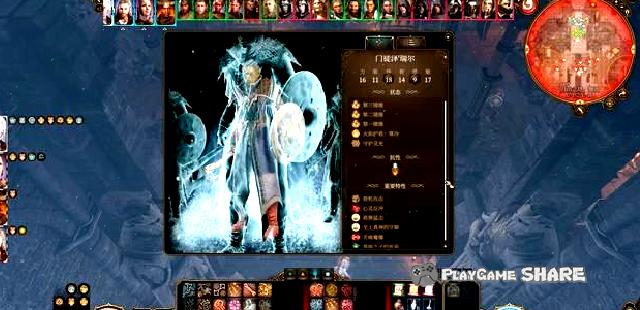
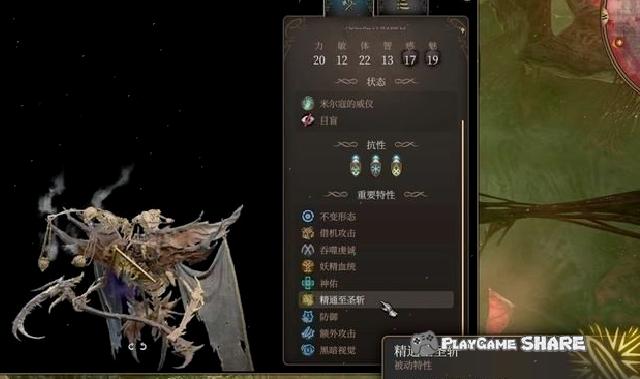
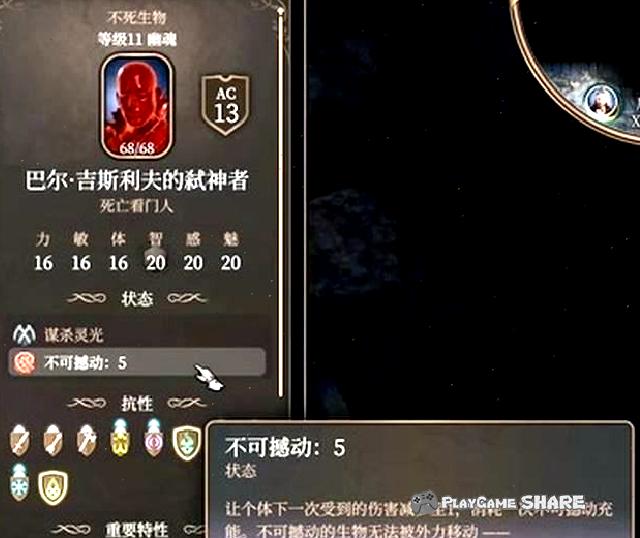
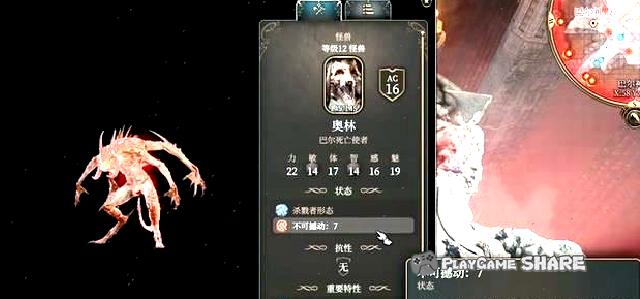
Of course, you can also call the ambush friend to come out to do one. The picture below is the attribute of the strongest "Kanis" of the patrol team.
Whether or not to kill the enemy, you need to pick up the lamp on the ground.
After picking up the lamp, the plot will be triggered.
[Remarks] Although you can get another lamp in the future, it will not trigger a conversation with Pick Jing.

After picking up the lamp, you can talk to the Picker inside. You can first talk about the conditions and release it to get a bell affected by immune shadow. Since then, you no longer need to hold the torch.
Of course, you can also twist the device or smash the lamp to kill it (no reward, nor the light).

Continue to go forward, you can find the notes of the Gisan Yanji people outside the light curtain before entering the town.
If the relevant plot of the "Gi Siyan Nourishment" was not completed before, Ledizel would express dissatisfaction here.
All the way to the tower of the month, I saw the Demon Mizola who signed the Magic Qiche outside the tower outside the tower.
She asked Will for "her assets" from the tower of the moon, and we could also use this to talk to her by judging (DC20).

Before entering the tower of the moon, the guard will be stopped, and it is not difficult to judge.
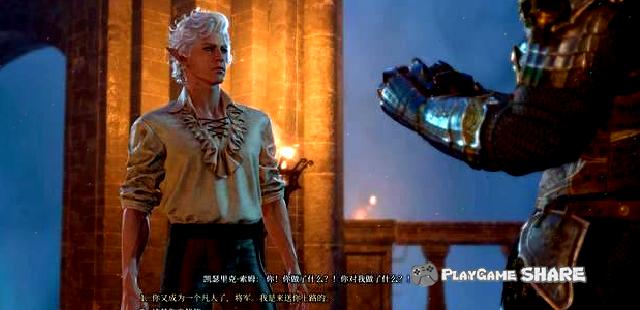
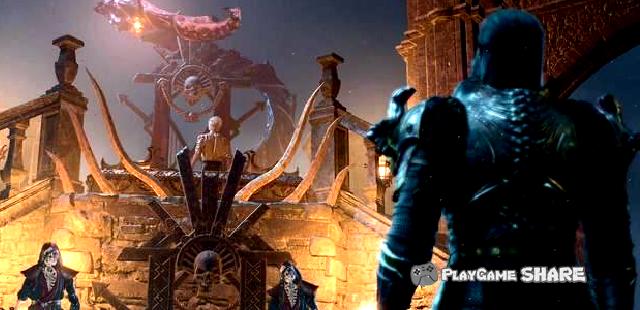
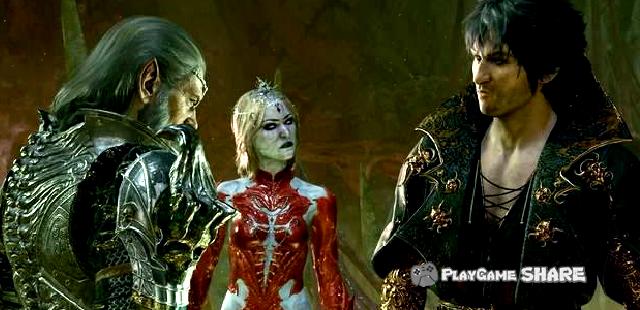
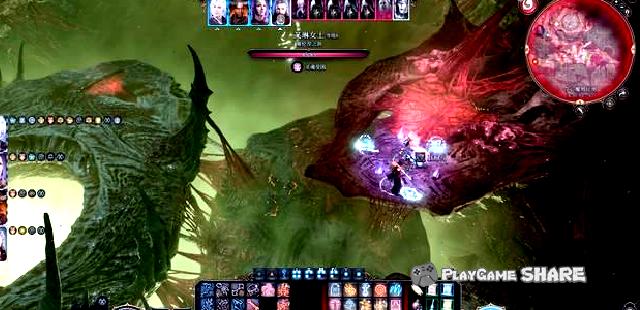
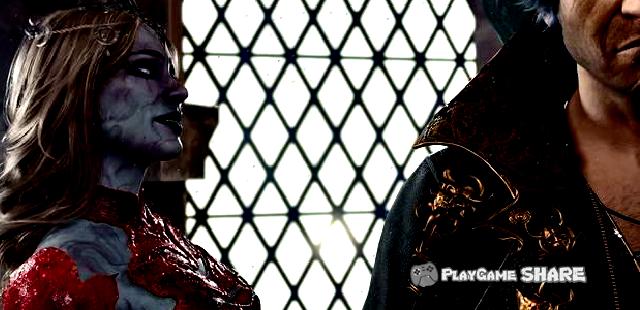
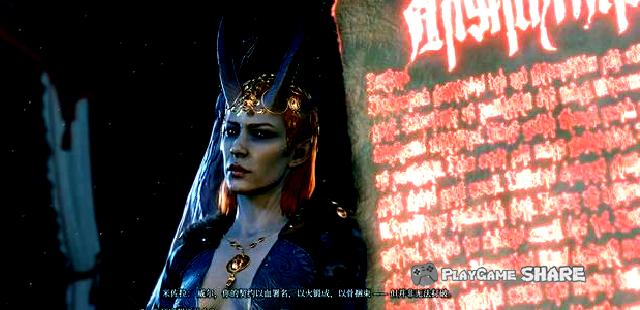
Later, the plot was triggered in the meeting, and the leader of the true soul "General Catherine" was seen.
In the plot, we can know that Catherine does not seem to be really hurt, and it looks like invincible.
After that, you need to decide the life and death of the sophistication. You will not support the players when you put them, but maybe you will encounter them elsewhere.
After completing the plot, if the "Geis Yankees of Nourishing Room" is still not completed at this time, Liezel will forcibly perform dialogue here and ask for leaving the team.
It can be left to leave her through a DC6 intimidation judgment, without having to care.
Then go to the second floor and trigger the plot after near the disc hernfling.
Then you need to judge the sky to cross the sea, and basically DC14 ~ DC18.

After gaining Zeror’s trust, she will give us a task to go to the tomb to find Barcelona’s custody relics.
This mission is related to "Raphael’s Rival". Please refer to the related page in the next part.
After seeing the general, I went to the second floor, and I had to pass Zeror’s "loyalty test".
If you pass, Zeror will let us go to the tomb to find the "song of the night."
If not, it will start directly.
[Remarks] After passing the verification, she can talk to the disciples who watch the door, deceive her or kill her to go to the upper level (the process of getting out of the tower on the top of the tower).
Chapter 2: Geis Yanji Nourishing Breeding (1)
12.
From the pass to the monastery of Zhenchen, walk north after entering the region.
Through the power of DC15, you can pull the cable car over and save a lot of time.
Trimming the plot near the monastery of the morning, just happened to be taken away by a group of cults.

The door of the monastery is closed tightly, and you can go around from the position below.
After jumping a few times, use the vine upward.
After entering the gap, walking up is to explore the periphery of the monastery, and go down to enter the monastery.

The control rod on the side of the main hall can open the door, and there will be no detour.
[Remarks] There are also iron doors on both sides, there are some items and documents in it.
After some investigation, go down from the ladder on the left side of the statue and enter the Geis Yanji base.
Because the Gis Yanji ethnic group usually believes that superior is the first, the general answers can be resolved to Lyerzel.
Go all the way to the medical room, you can see some larvae on the room table. At present, you are not in a hurry.
Triging the plot after talking to a doctor.
Chapter II: Geis Yanji Nourishing Room (2)
After the dialogue, the doctor introduced us to her "latest research", and honestly let Leezel enter.
After that, the multi-paragraph dialogue will be triggered continuously. It should be noted that Liezel must be let Layezer come down here.
Although the judgment is more difficult (DC20 ~ DC23), it can settle the crisis as long as it is successful.
Finally, the machine is destroyed, and choosing to deceive the doctor can be used to be fine.
If she knew that larva was still alive, she would flee the room directly and lock us inside.
It doesn’t matter if it is locked, the wooden door can be easily destroyed, and the prying lock only has the requirements of the DC10.
The important thing is that the various props in the room can be taken directly (including larvae).
The only thing to pay attention to is to be attacked by the soldiers outside the room when they go out.
[Remarks] Doctors will use "magic countermeasures" in the farthest, and it is recommended to kill priority.
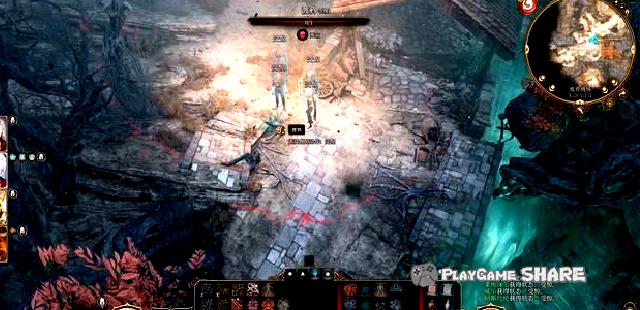
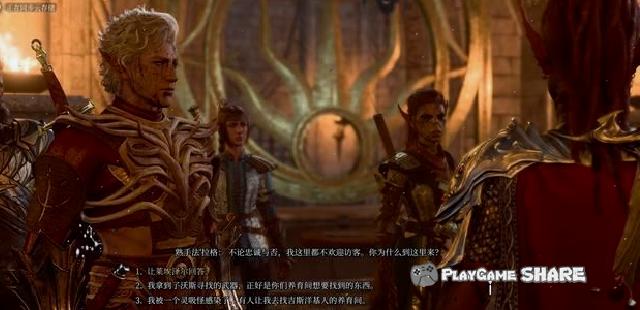
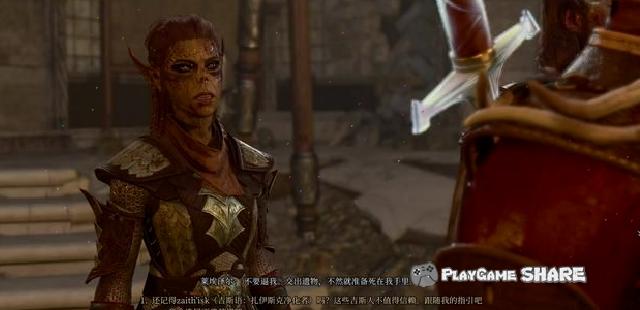
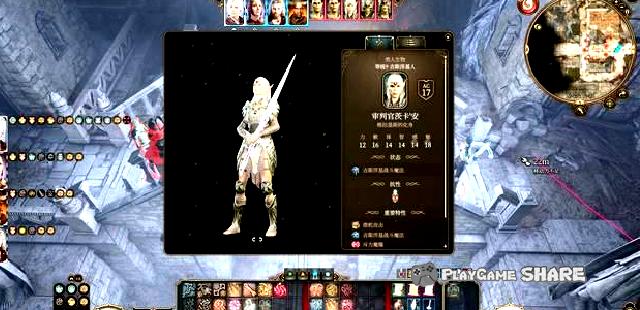
Go to find a judge, and the plot will be triggered when you pass a centuried room.
The judge seems to be looking for the relics held by Yingxin.

I thought I could finally see the judge, but because the key was taken away by the centurion, he could only talk to her first.
In the dialogue, only when you choose "You need to describe weapons" can you avoid fighting with her while keeping the relics.

Choose the other projects will basically enter the battle. The attributes of the centuries are as shown below.
It is recommended to give priority to killing a good position. One person dealt with the two wolves, one stands at the door to lock the door, and one person deal with her deputy.
[Remarks] Don’t forget to be afraid of the wolf.

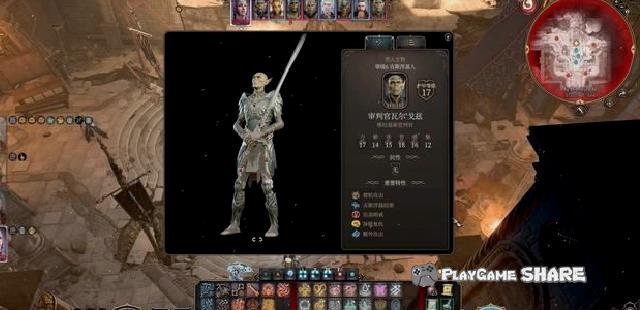
Then use the key on the centurion’s long hands to continue to move forward. After opening the door, it will trigger the plot.
[Note] After triggering this plot, unless the subsequent selection of the relics will be selected, it will be completely hostile to the Geisan family.

In the conversation of the judge, you can learn about some background information about the relics.
It is recommended to add the favorability of Ledizel.
When confronting the queen, if she has won the favor (friendly or higher) of Leezel, she will respect the decision of the player to retain the relics.
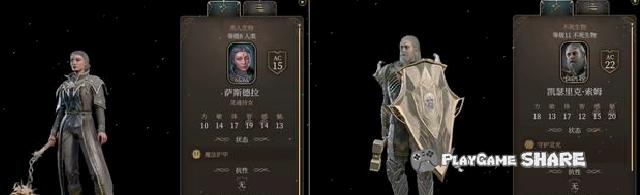
The attributes of the judge are as follows. The four surrounding enemies are dead creatures and can be dispersed.
On the other hand, it is recommended to use silence and settlement to make him into wooden stakes to easily kill.
After completing the queen of Gis Yanji after the battle, you can learn more information for a while.
If she told her the relics, she would open the portal and let us go to the star to kill the "guardian".

By the way, if you refuse directly, it will only attract the anger of the gods and forcibly end the game.
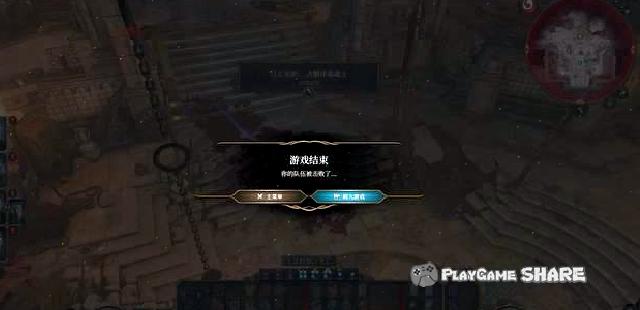
If she told her the relics, she would open the portal and let us go to the star to kill the "guardian".

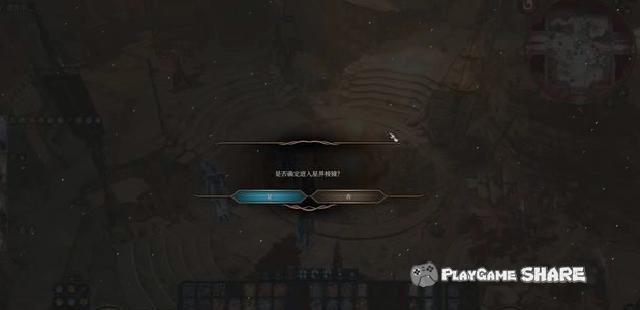
When trying to enter the prism, there will be prompts. If you want to know more plots, you can go in first.
[Remarks] Whether entering the prism or leaving directly, it will cause the Queen’s Geis Symbans and players to hostile.
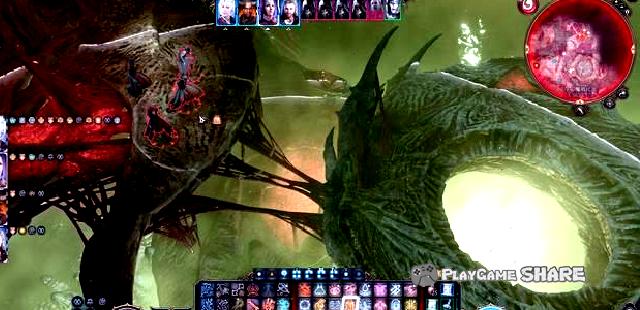
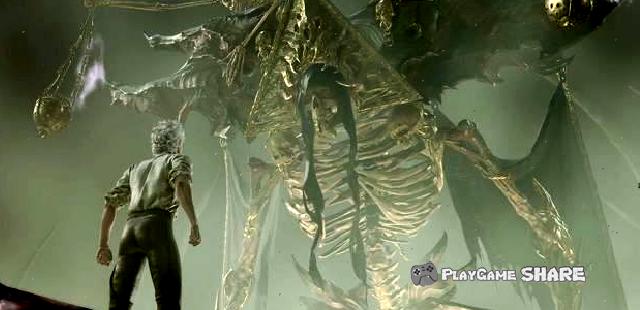
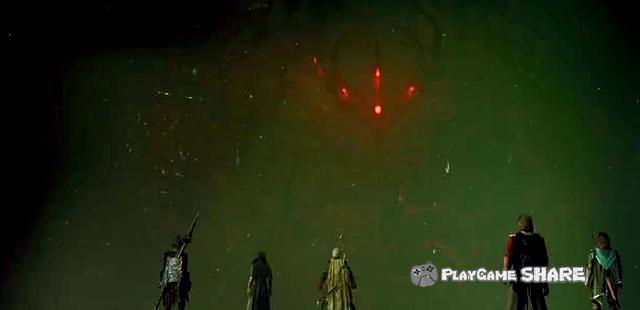
After entering the prism, he went to the meeting with a single knife and met the guardian through the arch.
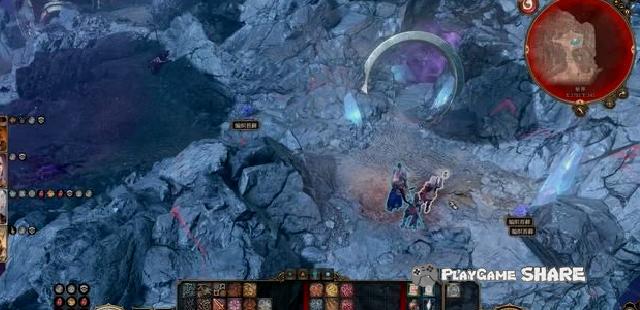
Even if you choose to kill the guardian in the dialogue, it will not really die. Instead, we know the conspiracy of the Queen of Gis Yanji.
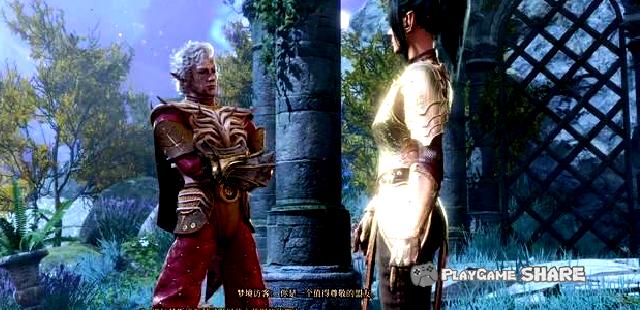
After returning, you can convince her to show her memory.
Chapter 2: Looking for Catherine’s relics (1)
13. Looking for Catherine’s relics
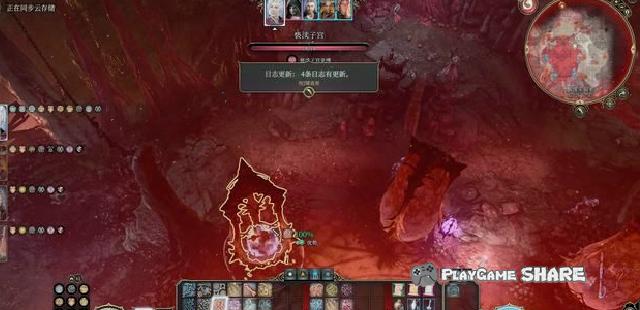
Go to the mausoleum, and after entering the tomb, I heard the sound of Barcelona came from Barcelona.
Ignore the continued exploration. There are many traps on the first floor, and there are basically not many good things, mainly some documents.

The order of the tomb is "the tower of the moon" → "Daughter" → "General", just press the button under the portrait in order.
It should be noted that there are many traps in this area. It is recommended that only one person comes in.
Enter the area "Sar’s Trial". The door switch below needs to manipulate the tie rods of the four compartments around, lowering the candlestick and extinguishing.
[Remarks] As long as there is light, the door will not open (sometimes including light and torch), and there are many traps in the four compartments.
Do n’t worry about reading the door if you ca n’t open the door. You can jump mushrooms on the west to enter the trial area from the side.
It should be noted that after jumping mushrooms, the enemy will be encountered in the past.
Barcelona’s men can be found in the trial area, and they can fight against the shadow enemy with them.
After entering the trial area to the west, you can see Barcelona through a shadow war.
Barcelona is struggling to deal with Shar’s trials, and it is usually not recommended to kill him directly here.
Seeking his help by dialogue, you can get a bell that summons people.
Chapter 2: Looking for Catherine’s relics (2)
Then there was Sar’s trial related. In order to complete the relevant plot of the shadow, the recommendation was to complete the trial with her.
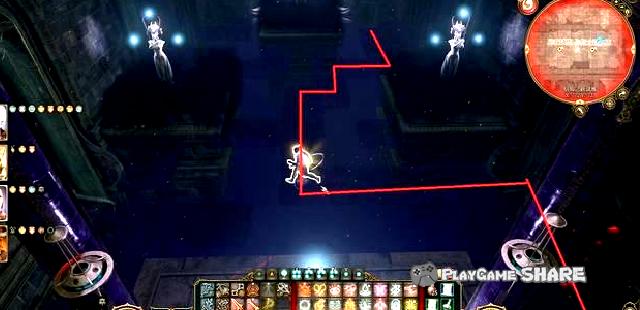
The first is "steadily trial". The goal is to avoid the enemy while avoiding the enemy.
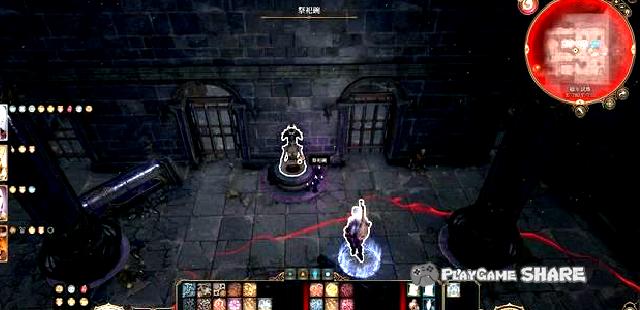
The blue and yellow-green below are the enemy patrol route. After pulling the green labeling tie rod, you can drop the wall. After getting the key of the red label, you can open the door.
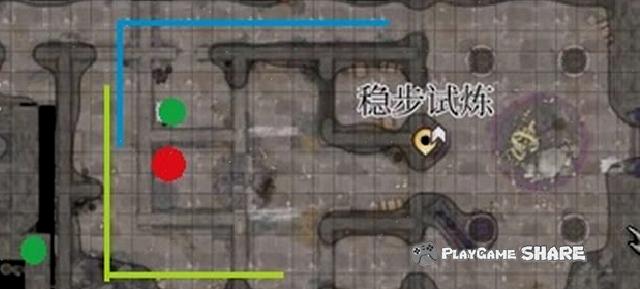
Recommend two simple completion methods:
① Stepping+immune ground shoes, do not take the key to use the door.
② Cigarette+turn-based system, fly all the way to use knocking.
After completing the trial, you can get the "shadow gem" required for the launch platform.
Followed by "Test with me".
The goal of this trial is "killing our team’s avatar".
The attributes and equipment of the avatars are the same as when the trial is opened for blood dripping. It is the same as that of the trial. Take off the equipment and open the trial directly. You can easily pass it when you see the avatar.
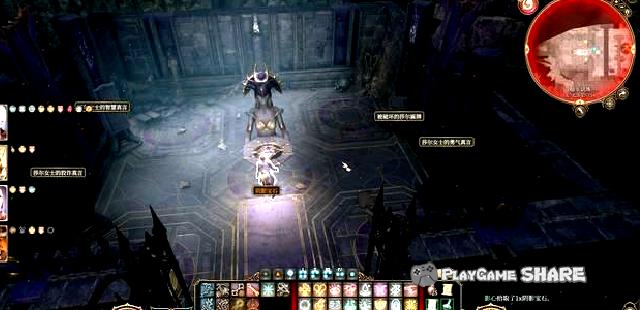
Finally, "the trial of faith", the goal is to reach the internal and directly get gems.
Adjust the gamma value of the game, you can see the hidden road in the water, or you can use flight directly.
If you are too lazy, you can also refer to the route below.

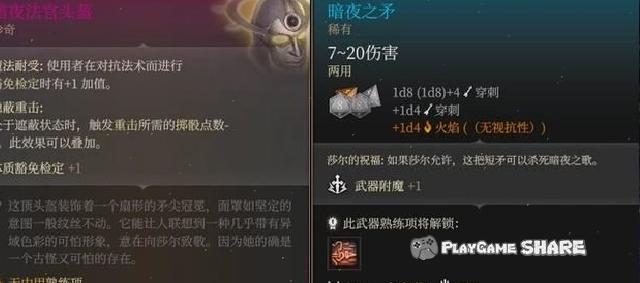
The last thing to arrive was the "Silent Library". After killing the enemy, press the left mark button to open the door and get books from the bookshelf marked on the right.
Insert the book into the switch, you can open the door and get the "dark night spear" and the equipment of some night judges.
[Remarks] For the process of the last gemstone, please refer to the related part of the branch mission "Raphael’s Enemies".
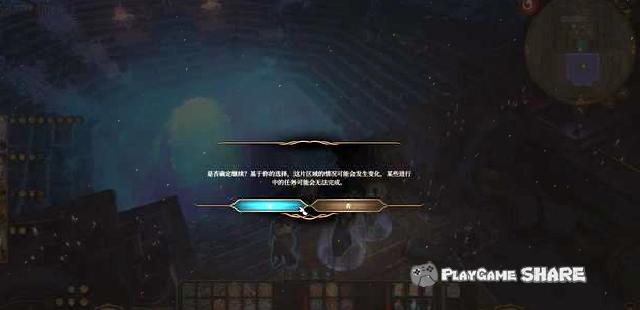
After getting all gems, start the platform and enter the area where the song of the night is imprisoned.
[Note] After entering the area, the main line of Chapter 2 will be advanced to the second half, and the branch lines limited to chapter first and 2 will be unable to complete.
Chapter 2: Looking for Catherine’s relics (3)
After entering the area, I encountered Barcelona, the main choice and influence are as follows:
① Barcelona takes away the song of the dark night-the failure of the shadow trial and leave the team forever.
② Drain Barcelona -Next.
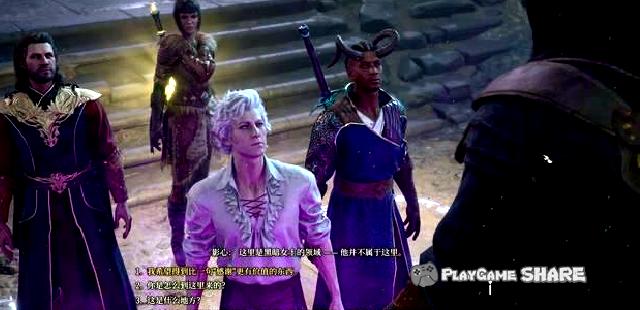
The good-looking kindness naturally kills Barcelona. It is recommended that teammates stand in a good position during the conversation, otherwise they may be pushed down the cliff by the big skull without getting the first hand.
Barcelona’s panel is as follows (standard difficulty). It is not strong. It controls him as much as possible and uses the blind effect of "Loshan’s blood" to disperse with the pastor.
After completing the battle, I learned that the song of the dark night was the daughter of the goddess of Sellene, and entered the choice:
① Let Yingxin complete the trial, Yingxin transferred to his job and basically lost himself, and obtained the legendary equipment "Sar’s Spear of the night."
In contrast, the hotel that lost Serenne will be controlled by the shadow. All NPCs except Jahila will turn into a shadow (Jahila can be cheated into the team).
② Prevent shadows and liberate the song of the night-the next context.
[Remarks] If the relationship between the player and Yingxin is not good, the shadow heart will leave the team.
After restoring the strength, after rewarding us, Erin left the tomb and went straight to the general’s old nest-the tower of the moon.
After leaving the tomb, comforted the shadow to go to the tower of the month to make a decisive battle.
Chapter 2: Defeat Catherine (1)
14. Defeat Catherine
After arriving at the tower of the moon, you can see that the harpist alliance comes out, and we basically do not need us to fight.
Dialogue with Jahila can get her assistance, and after entering the tower, he will fight with his disciples.
The attributes of the disciple Zeror are as follows, and the starting will use mirror.
If the enemy in her or the tower has been killed before, you can go straight to the top of the tower.
At the top of the tower, confront the general, and fought together with Erin after the conversation.
If you let Barcelona take Irene, the branch of this part is as follows:
① Zerrer will ask players to go to the hotel to abduct the general, Izbel, to start the "non-fatal attack" and dizzy Issabel.
② Drain Zeror, to kill Issobell, or complete the above ① items above can enter the top of the tower. It is purified from the general’s private altar (on the steps), triggers the relics and directly enter the "main brain nest point" process.
The attributes of the general and the disciples are as follows. The disciples use human beings, and those who do not die let the pastor go.
When the general’s blood dropped to about 40%, the plot triggered the plot, and the tentacles drilled out of the Tarri took away the generals and Irene.

Before you go to the main brain nest, you can accept Jahila to the team again. Don’t forget to take the general’s ring before leaving.
The character below stands next to the general’s "private altar".
In addition, if the main brain nest process is caught, the start of the start must be broken first, otherwise the game will end due to the transformation.
Chapter 2: Defeat Catherine (2)
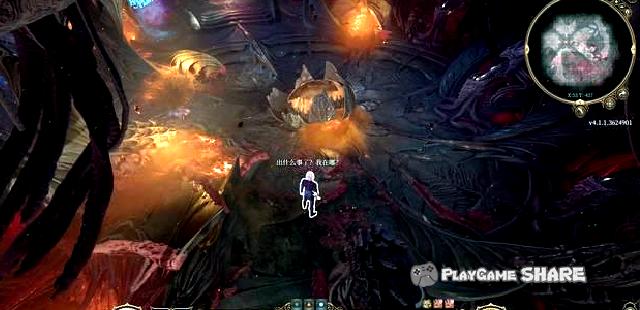
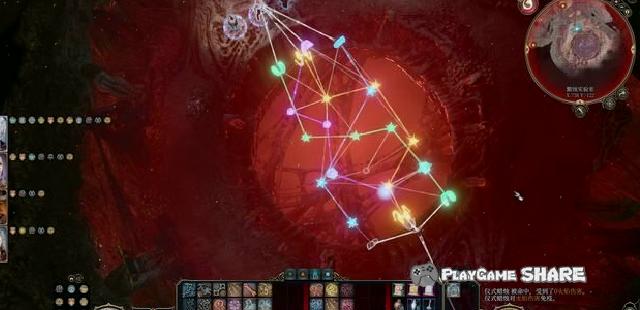
After entering the main brain nest acupoint, you can find the machine below in the southwest after exploring.
You can open the door after connecting the four similar nodes in the figure below.
In addition, in this area, you can also obtain BUFF by deceiving the soul maid, rescue the demon to complete the mission of Will, and save Toflin and Fan Boxing soldiers to complete the branch line.
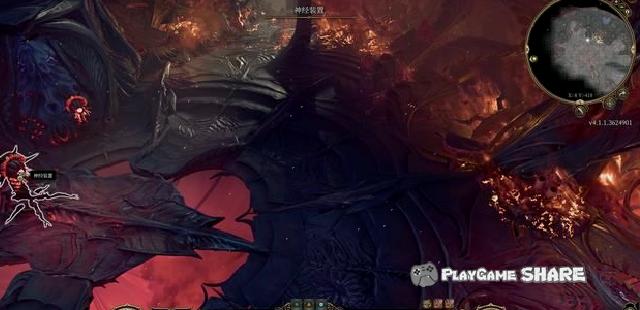
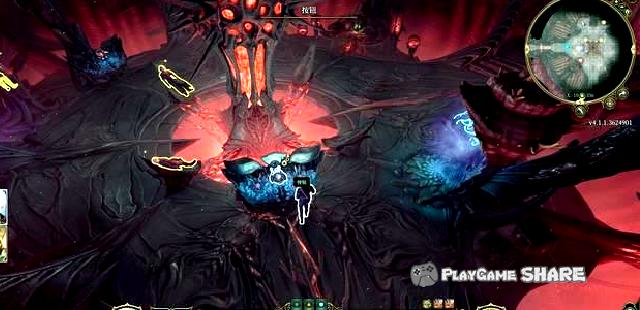
Finally, go to the depths of the Chao Acupoint to trigger the plot.
[Remarks] After triggering the plot, there are two BOSS battles, ready in advance.
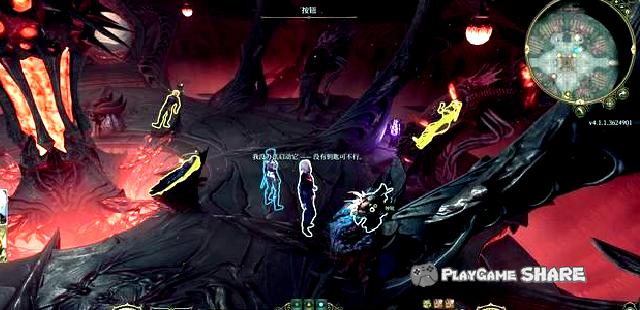
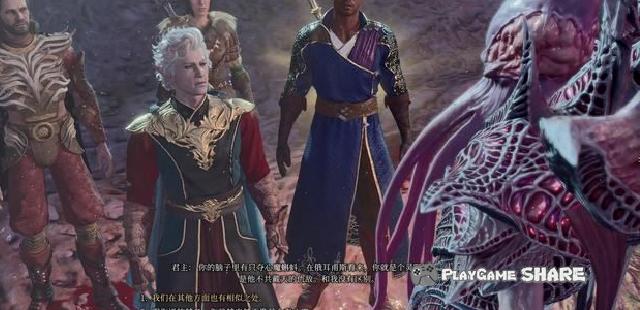
It turned out that Catherine had two ally, and their ultimate goal was to capture the door to Bod.
Wil’s father was taken away by them and implanted larvae.

Moreover, through the power of the Three Gods of Death and adding a color-resistant equipment, they talked about the main brain of the devil as their own use, trying to seize the whole world.
[Remarks] If Gal has learned his "destiny" at this time and was included in the team, you can choose "here" and "burst with them" directly, ending our glory in advance.
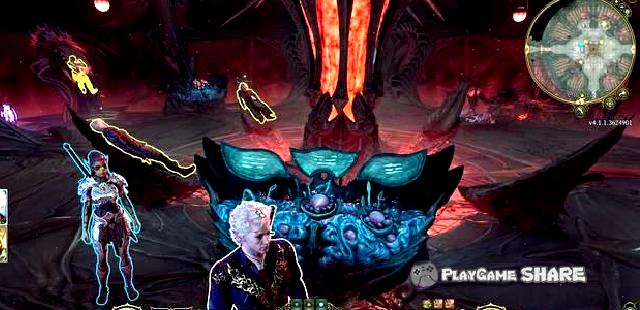
After completing the battle, the priority is to rescue the trapped Irene.
In addition, before defeating Catherine of the residual blood, be sure to kill several priests on the left.
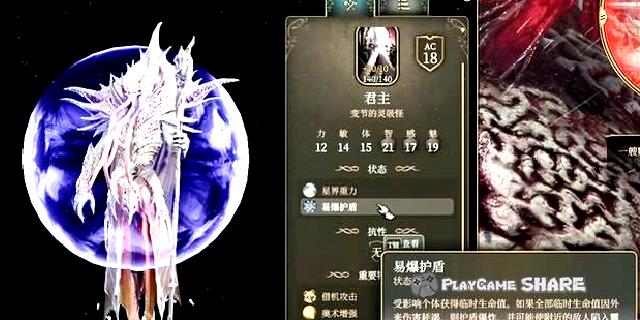
Mill Kou, one of the three gods after killing Catherine, appeared and entered the second game.
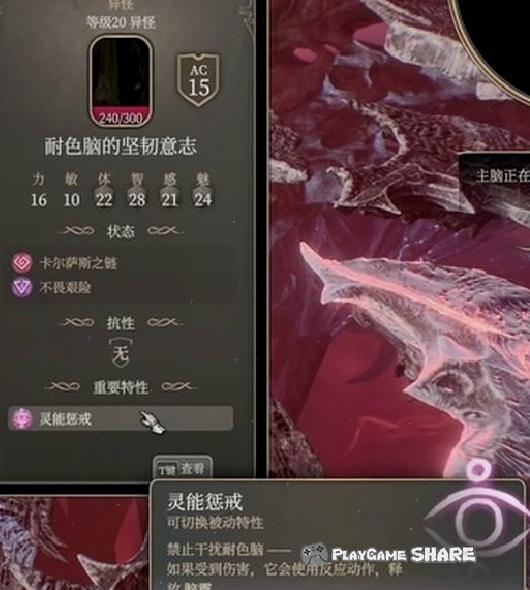
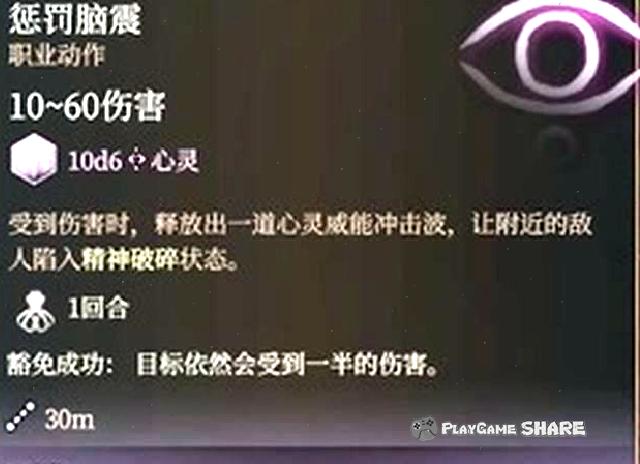
The picture below shows the attributes of Mill Kou. It can be affected by the basic effects of "deterrence". Although it cannot be fixed and dispersed, the pastor is still useful.
In addition, it summons priests in the battle and devour them to strengthen them.
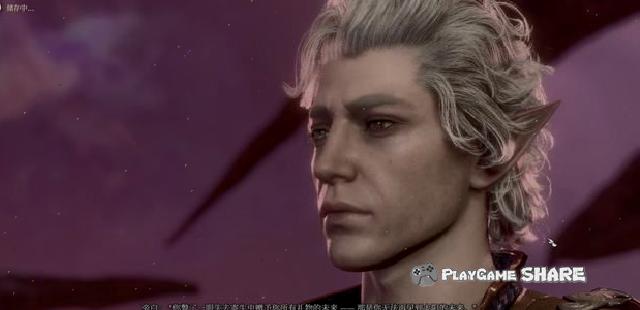
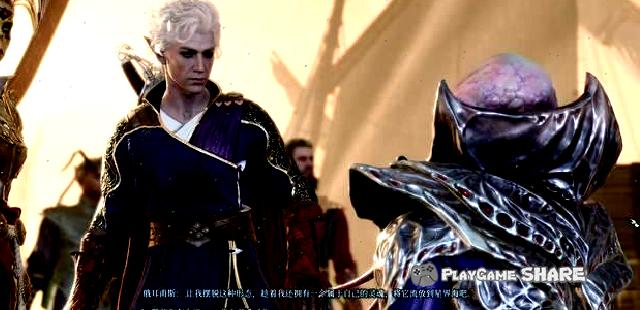
Triggering the plot after completing the battle, dialogue with the guardian and learned a series of truths.
The next task is to follow the footprints of the other two enemies to the door of Bod.

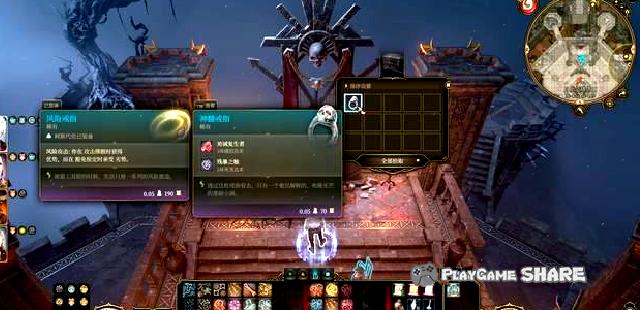
The main rewards of defeating Catherine are as follows, and there are some documents in the area. Don’t forget to collect it.
Chapter 2: Go to the Gate of Bade (1)
15. Go to the door of Bude
After returning to the portal, talk to people after returning, and enter the end of the second chapter.
It is worth mentioning that the tomb guard seems to know the Three Gods of Death, but it is not yet intended to tell us more.
Visit the tower of the moon again (just go out and come back), the guardian will prompt that we will call us to call teammates as much as possible (let them go to the camp).
The teammates available in this chapter are recruited as follows:
Issbeel and Irene
In Sarr’s trial, I persuaded Yingxin to give up the trial, liberate Irene, and let Barcelona take her away.
As long as I am rescued by Irene, I can basically recruit without doing bad things.
Jahira
When the shadow battlefield rescued the harpist, someone was protecting when entering the hotel. When he was drinking, he could feel good at talking.
After that, he did not hostile to the harmonist, or took Issobell away to coax her.

Halx
The first chapter rescue him can basically recruit and complete the "lifting curse" of Chapter 2 to ensure that he joined the team.
Regarding the recruitment of teammates, Irene and Issobell need to dialogue in the camp to determine the recruitment, and they need to pay attention.
In addition, Irene can unlock the memory of Yingxin’s seal by Shar, and learned that she was afraid of the wolf and her life.

Corresponding to "Sar’s Dark Night Short Spear" is "Caren’s Dark Night Short Spear", which was obtained after talking with Irene.
Chapter 2: Go to the Gate of Bade (2)
If the relevant plot of the Geis Yankeli Relief has been completed before and chose the Queen of the Big Big, it will be attacked by the Gis Yankees on the way to the door of Bodd.
The attributes of the enemy general are as follows.
The plot was triggered after going to the door of Bude, and the other two "spokespersons" were irritating to the frustration of the plan, but Gotash, who dominated the matter, still seemed to have a voucher.
When switching areas, you can see the door of Bude in the distance.

After the long break, the plot will be triggered and choose your own "goal".
[Remarks] Origin characters will have additional options.
After triggering the attack, you need to reach the portal within 3 rounds, otherwise the game will fail directly.
It is recommended to change to a teammate with a higher attack value (agile) before long break, it is best to have a "alert" session.
[Remarks] It is the most convenient to find a mercenaries to find a mercenary directly.

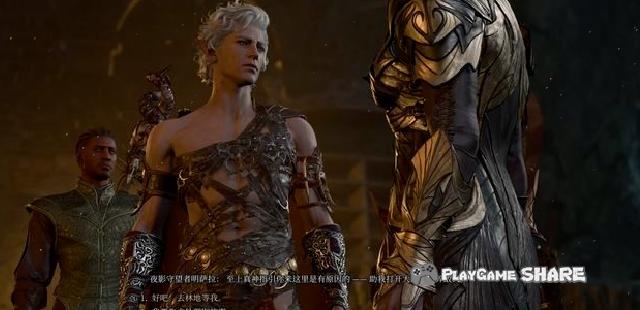
After entering the portal, I saw the Geisan fighter in the distance was launching an attack.
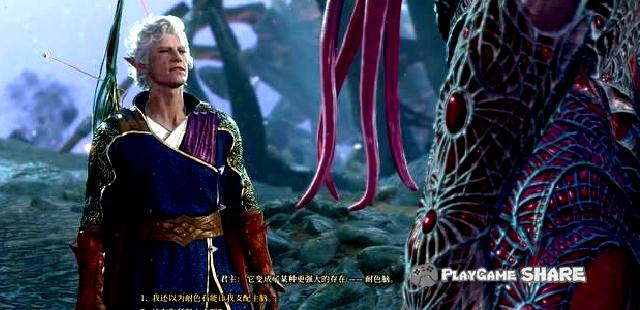
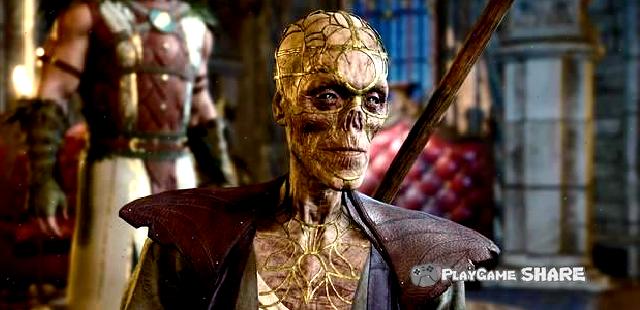
Following the call of the guardian to assist, but unexpectedly our guardians were actually a devil.
Choose to help it, and then he heard him explained that it was transformed by others. By chance, he was separated from the control of the main brain and started a new life at the door of Bude.
Until one day, Gotash was discovered that its power was deprived of the new level.
Later, the historical intervention of the Geis Yanji people, the monarch (the guardian seized the demon) found the relics that detained Orevis, and used the relics to get rid of the control of the main brain. Essence
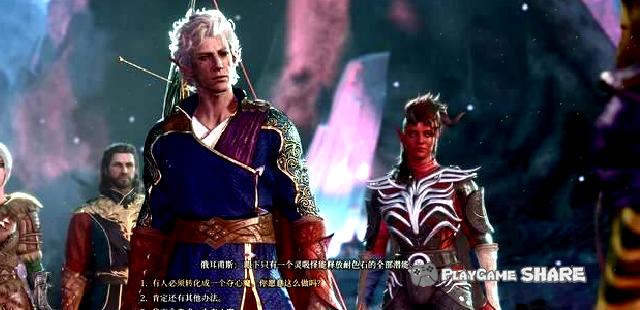
At the end of the dialogue, we can choose whether to further transform (if the larvae have been devoured before).
Choosing conversion can unlock the outer ring brain upgrade, but the nature (including the appearance) of the whole person will change and irreversible.
Passing a DC20 test can temporarily leave it, and there is a backpack at any time (re-transform when thinking).
Then there is the chapter of the door of Bude.
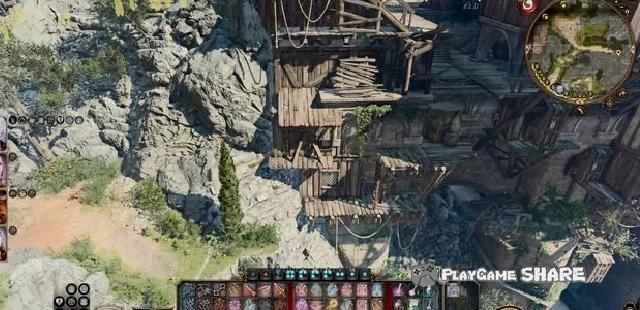
Chapter III: Flying Dragon Fortress outside
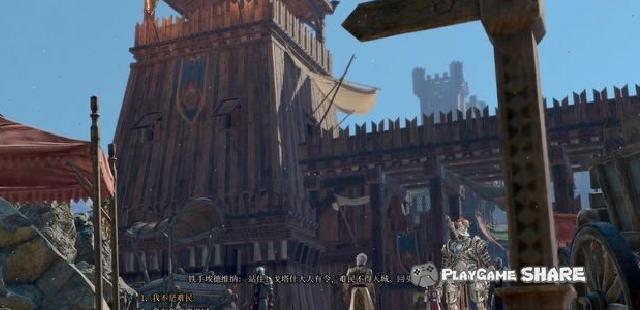
16. Foreign Dragon Foreign Minister Entering Flying Dragon Pass after a break.
It should be noted that because there are more NPCs in this area, this game will carry out pre-loading (or cache) of the large areas where the player is located.
Therefore, it is recommended to restart the game after entering the region and clear the cache of Chapter 2. Whenever it is stutter, restarting the game can basically solve it.
First of all, we arrived at the refugee camp. The Tivin and dwarves we saved before will appear in this area.
Moore, who was caught, was still disappeared, and their little businessmen could be found next to the material storage.
In the two areas in the figure below, you can encounter Olympic Olys in advance.
[Remarks] Right-click NPC and use "Survey" to learn the true identity of the NPC.
The rescued dwarf arrived through the secret door of the blacksmith (the opening of the hole from the beach for the first time).
They will provide a task and can also help us fight against "steel guards".
When entering the city level, if the dwarf was rescued in the dark region and the revenge furnace, and the tower of the moon was rescued again, it was necessary to choose the radical conversation options here.
The dwarf will invalidate the steel guard, just go in directly.
If the dwarfs were not saved before, they could also jump all the way from the cliffs in the east and sneak into the level.
Regarding the steel guard, when the power of the Supreme God was previously seen, if you saw it by the purple eyeball, it would not be able to pass it.
It is basically discovered when taking a good line. The current speculation is:
① The ground camping ground: kill the priests in the house and quickly kill the leader. The eyeballs in the Ming Sala’s room destroy the wooden bridge and let it fall.
② The furnace of revenge: Waiting for the death of the true soul, or sneaking the eyeballs to kill.
③ The tower of the moon out: try not to fight in the tower as much as possible, and sneak into the top of the tower in the second half.
④ Use blindness, silence, or sneak-to-eye.
After entering the level, when entering the fortress, you can use the passenger permit stolen in the "Jianwan Express" of the refugee camp.
Or the second chapter of the general BOSS theater, the invitation letter was obtained on the table below, both of which can be released directly without passing the verification.

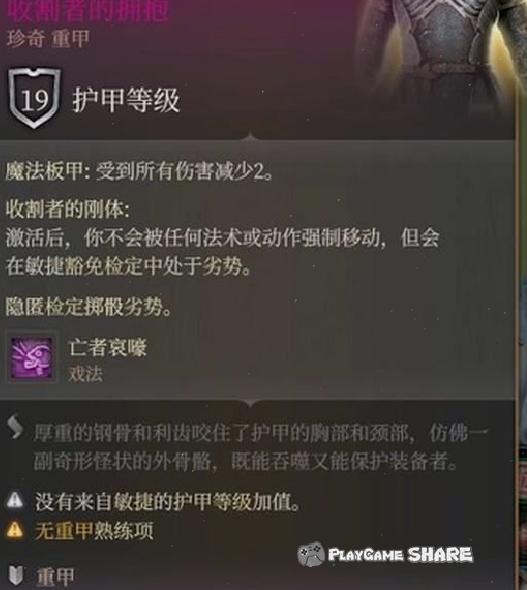
There is also an invitation letter in the room of "Xia Ruis’s caress".
In addition, after completing the "investigation of the murder" by completing the branches, you can get a pass from the detective of Feixiang, or pass the "donation 20,000".
Chapter 3: Raphael’s Proposal
17. Raphael’s proposal
Enter "Xia Ruis’s caress" and talk to the female half-body next to the bar triggering task.
She told us that Raphael waited for us in the upper room and went straight.
[Remarks] This task is re-closed with the mission of the Geis Yankees, "Help a centimeter of Vols" and the "Gisan Yanji soldiers".

If it has previously triggered the hostile to the Queen of Gisan and received the assistance of the centurion-long Vol, you can see that she is trying to impress Raphael.

Of course, Worth cannot give Raphael what he wants, and the "trading object" he really cares about is us.

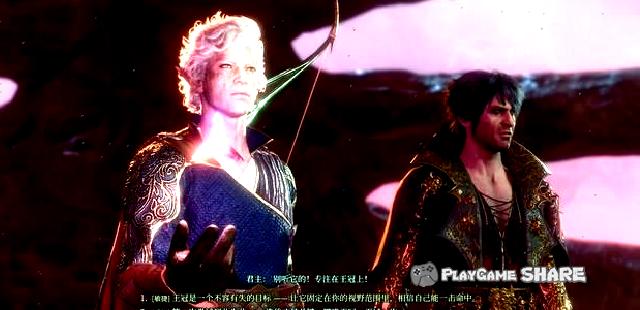
During the negotiation, Raphael temporarily sealed the monarch’s induction and confessed to us that he had the way to rescue Orevis.
It turned out that what Raphael really wanted was the crown of Ryll on the main head. To this end, it was natural to let Orevis destroy the main brain.

According to whether to sign a transaction with Raphael, the impact of the main line is as follows:
① Get the hammer, but you must give it to Raphael after getting the crown (perhaps you can kill him after giving it for Rapham).
② The relationship with the monarch after obtaining the hammer worsening, and when entering the star world again, it will trigger the plot that destroys the relics.
③ ignore the transaction, Raphael will continue to wait before promoting the main line.

Chapter III: Gotash’s Poor Stone (1)
18. Gotash’s color-resistant stone
After entering the fortress, the plot will be triggered, and the steel guards controlled by Gotash are "invited" to participate in the Gotash’s award ceremony.
Even if you ignore it, you can continue to move forward, but the devil Mizola will appear on the bridge head, and it is recommended that we take a look.
In addition, you can buy some equipment in the fortress through lobbying.
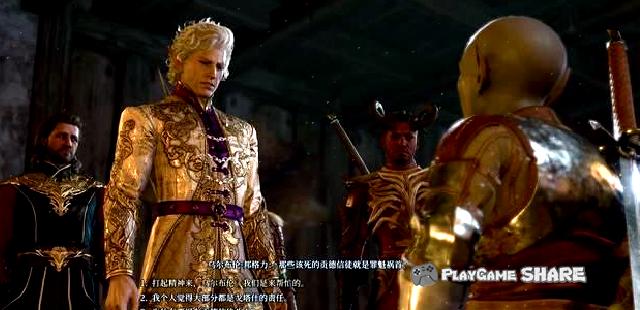
Go to the second floor of the fortress to attend the ceremony and get a chance to talk directly with Gotash.
It can also be started here, but steel guards will be a big problem.
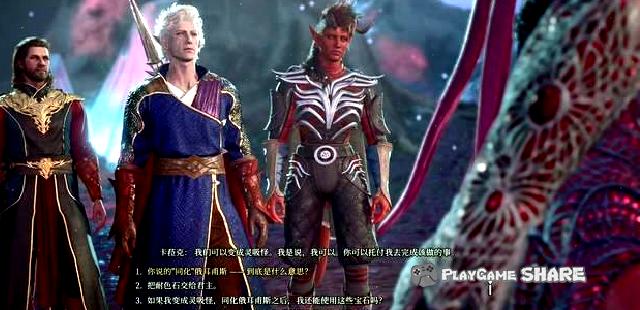
In the dialogue, we learned that the original purpose of the three was to let Gotash control the door of Bodd, and then continuously transformed residents.
However, at the moment when the general was dead, the plan could not be carried out again, so he made a suggestion to "join hands" to us.
If you promise him, he will immediately be hostile to the Olympic forces. Of course, you can not promise him to find other methods.
[Remarks] Because fighting with any disciple will affect the situation of Bude’s door, it is recommended to complete the exploration within the region and then promote the main line.

After watching Will’s father, the Duke of Ryvar, he left the place after Crown in Gotash.
When I crossed the bridge, I met Mizola again. This time, her proposal was to restore the consciousness of the Duke of Revita.

Chapter III: Gotash’s Poor Stone (2)
21. Gotash’s color-resistant stone
Since then, if Getash’s color-resistant stone has not been obtained, he can return and choose to cooperate with him.
You can use "detection of ideas" to learn that he wants us to maintain a tough cooperative relationship, so he will be more assured.
If you want to fight with him, it is recommended to complete the "revenge of steel dwarf" by the branch line.
Getash is an ambitious person. Although he will try to exclude his enemies, he does not exclude powerful people to cooperate with him.
It is worth mentioning that even if he promised to cooperate with Gotash, he would die when he was fighting against the main brain for the first time.
Therefore, if he does not need his equipment, it is also a good choice to judge and choose to cooperate with him.
Get Gotash’s color-resistant stone, or cooperate with him and go to Mitan Wharf.
[Note] After taking a small boat, it will enter the end of this game, and all the branch processes will not be completed.
After arriving at Midan, you will go all the way, and you will encounter a round of brain-eating battles on the road.
On the way, you can find the body of the adventurer and sister, and take the body of the sister "Lithtia" to the sister to get some gadgets (the sister’s body is locked in the locked door).
Chapter III: Calling Allies (1)
19. Call all ally
This task is raised by the alliance that should deal with the final battle.
Advisor Florek
In the Fortune Fortress, the prison can be entered from the position below.

You can get the keys on the guard with pickpocketing, because whether to see blood will affect the development of this task. It is recommended to open "non-fatal attack" or sneak throughout the process in advance.
After getting the key from the guard, you can open the door deep in the prison to rescue the prisoners.
If in the first chapter of "Wolin’s Dormant", the consultant Frehek was rescued from the sea of fire, and we could see her here.
After persuading her to join the team, she left the wall from the prison storage room.
After arriving at the outside, she will leave and expand the power first to support us in the final war.
Wearing
After satisfying the following situations, this character found it in the middle of Xiacheng District. He would say that although he could not get the problem of Kazak, he could still be used as our allies (selling equipment).
① The first chapter has completed the "our irritable friends" related upgrade tasks.
② Chapter 2, did not destroy the "Final Shop Hotel", and upgraded Kaika again.

Moore
After satisfying the following situations, this character found the nine-finger camp in Xiacheng District.
Although it will not help us directly, Moore’s men can still sell some equipment.
① The first chapter is to complete the "Finding Dragon Point" related tasks (the "saving refugee" part of this strategy).
② Chapter 2, promised to bring the children back to Moore after Moore was taken away.

Chapter III: Calling Allies (2)
Roland
After this task meets the following situations, it is found in the central part of Xiacheng District.
① In the first chapter, Druidi persuaded him to stay with his friends.
② Chapter 2, he found him outside the town of Rezawi after rescing the prisoner of Tidolin.
[Note] To complete his alliance mission, it is necessary to persuade Yingxin and rescue the "Song of the Night" directly in the prisoner of the second chapter.
Talk to him and talk to the stairs and talk to Luo Ruokan’s phantom. Then use the leftmost teleportation door to transmit it to the Magic Tower.
Dialogue with Luo Ruokan, it turned out that his purpose was the same as Barzaz, just to use the power of Ms. Erin.

Regardless of whether he promised his request, he could see Lorean with her after returning to the camp to find Erin.
After going to Gaota again, Roland will also be present, and strictly refuses Luo Ruokan’s proposal to enter the battle.

Luo Ruokan’s panel is as follows, because he will use skill counterattack, it is strongly recommended to solve the surrounding element enemies first.
After completing the battle, Luo Ruokan will be executed.
You can use necromancer to know some intelligence in the underground back room (easy to complete other branch lines).
After talking to Roland, he will become the master of Gaota, and he promises to assist us in the final battle.

Chapter III: Calling Allies (3)
Calling allies (supplementary parts)
Saifeluo
After this character meets the following situations, it will appear in the final war:
① Chapter 1, lift the crisis of the Druid Camp, and Savelo survives.
② Chapter 2, Irene and Issobell survived (whether or not to assist the generals) and rescued Safiro in the nest.
③ Chapter 2, rescued the Timlin from the underground prison of the monthly tower and found the lost Roland.

Alabeel
After this character meets the following situations, it will appear in the final war:
① Chapter 1, rescue Halxin from the ground camp and let him go to Chapter 2.
② Chapter 2, complete the "curse of shadowing" by the branches.

Gisan Yanji people (centurion-long Worth)
After this character meets the following situations, it will appear in the final war:
① Chapter 2, collect information about Roths, and resist the current Queen of Geis Yangji, triggering and promising to assist the centurion in the long break.
② Chapter III, complete the "Hope of Hope" by the branch mission, and get the Hammer of Russia, liberating Russia’s ears (no matter what time).

Issobell
After this character meets the following situations, it will appear in the final war:
① Chapter 2, protects her from being taken away during the hotel’s defense war.
② Chapter 2, refused to promise the request to bring the general to the tower of the moon, and talk to her at the end of Chapter 2.

Ms. Irene
After this character meets the following situations, it will appear in the final war:
① Chapter 2, refused to kill her in Shar’s prison.
② Chapter 2, Shar’s prison cannot let Barcelona take her away.
③ In the third chapter, in the process of "The Song of the Dark Night" of the branch mission, he rejected the proposal of Luo Ruokan and defeated him.

Valeria
After this character meets the following situations, it will appear in the final war:
① Chapter III, complete the "investigation murder" of the branch mission.
② Chapter III, rescued it in the branch mission "Baltan Referee" and refused to become a Balt’s blasphemy assassin.

Wow
After this character meets the following situations, it will appear in the final war:
① Chapter 1, talk to him in Druid Land, and learned that he is going to the ground with the ground (not completed).
② Chapter 1, rescue him in the ground camping place, and the subsequent eye-eye process can be rejected.
③ Chapter 3, rescued him in front of the steel guard’s manufacturer.

Nine fingers
After this character meets the following situations, it will appear in the final war:
① Chapter 3, refuse to assist the Stone Lord in the branch mission "Assisting Underground forces".
② Chapter 3, the branch mission "Assist underground forces" learned the betrayal of the San Talle and returned to the nine fingers to resolve the crisis.

Uma
After this character meets the following situations, it will appear in the final war:
① Chapter 1, Astai Lun’s partner task, does not kill the vampire hunter encountered in the tea room.
② Chapter III, found Uma in the west side of Lvavatton, and promised to help find the children who were taken away.
③ Chapter III, Astai Lun’s partner task, use a staff to release prisoners after the destruction ceremony.

Halx
After this character meets the following situations, it will appear in the final war:
① Chapter 1, rescue him in the ground camping site and lift the crisis of the Druid camp.
② Chapter 2, complete the "curse of shadowing" by the branches.

Ming Sara/Minsk
After this character meets the following situations, it will appear in the final war:
① The first chapter is to complete the "rescue refugees" related tasks, so that the hotel is successfully entered in Chapter 2.
② Chapter 2, if you choose to assist the general to take away Issobell, you need to return to the hotel to persuade her and complete the battle.
③ Chapter III, find the hiding place of the harp player, and complete the branch mission "high-level harp player" and "assisting underground forces".
Fist
After satisfying the following situations, the characters in this faction will appear during the final war:
① Chapter 2, rescue Mizola in the nest to survive Will.
② Chapter III, talk to Mizola at the head of the Alongguanqiao head, and then triggers and accept Mizola’s proposal during a long break.
③ Chapter III, enter the Steel Throne and rescue the Duke of Gao.
[Remarks] You can also bring out the corpse of the Duke before accepting Mizola’s proposal.
Mizola
After this character meets the following situations, it will appear in the final war:
① Chapter 2, rescue Mizola in the nest.
② Chapter III, talk to Mizola at the head of the Alongguanqiao head, and then triggers and accept Mizola’s proposal during a long break.
Iron Hand Bulfa/Gose believers
After satisfying the following situations, the characters in this faction will appear during the final war:
① The first chapter, the gloomy area, assisted the pupae and iron hand dwarf.
② Chapter 1, the furnace of revenge, protecting the slavery-involved iron-handed dwarf.
③ Chapter 2, the tower of the moon is rescued from the underground prison.
④ Chapter III, find the base of the Iron Handwich in Levonton, and accept the branch mission "The revenge of the iron hand dwarf".
⑤ Chapter III, make a choice in the branch mission "The Revenge of the Iron Hand Bow Confucianism", and protect the trustees of Gentle.
[Remarks] The assistance of the Gentle believers needs to rescue the hostages in the steel throne.
Chapter III: Balin’s Polygish Stone
20. Barin’s resistant stone
This task is recommended to be carried out after completing the branch mission "Baltan Referee".
Go to the "bottom city ruins" transmission point of the sewer to trigger a dialogue with the locking stone gate.
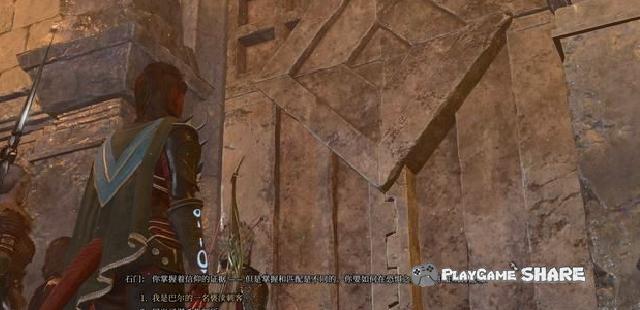
Even in the case of holding Barlin, you need to get "proof" to pass.
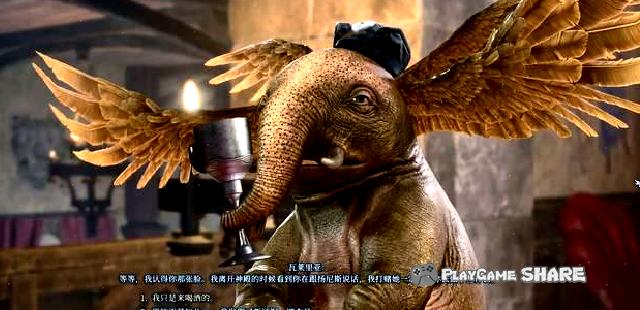
Of course, when holding a token, the player either has become a blasphemy (killing the flying elephant), or he has killed the believers in the referee (rescued the flying elephant).
After entering, you will be attacked by the ghost on the way. The strength is not high, but the distance is far away. You can pull back and pull back.
There is a fork on the road to the temple. On the left side of the figure below is the place of the main brain. You can first open a transmission point.
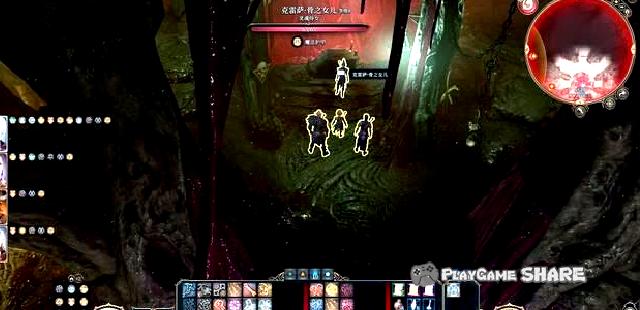
On the right is the temple to Balta, and it is basically not encountered by the enemy.
Use the amulet to enter the temple, and you can see your companions locked in the distance in the distance.
It should be noted that if the believers in the referee have been killed before, even if Getash’s color-resistant stone is brought to, it will not be able to obtain the trust of Olympic.
After entering the battle, the Olympia will be transformed. The picture below is the attribute after the transformation.
Try to control the battle around the altar can reduce the number of enemies to participate in the battle, or save the teammates on the stage to increase the hands.
After completing the battle, I got the legendary weapon and her color-resistant stone.

Chapter III: Fighting Main Brain (1)
22. Fighting the main brain
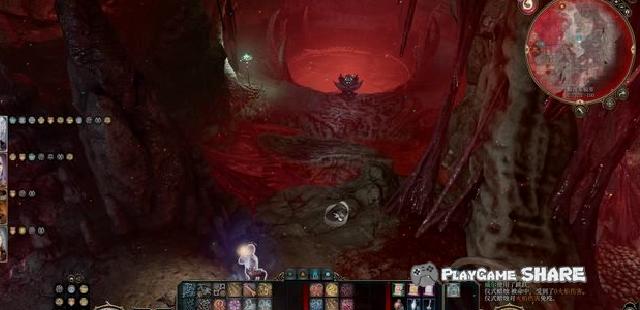
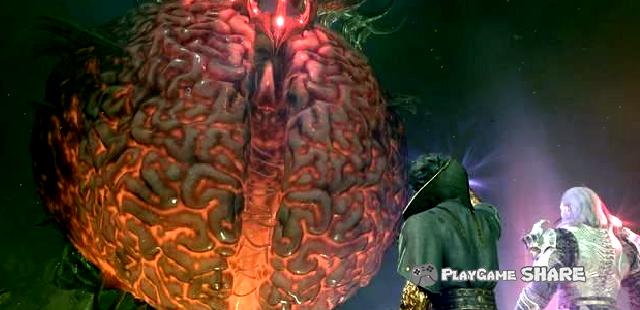
Finally, face the color resistance brain deep in the depths of the dense pond.
Then perform a positive face-to-face duel with the color resistance, try to control its crown through color resistance.
It is worth mentioning that there are four continuous verifications here, and you can choose a specific attribute for judgment.
The difficulty is DC20 → 25 → 30 → 99, and the last judgment of the DC99 can only pass through the dice.
[Remarks] It doesn’t matter if it fails to pass all. The more successful times here, the lower the initial blood resistance of the color resistance in the final stage.
Unfortunately, even if we have the blessing of relics, we still cannot master the power of color resistance.
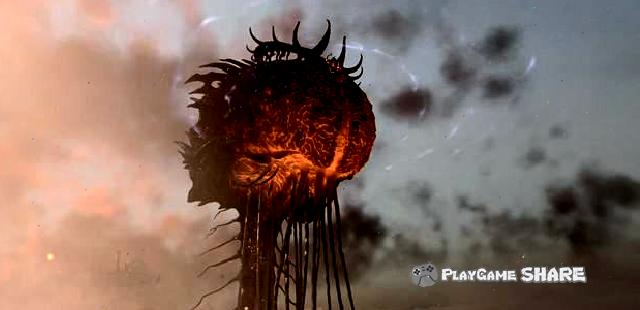
The restricted color-resistant brain was lifted away from its restraint, and it was summoned to win the monster and attack the door of Bude.
Helplessly, we had to return to the star world first to discuss with the monarch.
The final choice will be made to Orevus’s stay (if he has not rescued him before).
Because the larvae in our brain are still affected by the main brain, and the spiritual control ability of spiritual monsters is far stronger than other races.
Therefore, a spiritual suction monster must be allowed to operate color-resistant stones. Only in this way can we avoid interference of the main brain.
According to the player’s actions and partners who joined the team, they can be divided into the following three methods:
① When Kakka is in the team, she will take the initiative to propose to become a spiritual suction monster so that she can escape the death threat brought by the hell engine.
② The monarch who is a spiritual suction monster will take the initiative to ask him to control it, but his teammates will oppose it.
③ Regardless of the opposition of the monarch, try to rescue Orevus and give up assimilation with him.

If you choose to rescue Orevis (at this time or before), the monarch will directly invest in the master’s brain.
However, we can still make Orejus a spirit monster (or itself).
After completing the transition, leave the star world and go to Shangcheng District to the final decisive battle.
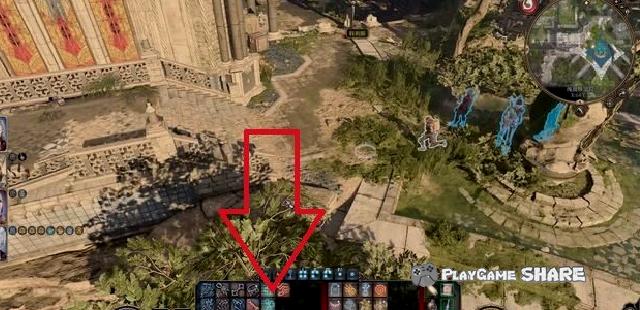
According to the completion of the "summoning allies" in the branch mission, we can summon allies in the final theater.
The key position is above the weapon bar in the lower left corner.
After entering the church, he made a speech and listened to his companions after speaking.
Chapter III: Fighting Main Brain (2)
There are a large number of enemies in the subsequent area. It is recommended to summon more allies for assistance. It is okay not to kill all.
When you are close to the main brain, the color-resistant brain will summon a snail shell. It will fire a round of shells every round. The yellow circle on the ground is its shelling range.
After climbing up the color tolerance, he would fight into the battle. If he had been hostile to the monarch before, he would also appear when he arrived here.
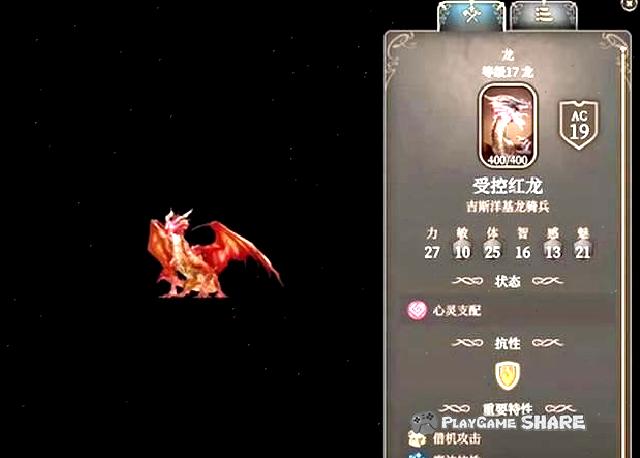
In addition, if the Red Dragon assistance (Gao Duke branch line) below the Flying Dragon is not obtained, the red dragon appearing here will also be a difficult threat to handle.
Another thing to pay attention to is that walking on the surface of the color tolerance will have a chance to summon the tentacles.
The tentacles will restrain a nearby role at a certain probability at a certain probability.
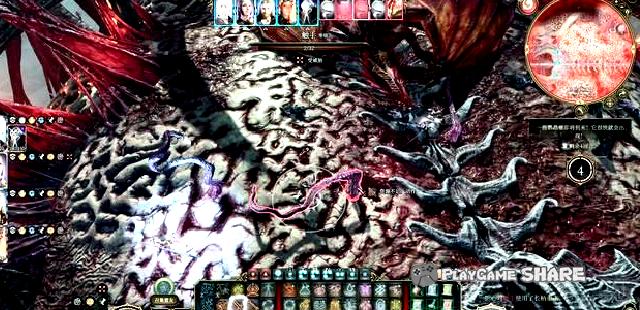
Let our spirit monster enter the final battle area after using special skills in the main brain.
The attributes of the color-resistant brain are as follows, and the initial blood volume can be effectively reduced according to the previously approved number.
It should be noted that the main brain will cause a counterattack to the attacker. It is recommended that all teammates enter this area as much as possible (after all, there is still time limit).
In the final choice, we can also choose to kill the spirit sucking monsters, dominate the crown ourselves, and become the true god.
However, this will not be able to watch the ending part.
If you choose to destroy the main brain, you will enter the ending part, and see the ending of the partners according to the various choices made by the player.
In the end, we were carried into history as the guardians of Jianwan.
After the end, there will be an egg. The "tomb person" wakes up at the ruins near the fall point is actually the enemy of the three gods of death.
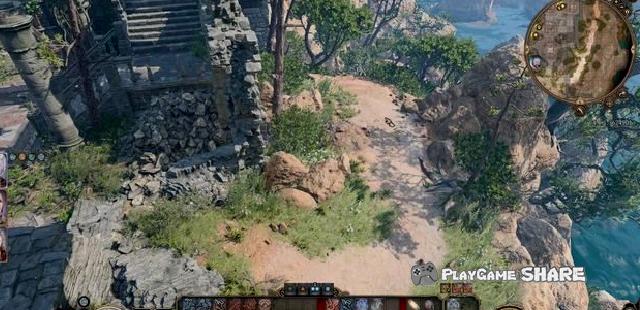
Regional Total Observatory: An nautilus crash area
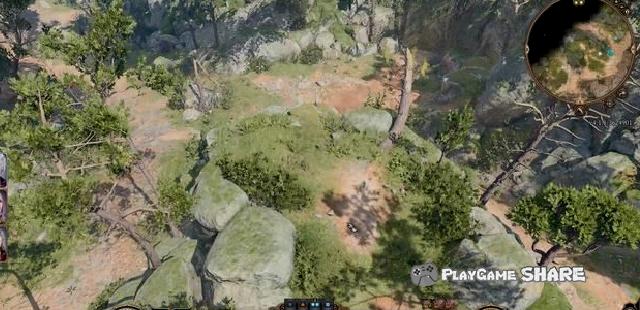
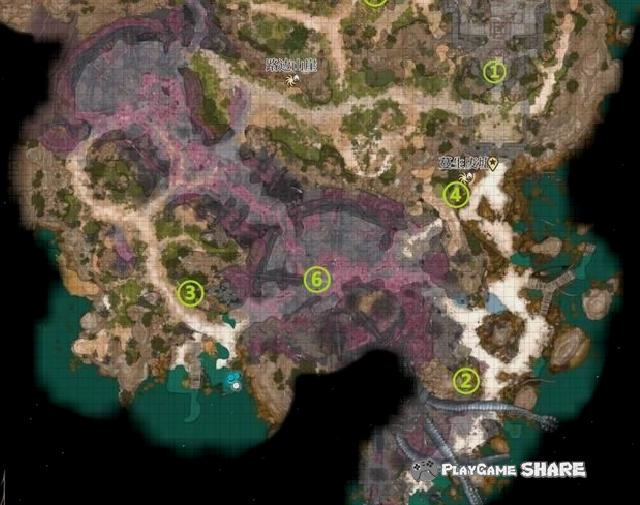
1. Phaose crash area
Regional overall
The picture below shows the map in this area.
① The branch mission "Explore the ruins"
② Partner "Shadow Heart"
③ Partner "Asleen"
④ Partner "Gal"
⑤ Partner "Laezel"
⑥ The incident "injured the heart of the heart"
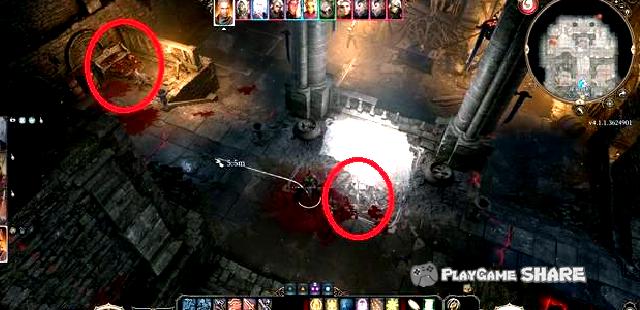
Line task: Explore the ruins
Branch -Exploring the ruins
In the process of this task, Gal, Asdon and Yingxin can be obtained in the process of this task.
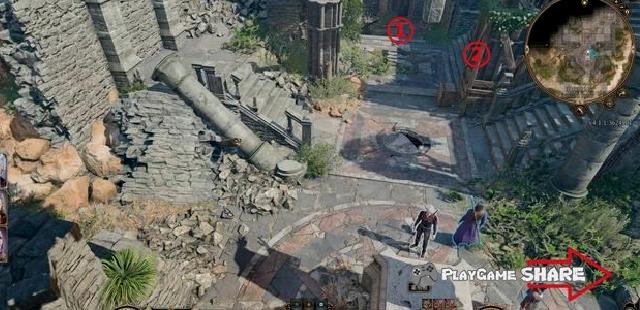
After approaching the ruins, you can see a few thieves, and they seem to be looking for loot nearby.

You can choose lobbying, bullying, and intimidation to drive them away (the charm/intelligence/strength of the DC10).
[Remarks] Anesthesia needs to use Astai Lun for dialogue. This conversation will not let teammates know that he is a vampire.

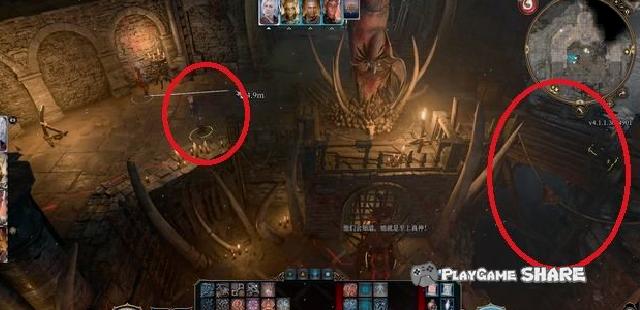
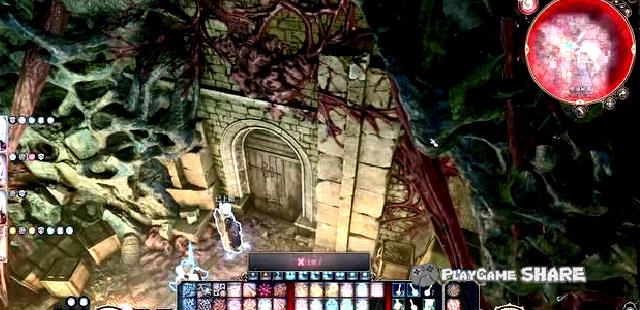
There are three entrances of the ruins.
① Knock the door directly.
② Follow the mechanism up, shoot the upper rope above the bow and arrow, and smash the hole and jump down (no fall damage).
③ Bypass and use the unlocking tool to open the secret lane.
The first is route 1
Calling the door directly will trigger the dialogue. If the thieves outside the door before, you can’t go in anyway, you can only choose to unlock.
[Remarks] The successful use of Aslee deception can get the incentive points, but the result is the same.
After entering, you can see the thieves behind the door. After approaching, you will directly touch the battle.
It is worth mentioning that there is a switch next to the door that allows a teammate to stay aside first. After the enemy comes in, close the door and get it one by one.
[Remarks] You can choose the route after separating the enemy, kill the enemy in batches, or introduce all the enemy after introducing all the enemy.

You can also directly touch the battle and use the explosive bucket in the distance to cause damage.
Then is route 2
The shooting agency, or stepped on this area without notice the trap.
If the thieves in the area are not resolved, they will enter the battle directly after falling.
After completing the battle, pick up the thief tool after the explosion barrel, unlock and enter the ruins.
If there is no tool for lifting the trap, you can’t get good things, and this direction cannot reach the other side. Therefore, it is recommended to take the route directly 3.
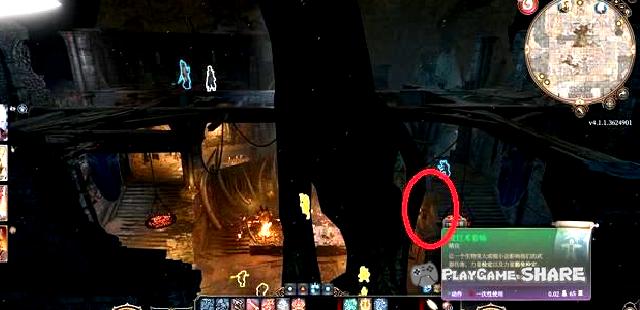
Route 3
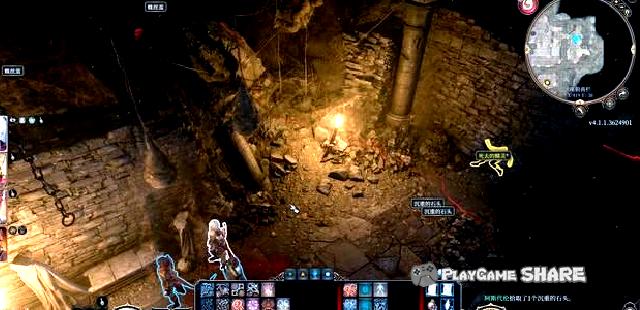
You can reach the entrance of the dense road along the way from the figure below. The unlocking needs to pass the agile judgment of the DC20.
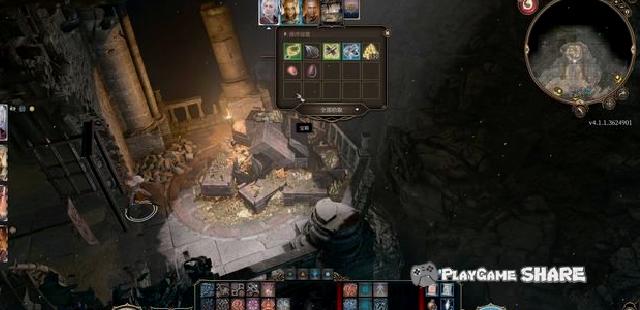
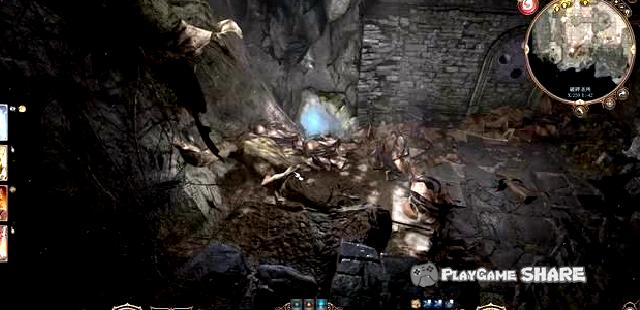
After entering, go to a place similar to the tomb, and there are some corpses and skeletons lying around.
It should be noted that the start switch will be reborn as an undead, so it is recommended to take away their equipment in advance, or directly sneak attacks.
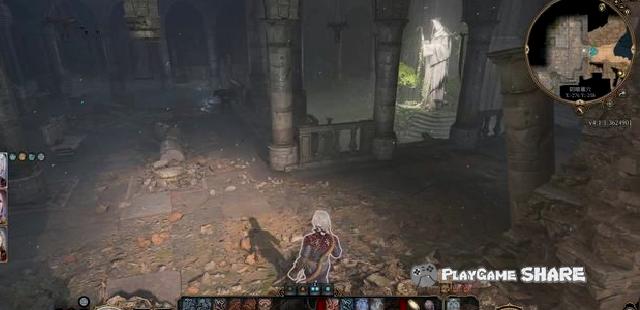
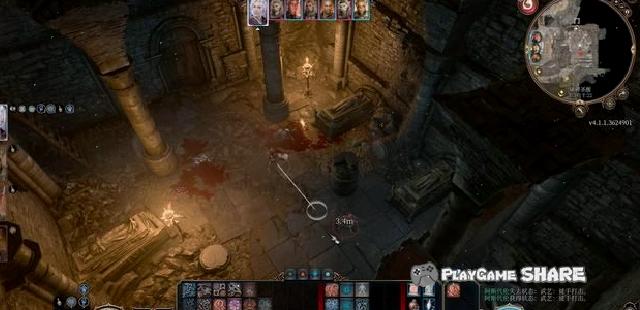
You can find the switch button through the internal stairs.
After pressing the button, the corpses and skeletons in the scene will be reborn as an undead and forcibly enter the battle.
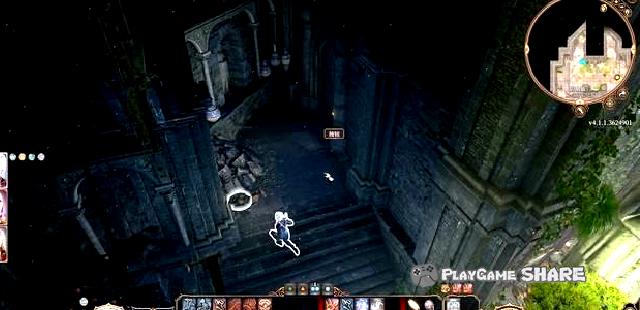
The coffin in the room opened by the investigation agency, according to the player’s reply, the undead will do different actions in future encounters.
The boxes on the side can also get the "Lost Sound of the Lost" of the necklace.
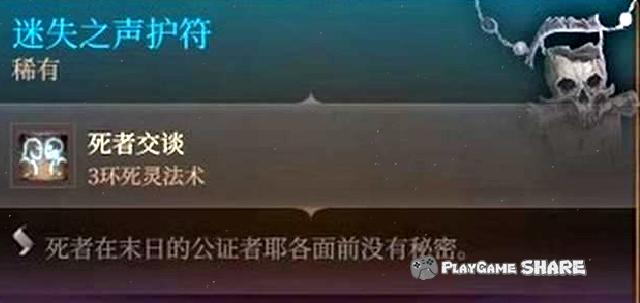
The small rooms in the tomb can be found "The Book of Gods", and it can be opened through the magic judgment of DC15.
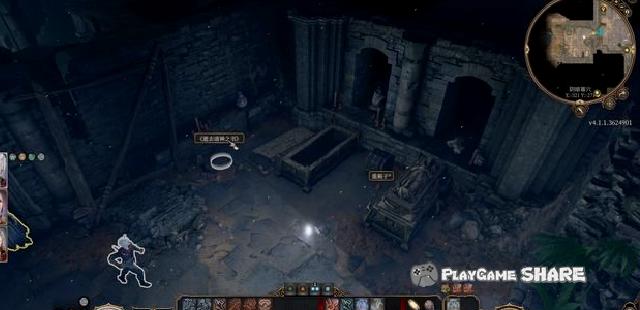
After unlocking the door, you can reach the side of the previous route 1 and route 2.
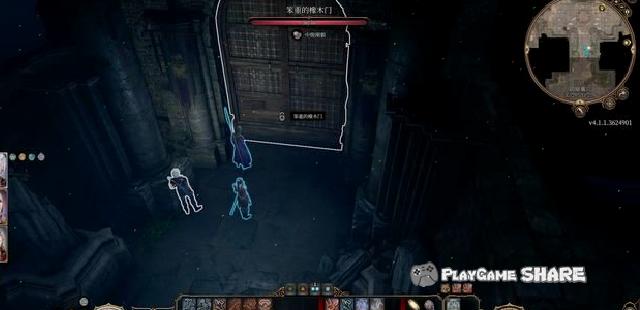
If you hold a tool to unlock the trap, you can get a trap coffin to get the "Guide to Steel Guard".
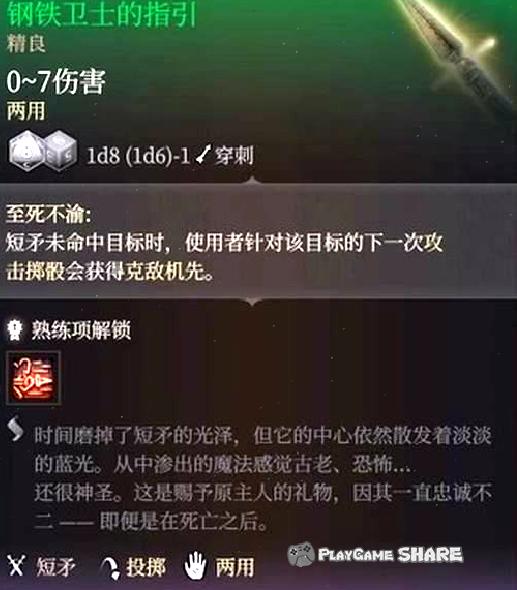
Triggering event: Nautilus crash area
Incident-injured
In the crash area, you can find the wreckage of the wreckage, and the incident will be triggered after approaching.
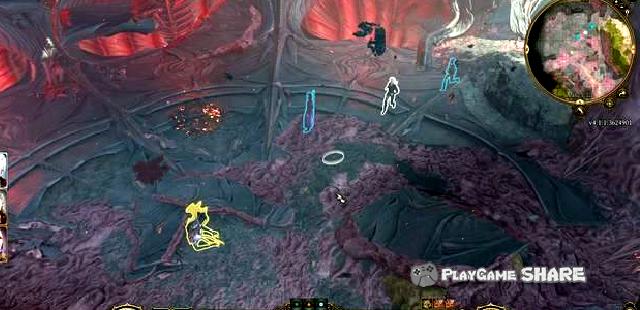
During the dialogue, you can yield to it through the intelligence of DC15, rescue it and enter the battle.
You can also let it stay there to die, and then kill it outside the dialogue.

Regional general view: green forest land
Green forest
Red mark-area connection point
① Hidden entrances in the camp
② Dragon Point
Blue mark-task-related
① Investigate the beach
② Save refugees
③ The assistance of the doctor Ney
④ Stealing idols (interior in Longxue)
⑤ Investigate Kaha
⑥ Kaichk Personal Line
⑦ Laezel Personal Line
⑧Well location
Save Di Jing Saza
Green mark-event and NPC
① The poets
② Paralyzed Tifillin
③ Weird Bulls
④ Olan and his partner
⑤ The true soul of death
⑥ The bear (lifting ladder) who eat fish (lifting ladder)
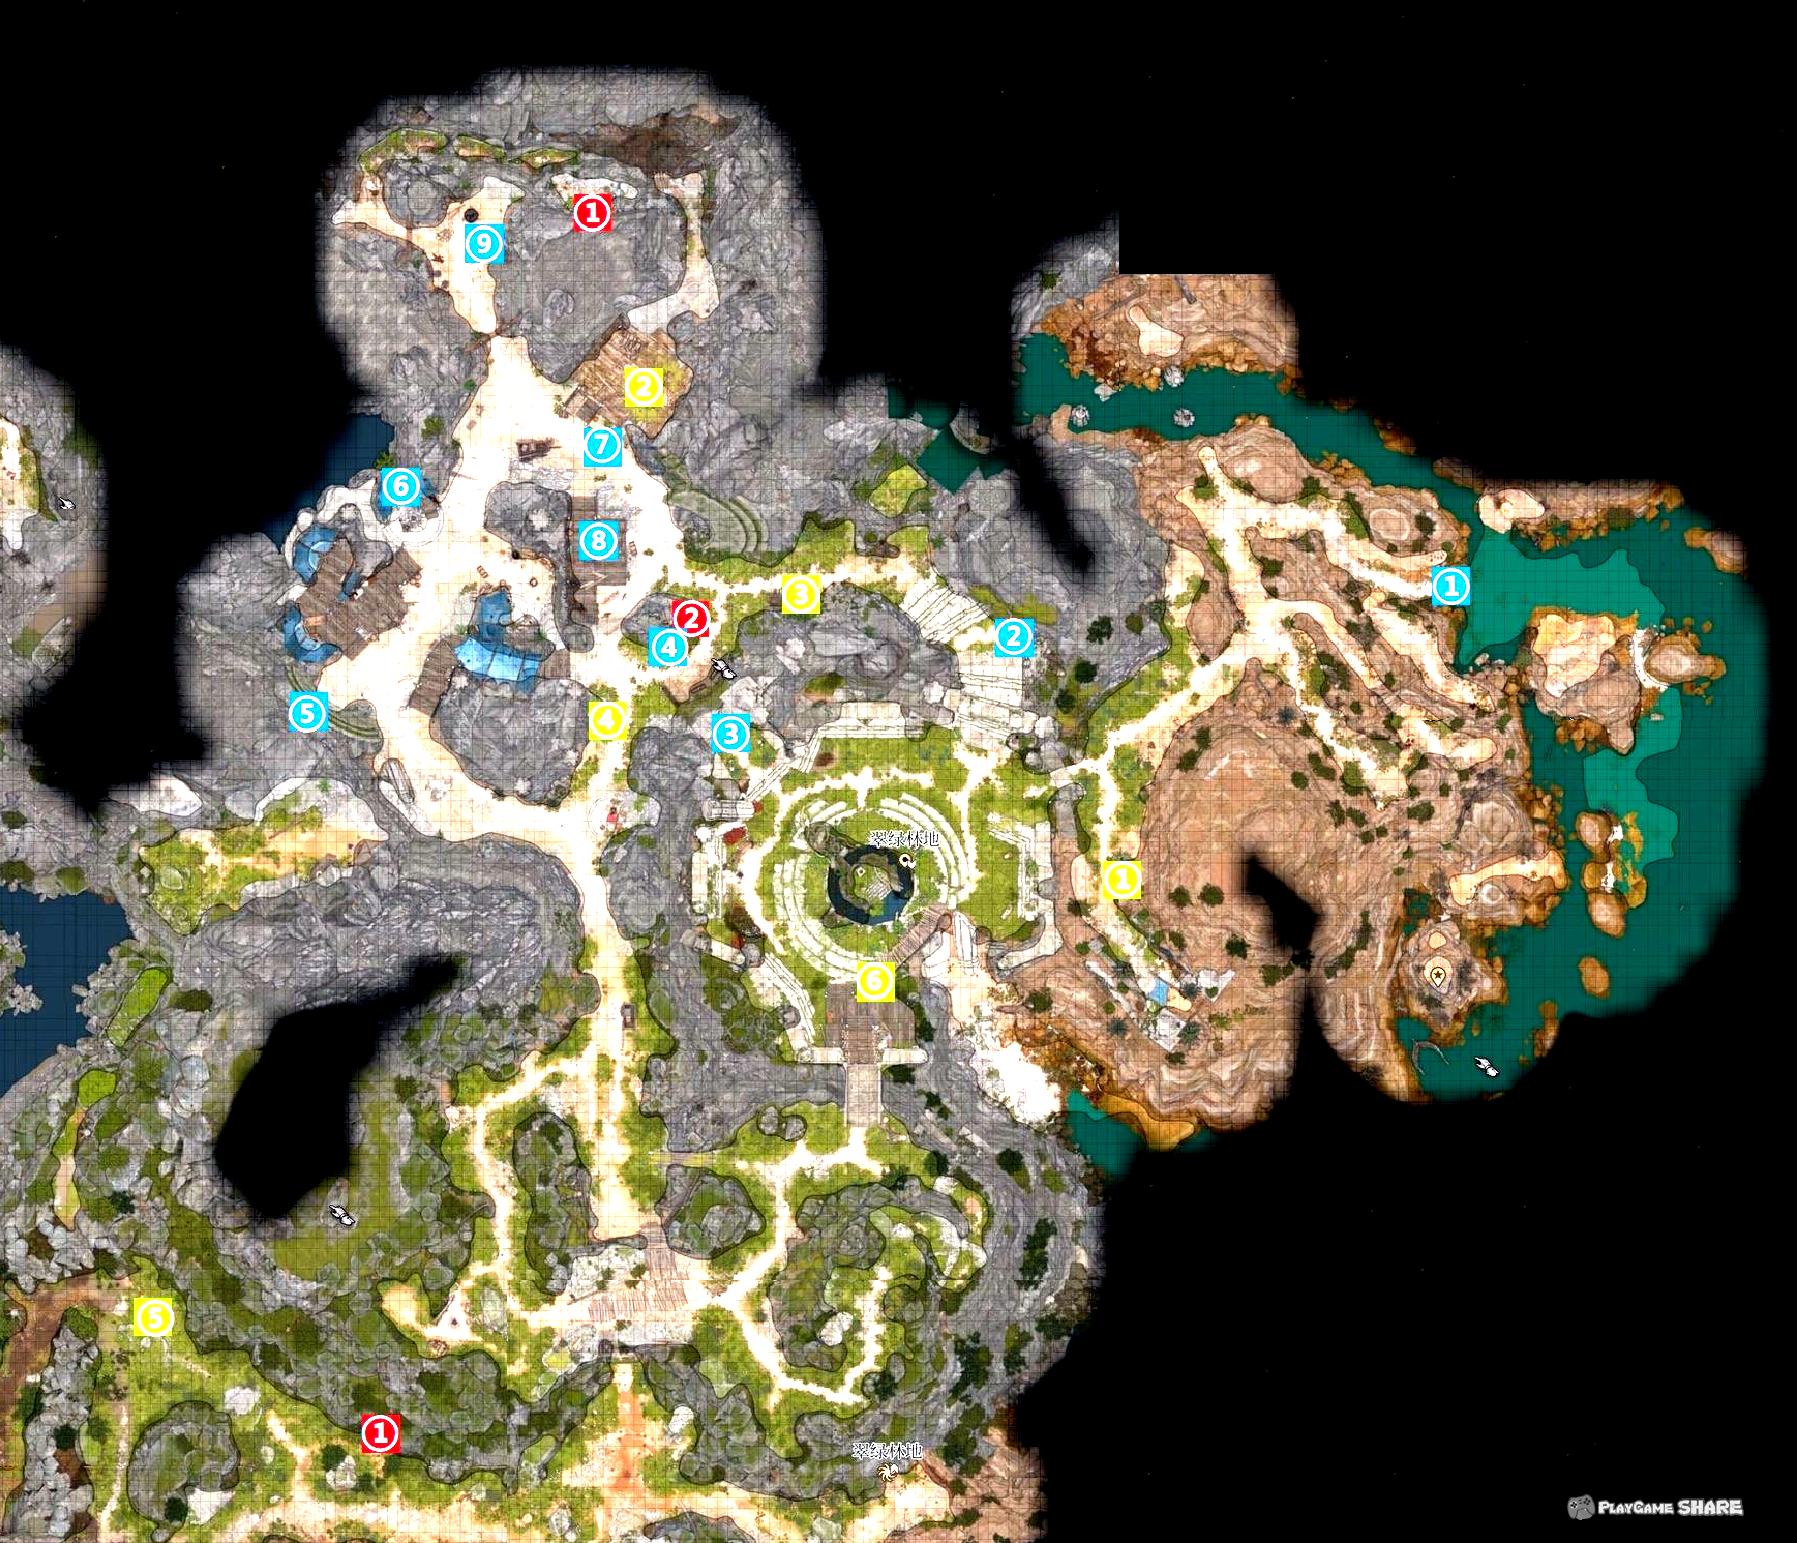
Branch task: rescue Di Jing Saza
Rescue Di Jing Saza
Not far away from Druid Camp, you can find a hidden entrance through survival judgment.
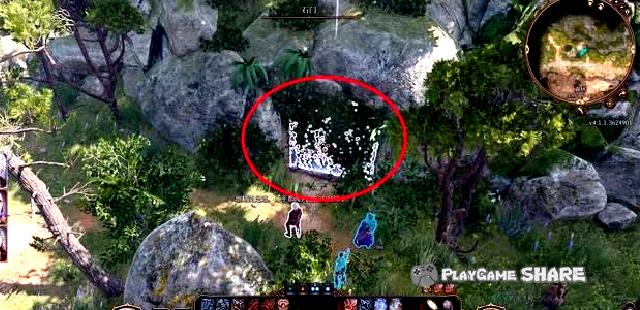
After entering, you can see goblins in the distance.
It should be noted that the statue near the activation will be attacked, so that a character can sneak and turn it off.
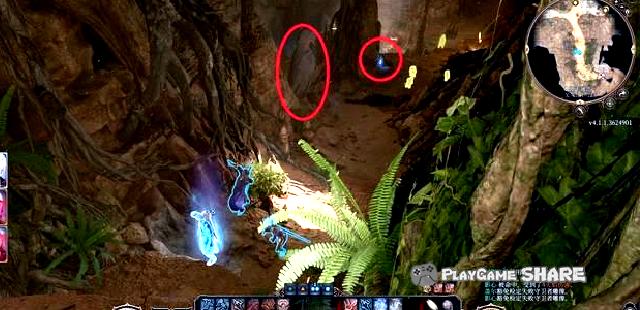
The map in the dense road is as follows, the mark is the statue and the corresponding switch.
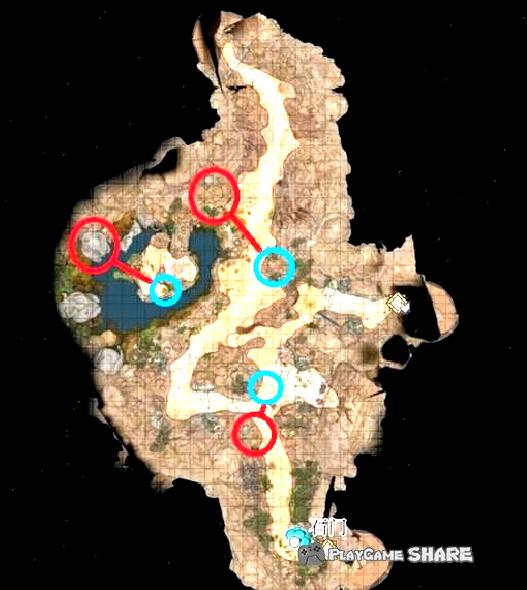
After that, sneak on the goblin above, and then sneak on the side one by one.
Let Astai Lun sneak on spikes without triggering the battle, just "enter the battle".
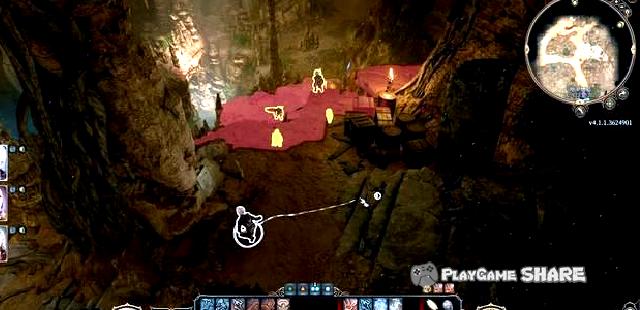
After coming out of the other side of the secret road, you will enter Druid’s camp, and you can pass by jumping.
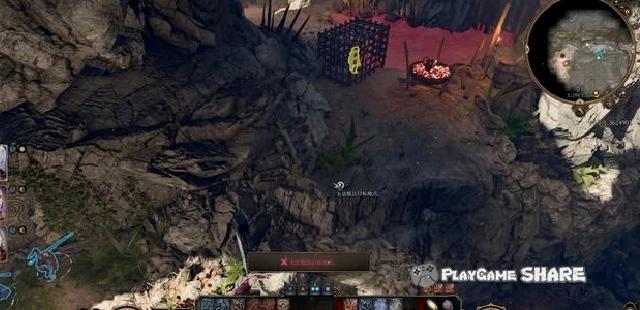
Talk to the closed Global Saza, choose to rescue it to prepare to unlock (DC10 agile).
[Remarks] Whether it is unlocking or a subsequent way, once the soldiers are found by the camp, they will trigger the battle.
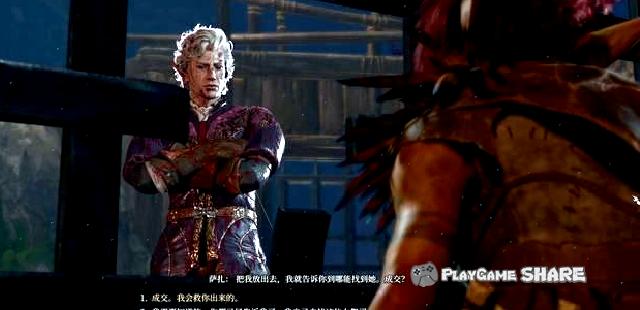
If you arrive here after entering the camp, it will trigger the plot that the soldiers want to get rid of the ground.
You need to choose "Stand in the middle" and then rescue it through the judgment of DC10 (intimidation/lobbying).
[Remarks] Successful completion of this scene can enhance the favor of Gal.
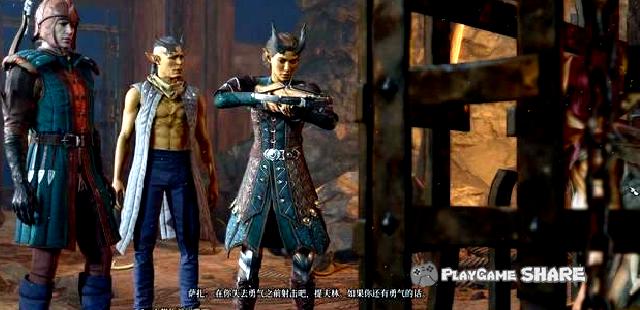
After rescue it, you can separate from the camp along the dense road. Almost all the goblins in the area will not attack the player for the first time (except for the werewolf).

After talking to Ming Sala in the ground camp, you can find her in the ground camp after choosing to protect her.
It is worth mentioning that once she chose to protect her, even if she was hostile to the ground, she would be counted as a neutral unit, as long as she did not hurt her, she could continue to promote her branch.
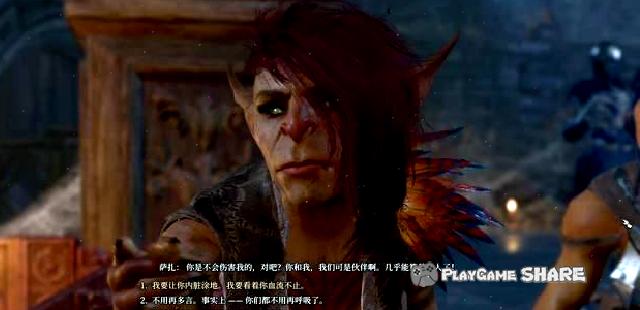
After that, the main story was advanced to the tower of the month, and when he picked up the general, he chose to let go of the ground.
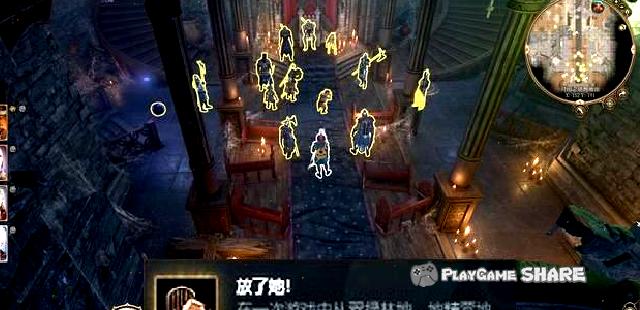
Line task: rescue refugees
Rescue refugee
In the Druid camp, walking along the slope from the position below can trigger the event.
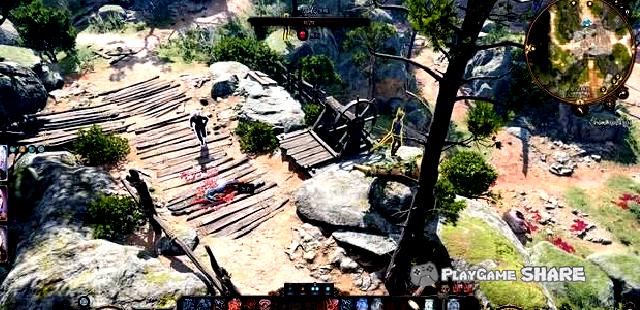
After approaching, I saw a Xiong Di Jing trying to assassinate a civilian and entered the battle.
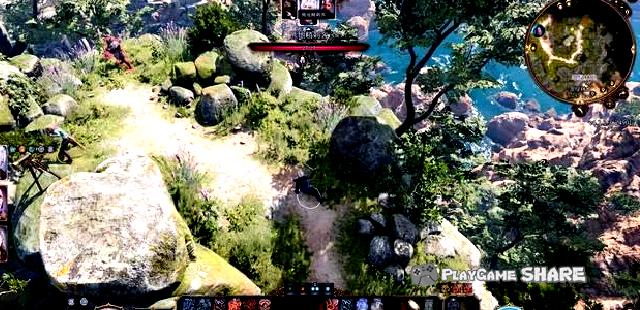
After completing the battle, as long as the civilians do not die, the dialogue can be triggered, and the special item "soul coin" can be obtained.

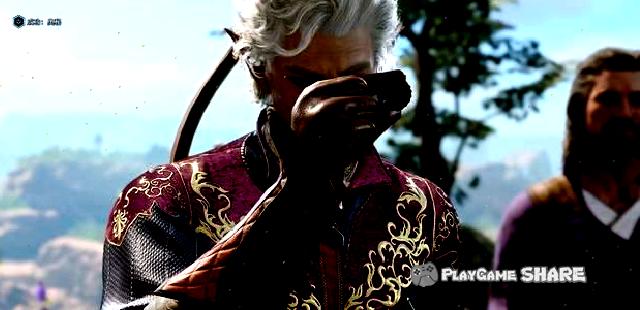
The other part of this task is "Rescue Girls from Druid". Please check the "help of the physician Neidi" part of this strategy.
After successfully rescue the girl, return to the stairs.
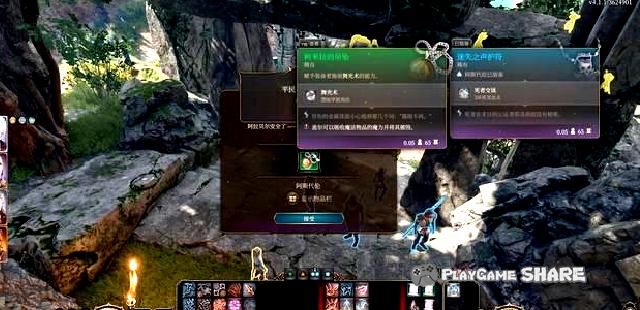
Chapter 1 Rescue the reflexive people supplement
After completing the branch line "investigating the beach", and rescing the little girl who stole the idol after entering the forest land, found the little businessman near the beeper near the cattle.
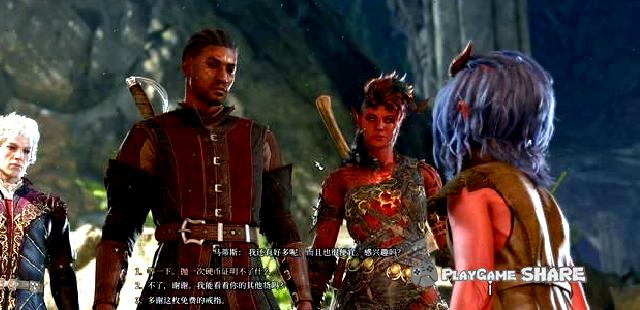
After a trick, if the player bought any things in his shop, the child on the side will try to picked up.
After letting him go, use the password obtained in the "Investigation Beach" to enter the Dragon Point.
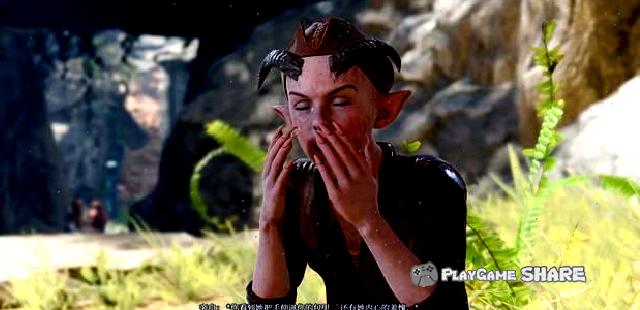
Finding their head Moore in Longxue, because he repeatedly rescued his partner, could get his favor.
He can help us in the process of chapter second and third, and take the initiative to help him or be able to receive the task "Stolen the Druid Statue".
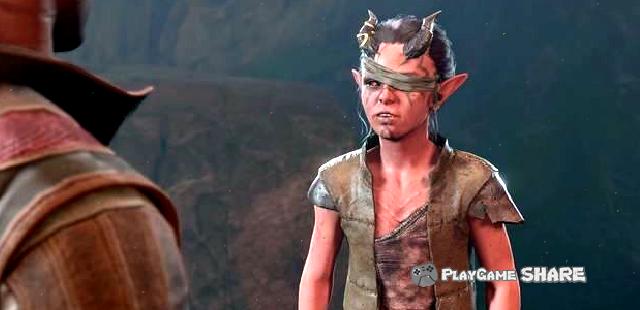
Go to the island in the southwest of the tea room, return in the cracks of the wooden stakes, and return to the ritual to complete the battle.
Then use the master’s hand to throw the idol to the place where no one can see, take it and deliver it.
[Remarks] You can also steal the statue back from Moore after delivery, and you can gain gain with your body.
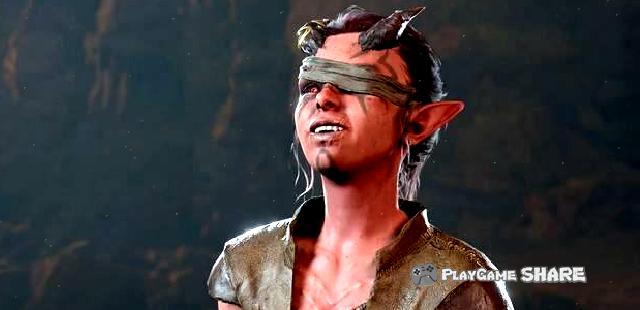
Triggering event: Druidi Land
Event -Apply a reply
In the Druid Camp (near the entrance of the Earth Prison Cage), you can find the lock room in the figure below.
[Remarks] When talking with the surrounding animals, you can know that there are special items in it.

On the front, you need to avoid your ears and eyes and open locks. You can also jump all the way to the back of the house near the entrance of the camp (refer to the "Sali Saza") from the ground (refer to the "Satta Saza") (need to be higher than 15 or use the potion).
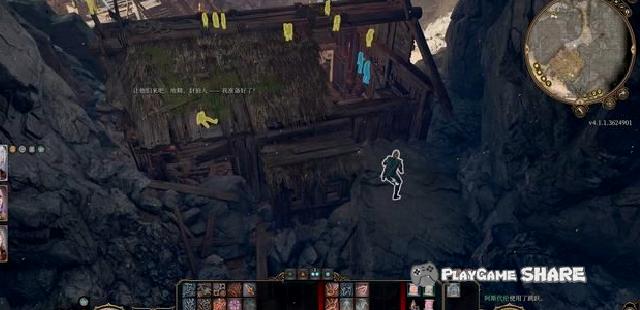
After entering, the guard dialogue sitting on the ground, through the judgment of the DC10 (insight/lobby/deception/intimidation), learned that she was paralyzed and could not stand up.
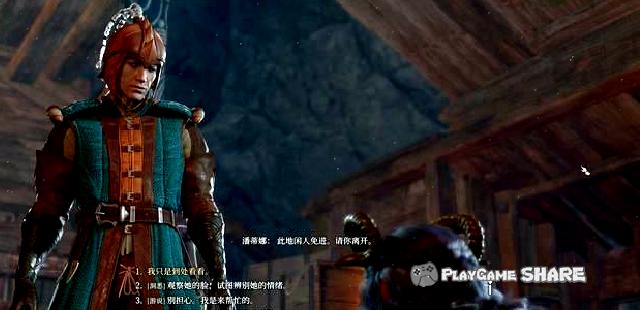
Let the characters in the team use "recovery" to cure her to let her stand up, and then enter the round to steal the item "cabinet key" in the box.
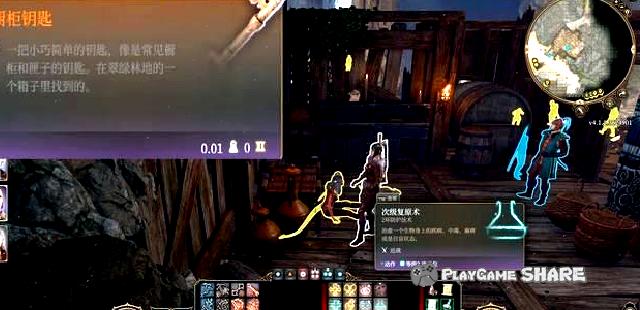
Incident -True Soul
By the bridge head near the camp, you can see two young people calling the injured old man. The dialogue will be triggered after approaching.

After the dialogue, no matter how they choose, they will trigger the heart communication, and the two who see this scene call the player the "true soul".
Basically, they will go to find a bear. Only when you choose "I am not a true soul" or "I am a survivor", they will fight with the two.
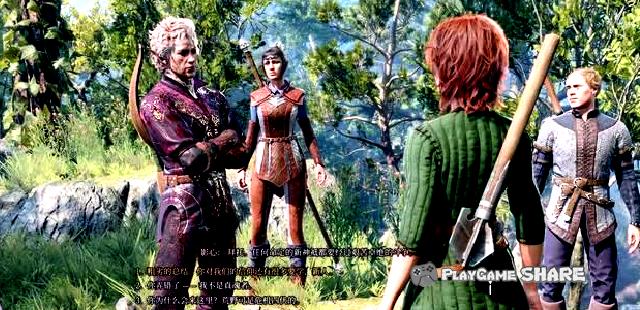
In addition, after the two of them investigate the body, they can obtain special props "parasitic specimens" through "welcome its influence".
Later to Xiong Chao.
[Remarks] The exploration of the bear nest can get the inspiration point of shadow.
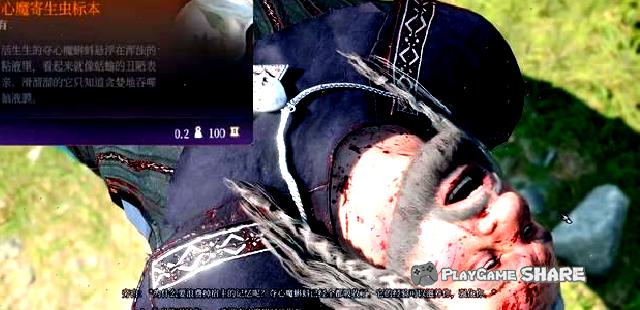
The fork in the bear nest can find a magic box, jump to the back of the stone statue, and you can get prayers by detecting the judgment.
After getting prayer, let’s read it, and let Yingxin open to get the equipment "Moon Tears".
[Note] Take any items except the equipment will lead to a decline in the favorability of shadow heart.
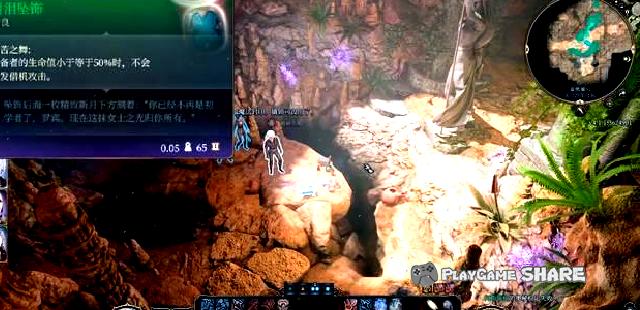
In the depths of the nest, you can see a skeletal, injured bear, bear and bear eggs.
If animal conversation (or potion) is used, the dialogue can be triggered at the first discovery, and the battle is avoided through the DC10’s judgment (intimidation/lobby).
[Remarks] Avoiding the battle only once.

It is recommended to arrive at the position above, then use animals to talk, and then jump to get the equipment (don’t take the bear egg) before returning. Even if you trigger a dialogue, you can avoid fighting.
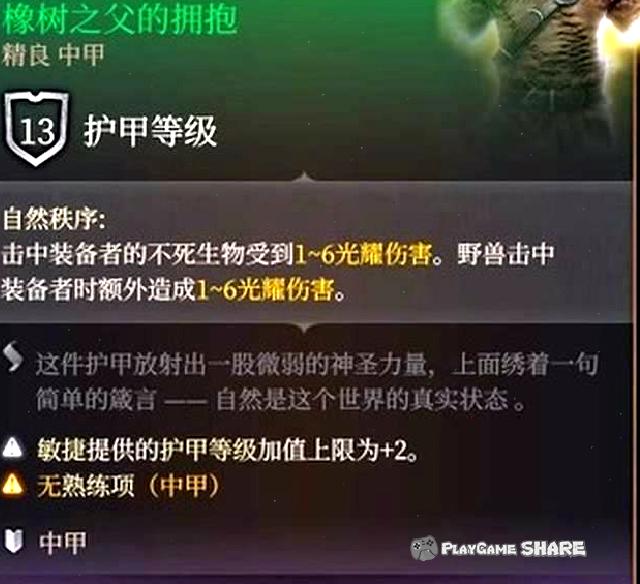
If you really want to fight, lead the bears to the label position below, and the shooting stone pillar can cause high damage.

Regional general view: infection village
Dyeing village
Red mark-area connection point
① The Bear Bear Nest Point
② Underground entrance (spider web)
③ Underground entrance (pharmacist cellar)
④ Underground entrance (dry well)
Blue mark-task-related
① Find a song of dark night (if not received in the forest land)
② Investigate the ruins (necromancer/light language weapon)
③ Rescue dwarf (windmill)
Green mark-event and NPC
① Heterogeneous mating
② Scratch (need animal dialogue)
③ Recruiting food demons
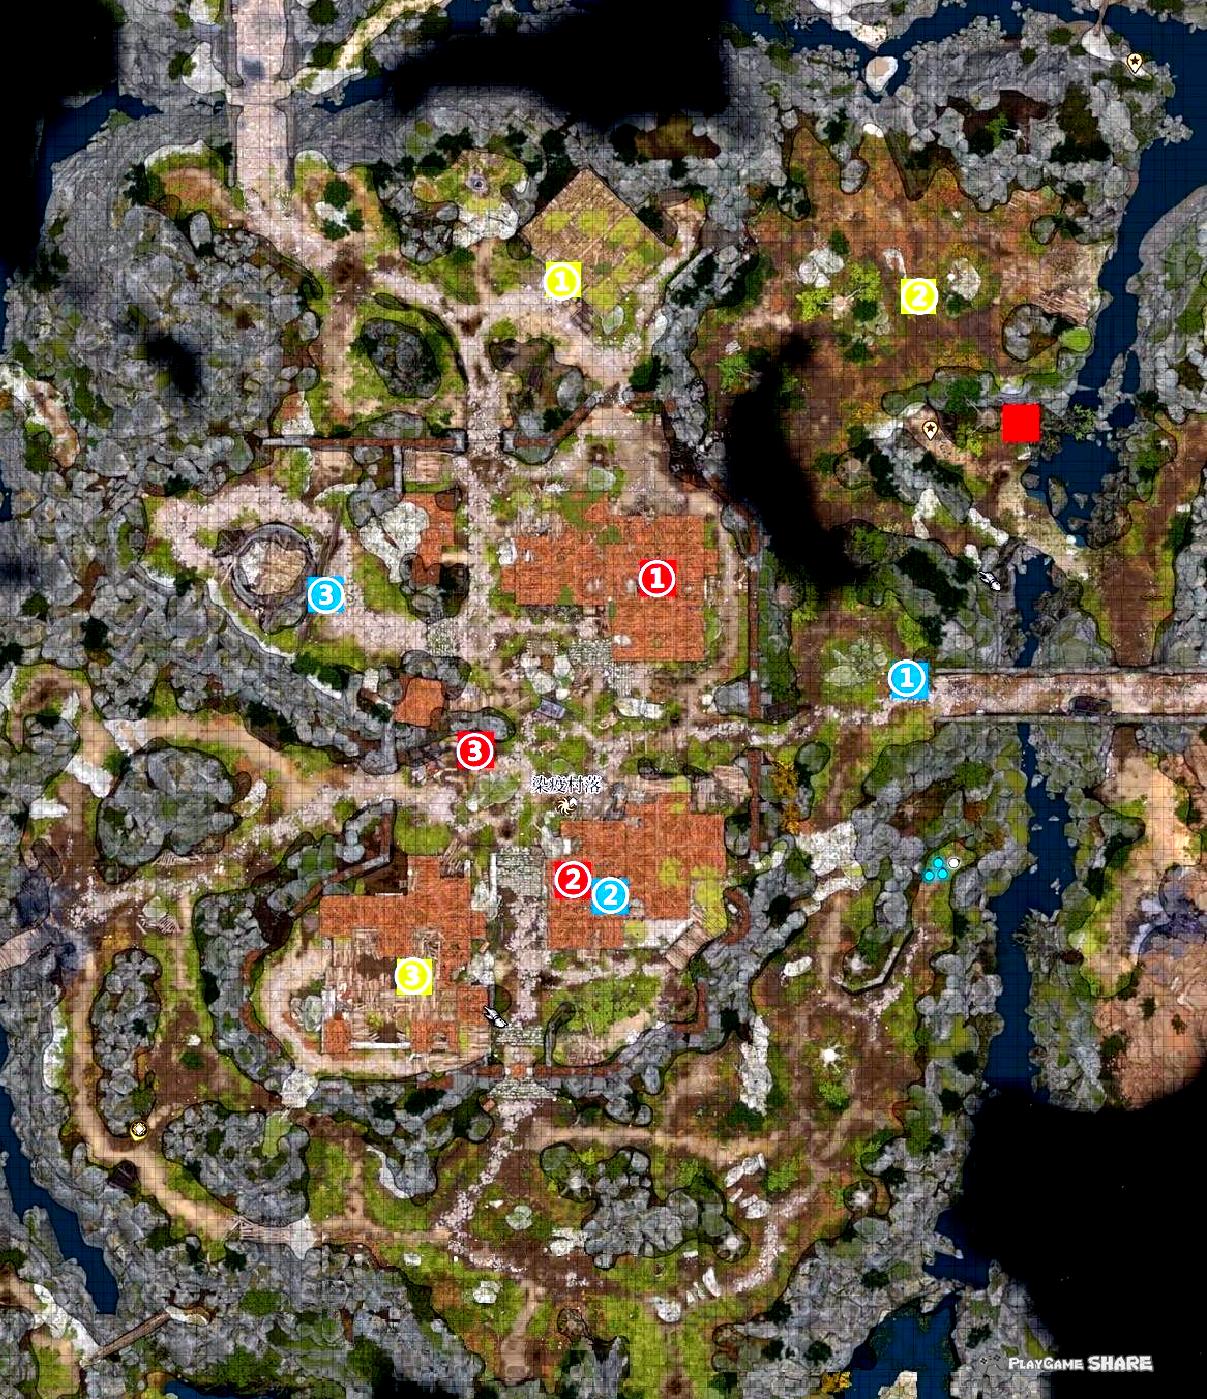
Line task: Search the cellar (1)
Search cellar
In the house northwest of the epidemic village, you can see the ground covered by the clue, and you can jump down after destroying the cobweb with flames.
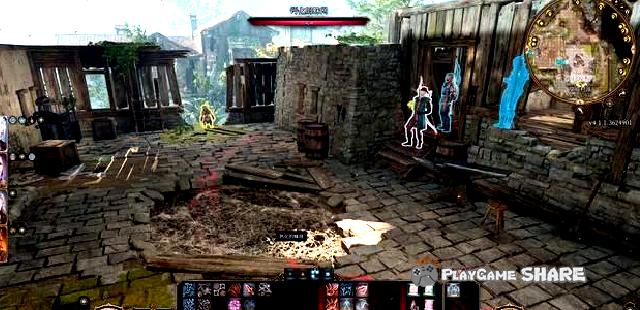
"Gaoya drawing" can be found in the box area of the cellar area.
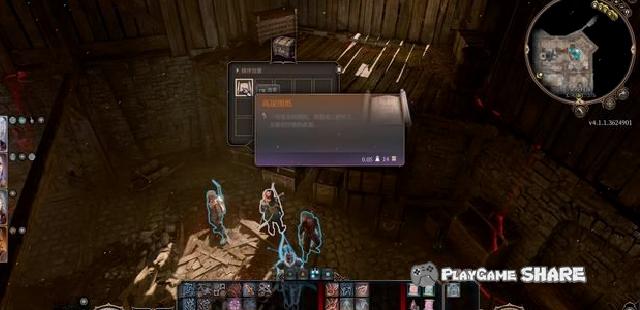
In addition, the relevant manufacturing instructions and partners’ special materials "Purgurm alloys" can be found.
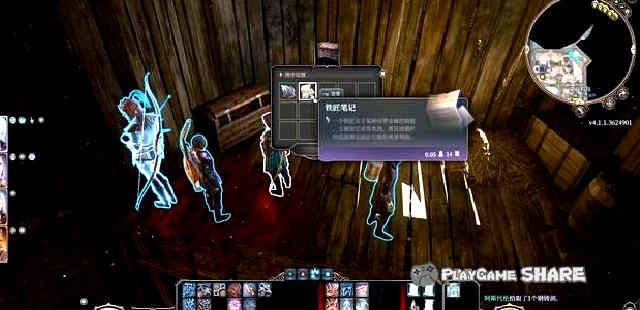
Processing light language equipment requires the material "light-language bark". Please refer to the "dark area" part of this strategy.
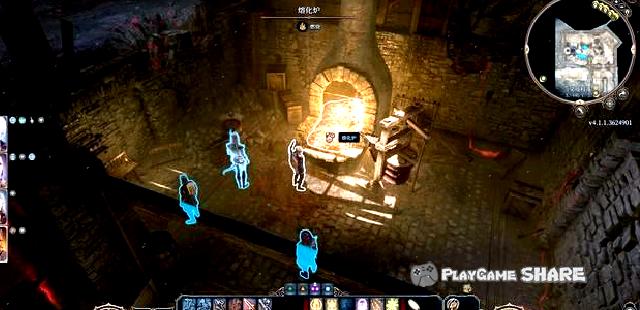
Continue to search the cellar, and the wall surface of the picture below can continue to move.
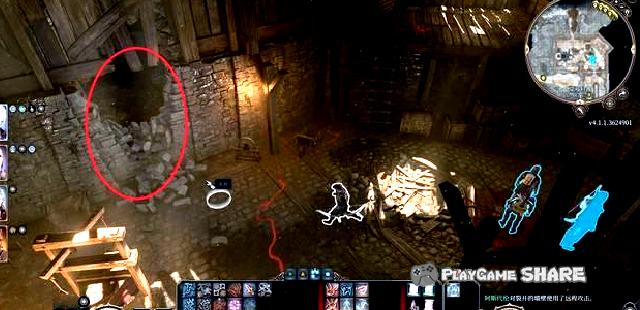
The area next door is the nest of the phase spider. If you go to the cobweb, there will be a restraint judgment. Burning the cobweb can let the units on the spider web fall.
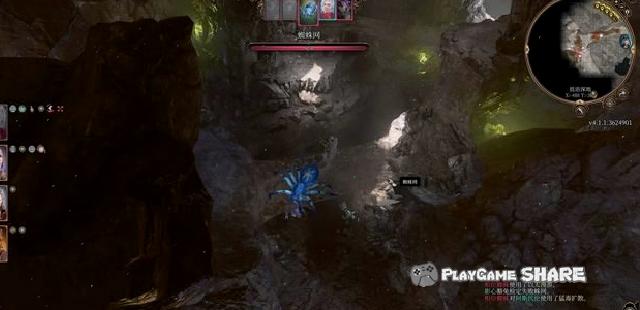
After completing the battle, search the upper layer and find some related literature.
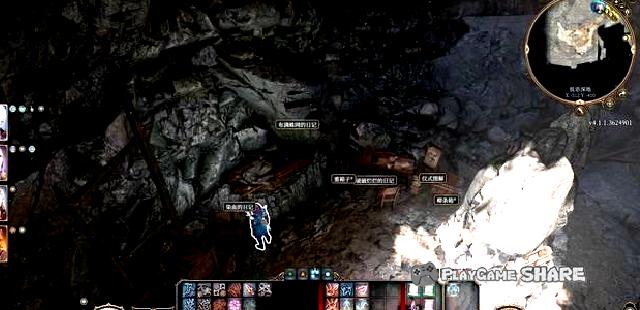
Then go to the west of the area and see a large phase spider BOSS below.
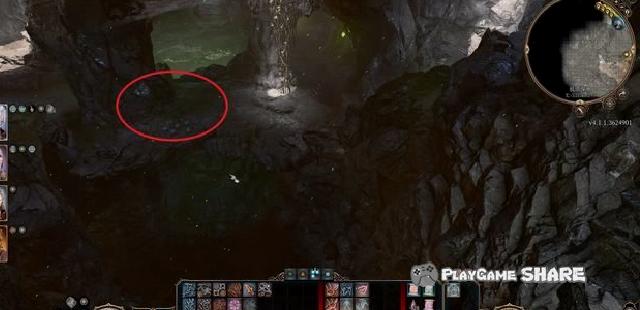
There are spider eggs in the three directions in the figure below. It is recommended to burn them in advance to avoid the boss from summoning the little spider.
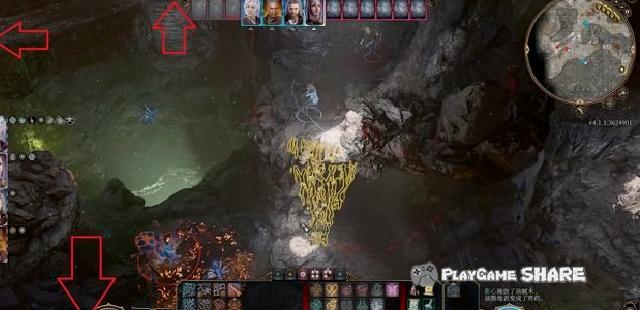
After killing the spider, you can get the special prop "dark amethyst" on the lower layer.
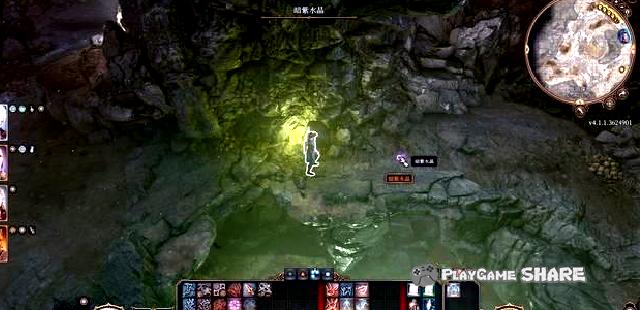
Line task: Search the cellar (2)
The other side of the cellar is at the counter of the pharmacist, and the key found in the ruins can be entered.
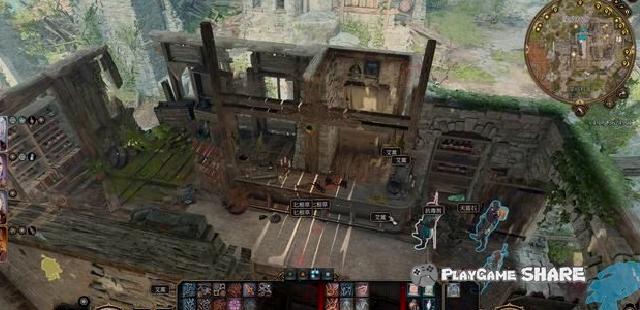
There are many alchemy materials and formulas in the cellar of the pharmacist.
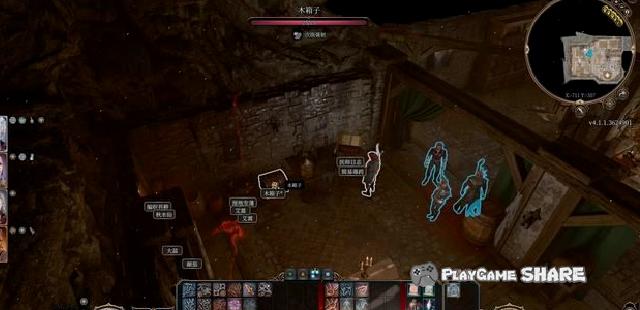
Find the switch in the figure below to open the hidden channel.
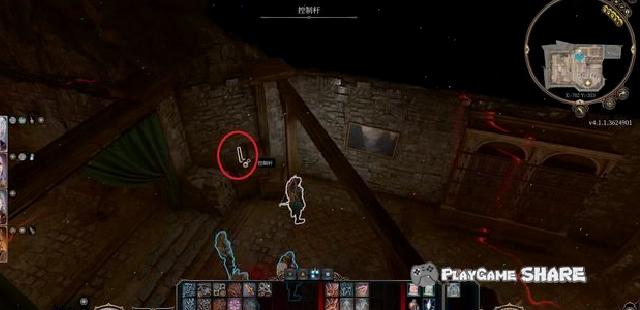
Entering the hidden area, note that there is an enemy sneak attack in the coffin in the figure below, because it is recommended to shoot in advance.
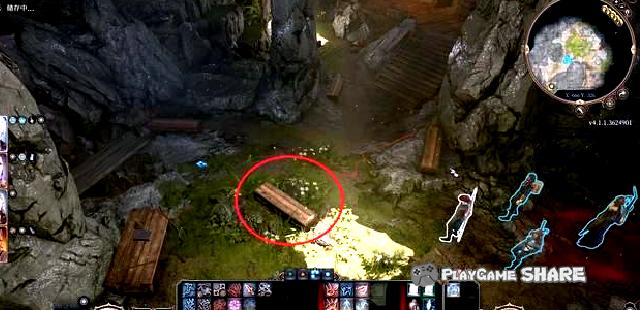
The mirror found in the area needs to be answered by the information found in the pharmacist cellar, and then can enter the hidden workshop by judging.
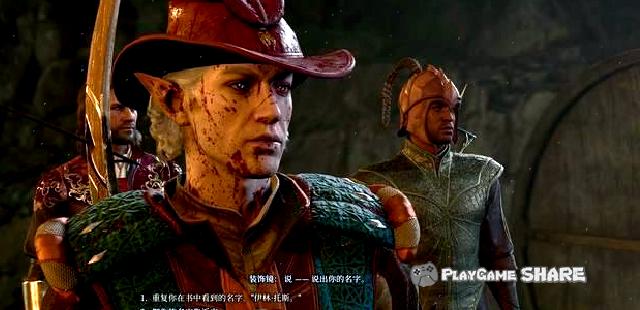
You can find the door and some equipment in the workshop. The corresponding keys are as shown below.
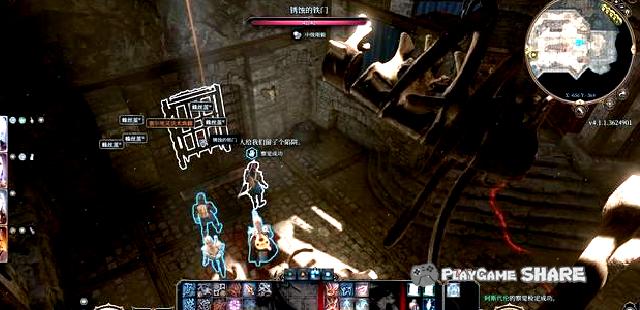
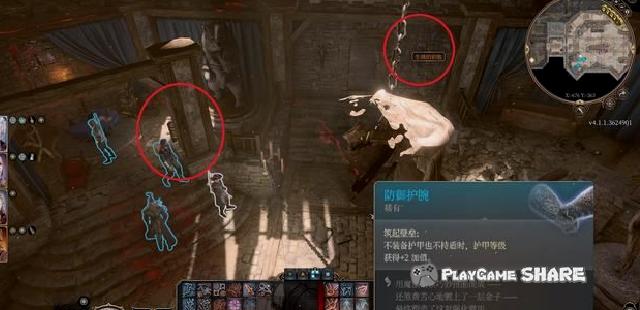
It should be noted that do not touch the book first after opening the door. There is a pressure plate.
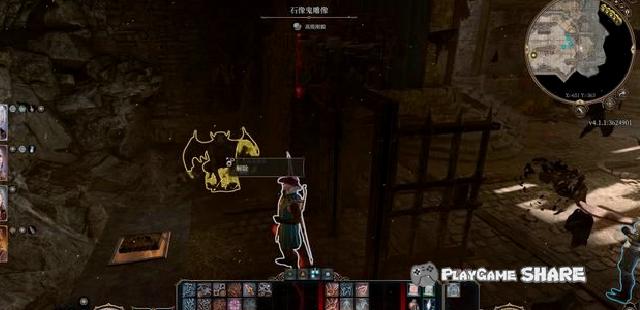
The locking books need to use the "dark amethyst" in the phase spider nest to be opened. Through multiple judgments (DC10 ~ DC15), you can obtain the northern knowledge.
Of course, you can also choose to destroy it, but it is not feasible whether it is finished or damaged at present.
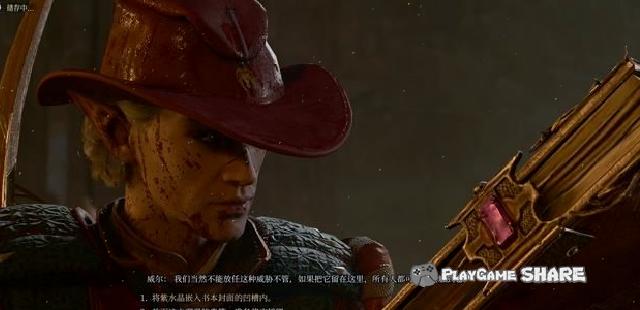
Regional general view: the road to promotion
Road to promotion
Red mark-area connection point
① The basement of the toll collector
Blue mark-task-related
① Kakkak
② Carpick personal line
③ Looking for the lost goods
Green mark-event and NPC
① The key of the toll collector
② Uncomfortable wolf man

Line task: hunting the devil
Hunting devil
Several knights can be found in the area below, and they will not actively attack players.

Dialogue with their leader Anders can trigger the task. Their purpose, like Will, is a demon named "Karcker".
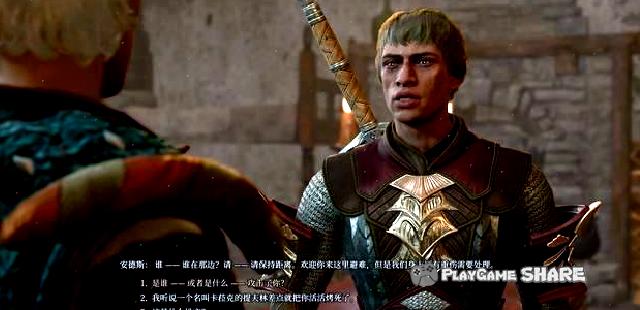
The mission reward is his giant sword, but if Kayak’s companion task has been triggered before, you will know that they are actually dressed by demons.
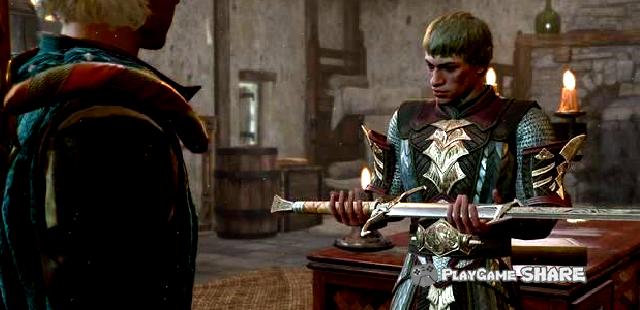
It is recommended to deal with the following formations.
A role in the upper left corner stands on the cabinet (jumping over the second floor). After using non-harmful spells such as greasy surgery facing the side door, the dwarf will go to the top of the building to check (benign bug, unable to reach the target).
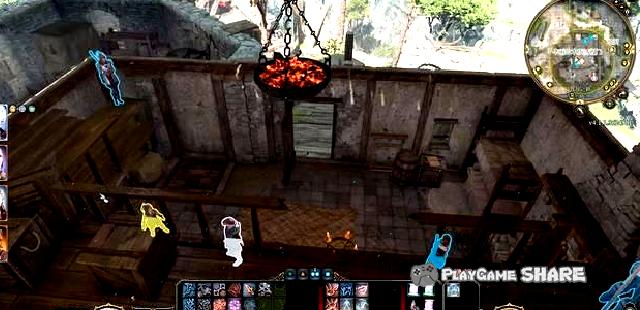
After she left, she could directly collect the hardest knights. It was too late to wait for the dwarves to return.
Another elves used dark fog or silence to dry aside.
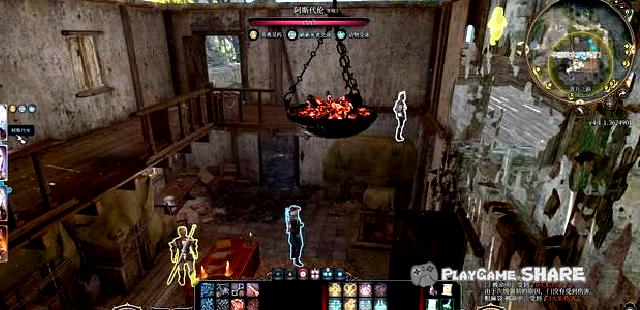
If you fail to kill the knight, you can also use the flames above to smash him.
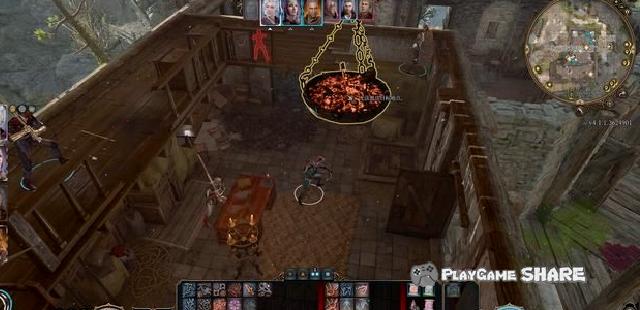
Kill him to get the task reward he promised-justice.
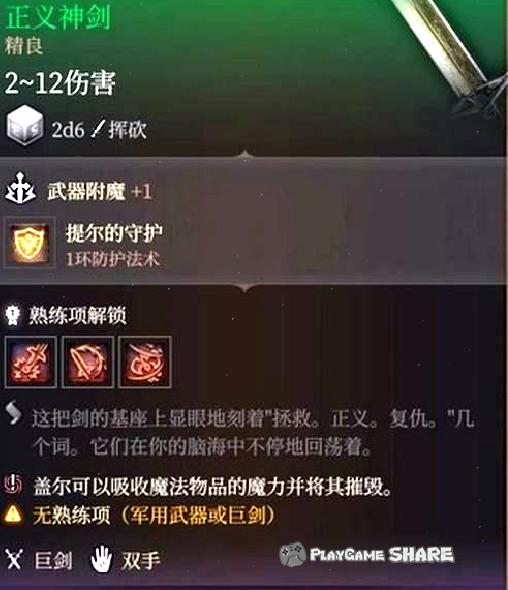
In addition, after entering the cellar, you can open the door with the "key to the toll collector". There are more traps in it, but at least three people need to go in to lift the agency.
[Remarks] If you learn to become fog or become smaller, you can also find tunnel into the inner side in the area.
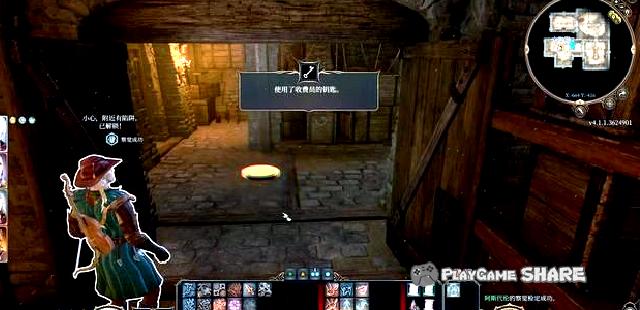
On the side of the area, let the two players sit on the chairs on both sides to complete the puzzle and get the items inside.
There are also traps on the ground after solving the puzzle.
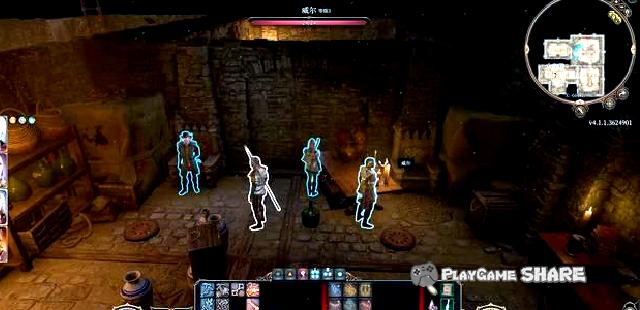
Branch task: find the lost goods
Find the lost goods
This branch will be triggered after a cave near the northwest of the region. It is recommended to enter from the figure below (the arrow logo of the area of the area).
There is an organ in the position of the label below, and the boulder can basically kill the player.
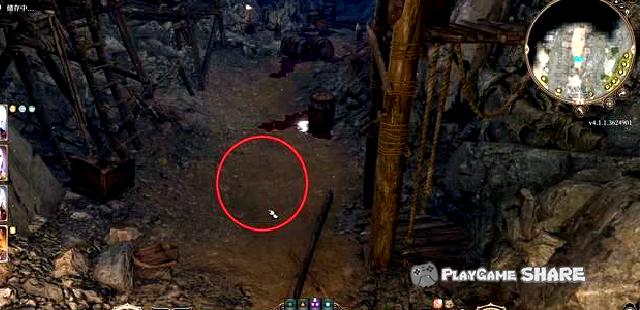
After reaching the cave with jumping or flying, near the NPC trigger the plot.
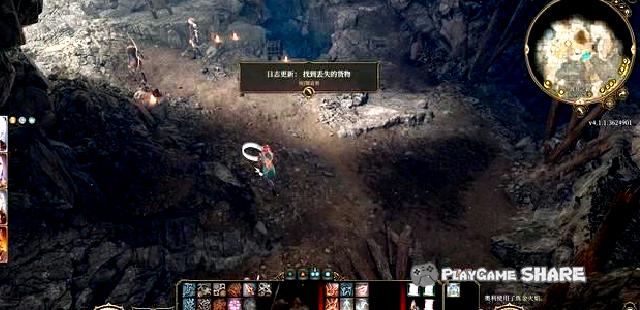
It was learned that they were blocked by a group of wolves in the cave, and no matter which conversation they chose, they would enter the battle.
[Remarks] If you come from the front of the cave, you will directly touch the battle.
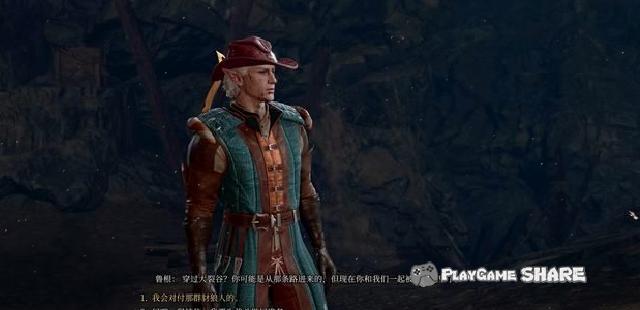
Even if the enemy is the first, you must ensure that a NPC is survived (unless you have a necromancer).
It is recommended to use flames or dark fog to block the entrance of the cave to concentrate the firepower to deal with the wolf people who rushed in.
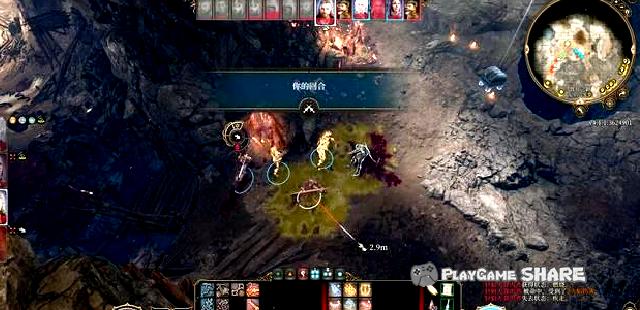
After completing the battle, you can get some good equipment. After talking to Lugan, he can know that he is the "San Tarin Club".
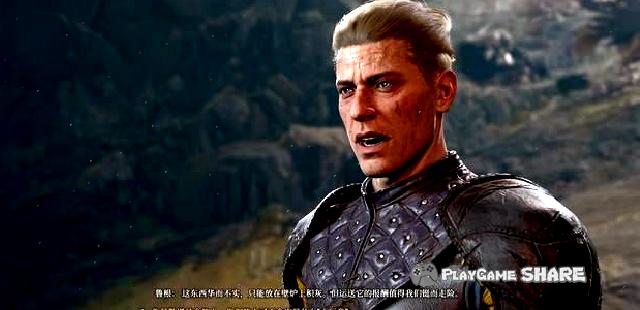
After the dialogue, he can convince him to deduct the goods, or pry him out of his prying lock to get the special prop "iron bottle" inside.
[Remarks] Using props and judging the bottle can be opened, which is the powerful monster "Observer" that cannot be dealt with in the early stage.
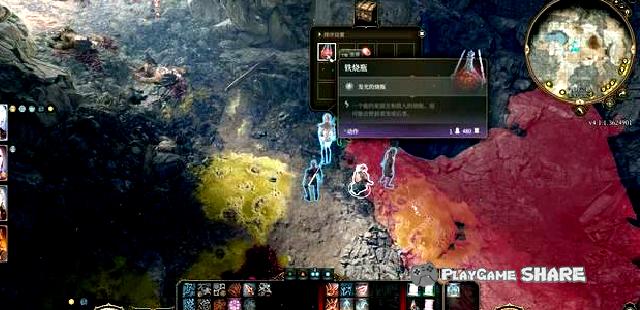
Regional general view: Wojin dormant land
Walkin’s dormant land
Red mark-area connection point
① Sanatalin hiding point
② Gorgeous Monastery
Blue mark-task-related
① Fire rescue consultant
② Rescue people in the fire field
③ Dowry location
④ Geis Yanji Team
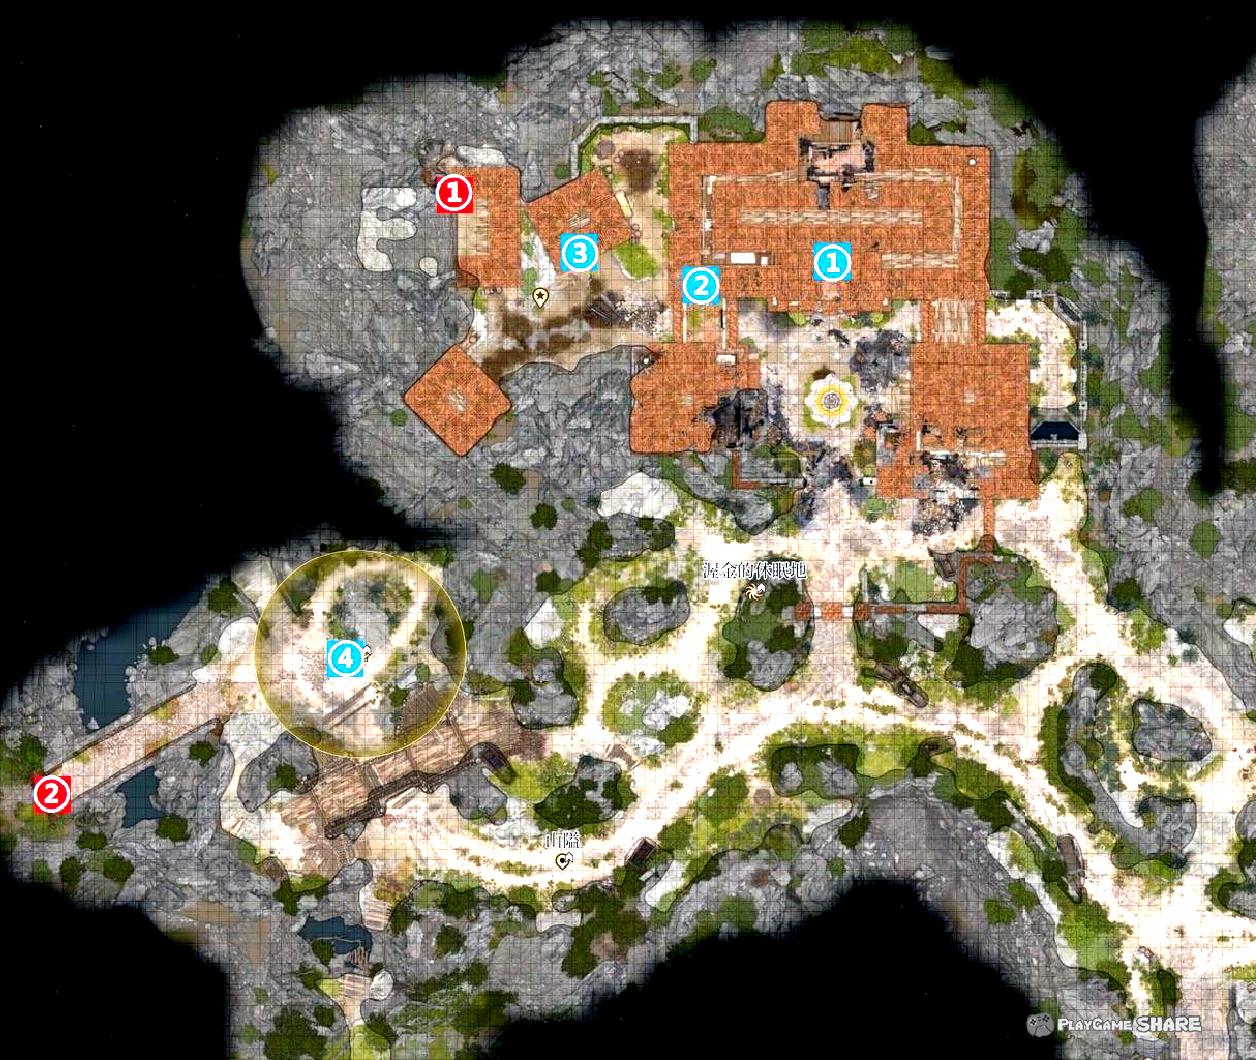
Side task: rescue the trapped person
Rescue the trap
After entering the hotel area, you will see a group of people trying to kick the door. It is the related trigger of the task "rescue the Duke of Gao".
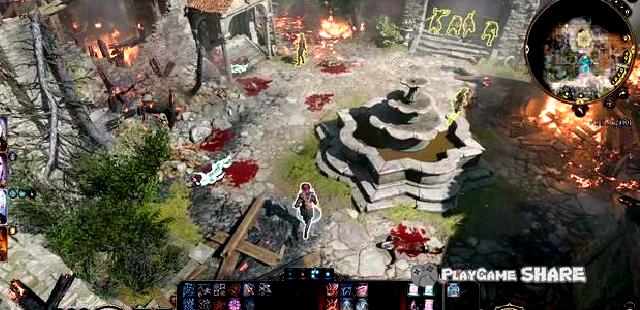
Enter the second floor of the left house, you can learn the treasure position of the corpse through the necromancer dialogue.
Another label is the husband of the corpse who is calling for help.
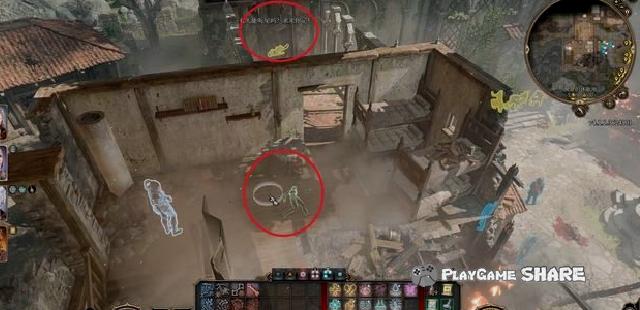
It is recommended to use a long-range attack to destroy the wooden board (it will cause explosion), and then let people with higher power attributes go in to save people.
[Remarks] It is recommended to turn on the round mode after entering.

Trigger and judge him to rescue him.
It should be noted that even if he was rescued, he could not act for the time being, and he needed to treat him or directly with his strength.
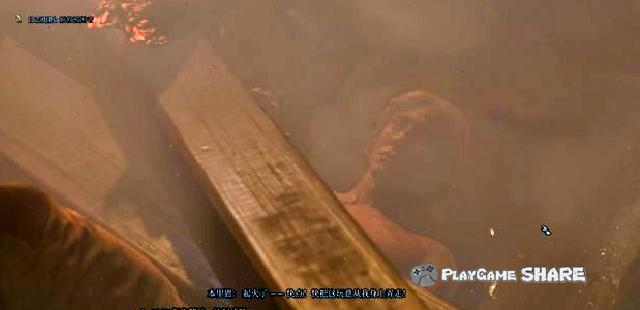
He talked to him after rescue him, and he mentioned the reason why he quarreled with his wife-dowry.
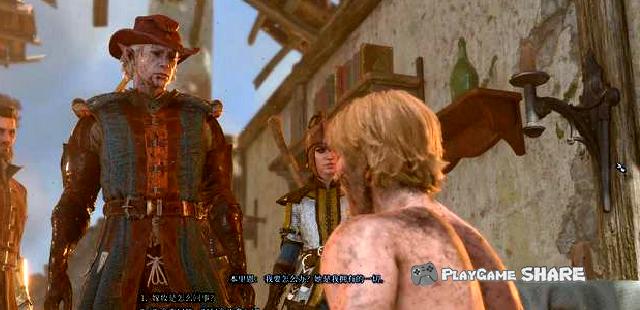
You can learn through the necromancer dialogue and you can know that the dowry is hidden in the west of the hotel (below icon), and you can complete the task when you return and give it to him.
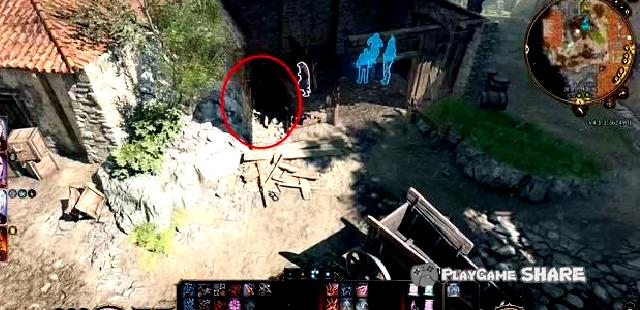
Branch task: rescue consultant
Rescue Gao Duke
The second phase of this task needs to be carried out after the main line is advanced to the "Moon Tower".
This task is related to the "Duke of Gao" of Will’s partner mission.
Trigger the task near the region, you can help the characters with higher strength to help, or you can also judge by yourself.
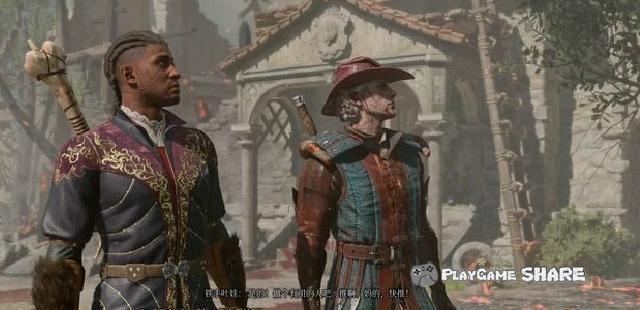
After breaking the door, walk directly in, and go to the outside room on the second floor to attack the wooden board to rescue people.
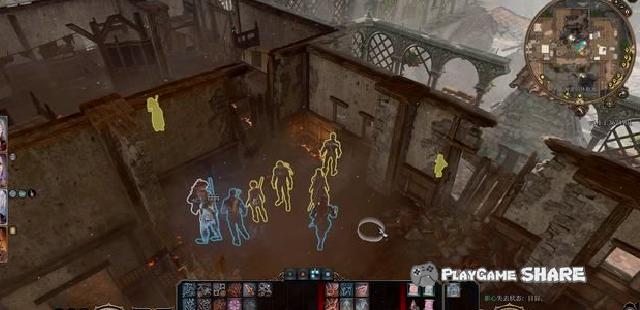
After returning to the outside, the dialogue was triggered and learned that a group of Duke took away their leader "Gao Duke".

And this "Duke of Gao" is also Will’s father, who must be accepted without saying.
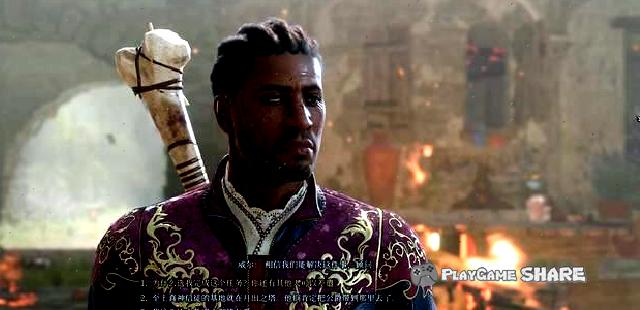
The task reward is one of the three-choice of lightning weapons.
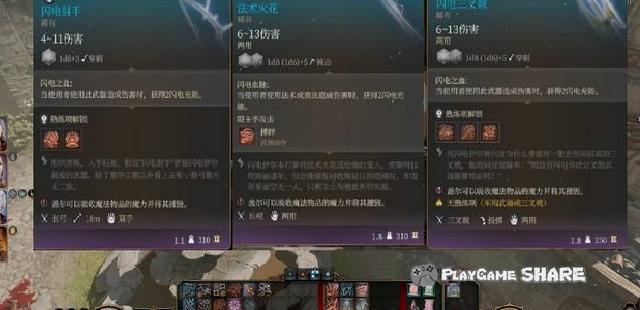
Line task: San Talin hiding point/rescue artist
The hiding point of the Sanata Club
The front of this area is the task of promoting the road of promotion "to find the lost goods."
Entering the hut in the figure below, you can see someone hiding behind the shelves.
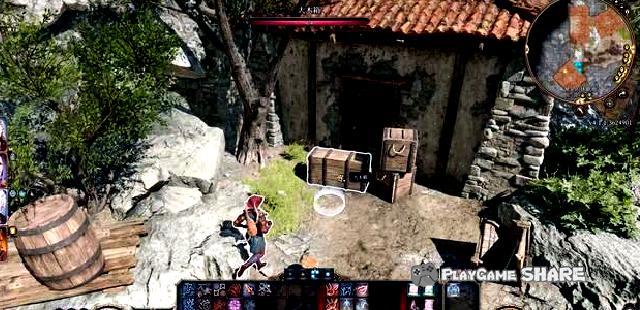
After triggering the dialogue, if any NPC was rescued before, you can get a password.
In addition, because the rescued people have returned first, we are naturally trusted.
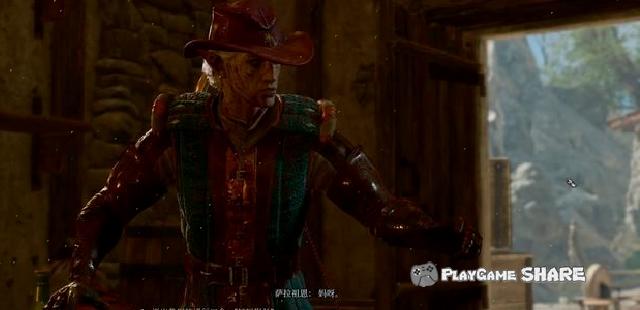
After entering the cellar, find the hidden door on the inside.

The overall view of Sanatalin will hide points as follows:
① The branch mission "rescue artists".
② Important NPC holding the key.
③ Treasure chest area.
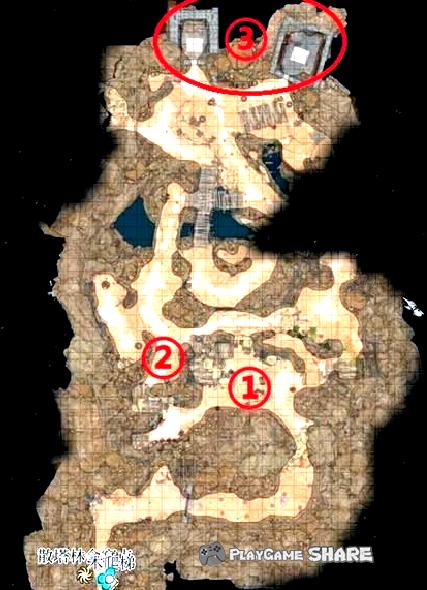
Let’s go all the way. If you have not fought, you can get the incentive points of Astai Lun.
The subsequent dialogue options need to be judged to save their lives. Choosing to kill the previously rescued NPC can also maintain a friendly state.
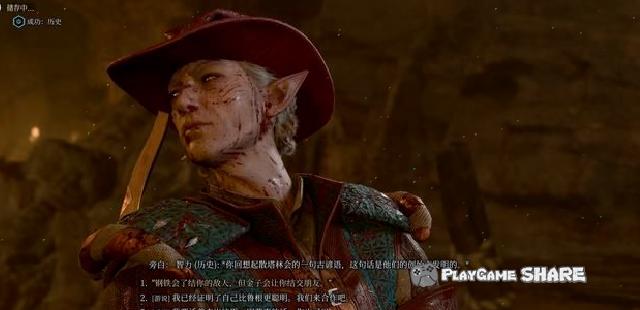
It is strongly recommended to steal the keys on the boss (if the unlocking tool is scarce), and open the treasure chest on the innermost side of the area to get the companion’s exclusive material "purgatory alloy" and a purple equipment.
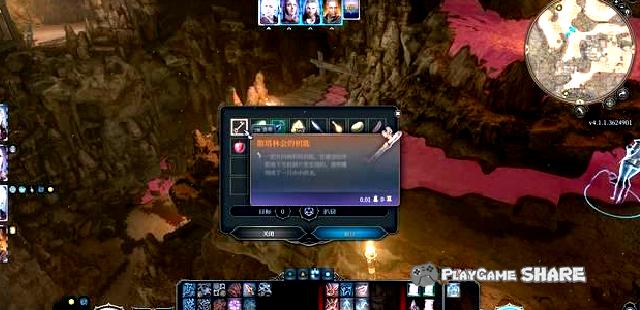
In addition, the lower-level merchants (the one you can buy paintings) can also stole some blue equipment.
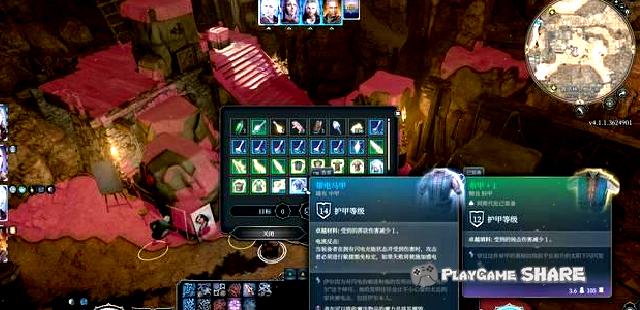
Next is the "rescue artist" in the regional branch task.
Talk to the businessman and choose to "buy a painting", you can talk to the artist.
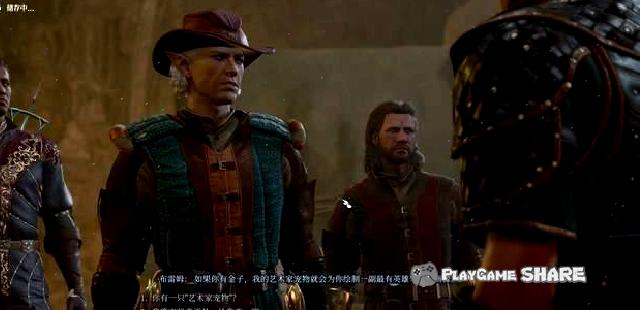
After choosing to assist the artist, you can find a businessman to redeem the artist (the minimum of 600 is used).
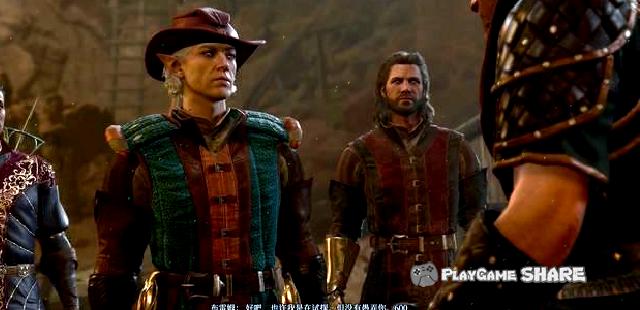
After that, he would leave first, saying that he could find him at the door of Bade.
[Remarks] You can know some of his backgrounds through dialogue.
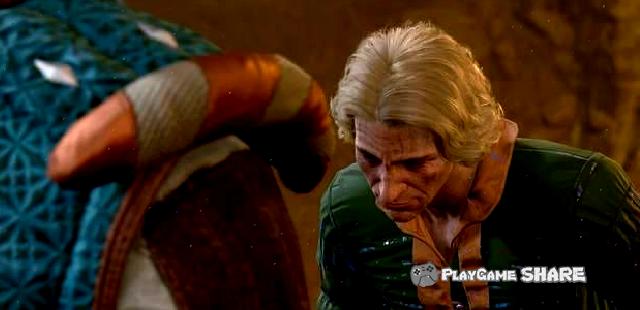
Regional General Examination: Tea Room on the River
Riverside tea room
Red mark-area connection point
① Ghost Po Nest
Blue mark-task-related
① Vampire Hunter
② Rescue Melina (trigger)
③ Ghost Po Treatment
④ Rescue Melina (resurrected husband)
⑤ Investigate Kaha
Green mark-event and NPC
① Transformed magic frog
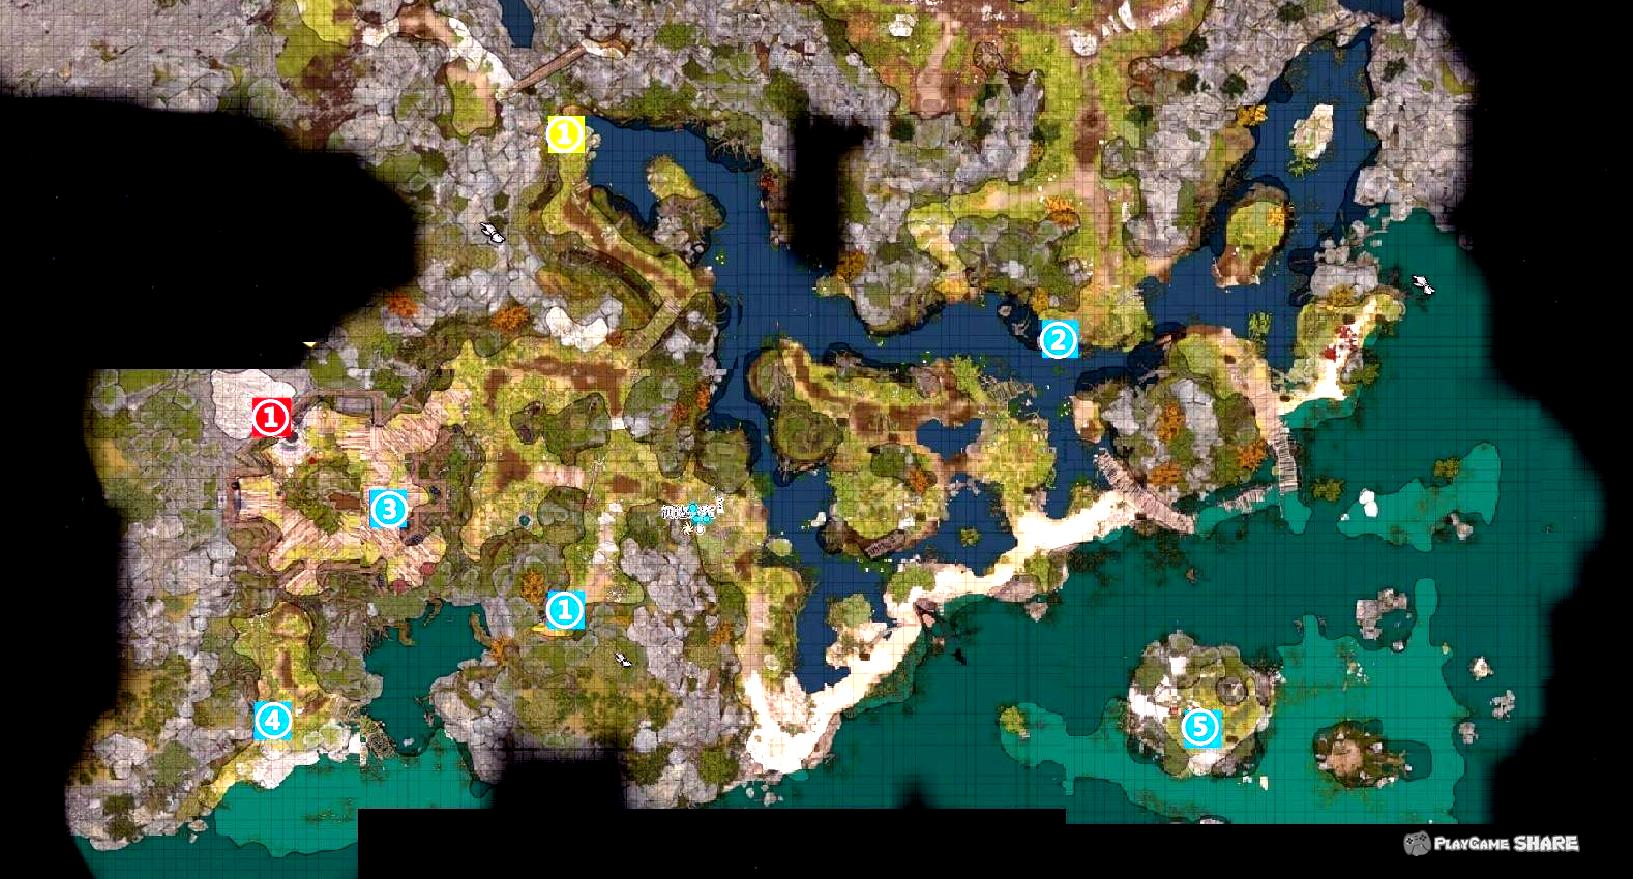
Line task: Rescue Melena (1)
Rescue Melina
This task is the pre-task of "Finding Essels" in the main task "Finding Treatment".
The two who met the two who had a dialogue with the old woman (actually a crow ghost) at the fork. They could go to the ghost hut by determining that they could see the ghost-loving camouflage, and then passed through the camouflage area (need to pass the judgment).
In the dialogue, you can try to let the ghost mother treat our larvae, but the price is one eye
[Remarks] Let the treatment of ghosts greatly affect the attack judgment, it is recommended not to.
At the same time, she can also see the missing Meinna in the hut. After choosing to attack the ghost, she will sneak into the dense road in the fireplace to escape.
[Remarks] Don’t be in a hurry to catch up, explore in the room to get the keys of some scrolls and side doors, which is convenient for returning.
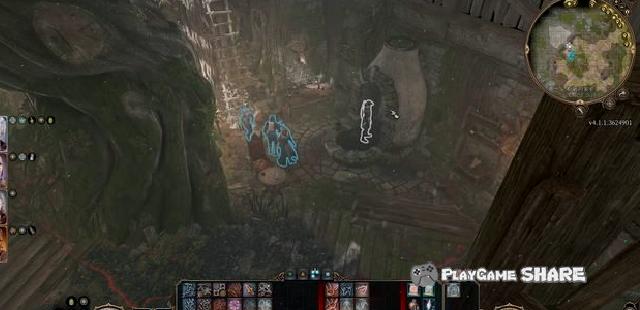
[Supplement] If we agree to let the ghosts make our eyes, you can know what kind of people who control the larvae in advance.
But in contrast, players will get a permanent Debuff, and they will not be able to obtain the "chairman’s righteous eyes" in the future.

Along the way, the dialogue was triggered by the invisible wall after passing through the area of several victims.
Regardless of whether to pass the judgment, players can move the perspective to the wall and choose to move directly through.
[Remarks] Several people who were curse by the ghosts need not be ignored, and they will be mentioned again.
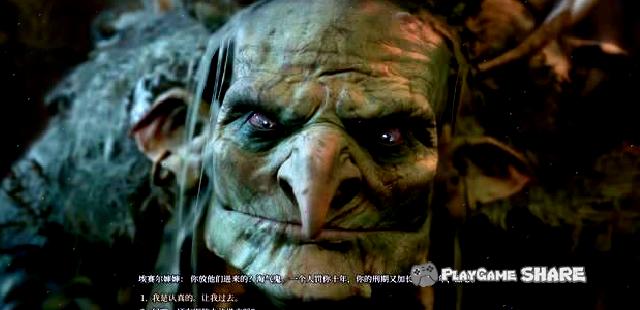
Continue to move forward to encounter several controlled enemies, and they can get strange masks after killing them.
The mask has a special perception and night vision, but do not wear it when the ghost is still alive.
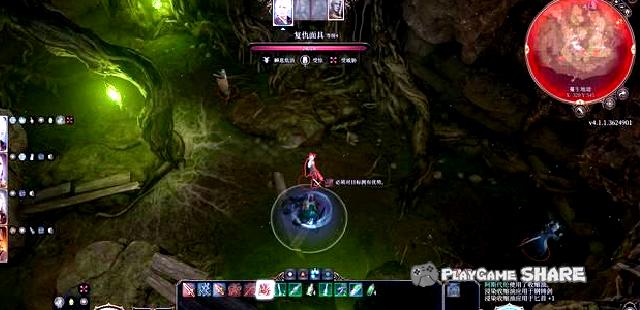
Continue to move forward. The organs in the figure below can allow one person to take antivirus elixir to remove the trap (ventilation port), or directly use jumping and feather to pass through the area.
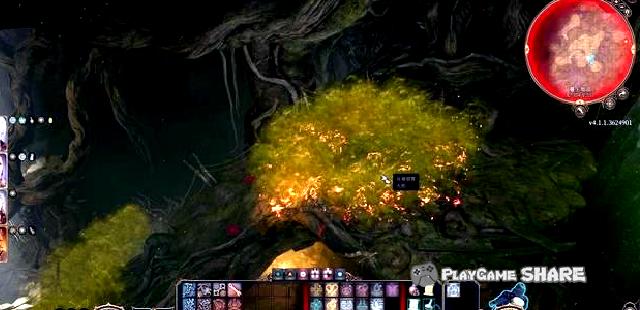
Arriving at the old nest of the ghost, it will trigger the battle after approaching.
[Note] If you want to rescue Melina here, you must ensure that there is a water bottle or precipitation spell on his body (water bottle is shown "water" in the item bar.
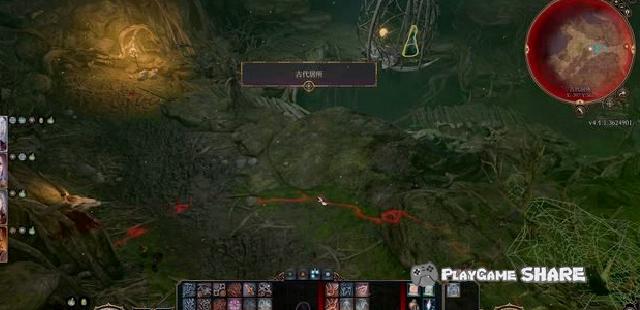
After starting the battle, the ghosts will cast a few avatars to try to attack the player, and they can kill the avatar with one blow.
The ghost also threw the flame bomb at the cage of Meinna from time to time, and Melina died after the blood of the cage burned.
Throwing water bottles or precipitation can relieve the flame effect.
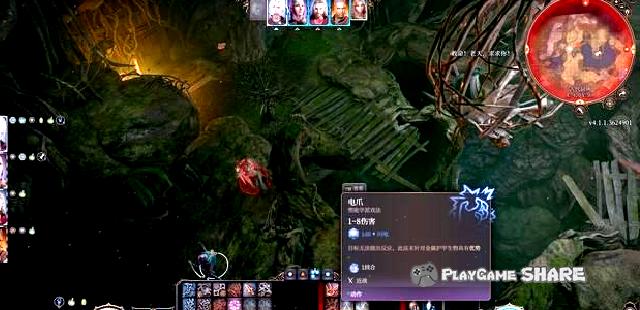
After killing the ghost, it is recommended to use the necromancer to ask her true intention from the ghost’s mouth, so that it is convenient to negotiate with Meinna.
[Remarks] Don’t forget that the deceased will not talk to the killer.
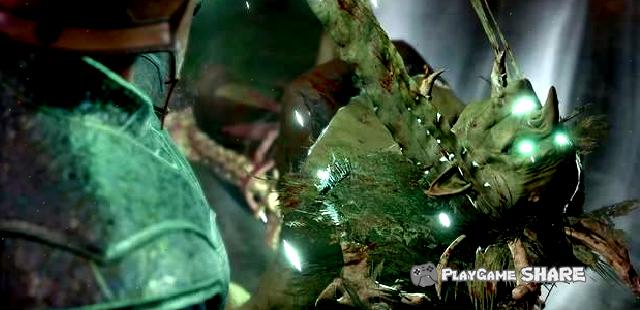
If the "non-fatal attack" is opened in the passive effect, she will have a chance to ask for mercy when the blood volume is close to 20%.
[Remarks] Asking for mercy will only trigger when it is her turn. When it is her turn, she will kill her even if she uses non-fatal attacks (although she will resurrect in the follow-up chapter like normal killing).
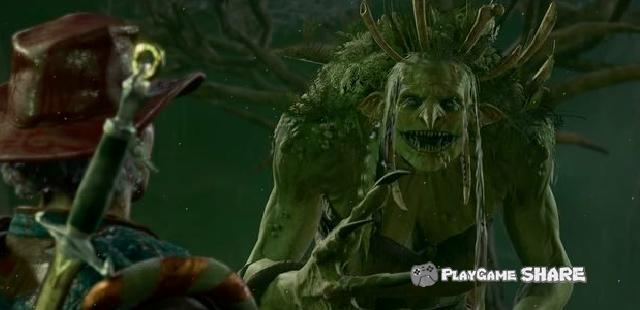
Line task: Rescue Melena (2)
Agree to let her let her leave, and can use judgment to rescue Melina.
[Remarks] Can’t get the items on the ghost and Melina’s pendant.
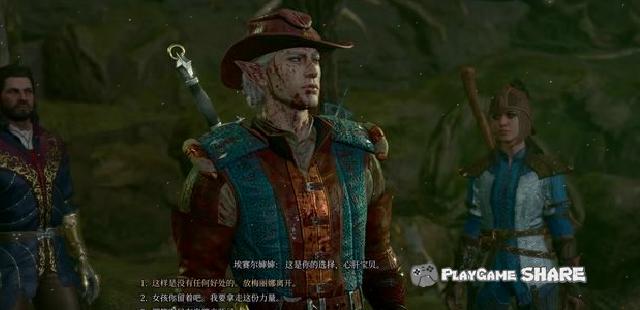
After that, the ghost-in-law will give us a beam of hair, and you can choose a main attribute +1.
In addition, as long as she got the "sorrow wand" in the house, Melina’s follow-up can still be triggered normally.
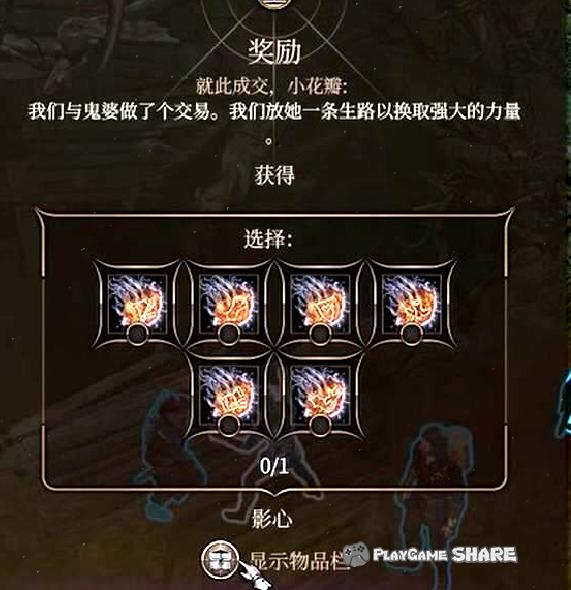
Use the switch on the side (yellow light) to rescue Melina.

After telling her the truth, she could get the item "Meinna’s Drinks".
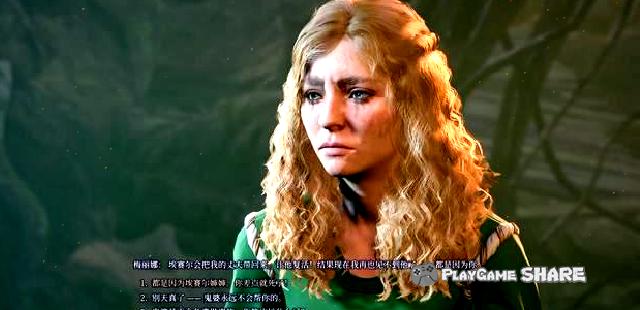
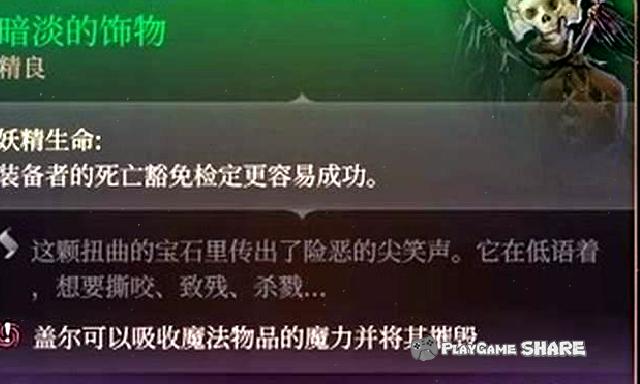
Afterwards, I can continue to get a variety of items in the Ghost Word’s workshop.
There is also a bunch of potions specially made on the table on the right.
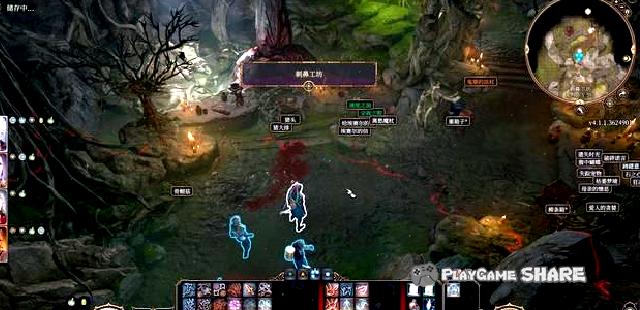
If you still want to trigger the follow-up of Meinna’s mission, you must bring the "worry wand" here.
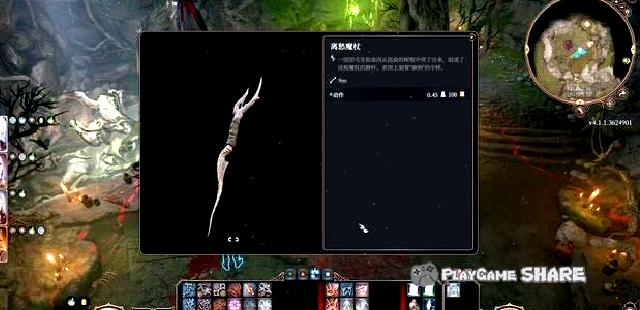
Continue to go forward, you can see Meinna again after leaving the magic magic rod.

Talk to Melina, and chose to resurrect her husband after using a wand to resurrect, and then let her leave her husband to the door of Bude.
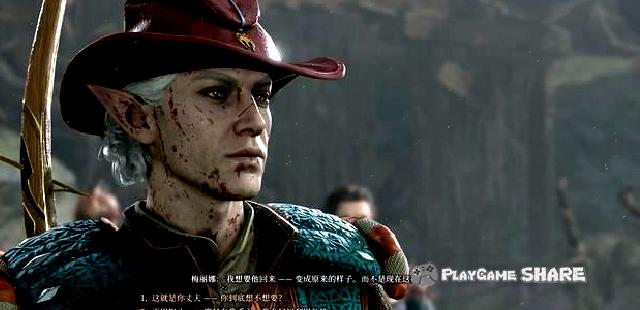
Later, he used the previously obtained side door keys to return to the ghost house, and once again entered the secret road to find those who were cursed to rescue them.
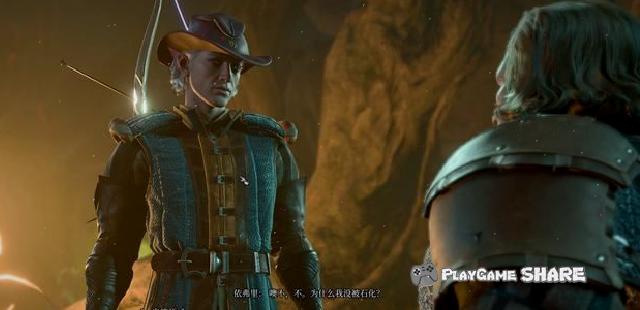
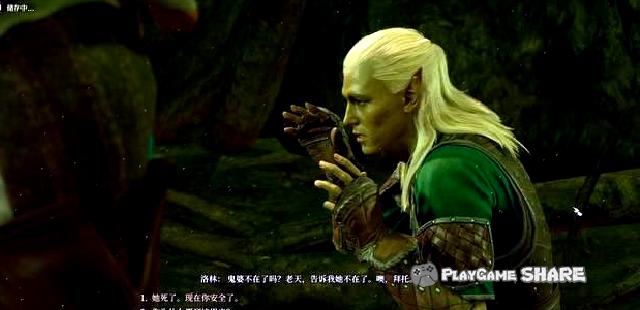
The picture below shows the map of the ghost area, which can go from the blue mark area to the "dark area" in the area.

It is worth mentioning that after killing the ghost, use the animal dialogue to find the "deformed frog" in the tea room area to get some rewards.
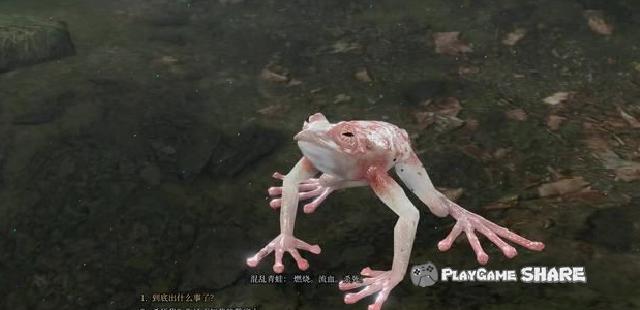
Regional Total Land: Earth Camping Land
Groundwatter
Red mark-area connection point
①Donghong Monastery
② Entrance of the Camp beam
③ Camp door
Blue mark-task-related
① Rescue the bard poet
② Yingxin Personal Line
Green mark-event and NPC
① Little Bear
② Poisonous pan
③ Licking the ground essence
④ Sneak into the route (change the fog drilling hole)
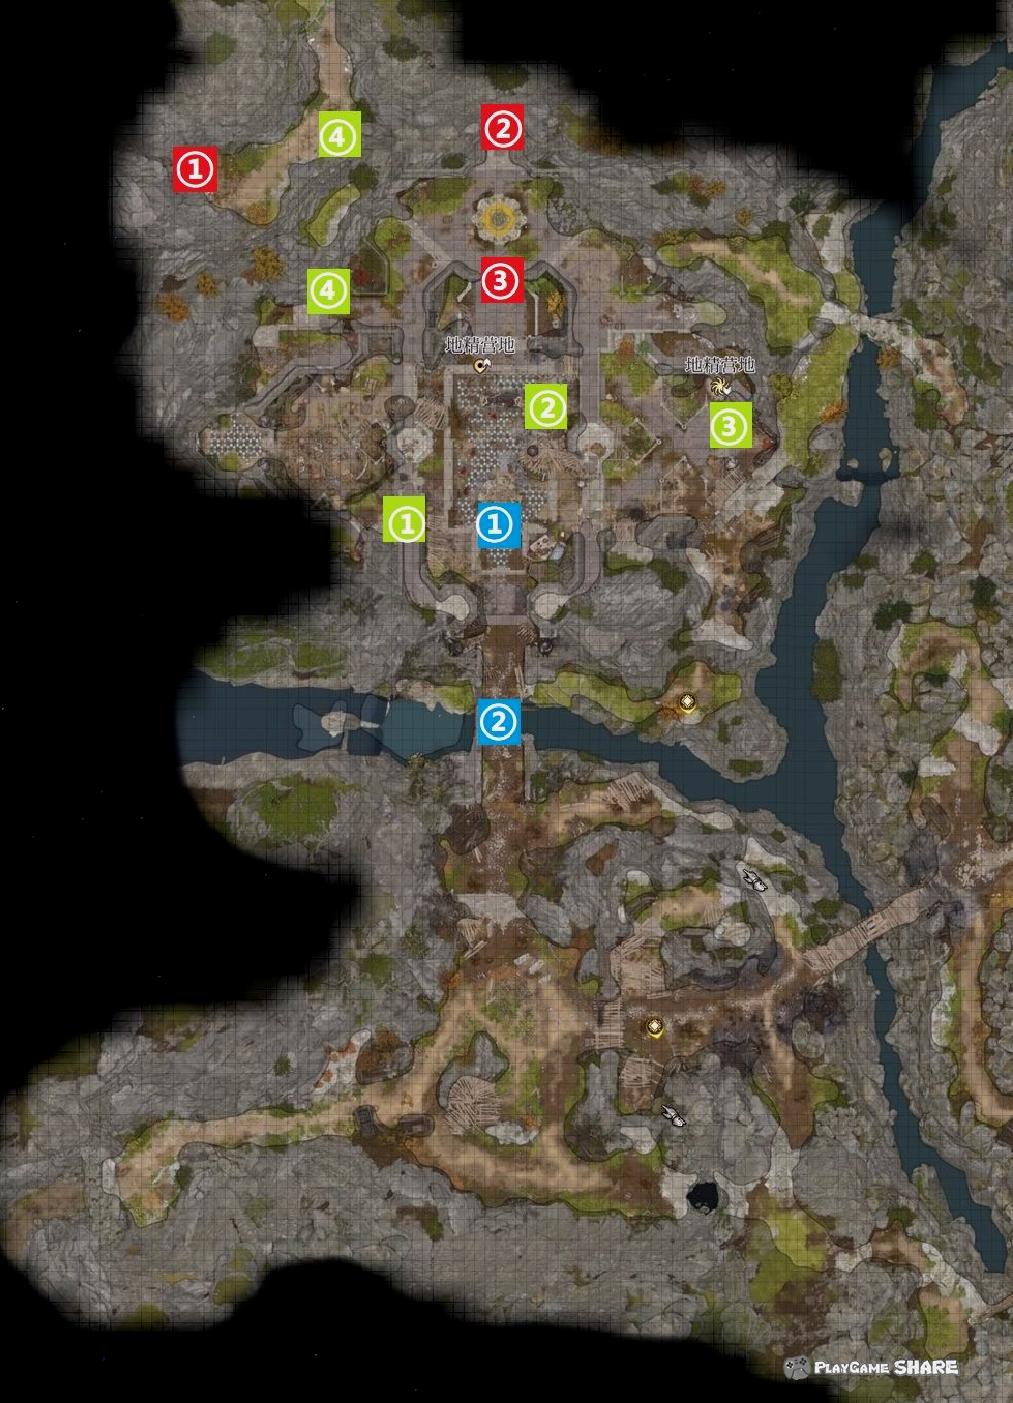
Regional general view: dark area
7. Dark area
Regional overall
① The entrance of the ground camping (red), the entrance (yellow) of the Ghost Po area (yellow), and other regional exports (blue).
② Light-language bark.
③ The branch mission "Find the lost boots".
④ "Find Mushroom Hunter" by the branch mission.
⑤ The branch mission "cure poisoning dwarf".
⑥ branch mission "True Soul Nayle".
⑦ Exploring the location "Afa Gao Tower".
The main task "Investigate parasites".
⑨’s reward place.
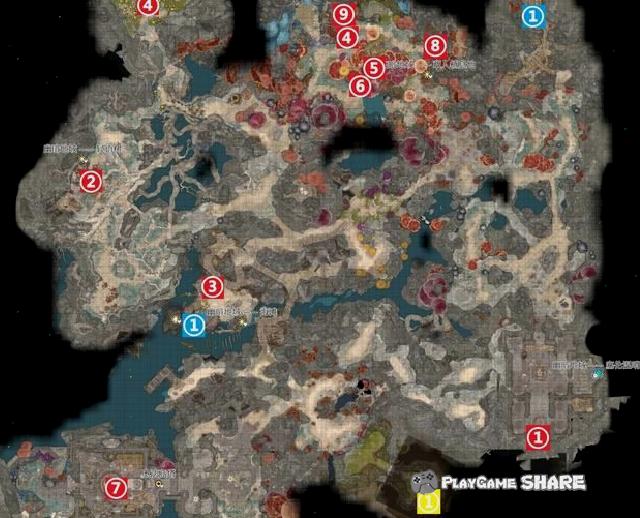
Line task: the dark area entrance
About the entrance to various regions
The first is the entrance of the ground camping site. After entering, you need to pry the lock to open the door of the post.
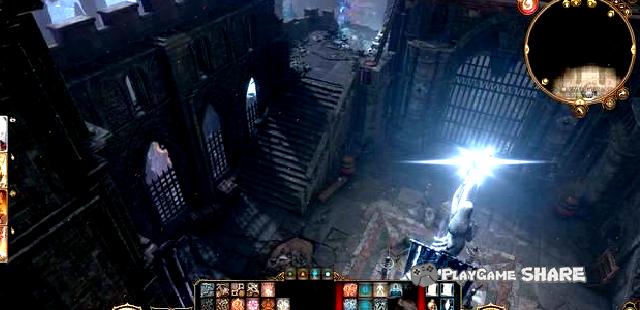
There are two whistle towers at the door, causing lightning damage and can basically pass through.
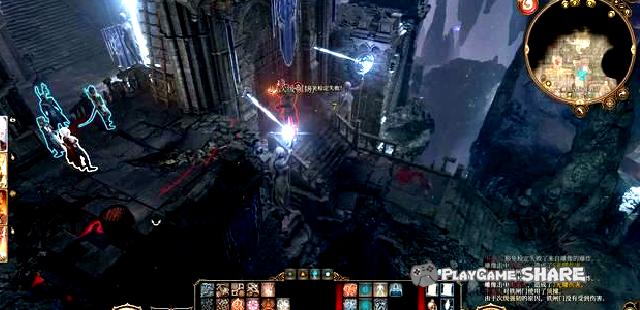
If you don’t want to leave from the front, you can jump away from the west, but the powerful monster "Observer" in the early stage of the reward will use petrochemical skills.
[Remarks] The petrochemical Our that has been petrified can be lifted with petrochemical oil, but they are hostile (can also be used by observer).
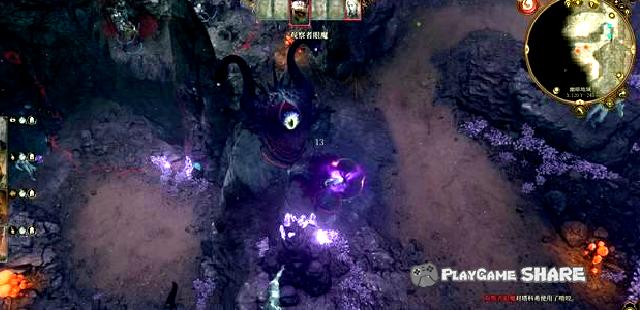
The entrance to the Ghost Po area is more convenient, and the blue portal can be used to reach below.
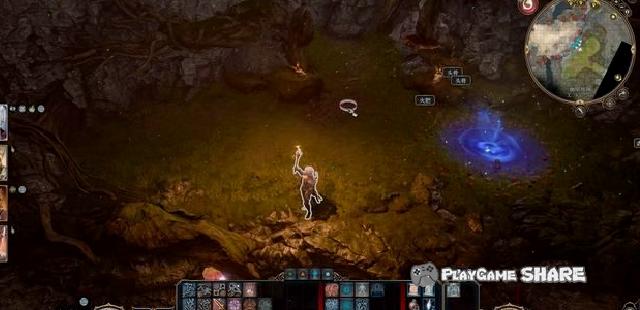
If you walk from the bottom up, you need to pay attention to the illusion. The signs below are entities.

The last one is the exit to other areas. The road passing on the way has traps. If it is unlocked, it cannot climb normally.
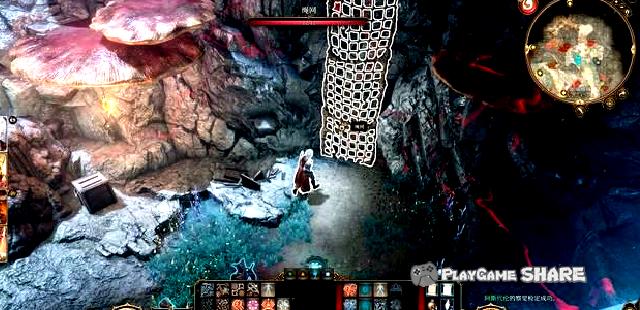
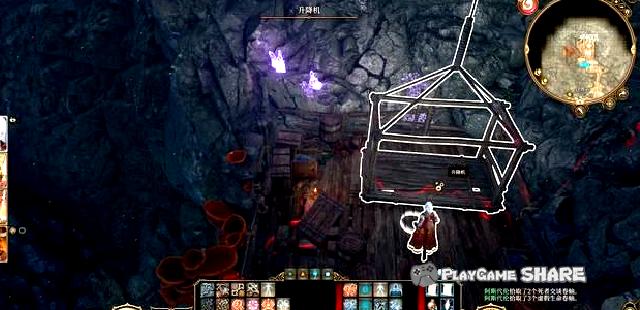
Line task: Lost boots (1)
Find the lost boots
[Important] In this task, you can get the boots in this task to enter the "revenge furnace" with a friendly attitude.
Near the Harbor, the dialogue is triggered after the NPC near the figure below. You can use the identity of the true soul (fake) to find the fugitive for them.
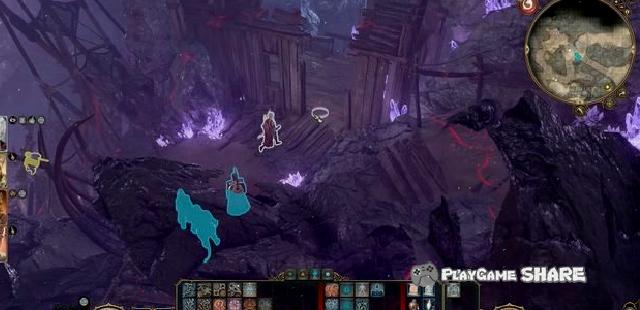
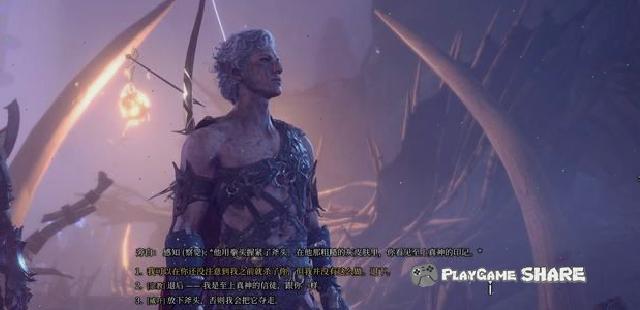
When I met the king of the Cross Camp, I could enter the camp after judging the friendship.
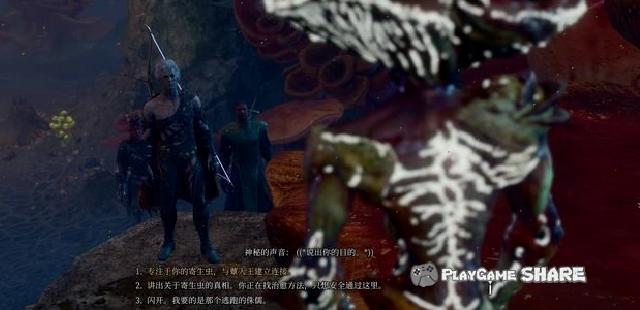
Those who can see the gray dwarves looking near the king of the people (thin), if they have obtained special antidote before, they can be handed over to him.
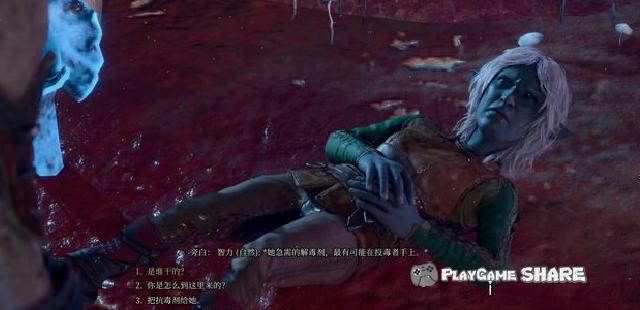
After talking to the king of him, you can kill the gray dwarfs, or you can take the evil route to kill the people.
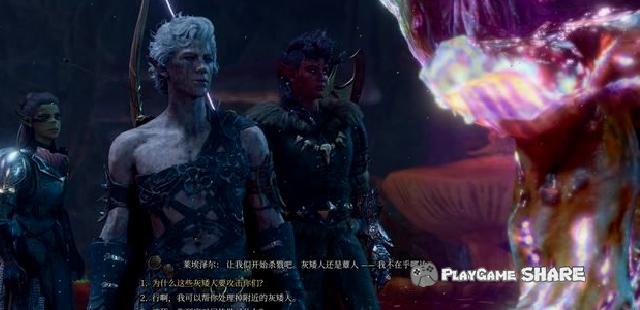
If you choose to kill the gray dwarf, you can find another king before leaving the camp and accompany him.
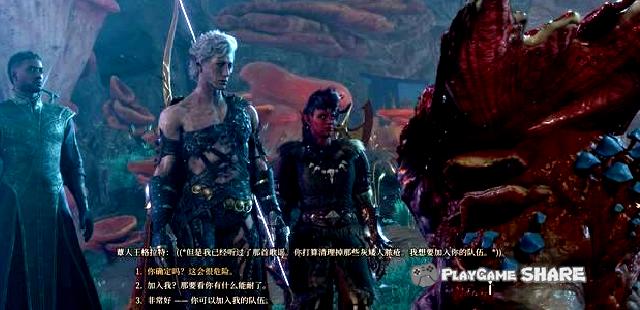
Line task: Lost boots (2)
After finding the gray dwarf and triggering the battle, it should be noted that they will summon the living dead, and it is recommended to start fighting above.
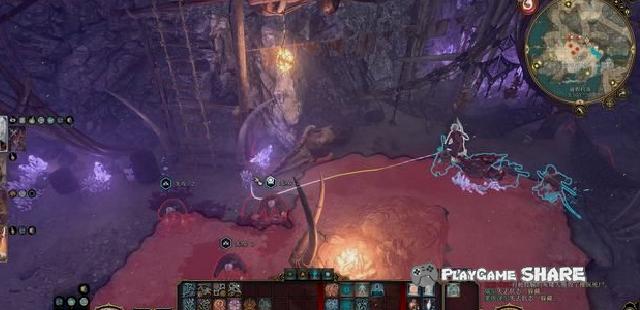
It is worth mentioning that the king (fat) after killing the gray dwarf will propose anti-water, go back to kill the king (thin), and let him go.
If you choose to disagree with him here, it will directly fight him, it is recommended to consume his blood in the previous gray dwarf battle.
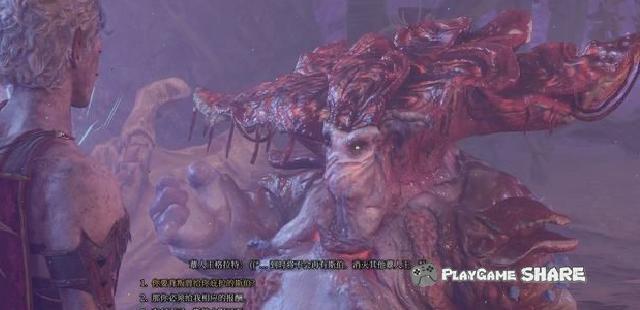
After getting the antidote from the gray dwarf, the dwarf given to the cricket camp can know the hidden items and the boots found by the gray dwarf.
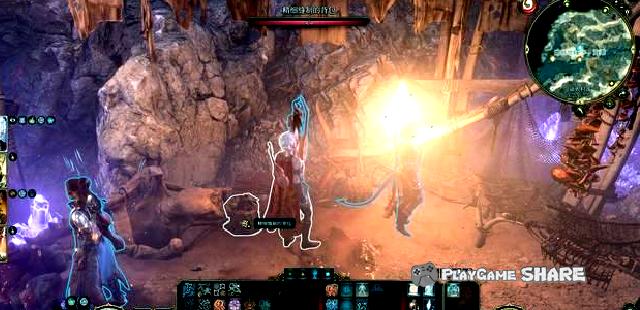
Return to the king’s place, complete the task to unlock the reward location (see the regional general view), and unlock the branch mission "True Soul Nayle".

There is a corpse in the reward location that can use necromancer and find various items in it.
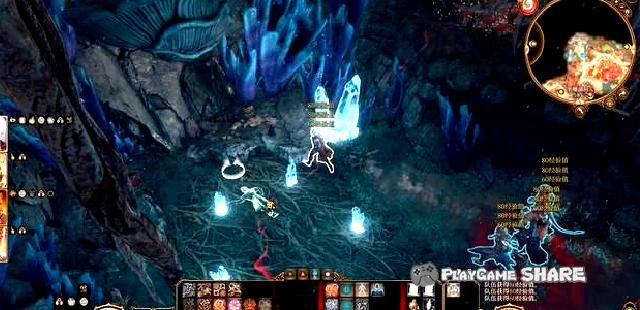
Line task: find mushroom hunters
Find mushroom hunter
You can find the NPC of selling materials on the west of the Renren Camp, and take the task of looking for her husband.
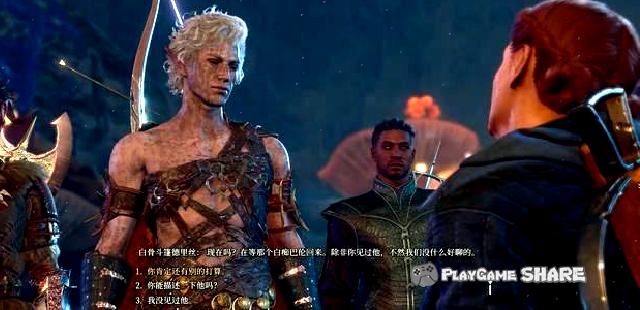
Go to the target location and you can see the green plants below on the way.
Because it will cause explosion and spray poison after approaching, attack from a fire from a distance can quickly eliminate the poisonous fog produced by the explosion.
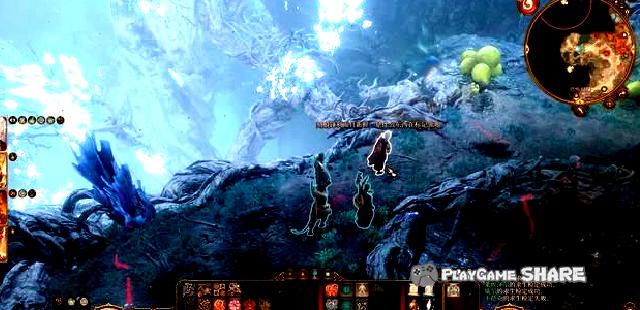
The location of the figure below leads to the material "light-language bark", and going down is the task route.
[Remarks] It is strongly recommended to go without the scroll "fascination steps".
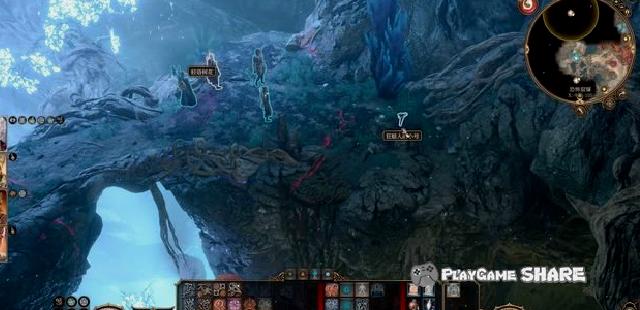
After approaching the mushroom hunter Baron, if there is a fascination scroll in the backpack, he can be given to him through the power judgment and let him escape.
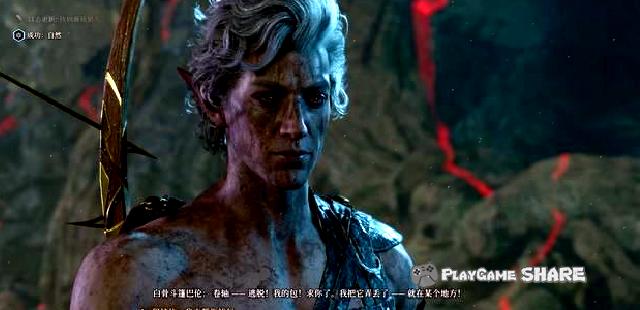
If not, you can only go to the location of the figure below to find the scroll (two in total), and he can also let him come out by himself. We remotely treat him to prevent him from violent (enable the round mode).
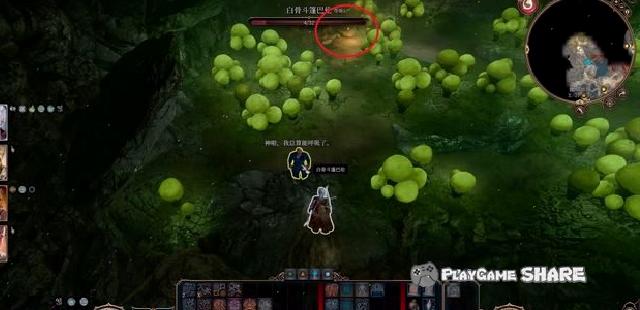
Back to the Camp Camp, you can deliver the task and get equipment rewards.
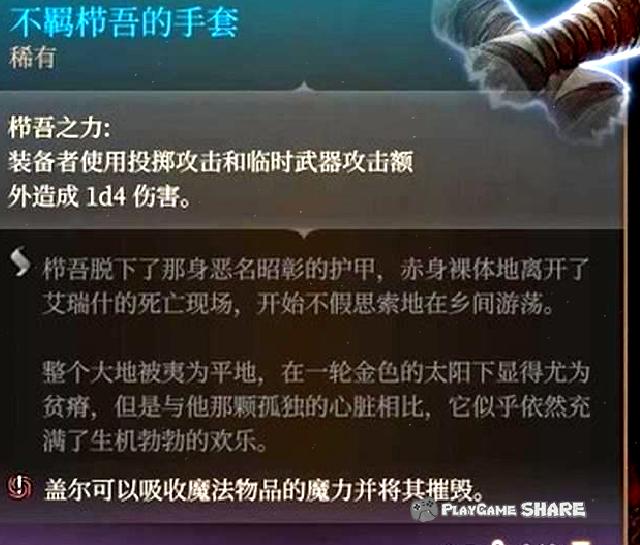
Line task: light language bark
Get light language bark
When you go to the target location, you will encounter some monsters on the way.
It should be noted that there is a "flower of light language" in this area, which will be silent after approaching.
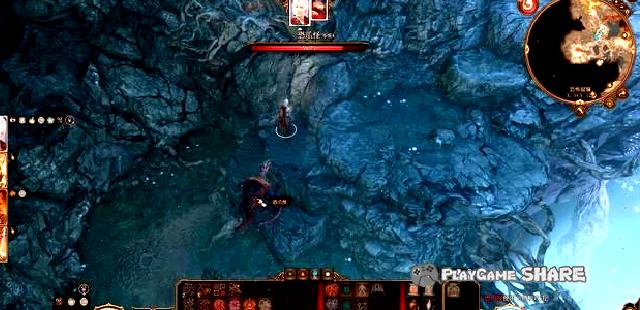
If you pull the lens, you can see the route leading to the light-language bark. You need to pay attention to the enemy on the trunk and right of the picture below.
After completing this task, you can return to the furnace of the cellar of the infected village, put the light-language bark into synthesis, and then select a whiteboard equipment on the dialogue on the character head to create a light-language dress.
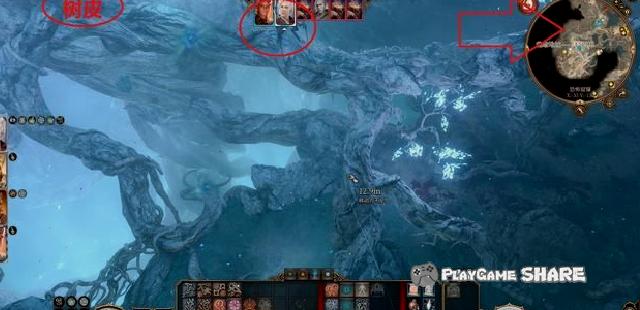
Triggering event: Exploring the Olympic Tower
Olympic Tower
Pass through the arch in the southwest of the area to find the Olympic Tower.
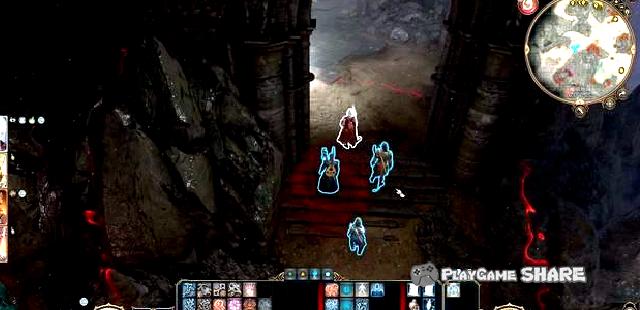
After entering the area, it will be attacked by a defensive turret. The turret is basically only affected by lightning damage. Entering the round mode is used to get it with lightning spells.
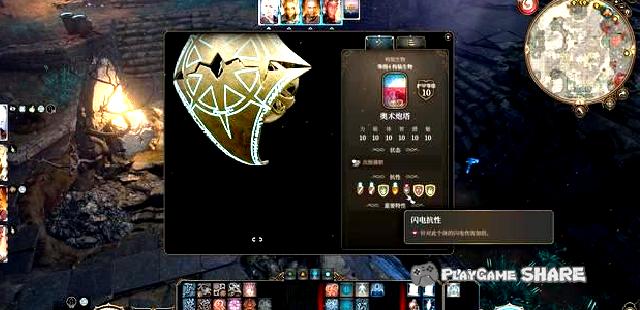
After exploring around the tower, use mushrooms (left on the left side of the figure below) next to the stairs.
Although you can also pry up directly, you have to go down in the end.
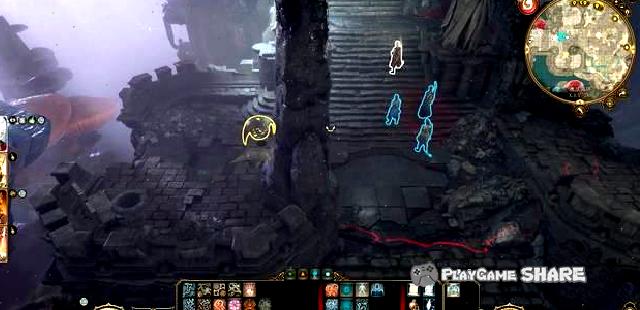
In the nearly bottom position, the form can be transformed into the tower to open the door, or you can directly pry the lock.
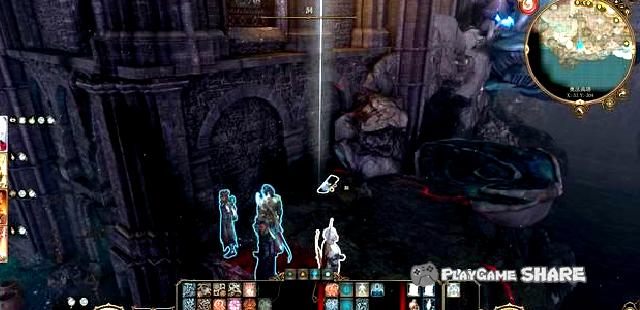
You can see some documents in the tower. After reading, you can learn that the facilities in the tower use "light-language tree flowers" as the driver energy.
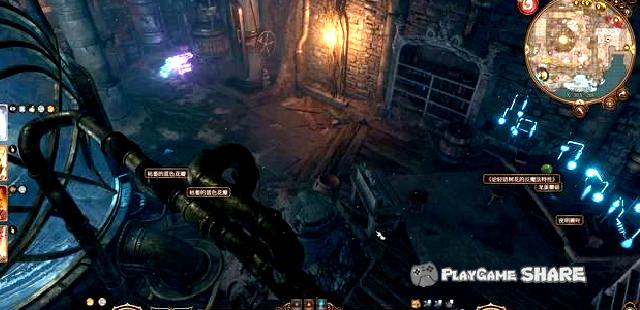
You can find a light-language tree flower near the bottom of the tower, and return it to the reaction furnace.
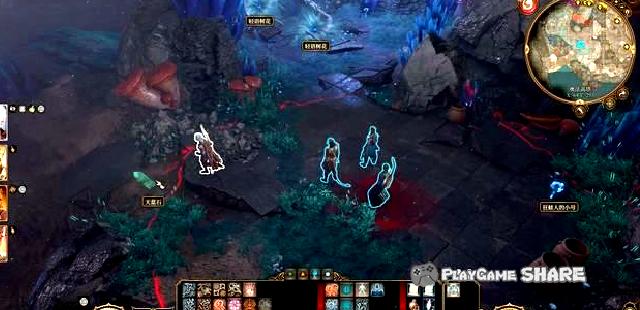
After the turret in the tower is closed, the elevator can be used.
One layer of upward, you must read various books in the tower when searching, and then use these knowledge.
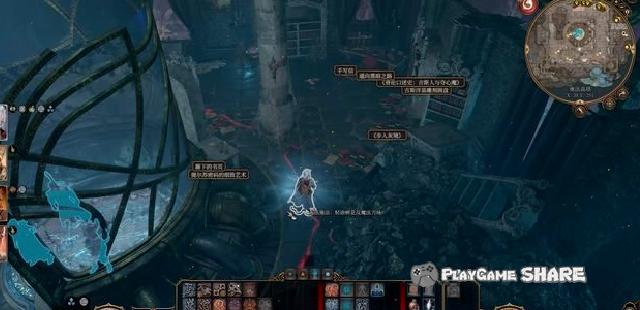
[Remarks] Knowledge such as books can only be obtained by clicking, and usually do not need to be carried or all over.
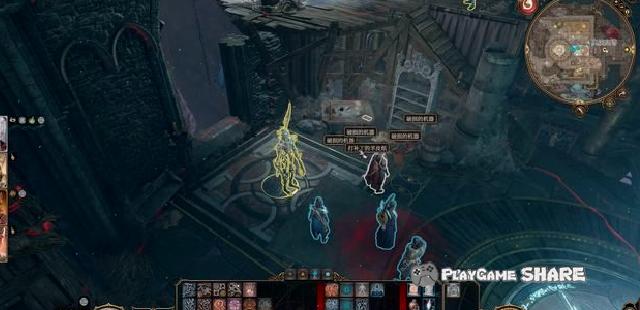
To the top of the tower, if you have read the script in the tower, you can enter the line of the upper structure and cannot enter the battle.
There are five lines in total. The only thing that cannot be chosen is "the living everything has light". Choosing this will directly turn to hostile (whether or not he has line).
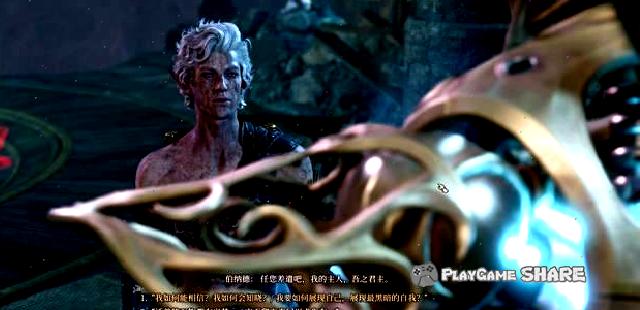
It is worth mentioning that when the above-mentioned lines are applied, the decorative experience will put a ring on the table next to it.
After wearing a ring, you can enter the bottom of the Olympic Tower (select "Go to the bottom" by the elevator).
[Remarks] If it is not for experience, there is no need to kill the body. It has only one key and a normal equipment on it.
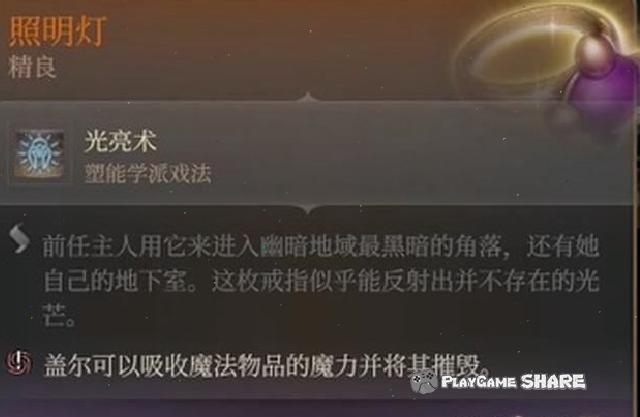
You can obtain some rare materials in the area and some of the owners of the owner in front of the Austrian Tower.
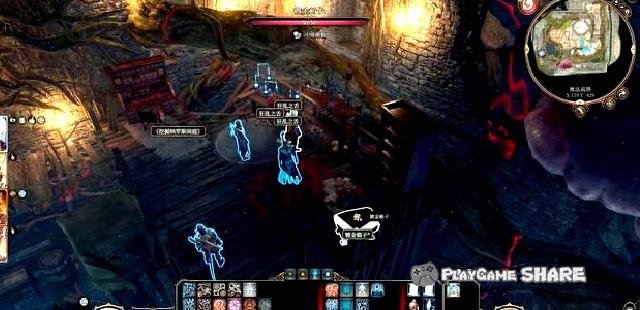
Regional Total: The Furnace of Revenge
8. Revenge furnace
Regional overall
① Purgatory alloy acquisition.
② evidence of the harp alliance and the green leisure court.
③ The console to the fine gold furnace.
④ Secret silver material location.
⑤ The branch mission "fine gold furnace".
⑥ The branch mission "cursed monk".
⑦ The main task is "through the dark region".
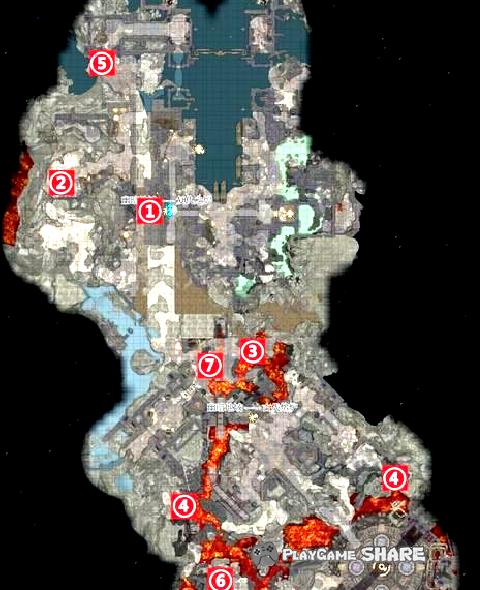
Branch task: fine gold furnace (1)
Refined gold furnace
Find the gray dwarf who whipped some sheep-like creatures (Los Beast) in the vengeance furnace, triggering the dialogue after approaching,
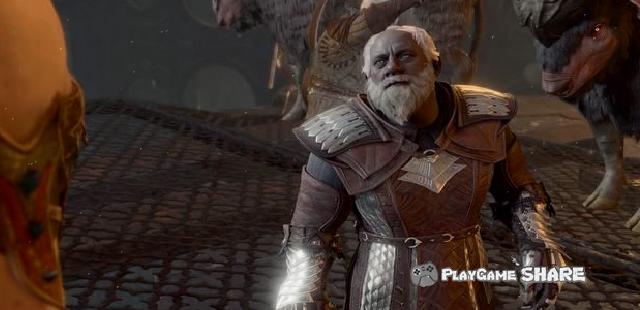
You can learn through the dialogue that you can reach the golden melting furnace after the gravel.
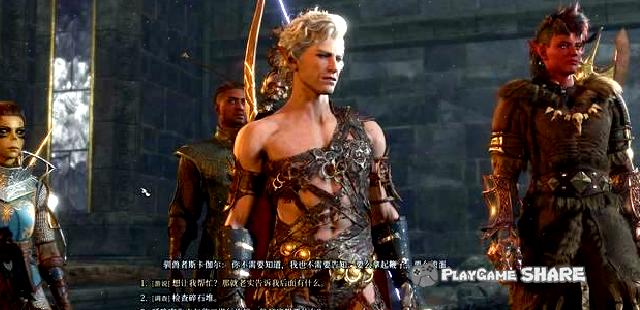
If you carry explosives (the damage throwing object), explode the broken stone to enter.
You can also help the dwarf through animal dialogue to help the dwarf and help us remove the gravel.
[Remarks] Unless the escape route is taken, it will work with the gray dwarfs in the area when completing other branch lines in this area.
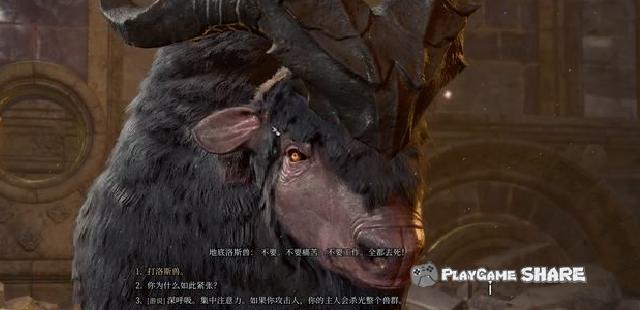
Walk along the road to reach the above road of the revenge furnace.
The location of the figure below should be noted that there are stone statue ghost traps on both ends of the bridge, which causes flame damage and has a knocking effect.
There are also a lot of traps along the road, but there is no need to go through the whole journey, just find the ladder down halfway down.
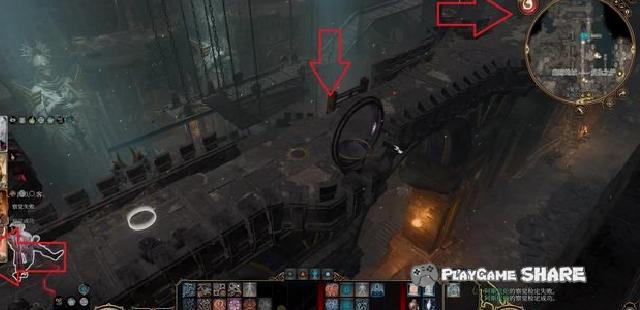
On the other hand, it is important to note that a variety of molds can be found near the revenge furnace and refined gold furnace to create fine gold equipment later.
The current known model has:
One-handed hammer, plate armor, scale armor, and machete (near the golden furnace transmission point);
Long sword (picture below, on the way to the furnace);
Shield (top floor of the residential area).
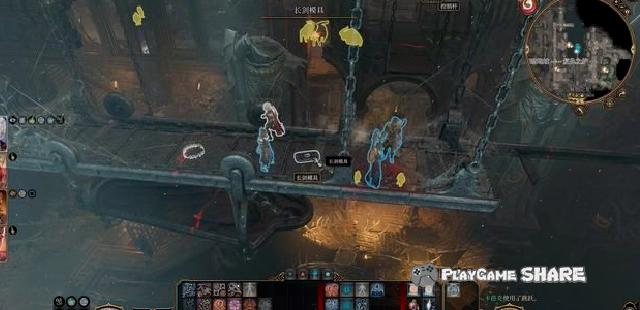
Continue to move forward, you can see that the connection road is separated, let the three wait here, and let the long-range displacement characters such as flying move around the road.
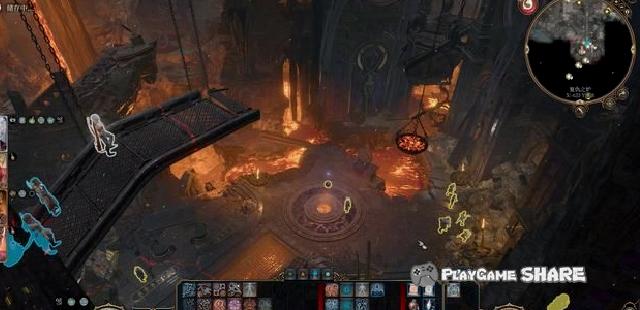
Starting from the fork of the stone statue ghost trap, passing through the horizontal section.
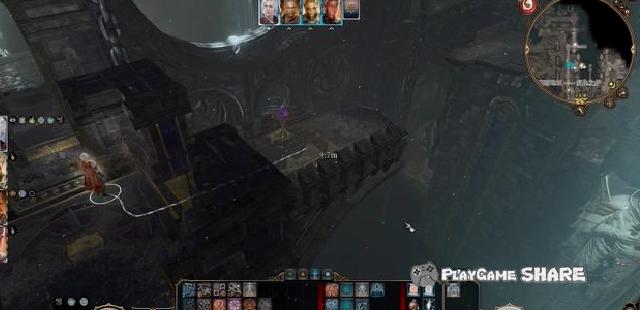
On the way, you can pass the "residential area", and you can also get the item "Map of the Moon".
Finally, the console in the figure below. If the character cannot use flight or displacement to the left area, you can only manipulate the agency to let the three characters on the right pass.
If you can reach it, first find the teleportation point over there and let other characters pass.
[Remarks] The lapse of the figure below is the plate mold, which is also a foothold of the displacement.
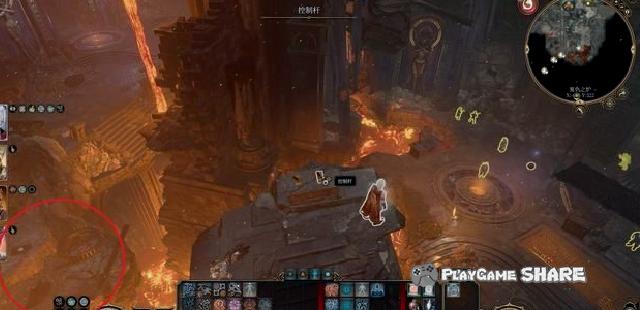
Line task: fine gold furnace (2)
If you come from the platform, the battle will be triggered at the position below (flying over).
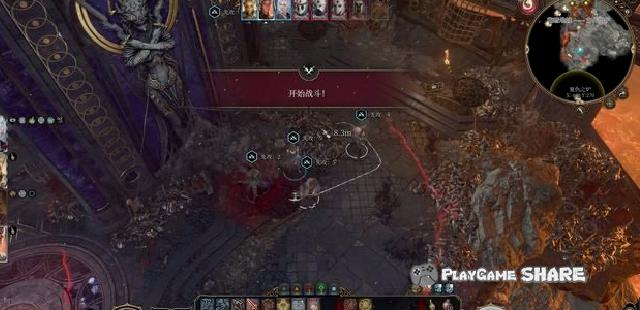
The picture below shows the mysterious silver position required to create refined gold weapons.
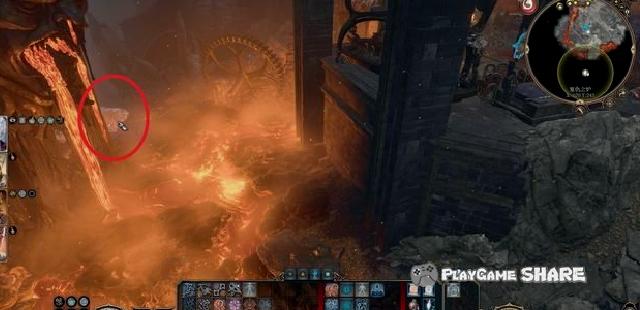
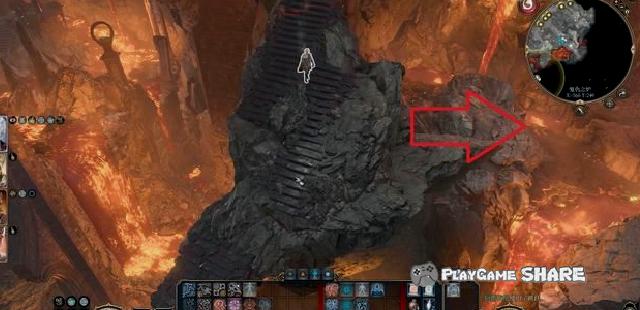
The operation order of the furnace is as follows:
① Putting into the mold, changing the mold, you need to pull the handle.
② Put in the secret silver.
③ Pull the switch, giant machines will hammer a central platform once.
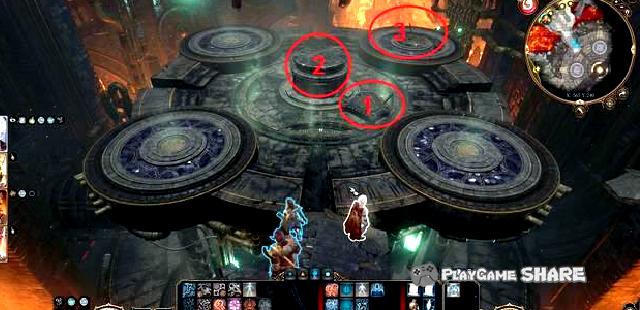
After the hammer is hit, the platform will be moved below, and manipulate the valve below to pour the magma.
[Note] The first time in the magma will trigger the BOSS war.
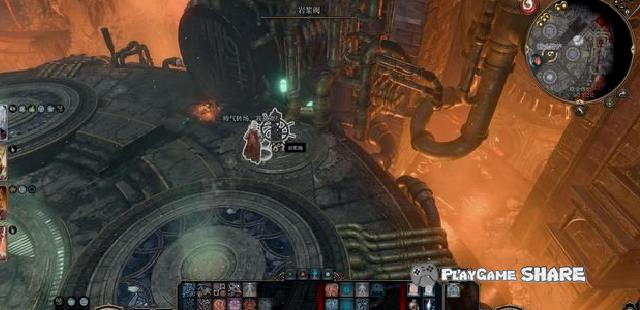
BOSS is only affected by blunt damage, and various damage is immune.
Because it will set the first character in the round to the object of hatred, it can be taken to the central platform.
Then pull the hammer switch to kill him.
[Note] The magma usually disappears within 3 ~ 5 rounds. After disappearing, the debuff on it disappears, and even if the blunt device is not harmful.
[Remarks] If you don’t use the hammer to kill it, you can achieve achievement.
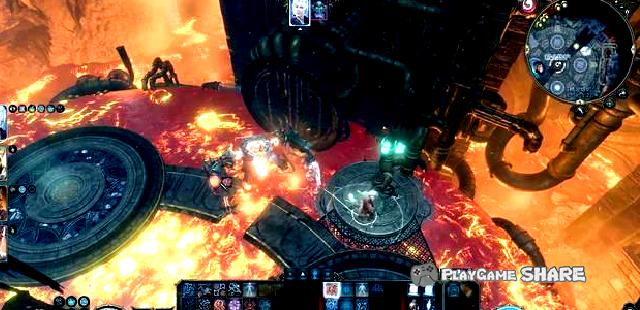
After killing it, continue to make the process, pull the switch when poured into the magma, and the hammer can be forged once.
The refined gold series equipment has "double-hit (weapons)" and "will not be hit".
Usually it is recommended to fight against it, after all, you can get better weapons in the future.
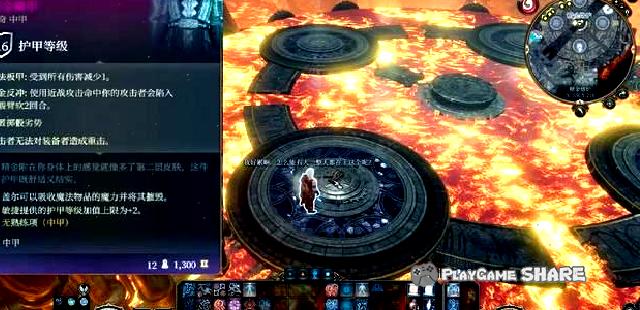
Line task: cursed monk
Cursed monk
In the following figure of the fine gold furnace, you can see the ladder and treasure chest in the distance.
Because there are spacious magma in this area, it is recommended to use displacement spells or jump three times.
When you open the lock and open the box, you can get the amulet. When obtaining the amulet, you will trigger the plot and see a monk trapped in the amulet.
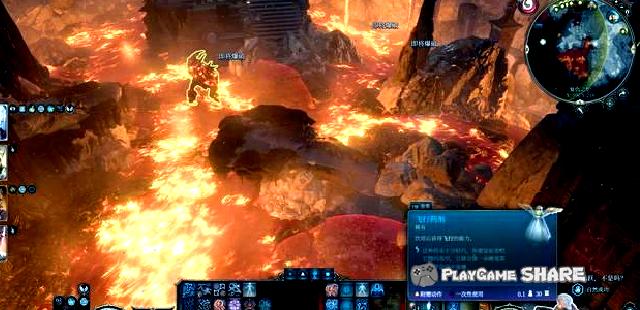
Through some DC10 judgments, you can calm the amulets, and you can learn that the monks want to return to the place called "Flying Longguan".
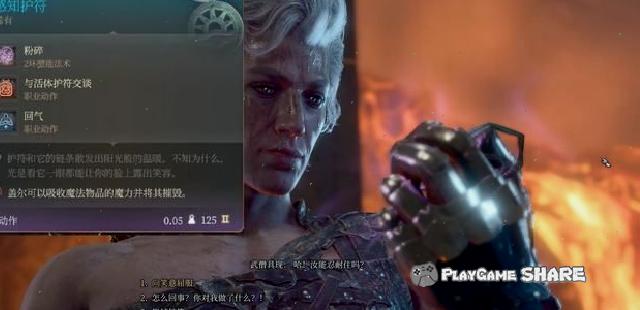
This branch cannot be completed in the first chapter, and the subsequent content will continue to be updated on this page.
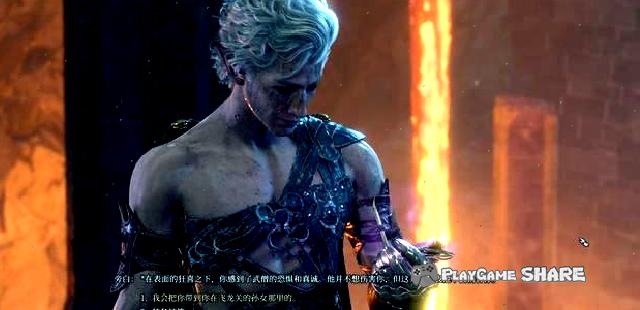
This part is the subsequent mission of the second chapter.
After entering the third chapter of Li Wenton, he talked to Sisters of Yannis in the "Temple of Love" and learned that the monk’s daughter had passed away.
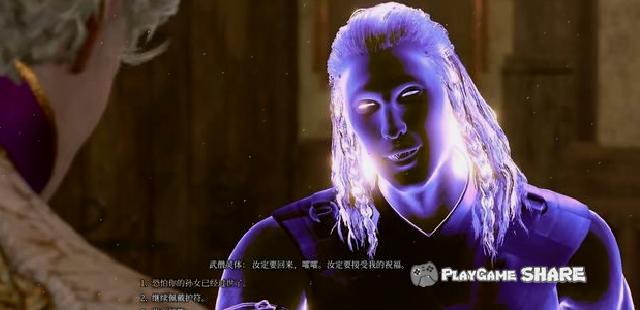
Go to the ground from the live board of the kitchen, find the granddaughter of the monk in the tomb, and then trigger the dialogue.
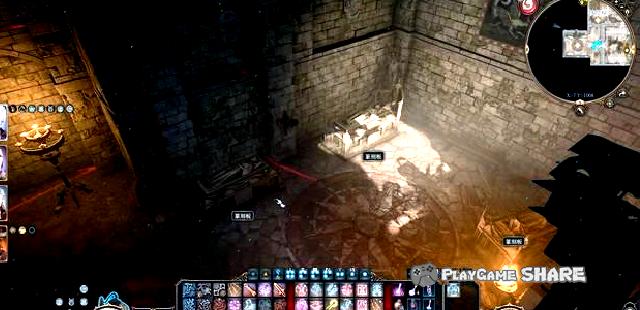
It turned out that the monk was laughed at, and we could rest in peace by being cursed for him.
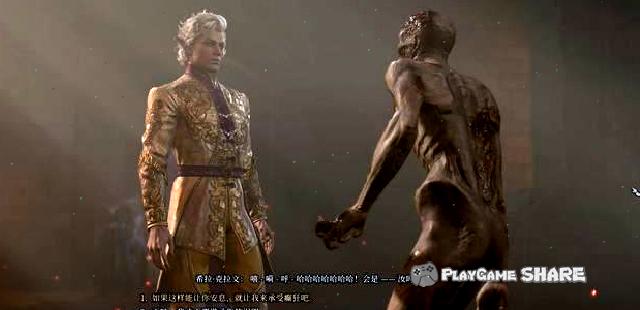
It should be noted that after letting him possess his granddaughter, the amulet will lose the original effect.
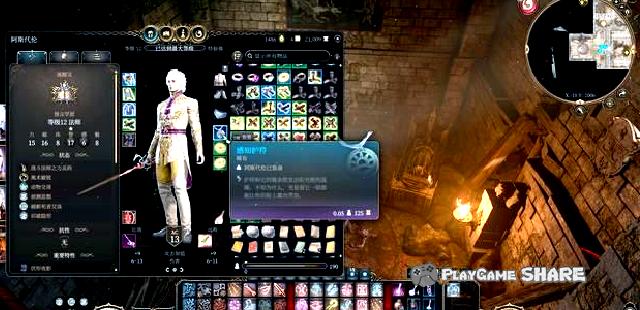
Line task: True Soul Nayle
True Soul Nayle
The front conditions of this task are related to the "lost boots" in the dull region.
If some columns of king of the king are completed in the dark area, it will finally let us go to the furnace of revenge to kill the "True Soul Naya" and come back to the delivery with his head.
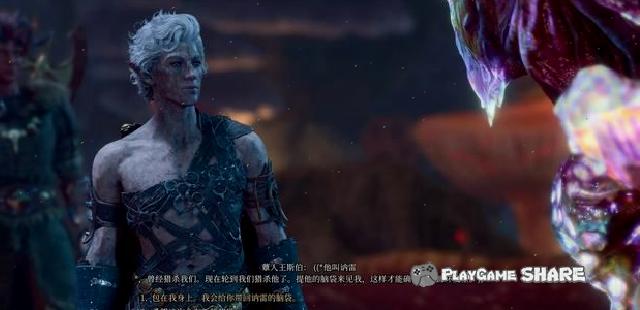
If you hold the boots found by the gray dwarfs, you can directly pass the inspection on the way to the vengeful furnace, and enter the revenge furnace area in a friendly form.

Finding the task area in the vengeance furnace, talking to the sergeant can be known to be trapped in the ruins.

If you hold a boot, you can choose to give her a mosquito leg reward, or hide and leave the boots.
[Remarks] If you choose to confront the gray dwarf, you will not give it the same.
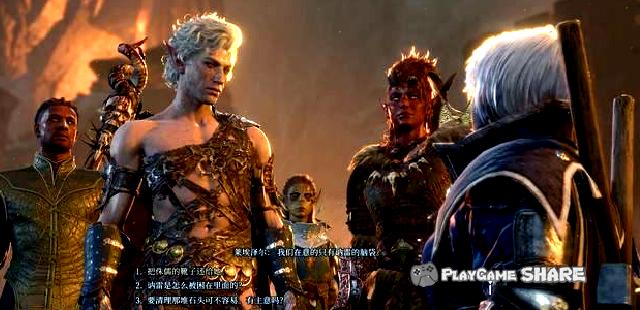
Then talk to the slaves who are excavated, and you can know that there are some rune explosives hidden nearby, which can be used to break the stones.
Of course, if the items (or spells) with force field damage can also be attacked and destroyed the stone pile directly.
The scope of throwing objects is large. In order to ensure that it is not injured, it is recommended to choose the upper right corner of the stone pile.
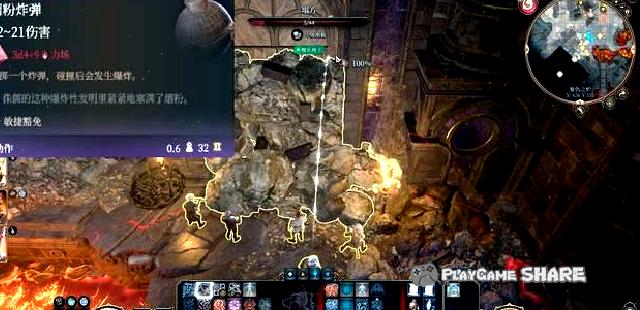
There are four ways to complete this task:
① Rescue Naya, protect the slaves-the branch line "rescue Ulbren" continues and fights with the gray dwarf and Nayle.
② Rescue Naya, not to protect the slaves- "Rescue Ulbulon" failed and fought with the gray dwarf.
③ Rescue Naya, only protecting the ash dwarf- "delivery of Nayle’s head" failed and fighting with Nayle.
④ Regardless of Nayle, once in the camp-the gray dwarf and slave disappear (the fate of slave is unknown), you can complete the "hand to Narley’s head" and pick up his items.
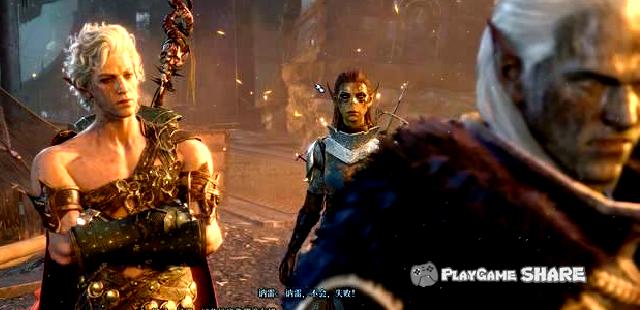
If you want to take a route opposite to the gray dwarf, it is recommended to complete the following operation in advance:
① Use animals near the port and drive away the spiders by persuading.
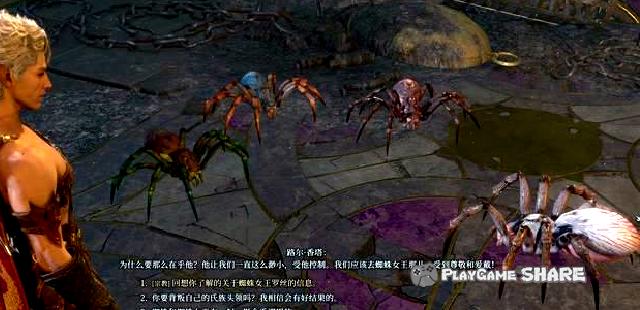
② When completing the "fine gold furnace" of the branch line, the dwarves of the supervisor were killed.
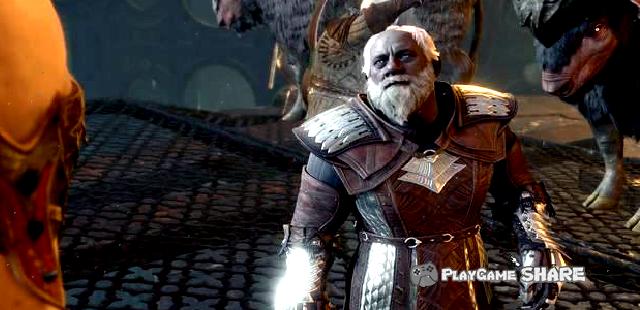
③ Drain some gray dwarfs, including two corpses at the door of the kitchen (near the port). You can also get a ring.
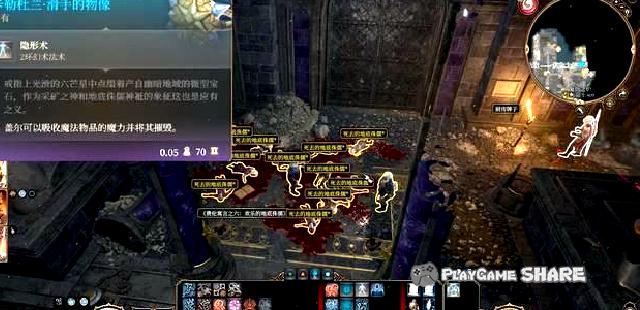
The two gray dwarfs in the figure below suggest that you can get the hell iron first.
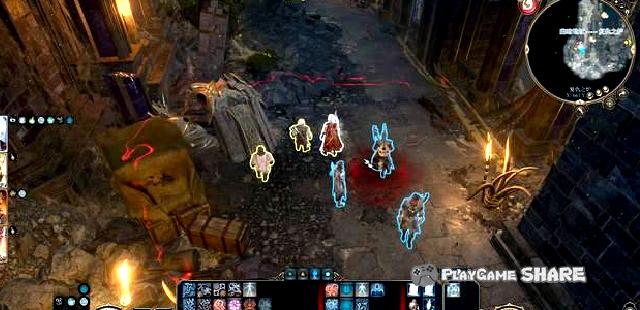
Regional general viewing: cover shadow battlefield
14. Follow the Shadow Battlefield
Regional overall
Red mark-entry and exit and main line
① Bridge of Levin Si Town
② Entrance of the Monastery Courtyard
③ The entrance to the furnace of revenge
④ Hotel survivor
⑤ Moon lift lights/acquisition points
Blue mark-branch task
① Investigate Selunne (the box on the second floor of the river)
② Punishment of evil
③ Capture and seek (dismiss the curse)
④ Roland location
⑤ Outside the fire handle
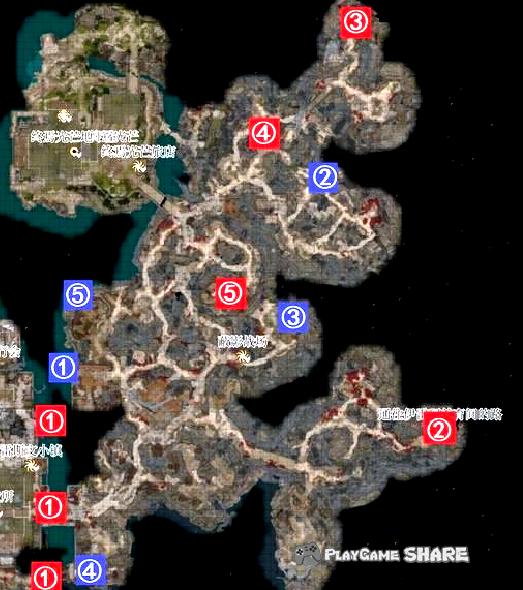
Line task: punish evil
Punish evil
On the northeast of the regional "shielding shadow battlefield", you can find the NPC that uses necrosis in the figure below.
After the dialogue, I agreed to punish evil and took this task to find documents in the winery in the small town of Rezaw.

After entering the winery, the plot triggered the plot near the obesity.
Dead Spirit will drink with players, and let us tell stories. You can pass the verification (DC15 charm), and the battle will be triggered without passing.
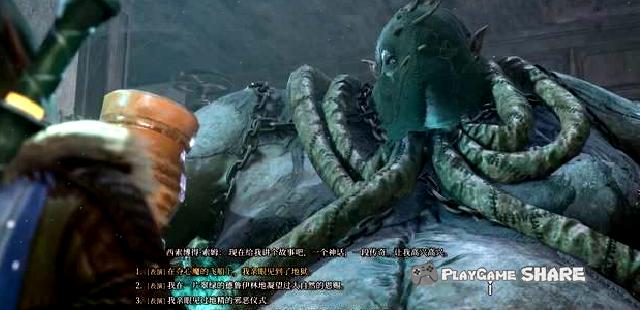
After completing the above-mentioned part, at the counter of the winery (the location of the obesity and dead spirit), use detecting the wooden boards on the ground. After opening, get the record and return.
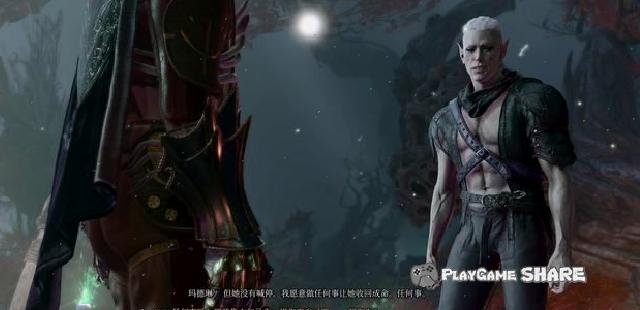
Talk to the necromancer when holding a record. After choosing to punish it, you can get a reward.

Triggering event: extinguishing the fire handle
Extinguish the fire handle
You can see the area with several torches in the shadow battlefield. You can know the details through the dead dialogue or viewing the surrounding letters.
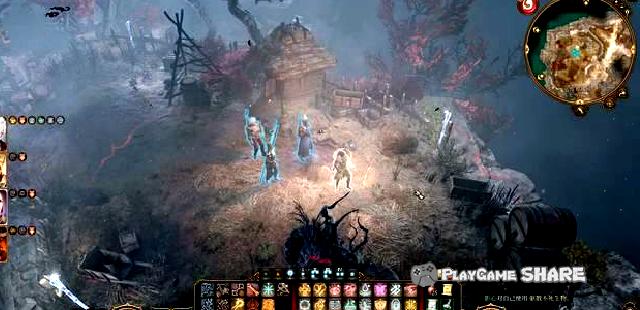
Trigger the battle after attacking the surrounding torch.
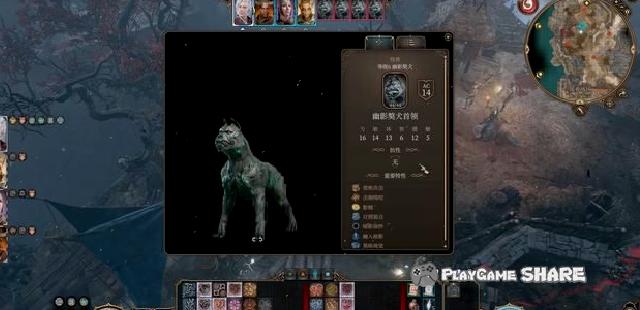
After killing the shadow that appears, get a reward.
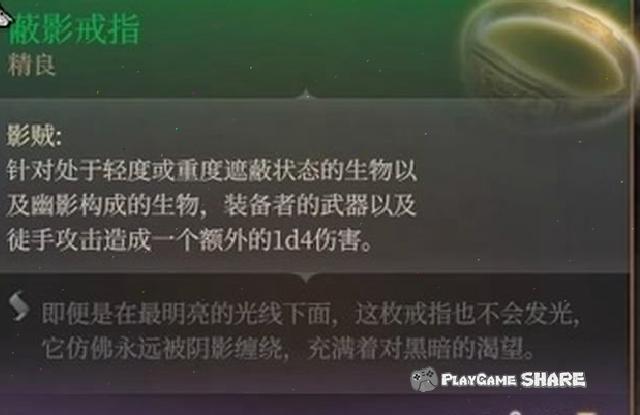
Line task: save refugees
9. Final Light Hotel
Rescue the people
This task is a summary of "Rescue Ulbulon" and "Rescue Tifillin", and the two can be completed at the same time.
If the Druids were assisted in the first chapter, the incident "persuaded Roland to stay", and the dwarfs were protected in the dark region, and the two branches were completed in Chapter 2.
First found Roland in the hotel, he lost two friends and blame the player by monsters.
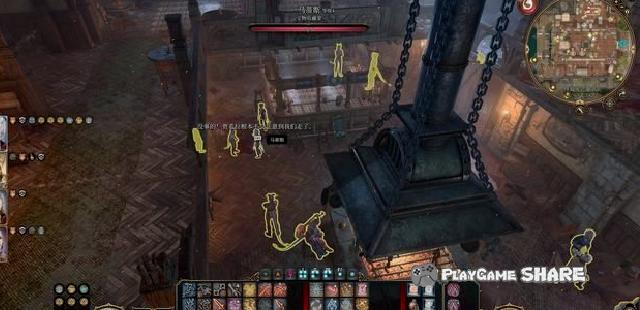
Then go to the tower of the month, and enter the dungeon from the right side of the Jiejin.
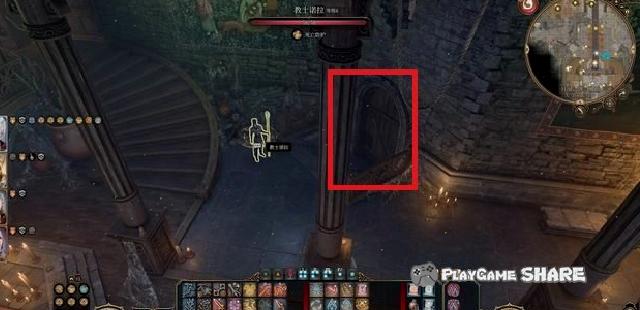
In the dungeon, you can see the closing refugees, and the Tifillin and the dwarves are separated.
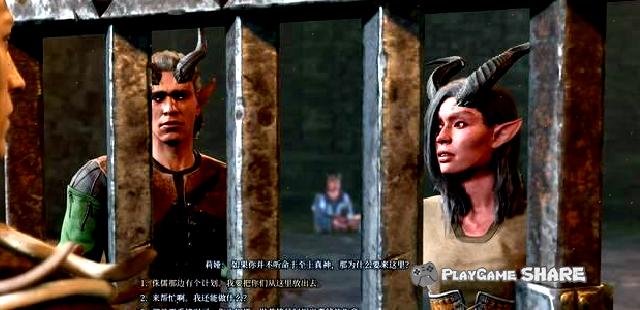
Talk to the dwarves to give them the bluntware, let them break the wall and escape from the place.
Let them break the wall with a low efficiency, and it will directly alarm the entire prison. It is recommended to come back and come back.

The main map of the prison area is as follows (excluding the evacuation route), and the middle is the head of the prison, and there is only him.
If the wander in the team is more damaged, you can try to sneak directly and kill him, and get the box above the key (you can also pry the lock, have a eye).
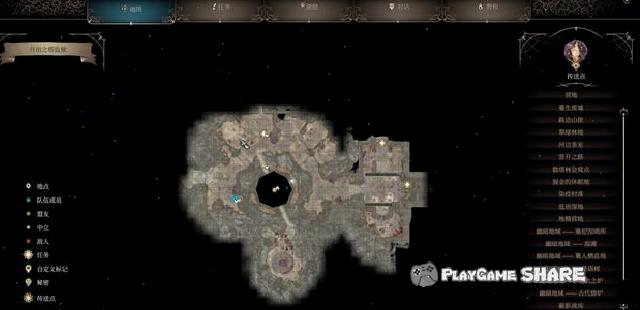
It is recommended not to jump down. Below is the area of the corpse, and there is another entrance.
[Remarks] There is nothing to pick up below, there are only three fear of claws, the only entrance is on the fork of the evacuation route.
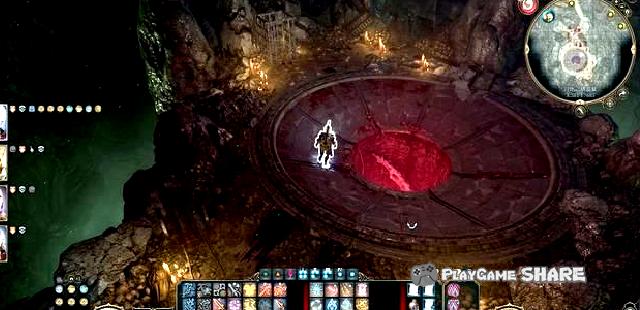
Finally, the fork leads to the evacuation point, from the picture below to walk all the way.
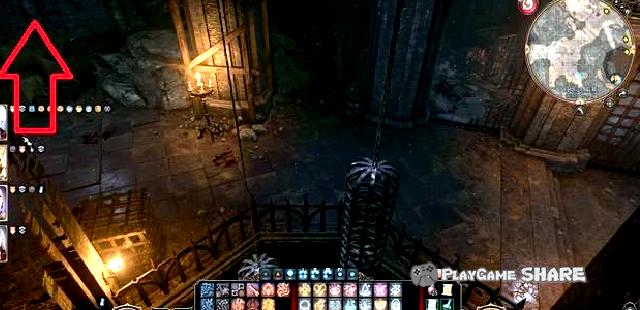
You can see the vessel for evacuation, and the passage can also lead to the broken wall of the two cells.

It is recommended to disperse the team. After turning on the round mode, the two walls are destroyed with a blunt device at the same time.
In addition, it should be noted that you need to destroy the iron chain (one left and right) tied to the boat in advance, destroy the iron chain and then break the wall, and directly wait for the teammates to come over to interact with the boat to evacuate.
In addition, once the prisoner is rescued, the units in the prison will turn in hostility whether they are seen or not.
If the movement is slightly slower when the evacuation, the refugees will be chased and dragged into the battle. If you want to play some flowers, you can also steal the key to sneak, steal the key of the guard and the chief of the prison.
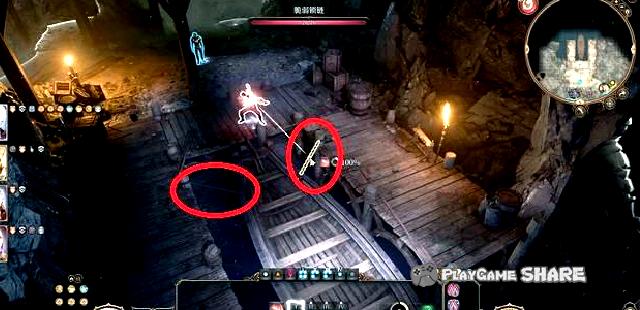
After returning to the hotel, you can get a reward to find a dwarf, but Roland is currently not in the tavern.
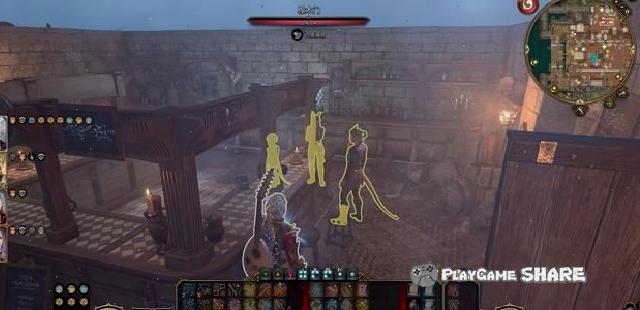
The position of Roland is shown in the figure below, the pitch fork road next to the bridge is requisitioned.
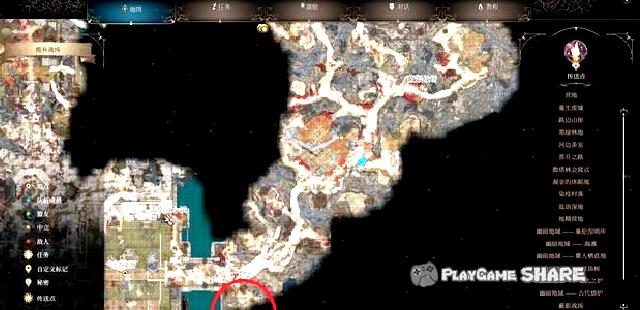
After approaching, the battle will be triggered. After completing the battle, he will also express his dissatisfaction, but he will still return to the hotel.
Back to the hotel to see that they can get a reward.
[Remarks] This part of the plot will not change before rescue Timlin.
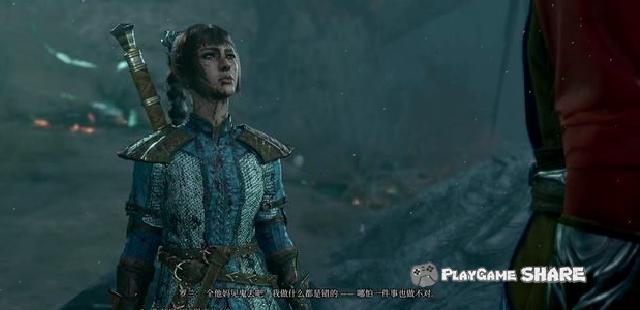
Branch task: Wake up Alder Kura (1)
Awakening Alder Kulala
On the north of the first floor of the hotel, you can see a fist lying on the bed.
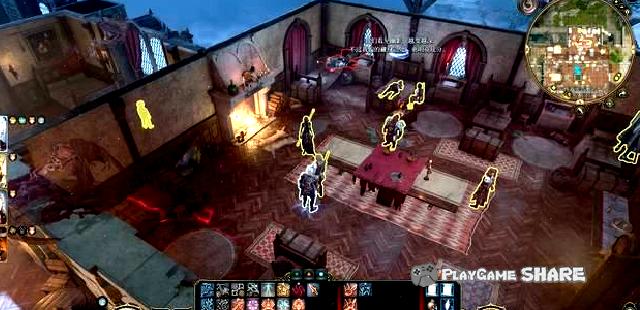
After approaching, the dialogue learned that he was influenced by the shadow, and it was difficult to restore his mind.
After getting the letter, you can go to other areas to find clues.
[Remarks] The next part is coincided with the branch line "Arabel’s Parents".
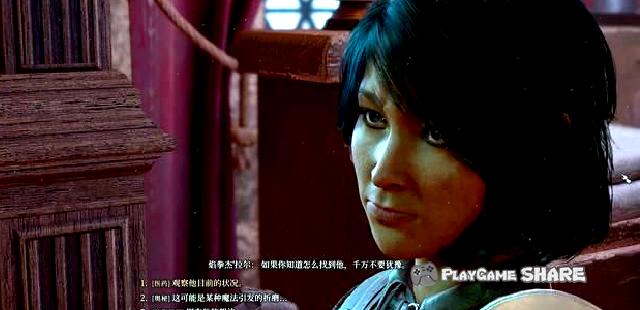
If you have not stood on the sperm side on the first chapter, or the refugees have escaped from the Druid camp, they can meet children named "Arabel" in the treatment center.
[Remarks] At the entrance of the northwest side of the treatment center.
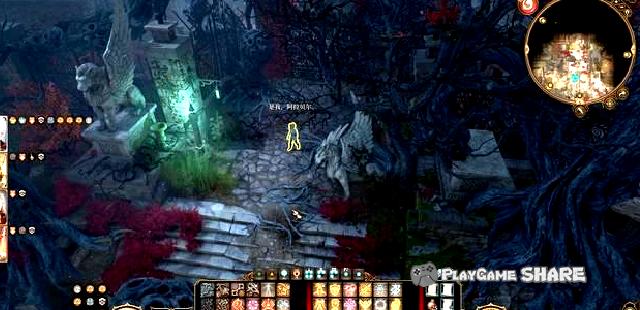
After completing the dialogue, he can let him go to the camp first, and then continue to explore.
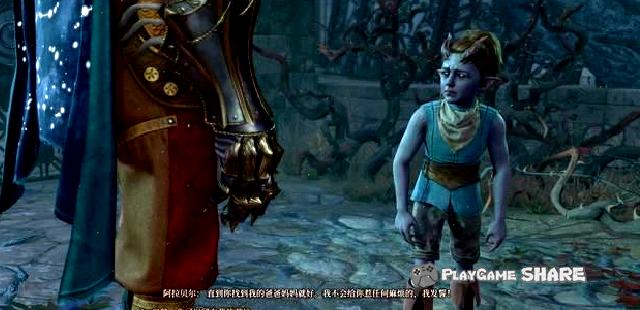
The picture below is the second floor of the treatment center. You can climb up from the outer eaves. The position of the icon below is found from the inside (near the central area of the central area).
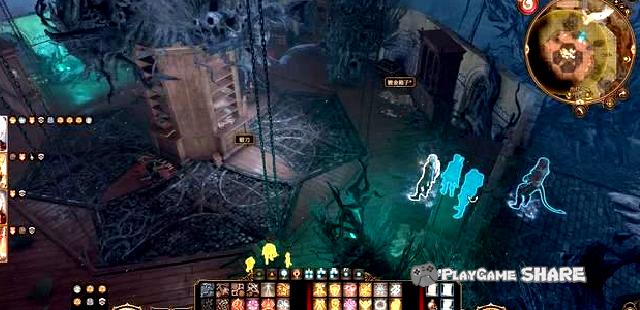
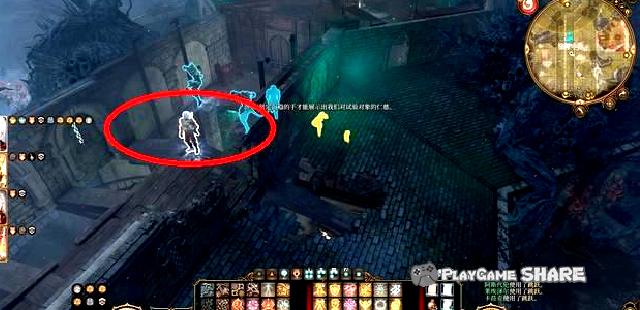
If you enter the gate of the treatment center, you will meet the nurse and you can go directly through the charm judgment.
[Remarks] Even if you do not pass the judgment, you can go in directly.
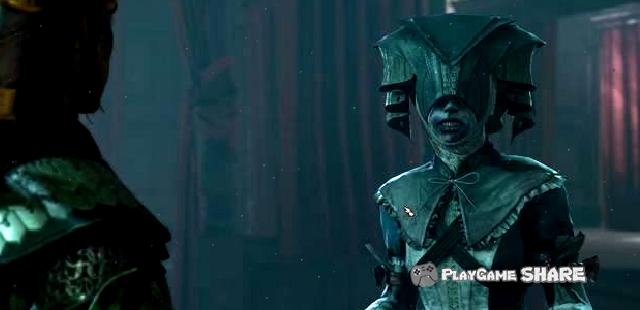
Arabel’s parents were in the next room, but they were dead at this time.
You can buy some senior poison with the nurse, and you can get some intelligence (although it is not useful) to use the necromancer at Rocky (father).
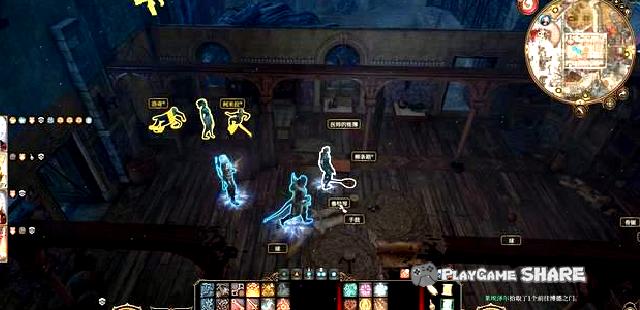
After returning to the camp, he can talk to Arabel, but he is unwilling to believe the fact that his parents are dead anyway.
Then go back to the "awakening Ald" part.

Line task: Wake up Alder Kura (2)
After the central area near the treatment center, the plot will be triggered.
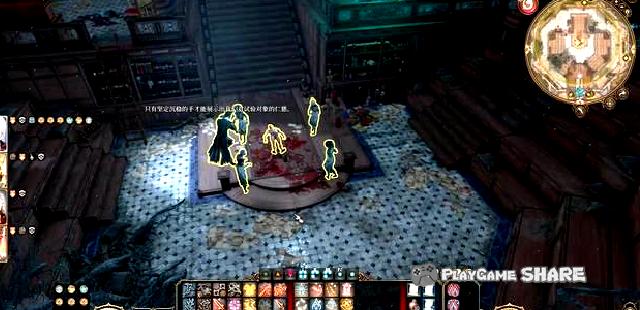
Men named "Marus Somme" are performing a killing called surgery with his "nurse".
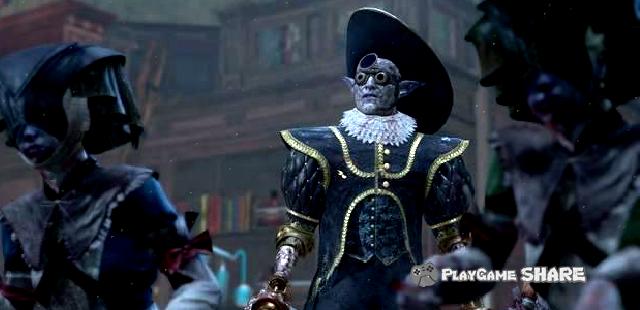
You can choose to fight directly or deceive them by judging (DC15 ~ DC19).
After cheating them, they can also use the charm of DC21 to make them use their bodies to "show the surgical process" and directly win.
[Remarks] Fighting with Marus, there is still a achievement in stopping him in the battle.
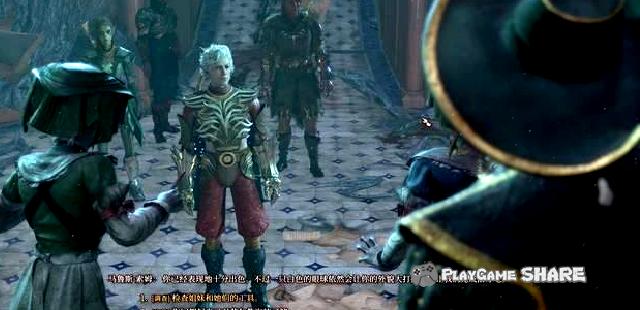
You can return to the hotel after getting "Shao Rutin" on Maruus’s body, and the key can open the upper door (although you can also go directly from the outside).
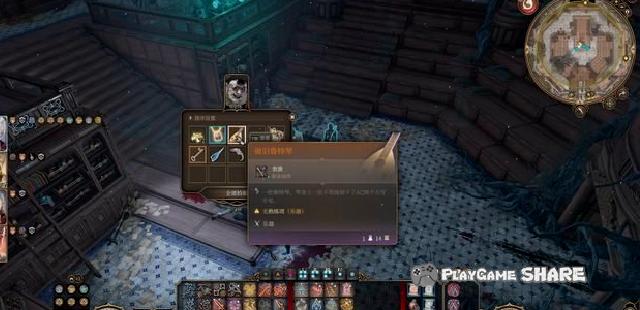
Back to the hotel, interact with Alt and use Outqin to wake him up.
According to him, he needs to find Druid named Halxin, and only in this way can he save the local curse.
Halxin is naturally the first chapter of Greater Druid.
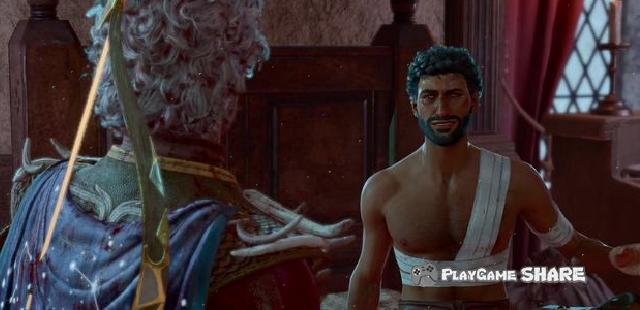
Line task: the curse of the shadow to remove the shadow
The curse of the shadow
This branch mission is connected after "Waking up Alt Cura".
After talking to Halxin at the camp, he returned to the hotel and found Alde.
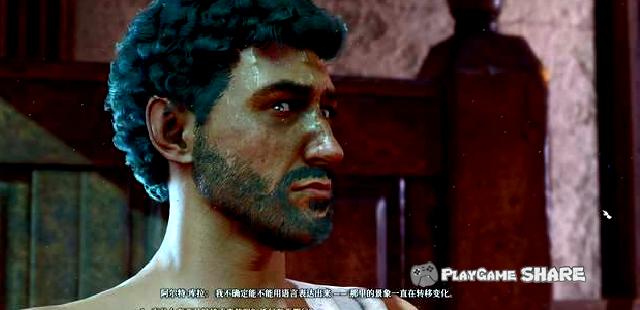
After the dialogue, Halxin will take us to the river and need to keep the portal in 3 rounds.
It is strongly recommended that you come back after obtaining the "Loshan Blood", and the number of shadows is large.
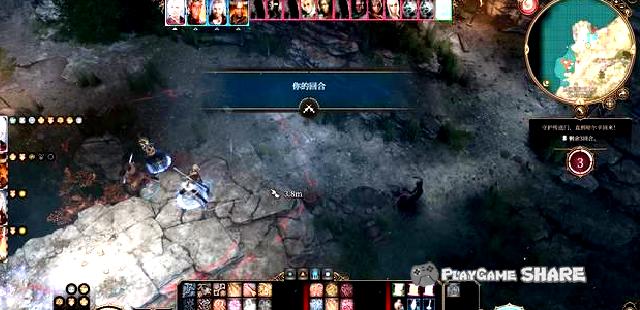
Then talk to Halxin. If the "catch and seek" incident on the battlefield before, he can tell him the child we encounter.
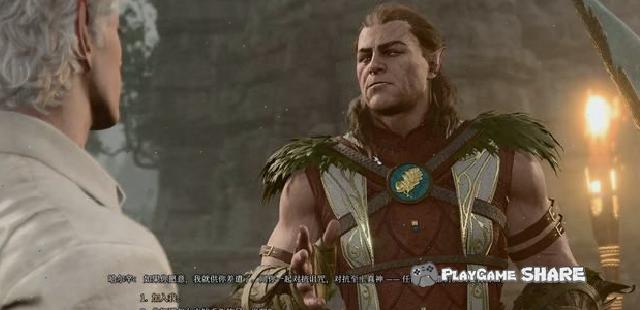
After finding the child again, the conversation will be transmitted away.
Regarding the "Hidden and Hidden" incident, the conversation after the child starts the game, two stages (recommended to enter the region alone).
① Use the detection stealth and find him near the car near the entrance.
② Use stealth potion to avoid shadows and talk to him in the house (reward ring).
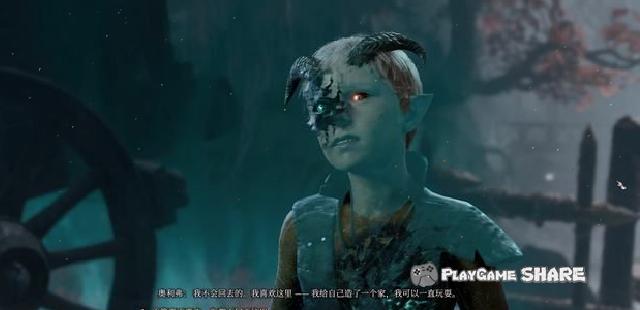
After entering the battle, kill the shadow and break his protective cover. After the conversation, return to the camp to find Halxin.
[Remarks] If the dialogue is not updated, you can complete other tasks first, and you can complete it before leaving the second chapter.
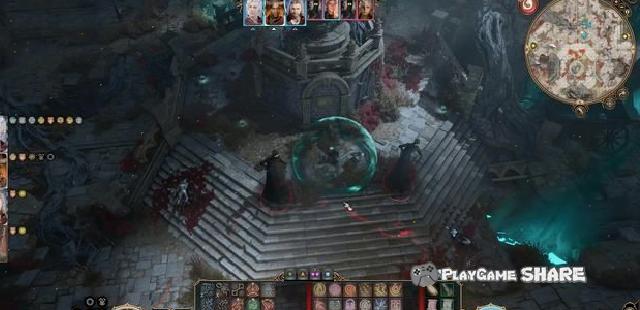
Regional General Examination: Leswen Town
15. Lei Siwen Town
Red mark-area entrance
① Tomb entrance
② Listing room, Murloc Wharf
③ Feilongguan (direction of the door of Bude)
Blue mark-task and event
① The basement of the mudwater gangsters (Selunne)
② Winery account book (the ground next to the counter)
③ Wall cracks (beams above the first layer of the moon out of the tower)
④ Moon out of the tower dungeon (rescue Tifillin/dwarf)
⑤ Ratqin (awakened Alde)
⑥ Arabel
⑦ Golden people in taxation
⑧ Dog head all ally (one floor, cut off perception)
Pharmaceutical exchange (attribute growth, dog leader next door)
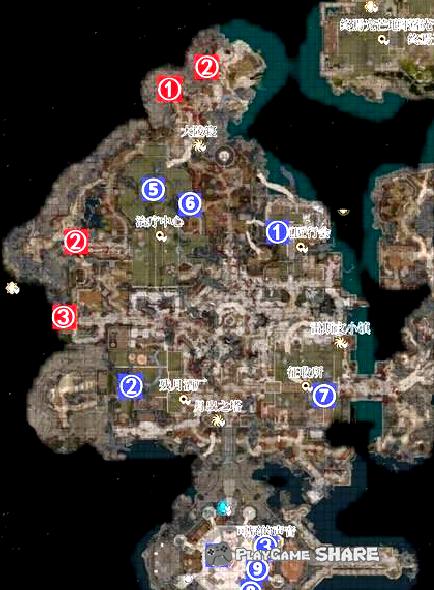
Line task: Carenie’s resistance forces
Investigating Sellennie’s resistance forces
When investigating the ruins of craftsmen in the shadow battlefield, you can receive this task (see the general location of the "Shadow Battlefield" in the specific location).
Tong Yingxin went to the mudsmith guild in the small town of Rezow, found the hidden door in the picture below and entered the basement.
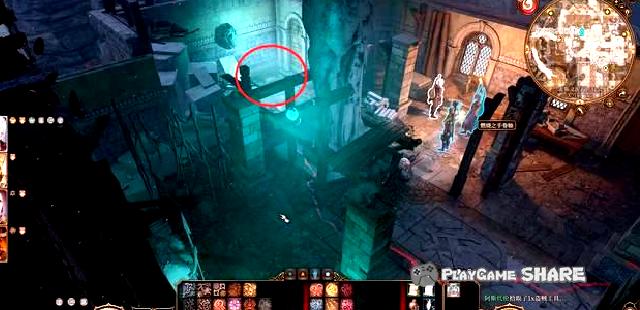
In addition to the secret door, there is another entrance, the lifting ladder on the second floor.

Find the control rod on the wall in the basement to open the door, and read the books on the script in the area to complete a part.
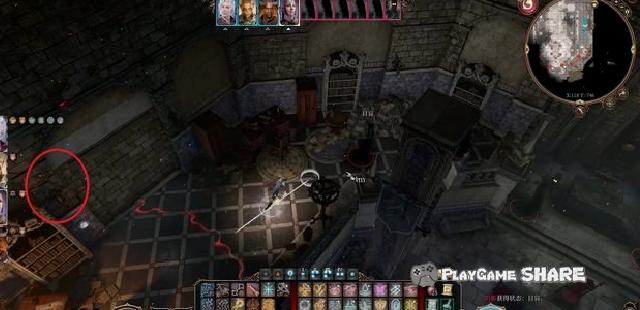
The other part is in the north ruins of the Light Hotel, from the position below.

After entering the area, there will be a group of "scared", which will cause "frightening" state to pay attention.
After killing the enemy, you can get an item that gets to the mark.
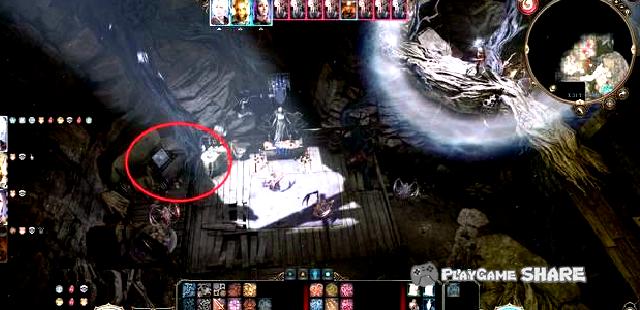
In addition, this area is connected to the underground prison of the hotel. If you are unfortunately arrested when you first enter the hotel, you can also escape without blood.
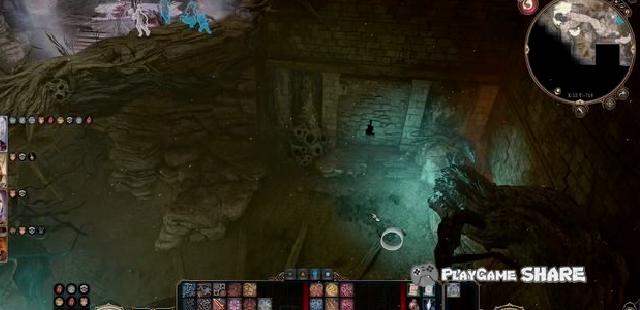
The picture below is the entrance to the prisoner.
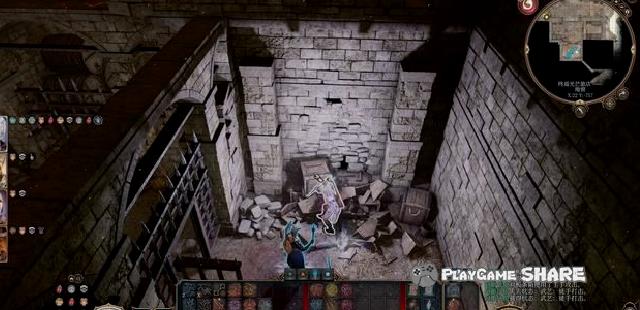
When exploring in the area, the box is also worth the "flash ring".
It can be matched with another ring to cause additional damage to the unit under the light source.
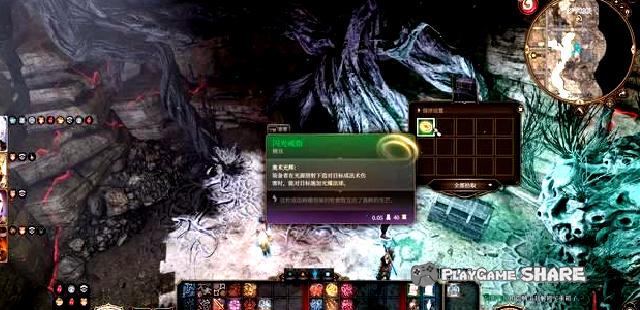
Triggering event: winery poison, mortar room, Murloc Bay
Liquor poison
After killing the wine guarantee in the winery, he got the key from him.
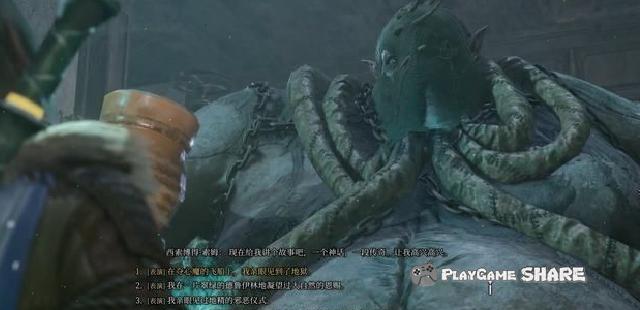
After entering the basement, investigating and studying notes can unlock the new poison formula.
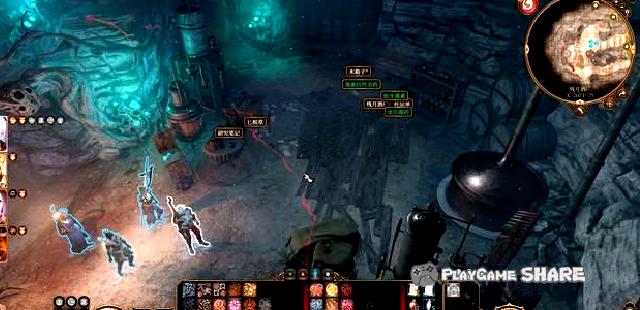
You can know the specific location of the material after a DC18 perception.
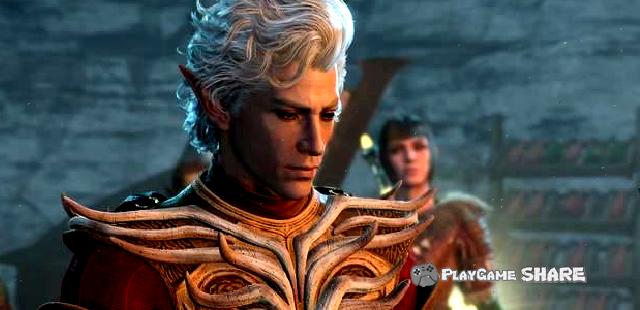
It doesn’t matter if it is not passed. The location is fixed.
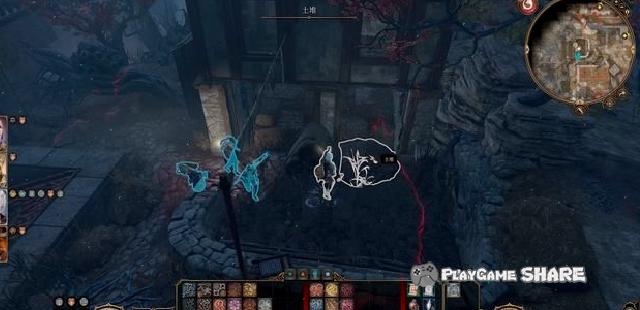
After getting the material, you can make special poison.
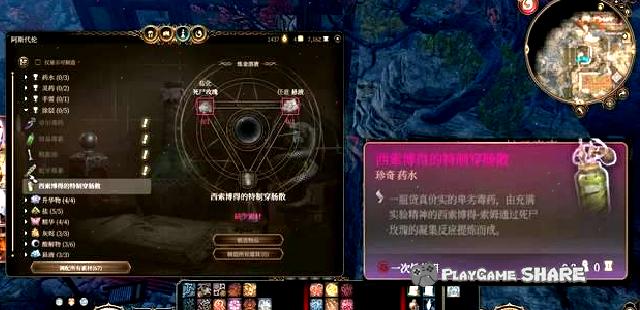
Live and Mermaid Wharf
You can see a group of shadows on the west of the small town of Reiswen. After killing them, you can enter the region to "mortar".
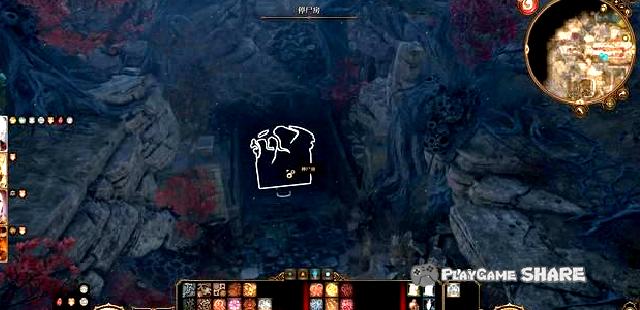
The curse inside is more powerful. You need to use the blessing of fairy or take out the moonlight.
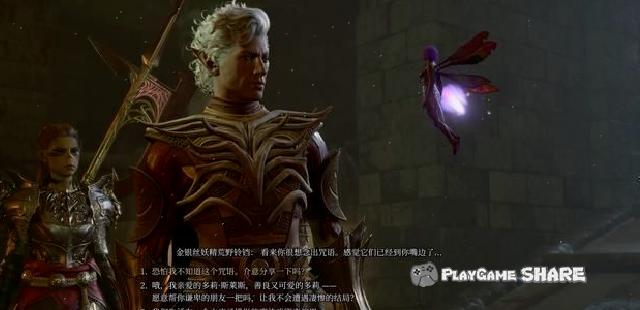
After continuing to move forward, they encountered a zombie, and each zombie had a trap, and the poisonous gas dissipated after lifting.
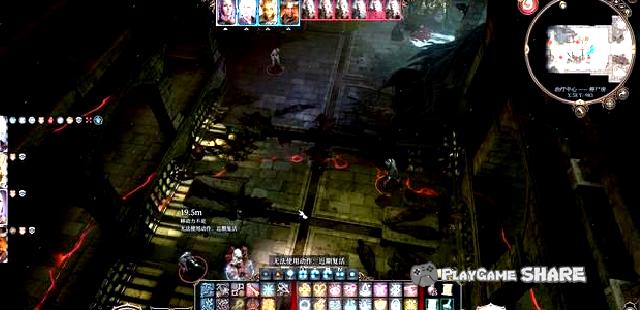
Pull down the leisure in the room on the inside, and then find the gate in the middle of the channel. Pull down another lever to open the door.
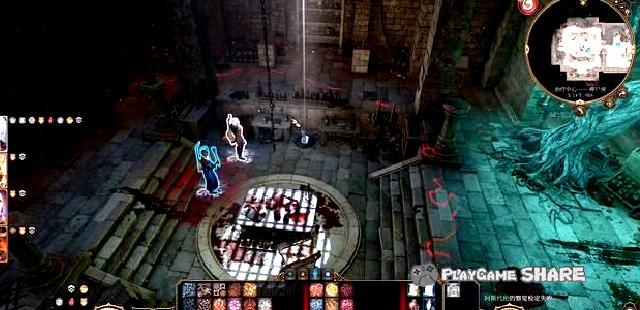
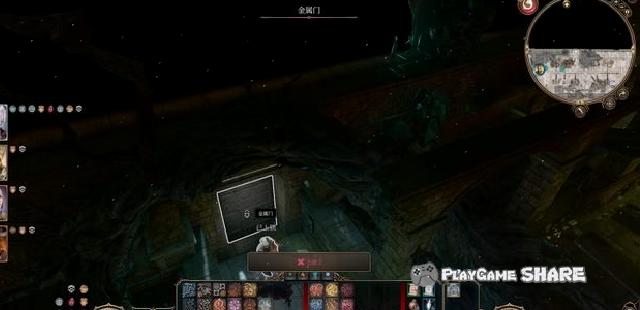
You can reach the Mermaid terminal all the way out of the door. They are all invisible and need to pay attention.
In addition, there is nothing good about toxicity along the way, and there is no good thing, you can do it without going.
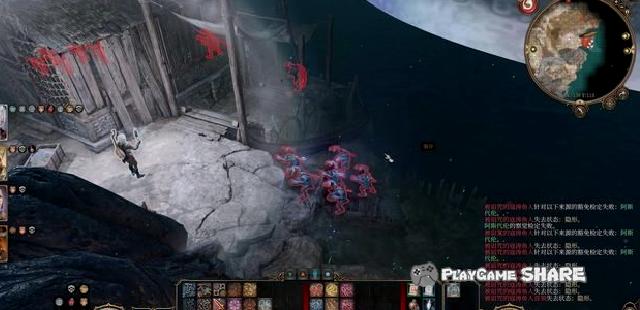
Triggering event: taxation office, the temple of Shar
The golden man who is collected
Near the taxation office, you can find several floating heads below.
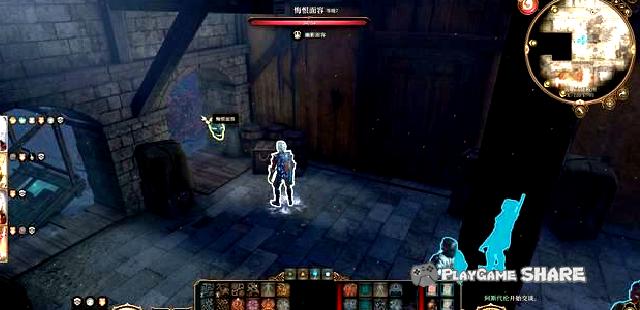
They are controlled by the golden people within the taxation office, and the conversation can trigger the dialogue.
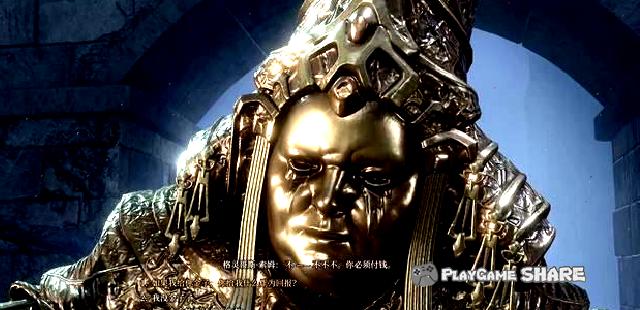
During the dialogue, the golden people will ask us for gold coins, 100 at a time without the upper limit.
Use dialogue to make it a Buddha on the spot (not), and if you fail, you will enter the battle.
[Remarks] The skull can be cleaned quickly with the priest’s necromancer.
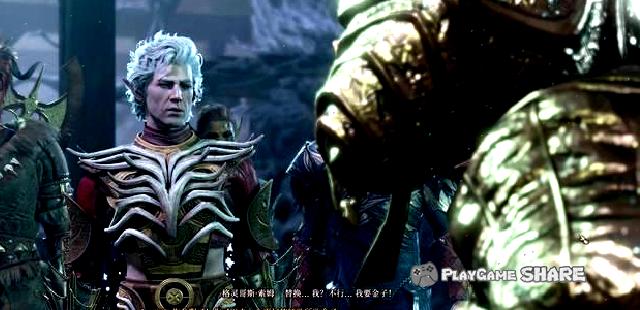
After finishing it, pick up the keys on the golden man, and open the door next to it to get some equipment.
Destroy wooden boards can also jump down, there are two boxes below.
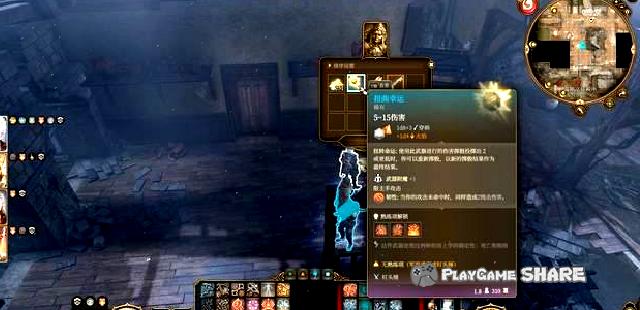
Near the center of the town, you can see the huge statue in the picture below.
There are some enemies around you, and you can investigate after solving.
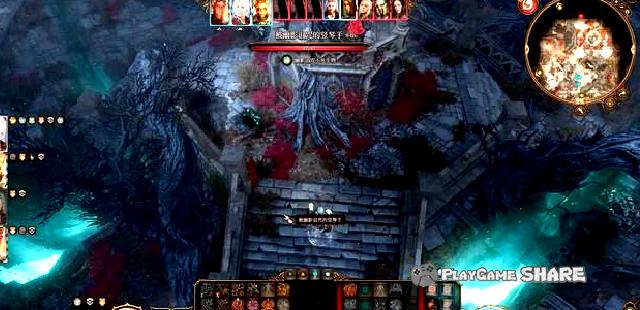
After finding the hidden door, investigate the seal stereotypes around in the order of counterclockwise to open the hidden door.
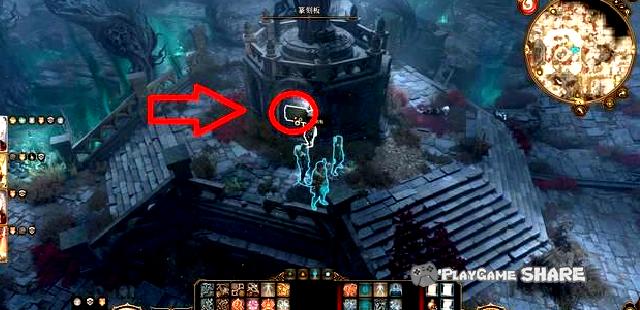
Below is the Temple of the Goddess of Shar. To investigate the statue and get the corresponding judgment of the DC14 to obtain the long break buff with attribute +5.
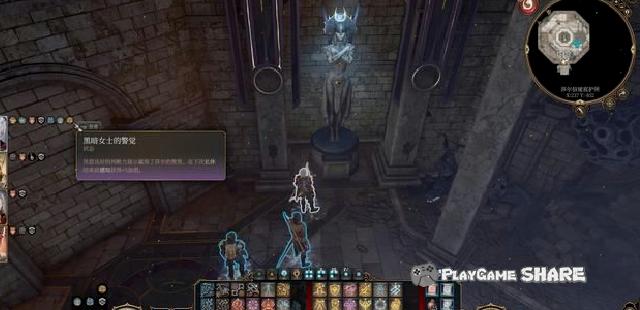
After completing the verification of the three statues, the inner door was opened, and it was Shar’s altar and ritual knife.
To investigate the altar and complete the ceremony, you can get some consumables.
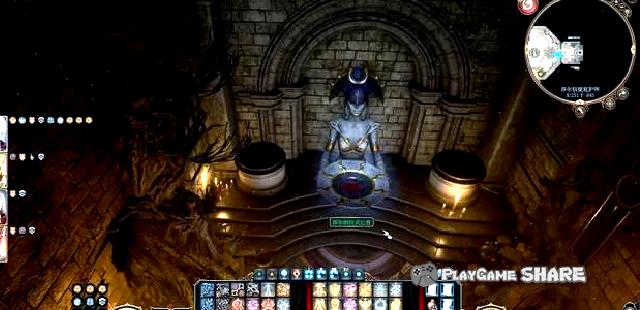
If you choose to take the knife, the hidden guard will jump out to fight.
The attributes of the guards are as follows, with a total of three, with reinforcements with corresponding attributes.
[Remarks] The purification of the priests of undead creatures can be solved quickly.
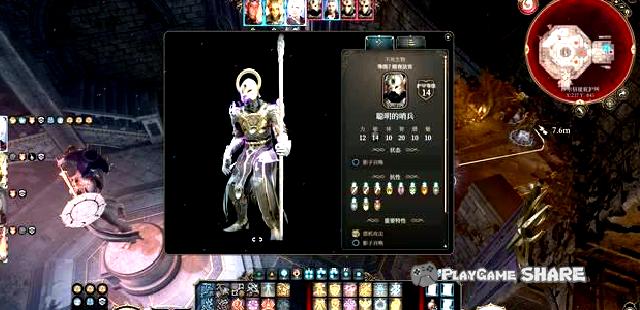
Regional general view: Geis Yanji Nurtarians
10. Geis Yanji Nurtar
Regional overall
Red mark-area entrance
① The underground entrance of the monastery
② Entrance of the cliff
③ Luoshan Dami Room
Blue mark-task-related
① Geis Yanji therapy room
② a century-old office area
③ Where the judge is located and the prism entrance
④ The history of Orevus
Green mark-event
① The Eggs of the Gis Yanji
② Painting the statue of the Queen
③ Inquire about the judge
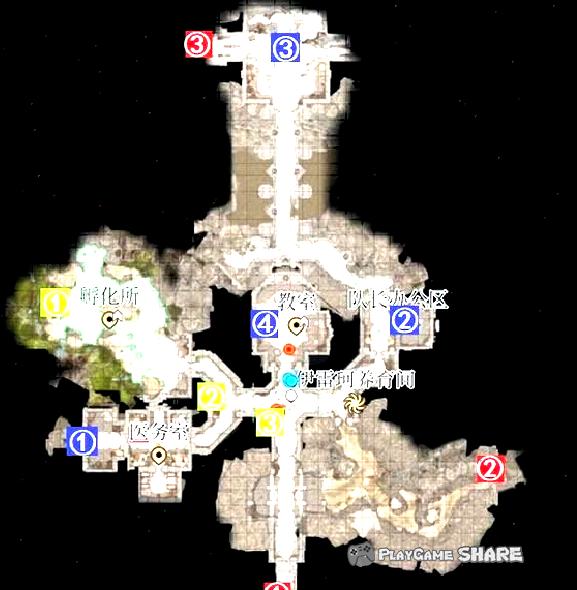
Regional general view: Georai Monastery Courtyard (internal)
11. Gorgeous Monastery (internal)
Regional overall
Red mark-monastery, the entrance to the raising room
① The vines next to the transmission point, after climbing up, destroy the wooden board (Little Dharma Nest)
② Outside the gate, there is a vine on the second floor after climbing the wooden box on the left
③ The cliff route, there is a downward vine on the way (the exit of the cliff in the breeding room)
④ Mountain Cliff route
Blue mark-task, location
① Luoshan Daza Ceremony Related
② Linking to the dog head nest (jumping to the northwest highland)
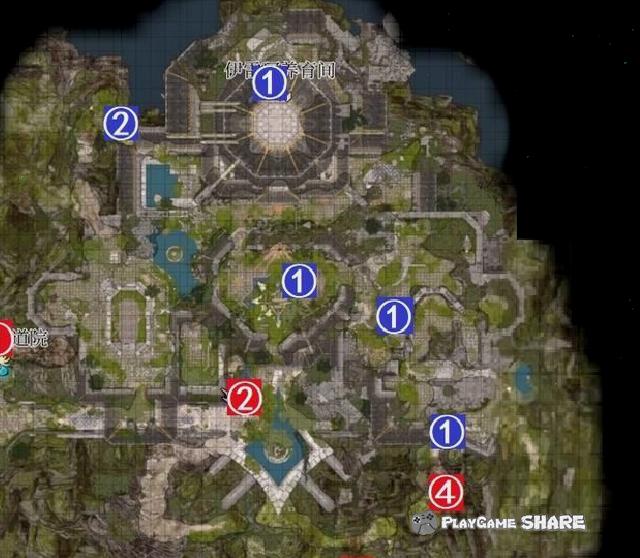
Line task: Luoshan Da’s blood
Luoshan Da’s blood
On the second floor of the Monuada Monastery, you can see the ceremony below.
The corresponding types of weapons need to be placed on the four stone tables, the correct weapons will shine, and the errors will be damaged by 5 points, and the characters will be forced to fall.
If there are corresponding weapons types on the body, just place it.
One has been placed in the default. The three weapons required are "war hammers", "nail head hammer", "long sword", and "Tomahawk". The glass on the ground can also be prompted.
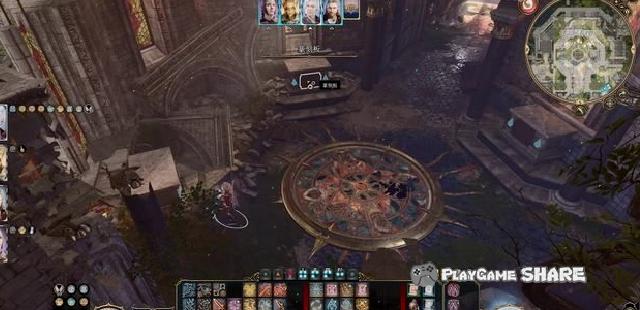
If you do not carry the corresponding weapon, it is also possible to press the normal preparation ceremony of the route below.
In the figure below, the left side of the vine climb up to be the eagle nest, and the door on the right is a guard place.
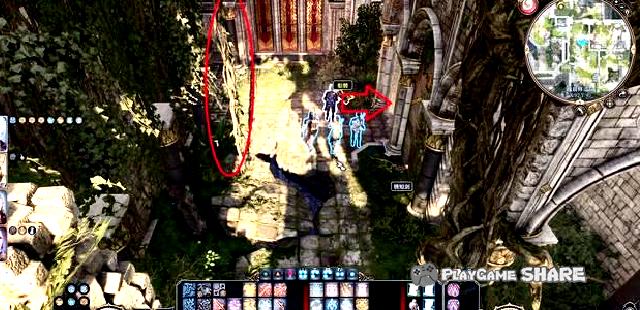
The weapon in the eagle nest is "ritual war hammer", and there are three routes to reach.
① It is the vine mentioned earlier
② After entering the door on the left side of the figure below to defeat a group of small law monsters and jump up from a room.
③ Broken wooden boards below, and you can see the vines when you turn around.
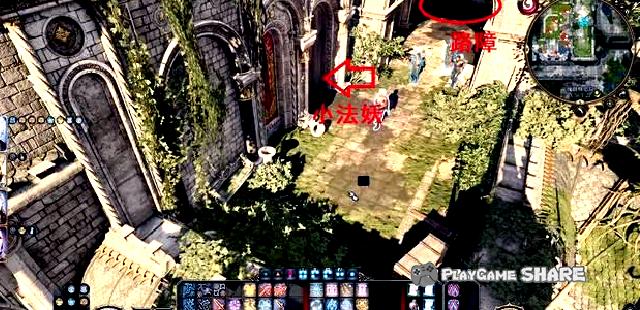
The weapon of the guard place is "Tomahawk", and there are also three routes.
① The door mentioned earlier, the guard will attack the player directly after opening the door.
② The route below is turned out of the window from the ritual location on the right.
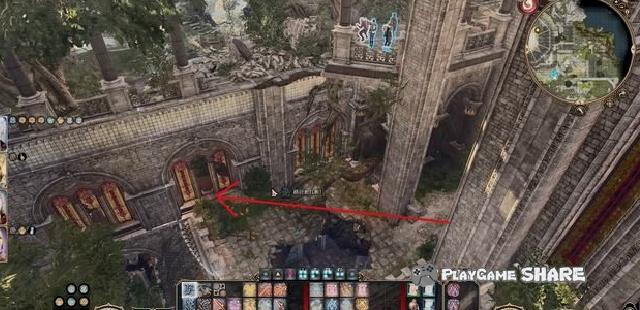
③ Broken the marked wall surface.
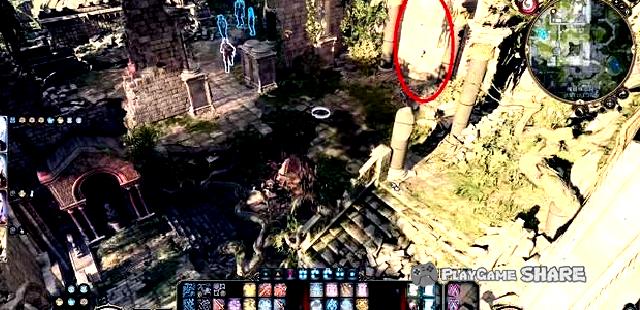
The third weapon "rust nail hammer" is in the tomb of the master in the distance, and shovel needs to be used.
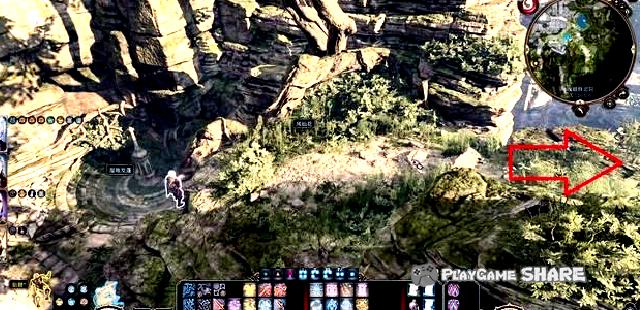
The wall on the side will be opened after the neat side will be opened, and the mark of Luoshanda will be obtained in it.
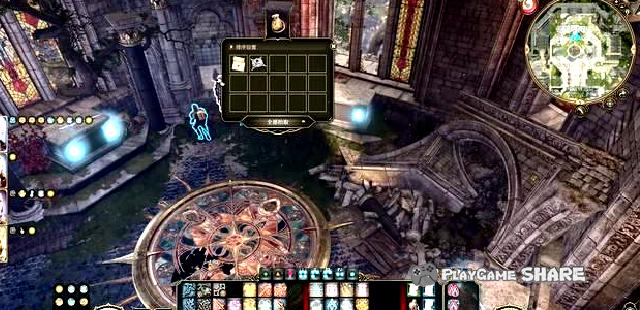
Then go to the nurturing room and find a hidden passage on the left side of the judge’s room.
Just adjust the direction of the statue as follows.
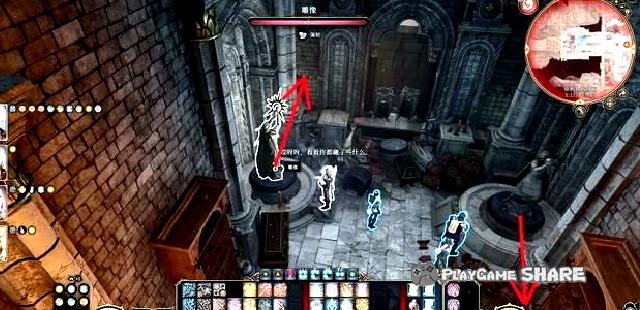
Then you need to pass through a passage, the energy source of the trap and destroying the light curtain.
The position of the energy source is shown below.
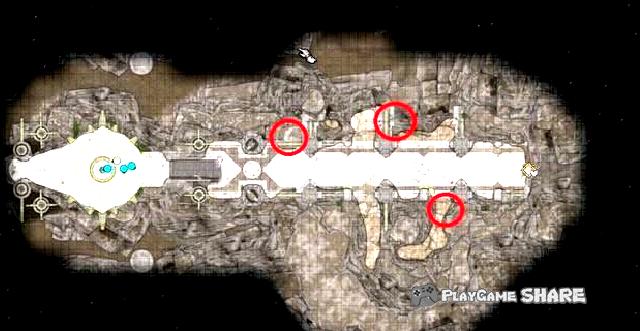
Finally, you can get the imprint into the groove to get the equipment "Luo Shan Da", which is very easy to use when dealing with immortal creatures.
[Note] The scope of the range of this equipment may trigger the hostility of some neutral units. The most typical is the "treatment center", the nurse next to the body of Arabel’s parents.
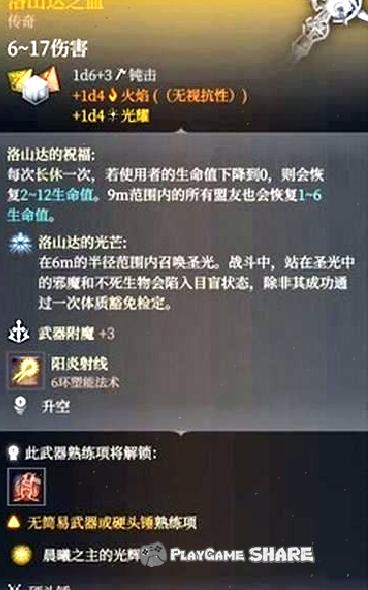
You can also take the blood of Loshan Da without using the mark, but you need to remove the four surrounding energy tower around the number of rounds.
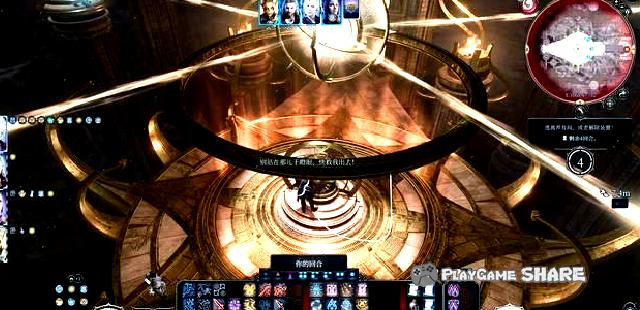
Regional general view: Georai Monastery (external)
12.
Regional overall
Red mark-area entrance
① The entrance of the ground camping ground (fork road on the left side of the entrance)
② Get the shadow battlefield entrance
③ Entrance entrance
Blue mark-event and place
① Direct cable car (strength DC)
② Bird’s Nest (small key)
③ trap area
④ necromancer
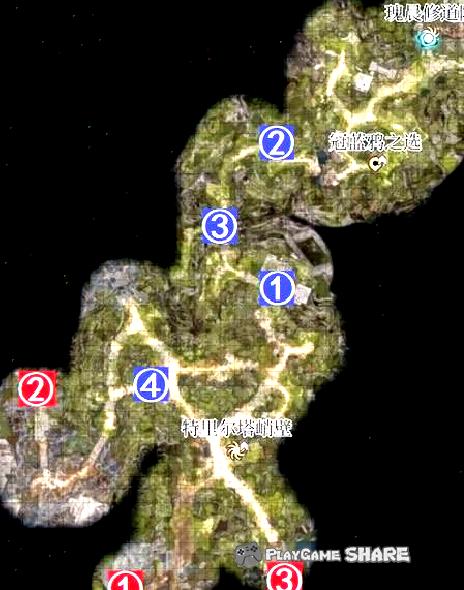
Regional Overall: Sar’s trial
13. Sar’s trial
Regional overall
① Barcelona
② Demon Yoge
③ Trial entrance fork (jump mushroom)
④ Broken mirror (collecting debris and literature)
⑤ Rat nest (evil magic array)
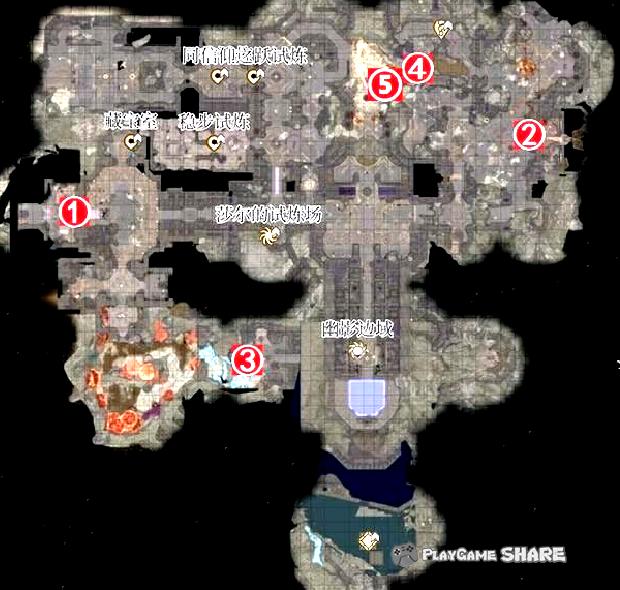
Line task: Raphael’s enemies
Raphael’s enemy
This task triggered the task when the Town of Reiswen was close to the tomb.
Raphael appeared and hoped that we would kill a demon in the tomb.
[Remarks] This plot is also related to Asdon’s companion plot.

In Shar’s trial, the route that can see the "shift beast" leads to the demon.
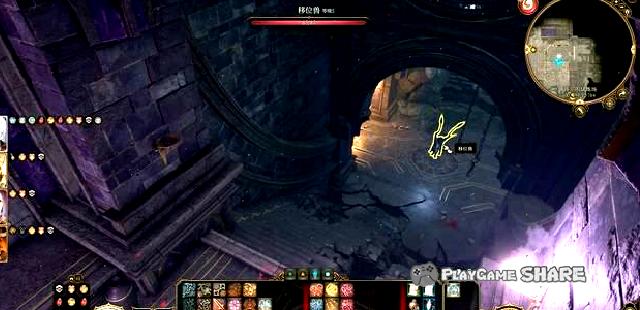
After entering the area, the dialogue will be triggered. If you do not want to fight, you can convince it.
[Remarks] Stealing things before triggering the dialogue will enter the battle directly.
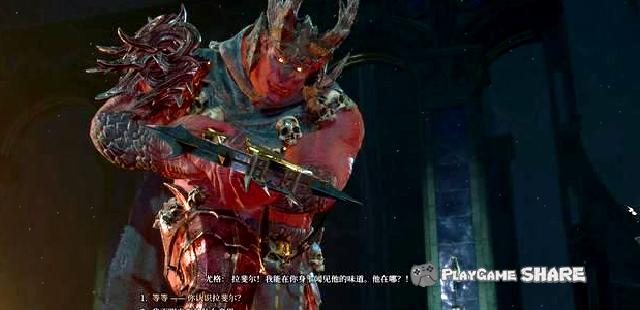
You can directly empty the area through the form of a dialogue, and the order is "Suspicious Contracts → Except the follower → remove yourself."
[Remarks] These options only appear during the first trigger dialogue. If you choose to assist in the investigation, you can only get it through the battle.
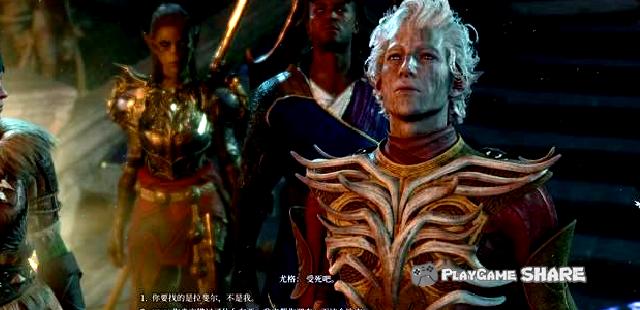
Don’t think about the counter-beast, it is loyal even if the spider meat is charm.
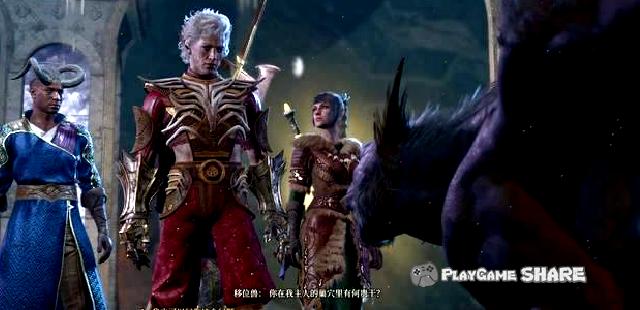
You can get a rare crossbow from Ug, and the gemstone required by the main line can be found near its seat (if you don’t steal it if you don’t make a branch).
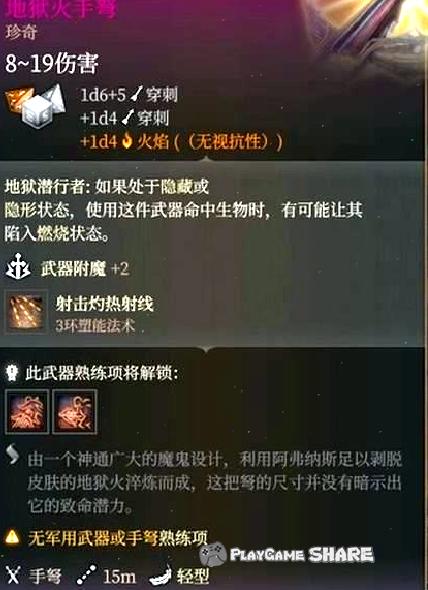
Triggering event: Rat group, Shar Endi
Demons
In the regional "Sar’s Trial", many mice can be found. Their conversations are basically the same. During any one of them will cause them to be hostile.

From the location below, you find the altar at the mark of FIG. 2 and learn that it is the product of the devil ritual.
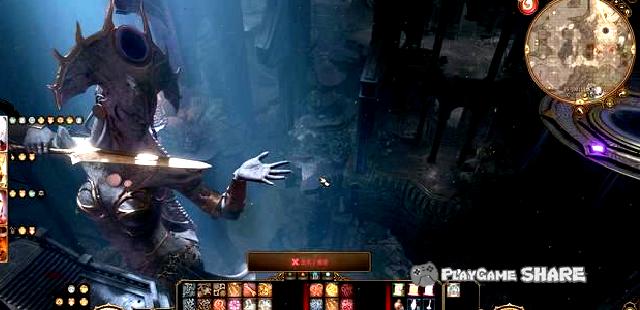

Choose to let it go in the dialogue to know the two hidden treasures (but there are not many things).
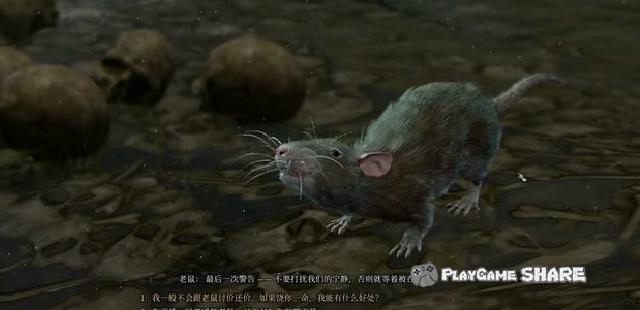
In addition, finding the altar surrounded by mice in the area can get Shar’s blessing (the effect is shown in the figure).
[Remarks] This blessing will cover the existing elixir effect.
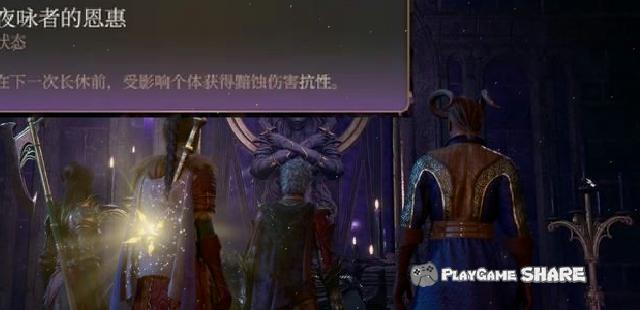
Triggering event: The Tower of the Monthly Out of the Monthly
Barcelona’s secret room
On the second floor of the tower of the month, you can find the room of Barcelona (the alarm will not be triggered).
There are some switches on the bookshelf in the figure below, but they are all obstacles and cause damage.
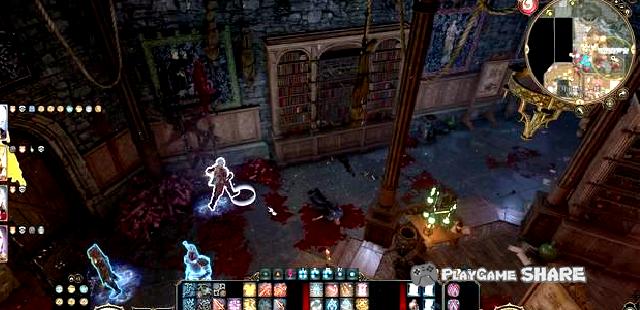
Take the "heart" on the table and put it in the altar next to the bookshelf to open the back room.
There are some research on moonlight lamps, and some collections of Barcelona.
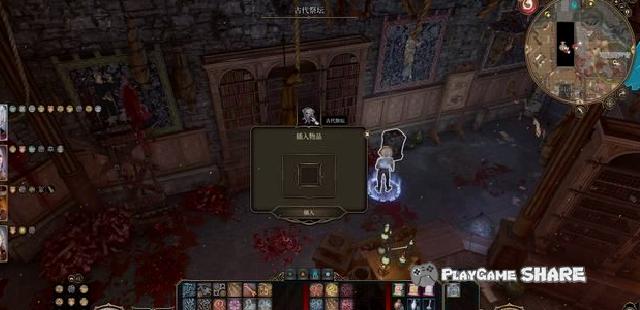
Survey suspicious sound
On the first floor of the tower of the moon, the dialogue of the food in the right room on the right room learned that there was a strange voice in the tower.
Find a ladder from the first floor to climb up, and investigate the wall seam of the icon below to trigger the plot.
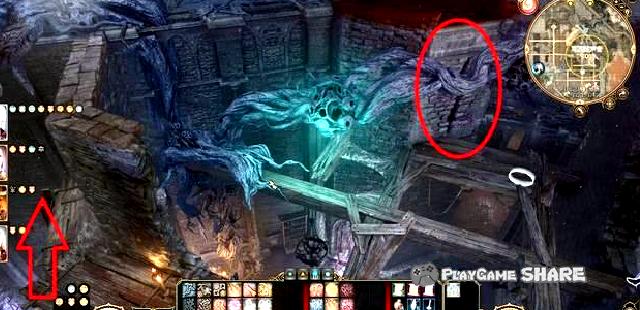
As soon as you judge the shot as soon as possible, if you do not work, you will move to the prisoner of the main brain nest (connecting the monthly outlet prison prisoner’s escape route).
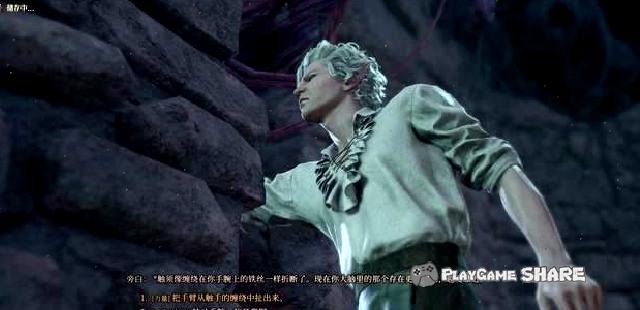
Assist in research
On the first layer of the tower of the month, find the NPC of the icon below to start the conversation.
According to the role of the dialogue, you can get a bottle of special potion (permanently enhanced attribute) after contributing blood.
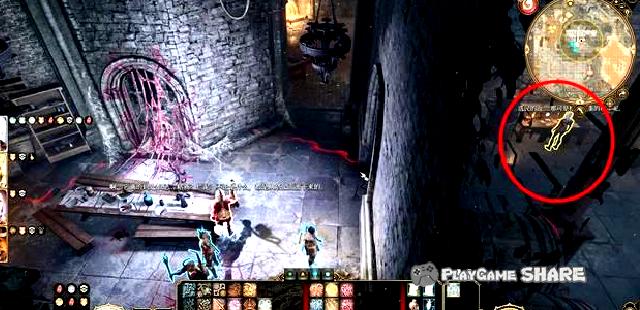
Regional general view: seizing the nest of the heart
16. Getting the Magic Nest Point
① lead to BOSS battle
② Incubation area, rescue the Duke Guard and Saifeluo
③ Cultivation area, Will mission
④ The Barcelona Research Zone, seizing the magic stone monument
⑤ Soul maid
⑥ Prisoner, connect the moonlight tower dungeon
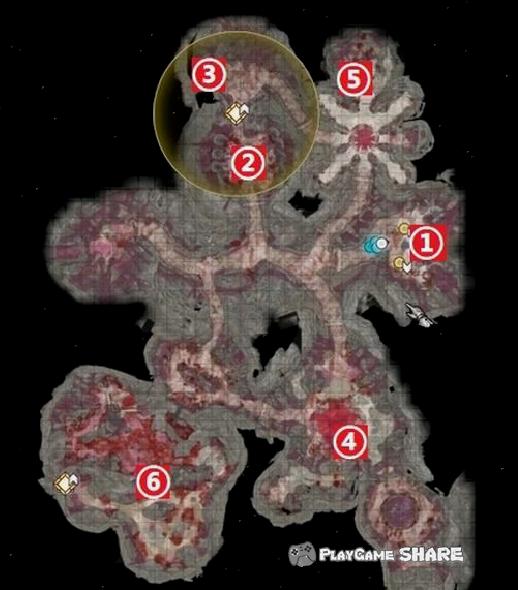
Line task: Mizola’s property
Mizola’s property
Take Well to the tower of the month in the main line process, and you can take this task before the entrance.
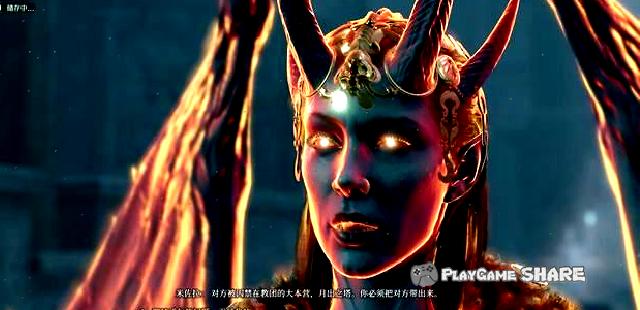
Through negotiations, Mizola promised to "reduce" Verr.

After that, in the second half of the second chapter, Mizola’s property was found in the main brain nest point -Mizola himself (or the monster).
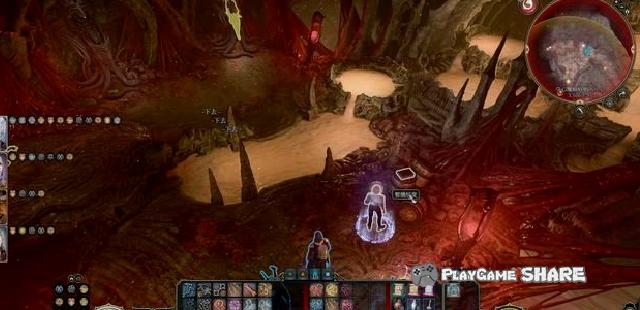
After the investigation agency, choose to release her out.
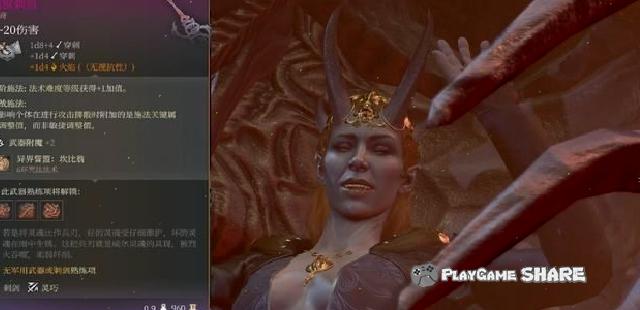
Regional Total Observatory: Levonton
17. Liwenton and Flying Dragon Fortress
Regional overall
Red mark-area connection point
① Under the temple
② Fireworks bear basement and material location
③ Bulk Tibetan
④ water well entrance
⑤ Fortress prison
⑥ Hidden in the harpist
Blue mark-task-related
① Fireworks Bear
② Temple murder case
③ Looking for "Library"
④ Find a clown
⑤ Find a pigeon
⑥ Asdon Personal Line
⑦ Shadow Personal Line
⑧ Will Personal Line
Laezel Personal Line (Raphael)
Green mark-event and NPC
① Freshmen seize the demon
② The legendary item of Qi Giant Spirit
③ Little businessman
④ Olympic
⑤ trap area
⑥ Nine-finger Trade Union and Stone Lord
Nabel’s performance
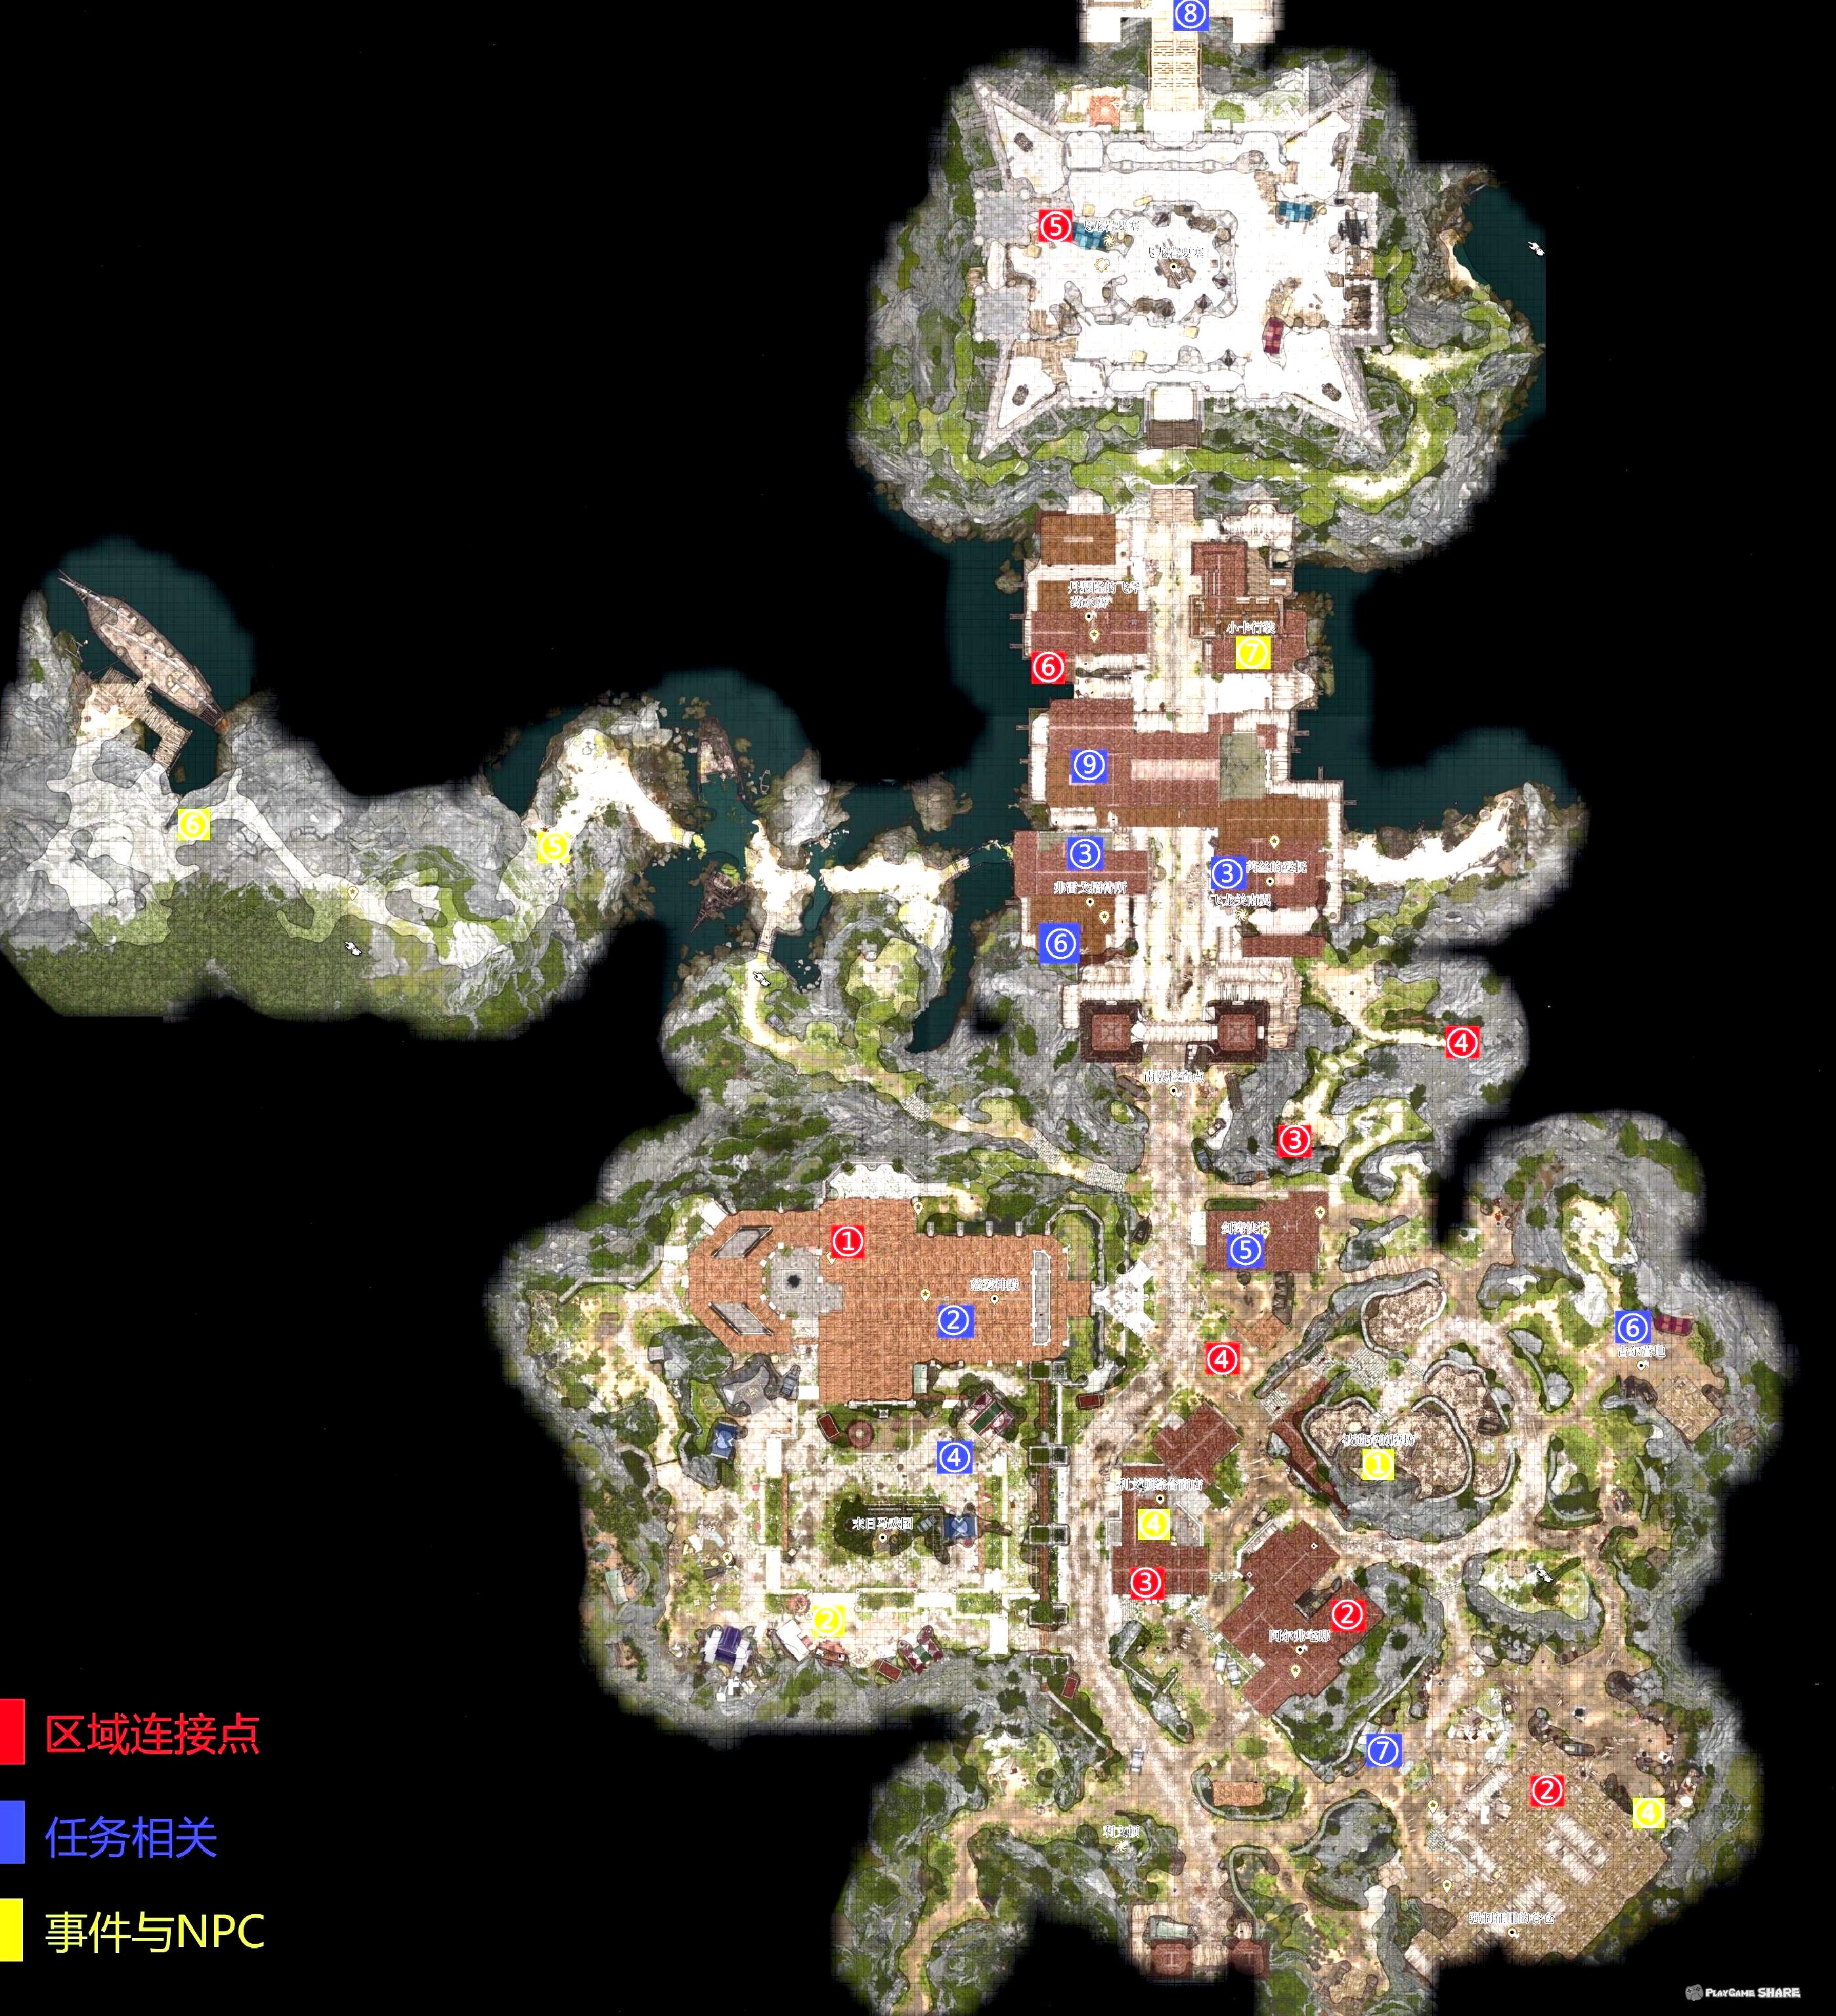
Line task: The revenge of the iron hand dwarf
Revenge for iron hand dwarf
After entering the cave from the northwest of Levinton, triggering this task needs to meet the following conditions:
① The first chapter helps the dwarf and the king of the people in the "dark region".
② Chapter 1, confront and protect the dwarf in the "Revenge Furnace".
③ Chapter 2, rescue the dwarf at the bottom cell of the "Moon Tower".
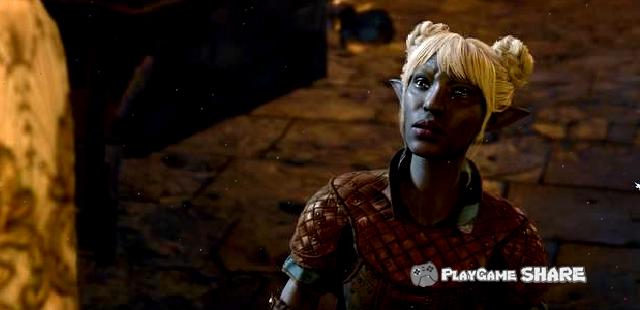
You can buy "flash bombs" dedicated to steel guards at the hidden store.
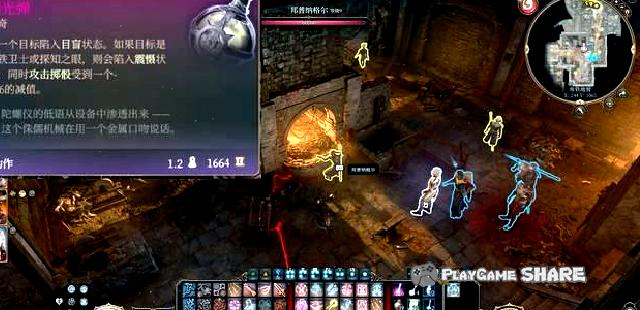
Talk to the boss of the iron hand, and he hoped that we sneaked into the steel guard’s workshop and detonated it.
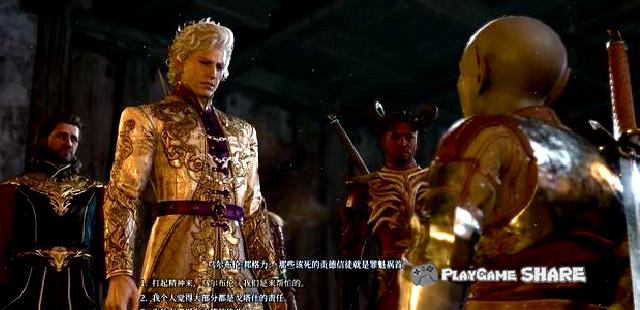
You can choose to suspend the damage and try how to blast. You can still get explosives.
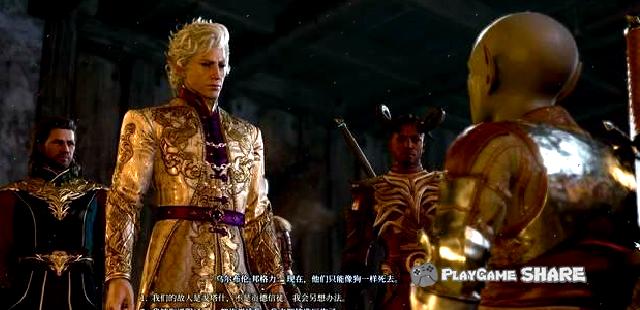
Pull the lever next to the basement ladder to unlock the entrance, and you can spread it from the Levon bowls above above.
The subsequent tasks need to be advanced after entering the city.

Line task: The revenge of the iron hand dwarf (2)
After entering Xiacheng District, if you assist the king in the dark area of Chapter 1, you can find the assistant to seize the demon in the light.

He will provide some new products and tell us that he has disappeared.
[Remarks] This branch line with the sub-lines of the Steel Guardian Workshop can be completed at the same time.
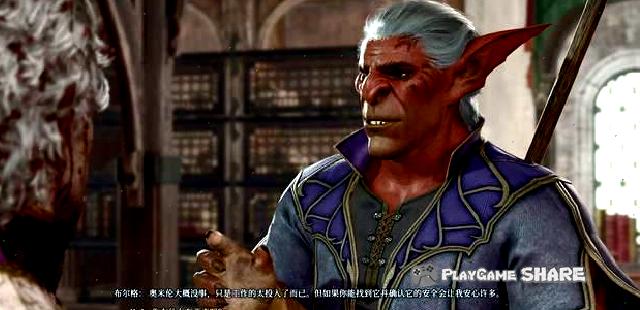
In addition, you can also go to the "House of Water Queen" south of the workshop to participate in the funeral and understand the dead members.
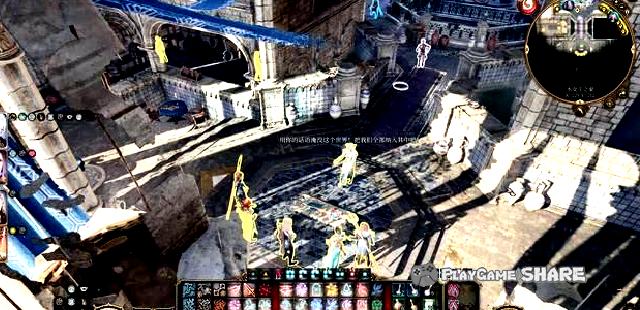
After the dialogue, you can take the task to find the "giant beast" in their mouths.

There are three ways to sneak into the workshop:
① Jump into the area from the south shore and find a door to unlock it (easy to be discovered by the guards).
② Large swinging all the way into the room with knocking (just avoid the guards).
③ The location of the figure below, change the fog into, it is recommended to open the round mode.
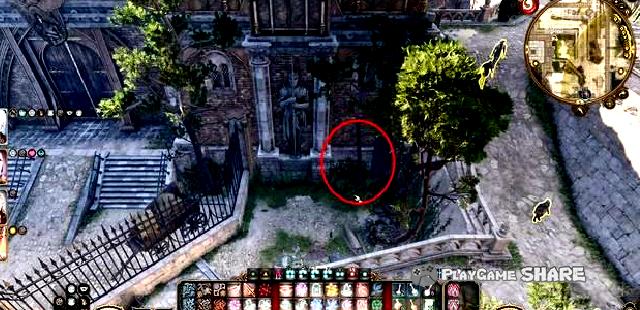
After entering, you can see two enemies, you can ignore them directly from the top.
Internal NPCs are not hostile.
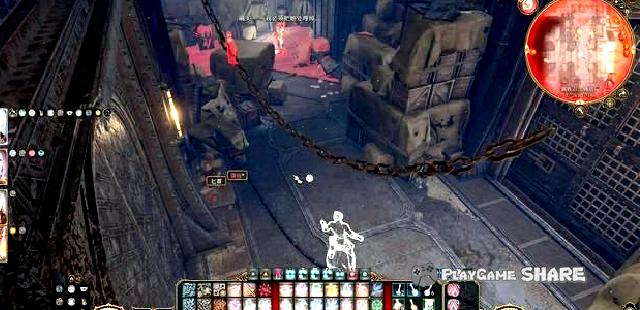
After being close to the crowd, the plot was triggered. It turned out that Gentle believers were also worked by Gossh with hostages and stayed up.
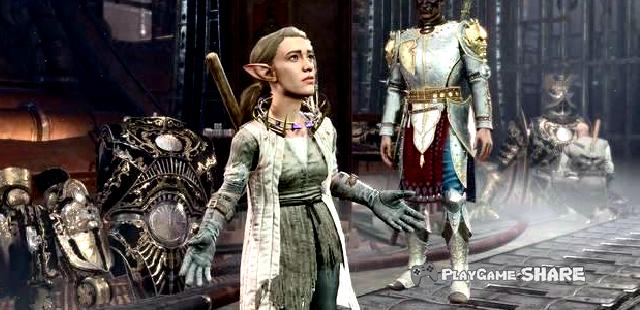
In addition, the collar they wear will be controlled by the supervision crystal.
[Remarks] Once fighting, the crystals in the hands of the supervisors need to be paid attention to, which will cause prisoners to die after triggering.
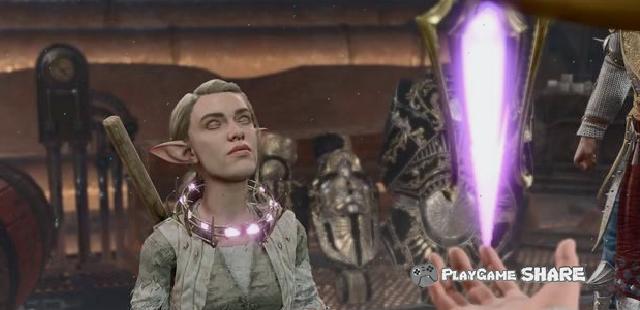
After that, you can get a crystal through the verification and walk around at will.
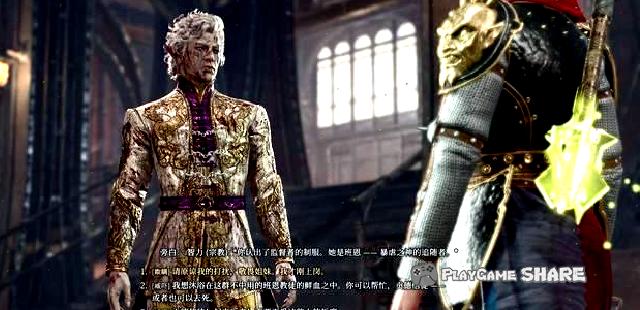
After obtaining the relevant information of the hostages inside, you can go to the ground to find out intelligence.
It should be noted that the underground is the restricted area. After being discovered, it will cause fighting, resulting in the context of steel guards in the city.

There are two ways to go down. One is to take the elevator (there are anti-hidden, not recommended).
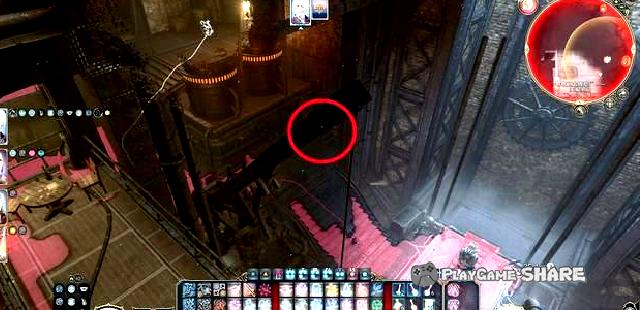
If you just want to complete the dwarf’s blasting task, you can kill them directly all the way to place the bomb.
The Titan, who keeps the control panel, drops the legendary long bow.
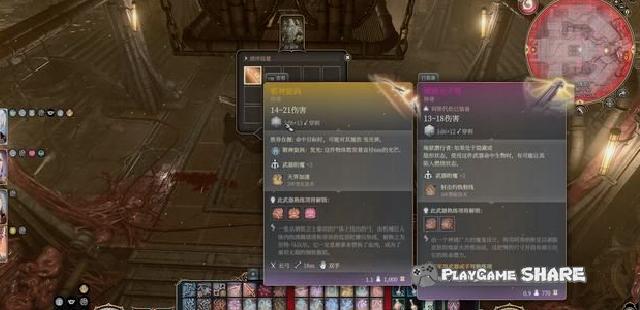
Line task: The revenge of the iron hand dwarf (3)
If you choose to help believers, you need to leave the workshop and unlock the other side of the port to enter the "Flem Freight".
After cleaning up the enemy, move the box and enter the lower layer from the living door.
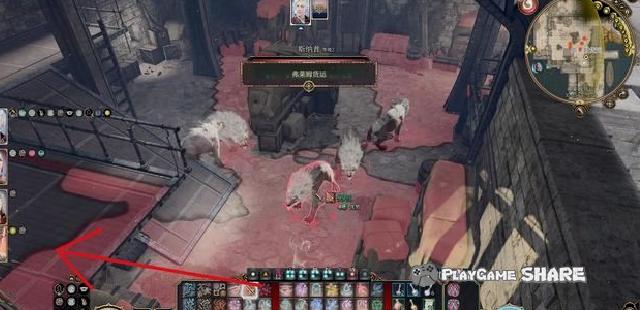
When he encountered a red hammer at the lower level, the submarine he made is actually a "giant beast."
Choosing to take him away can complete some tasks, but he cannot go to prison.
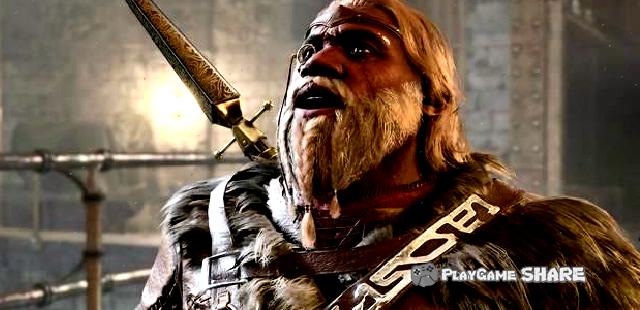
Temporarily let go of the red hammer to go to the iron throne prison, and will receive a communication from Getash on the way.
【Important Branch Note】
① Once you choose to break into prison, Gotash’s related forces will directly hostile with players.
② If Gotash is killed before triging the task, the red hammer will leave the submarine directly and cannot go to prison.
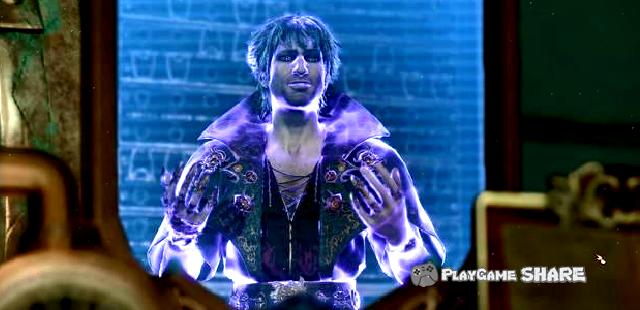
After entering the prison, you can hear the call of Omeren (the dark area seizing the demon), and learned that the Duke Gao was also detained here.
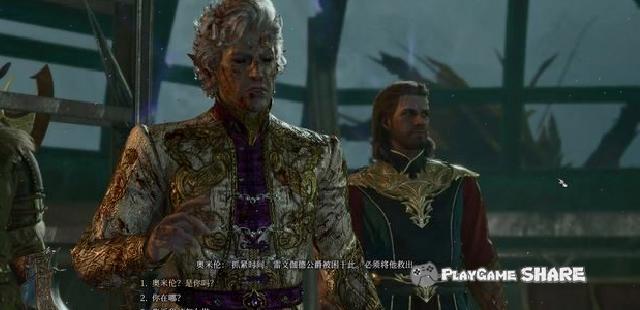
The limited time in this area is 6 rounds, it is recommended that all members drink the speed of speed.
The control rod next to the door can open the door to save people. The murder is not high.
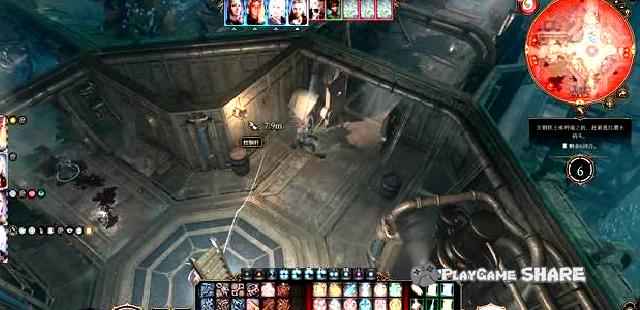
The figure below is the prison map and related personnel position:
① hostage (except beside the stairs)
② Duke of Gao
③ Ceremony
④ Some treasure chests
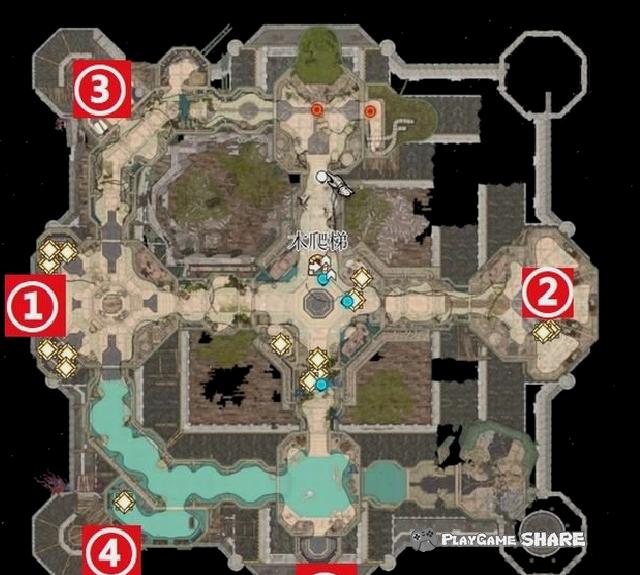
After successfully saving people to leave, it will be surrounded by the trendy forces when they go ashore, letting us hand over red hammer.
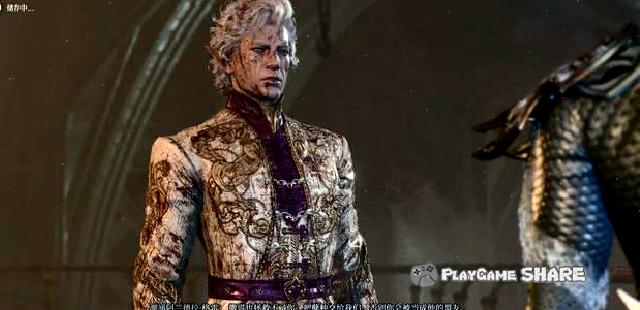
Surprising the red hammer can avoid fighting and get a piece of equipment.
[Remarks] If you choose to fight, the "non-fatal attack" will cause the red hammer to "be taken away" and will also be hostile to the tide forces.
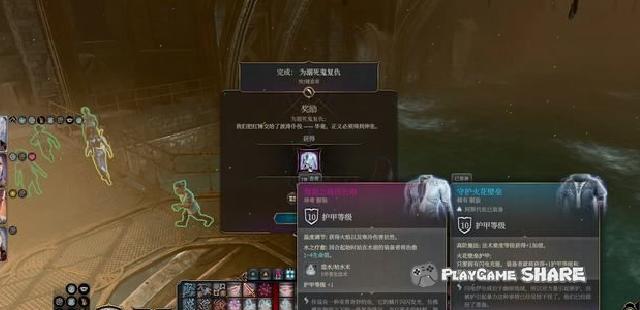
Line task: The revenge of the iron hand dwarf (4)
This task is also associated with Will’s partner tasks. The branch is manifested in the following two ways:
① After participating in the award ceremony, enter the steel throne without a long break (see Mizola).
② After participating in the award ceremony, I saw Mizora in a long break and let Will accept her proposal.

Mizola’s proposal was "keeping the duke’s life, but Will’s soul belongs to her."
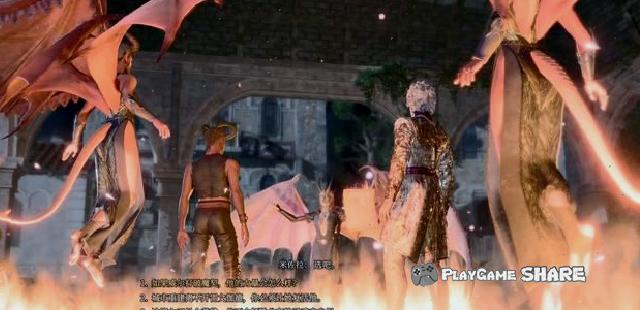
If you choose to rescue the Duke of Gao, he will be alive when he enters the Steel Throne (can be rescued).
Conversely, after refusal, he could only take away his body and could not be resurrected.
[Remarks] It is worth mentioning that after taking away the corpse of the Duke Gao, you can also ask some relevant information with necromancer.
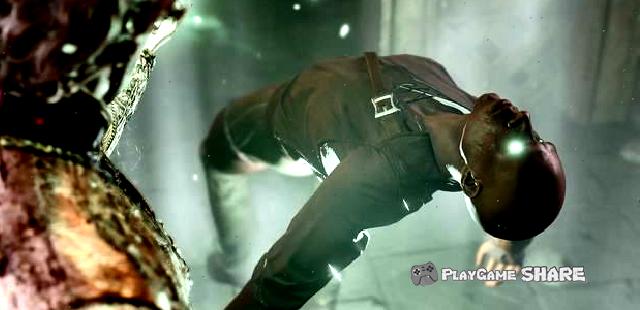
If Duke Gao can survive, players can let the monarchs "by the way" to protect him by dialogue, so that he can join the camp and understand the "another way" of the crisis.
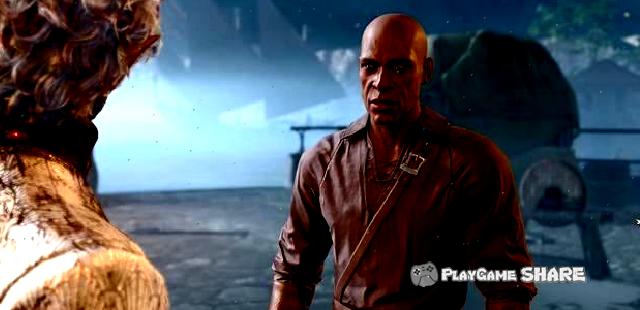
In addition, he will reach a reconciliation with Will to assist us in the final battle.

After promising Mizola’s proposal, she would also stay in the camp. After choosing "need to be rewarded", she would help her to assist us in the final battle by judging.
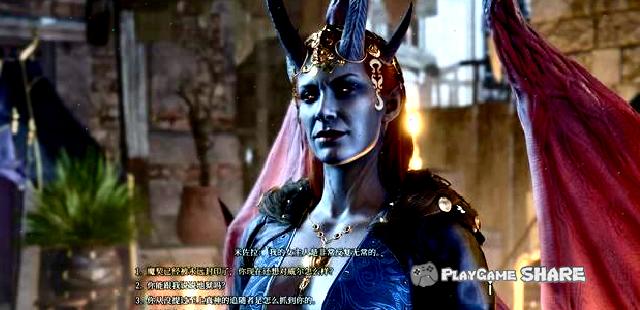
To sum up, the author’s recommendation of this task is as follows:
①Suy Dark Land Assisting the King of Renren
② The vengeful furnace saves dwarf
③ Levinton found the dwarf connection task
④ Participate in the ceremony
⑤ Talk to the bridge head with Mizola
⑥ Steel Guardian Workshop.
Red Hammer and Queen of Water Election (Do not participate in the funeral when choosing red hammers)
Bian into the steel throne and bring back the corpse of the Duke (more convenient than let him run by himself)
I promised Mizola’s proposal after the long break
Complete the subsequent dwarf, red hammer or water queen branch line.
Interestingly, after getting the corpse of the Duke of Gao, Mizola resurrected him. The main line of "convening allies" in the main line showed that the Gao Duke, who was hovering on the edge of life and death.

Branch task: investigation murder (1)
Investigation Murder
After entering Lvyon’s "Temple of Love", he found Sisters Sisters to trigger this task after talking with Detective.
The goal is to seek the truth of Father Rogan.
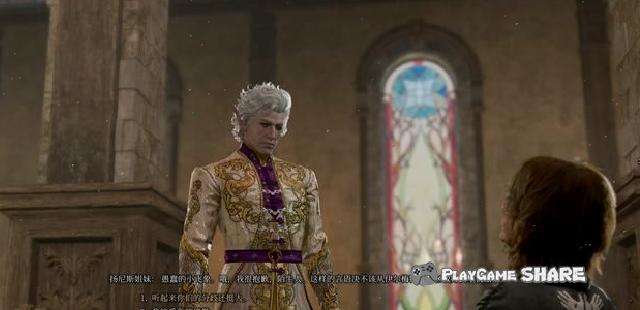
Finding Father Rogan’s body in the medical room on the side, using necromancer to learn that there is a secret path below the temple.
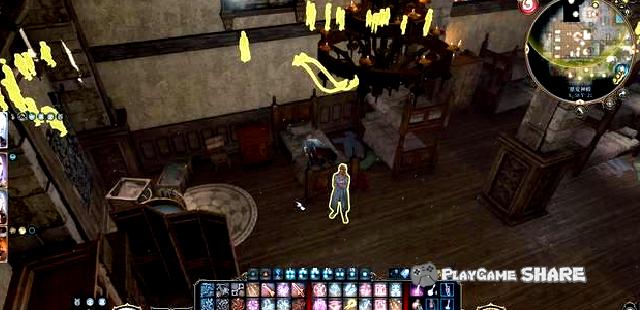
On the other hand, some information can be obtained in the dormitory to investigate the box of the priest.
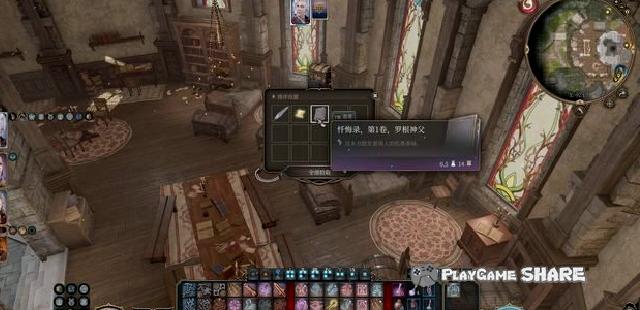
Go to the cemetery behind the temple and dig out Britig’s body to get information with dead spiritual techniques.
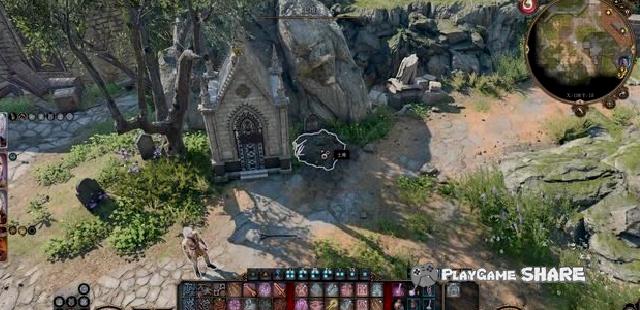
After that, I found the living goal door down in the temple kitchen.
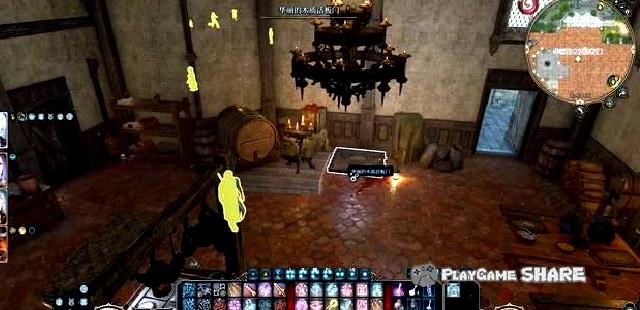
There are two ways to enter the secret road. One is to press the carved switch on the wall (one on the left and right).
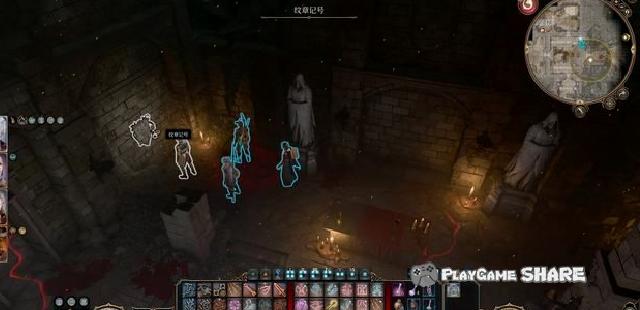
The second is to jump from the gap.
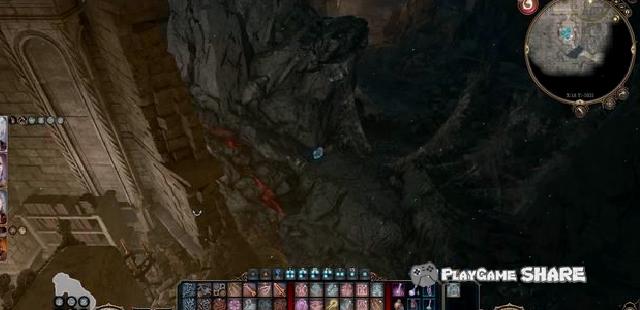
After that, fighting with the deformation monster, obviously this matter could not be removed.
[Remarks] In the corpse on the ground, you can find "Clown’s torso" and "Carved Key 10".
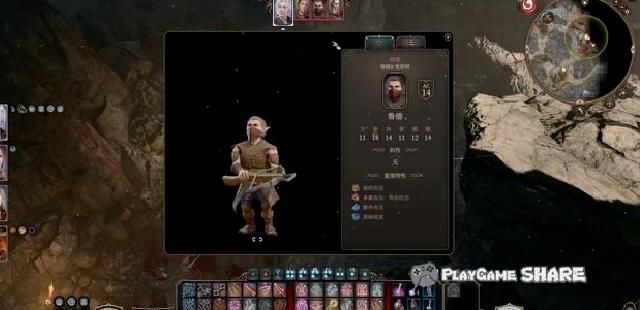
Use the "Carving Key 10" to open the bookcase on the top floor of the "Fredig Guest" and find evidence on the table.
[Remarks] This part is in line with the branch mission "Find Library".
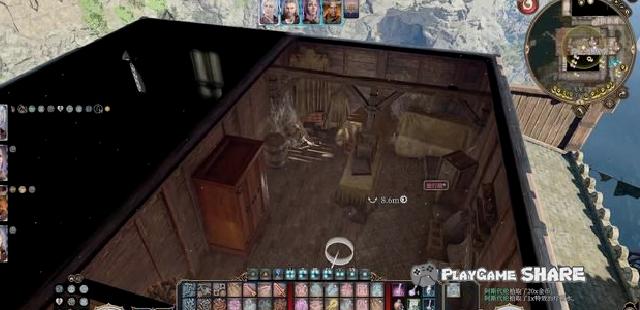
Go to "Xia Ruis’s caress", find Feixiang detective on the second floor and put on evidence to complete the task.
Feixiang proposed to let us go to the city to find his assistant and give us a pass.

Branch task: investigation murder (2)
In Xiacheng District of Bude Gate, after heading to the "Elf Restaurant", he found a chef Rowil in the kitchen.
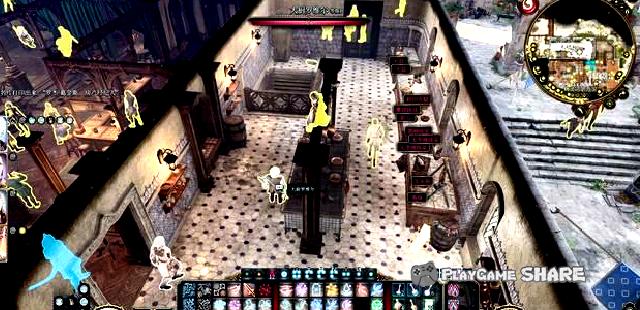
After the dialogue, he could pay attention to the person who intended to murder him, and he could also receive the branch mission to "clean up the mouse".
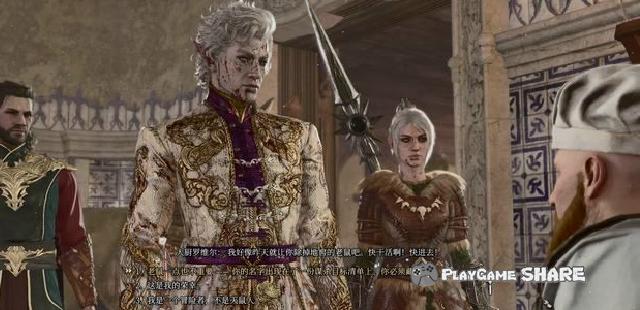
You can see the mouse group along the stairs. The amount of blood of the mouse is only 1 point, and the scope can be done.
After killing the mouse group, you can pick up the ring on the ground.
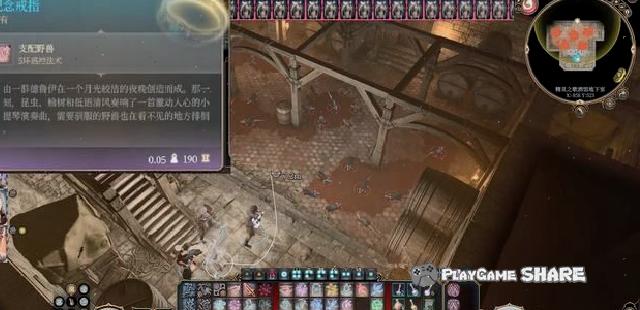
This task can also be brought with the "old hiding point of the monarch" to complete the branch line. By the way, mention it.
Press the button in the room in the gap below to open the dark door.
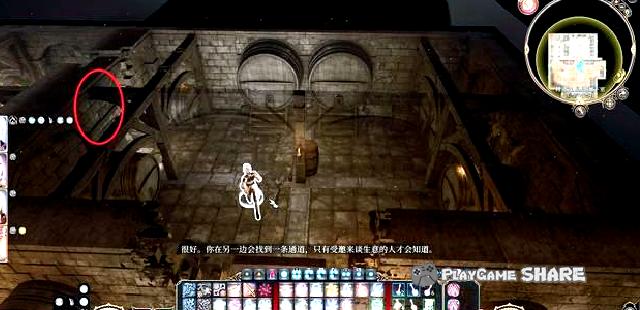
After entering the lobby, the plot will be triggered and fights with the Geis Yanji judge who just found here.

It should be noted that the "door owner" of the two portal door will summon a new enemy every round.

Then press the button next to the internal statue to enter the hiding point to understand some of the history of the monarch and get equipment.
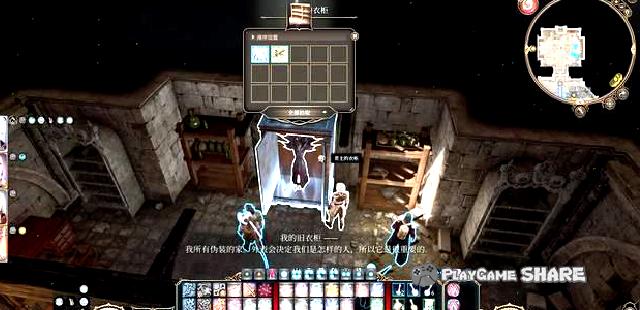
In Xiacheng District, following the list we got before, you can find Frank’s remains, which requires breaking the door.
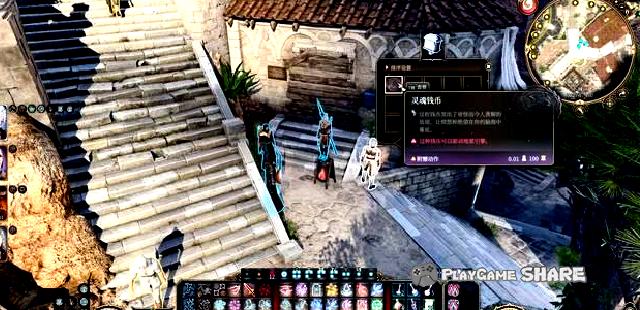
You can also find some files on the side.
[Remarks] There is usually an email on the wall of the house of the door of Bude. It is recommended to see more. Generally, there are some clues of some homeowners.
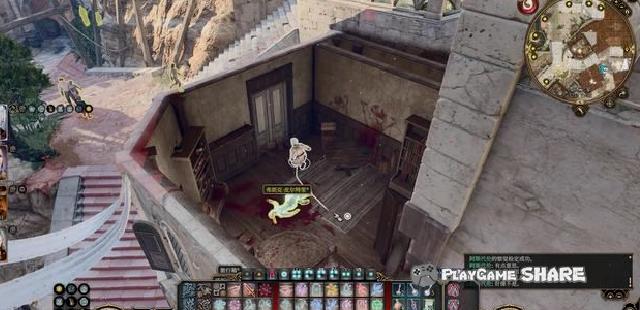
Using necrosis can obtain some characteristics of the murderer.
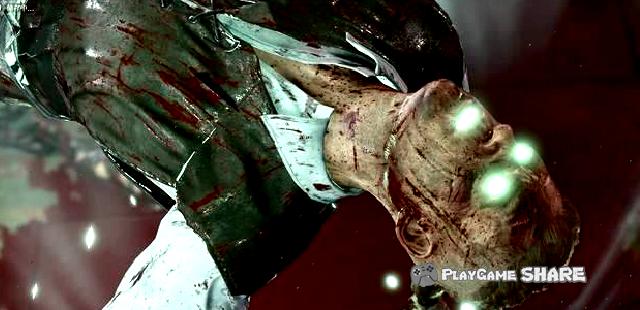
After finding Koala at the red wine party in Xiacheng District, it is recommended to try to take a break before 2 to 3.
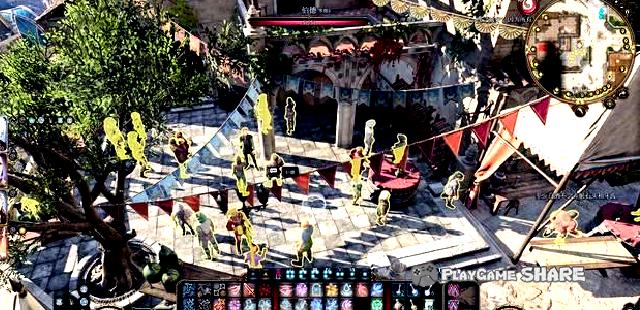
Through medicine, you can go directly to the battle after you know that you are toxic in the wine, and you will directly enter the battle after frustrating the red dwarf.
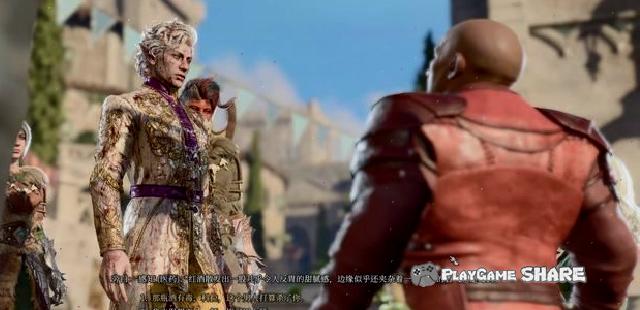
The enemy has several deformation monsters to help. After killing him, he can get the broken hands of several victims.
After that, you can report to the security officer assistant, or you can use these broken hands to enter Balt’s Hall.
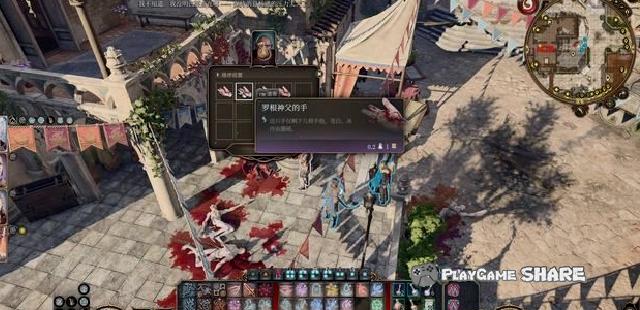
Line task: Balt Music Referee
Balta rally
This task is connected after the branch task "investigating the murder".
If the player does not complete the task, he needs to choose one to kill from the murder list and take away his/her palm.
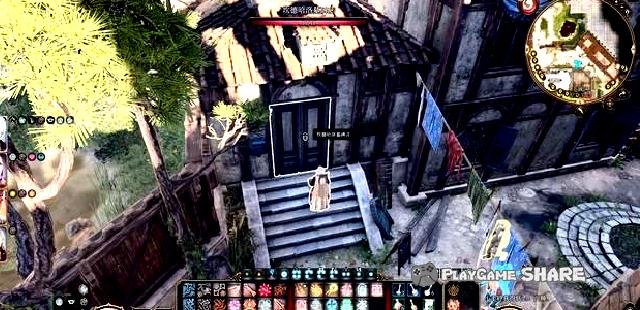
Enter the tombstone store, take the paintings on the wall below and press the switch.
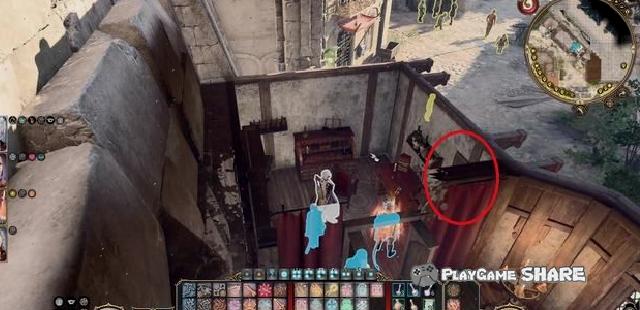
Enter the underground area, just walk along the torch, there is an explosion trap below.

Talk to guards at the entrance. If you do not carry the victim’s palm, you can only offer "some of the other" to enter.
The guards will disappear after completing the process in the palace.
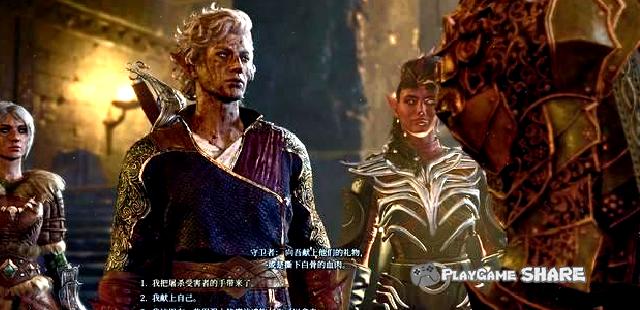
Enter the palace and see Barl’s loyal believers -Salo Foch.
You can learn about some history about Balt believers through dialogue, and you can also know that Olympic is actually his granddaughter.
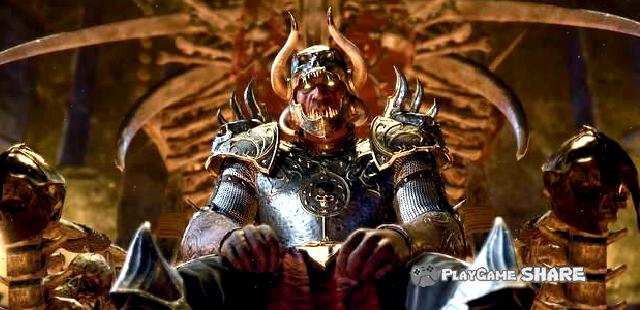
If you choose to accept judgment, Salohak will choose a palm to use necrosis. If this person is not killed by the player, you need to pass the deception judgment to complete the judgment process.
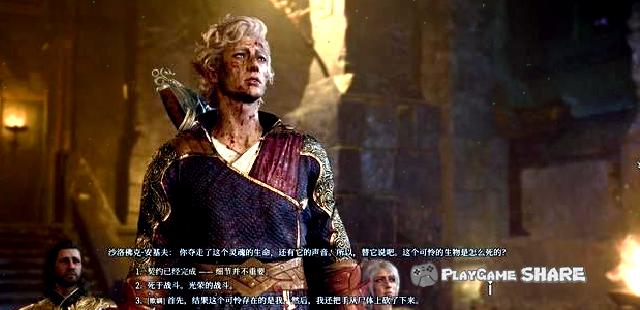
It is a relatively good battle time when judging, which allows teammates to move to the left and right highlands before the dialogue.
The attributes of Salohach are as follows. Before killing him, the followers will give him gain, and you need to pay attention.
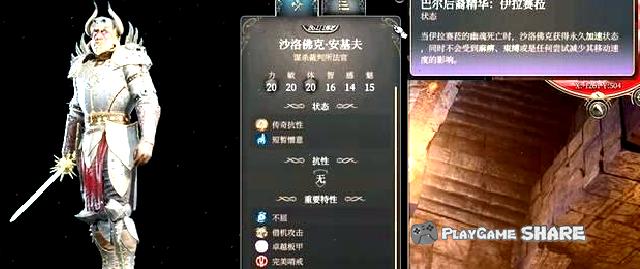
After killing him, you can get some equipment, and you can also get the items needed to enter the Balt Temple.
After that, other processes in the palace can be completed normally.
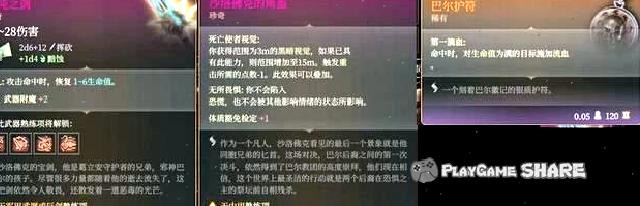
After being judged to the side hall, Salo Faque will allow players to kill the flying elephant detectives that they met before, and rebirth as a blasphemy assassin.
This is the time to choose the battle branch, but there are many enemies around, so it is recommended that you get it in the previous dialogue.

After completing the battle or killing Salohak in the main hall, you can also go to the side hall to rescue the flying elephant detective.
He will expressed gratitude to us, and the city guards will assist us in the final battle since then.
[Remarks] After completing the "Investigation Murder", you can also find an iron hand on the second floor of the Elf Restaurant (if this process is not completed in the branch line), you can trigger what the flying elephant detective said "Tell Xiacheng District to tell the city district to tell the district of Xiacheng District"Iron Hand".
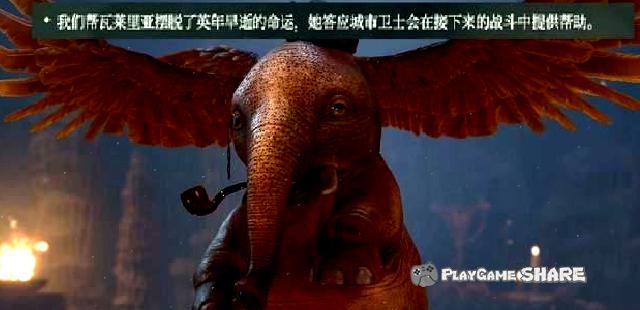
Line task: Suspicious toys (1)
Suspicious toys
After entering Levonton, you can see a craftsman quarrel with refugees.
It is recommended to solve the craftsman first, and give refugees to small money is a simple way to lose the favorability.
[Remarks] You can also "talk to the person in charge" first to enter the first half of the house to complete the task.
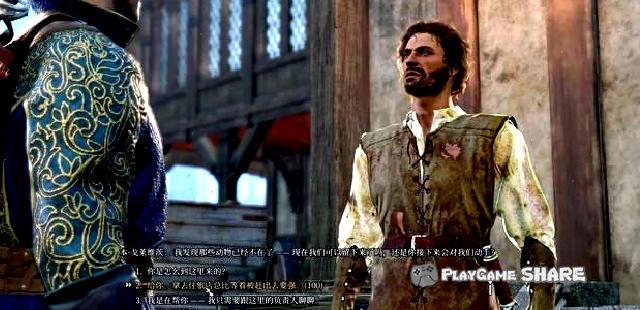
After getting the key on the second floor, open the dark door under the large room table on the first floor and enter the basement.
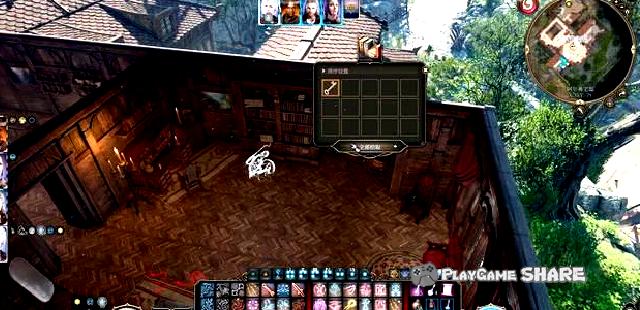
There are countless basement traps, and it is strongly recommended to directly reach the other side with the portal or flight.
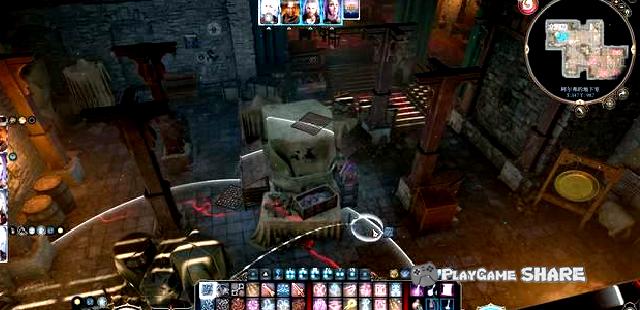
After getting the evidence on the table and the box, return and confront the craftsman.
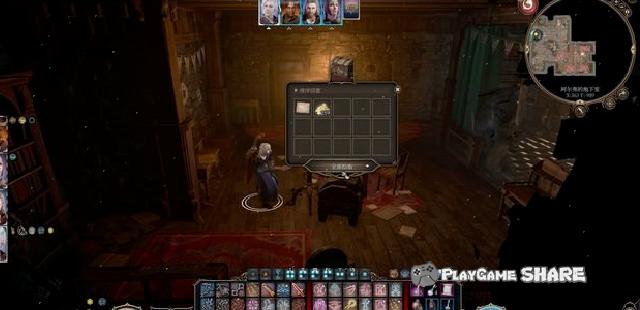
After all, we have no evidence now, and he naturally has no fear.
Go to the nearby material camp and talk to the captain after talking and enter inside to find it.
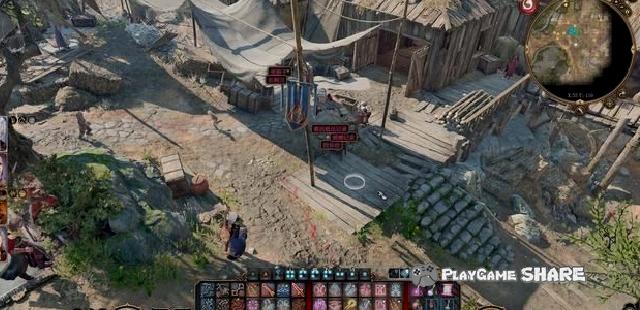
After passing the inspection near the board box, the investigation can be completed by lift the trap.
[Remarks] The trigger of the verification is slightly strict, and the big bang will be triggered before the traps.
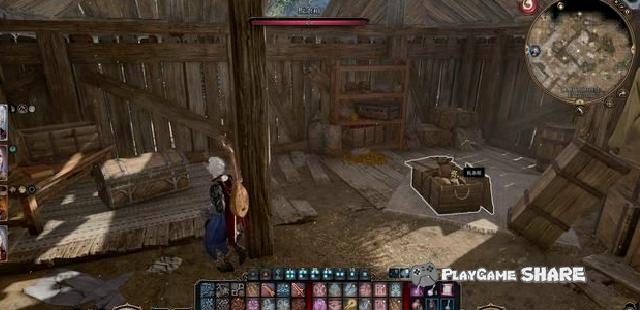
Back to the artisan again, the conversation learned that the craftsman was also threatened.
After that, the task needs to enter the city before it can be completed.
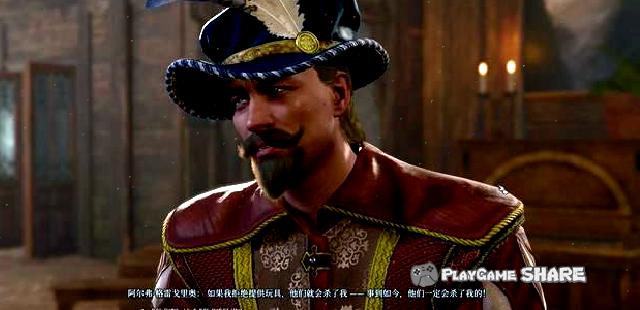
Line task: Suspicious toys (2)
After entering Xiacheng District, follow the guidelines to the fireworks shop. The dialogue can be triggered at the boss and obtained a permission to the second floor.

The second floor can also sell some strange stuff. If you want to go to the third floor, you can only be invisible or hard.
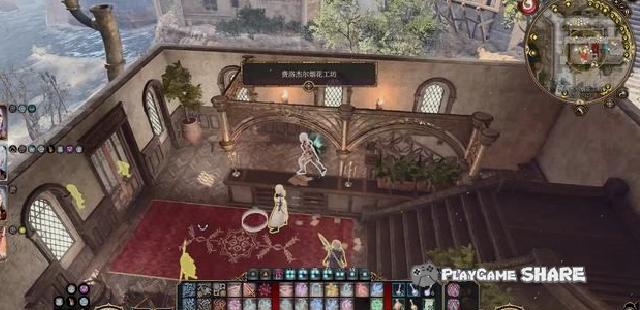
The picture below is the basement of the fireworks shop, and the key is on the boss.
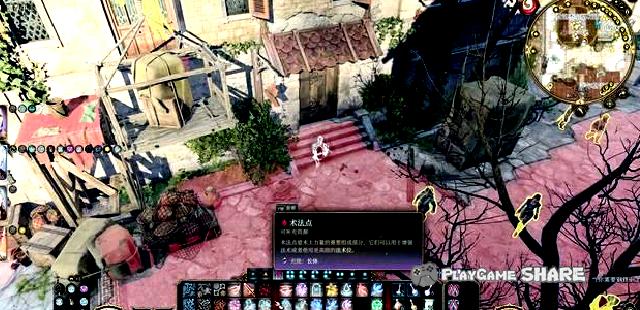
Open the box beside the wall and pull the control lever to get a lot of tobacco buckets.
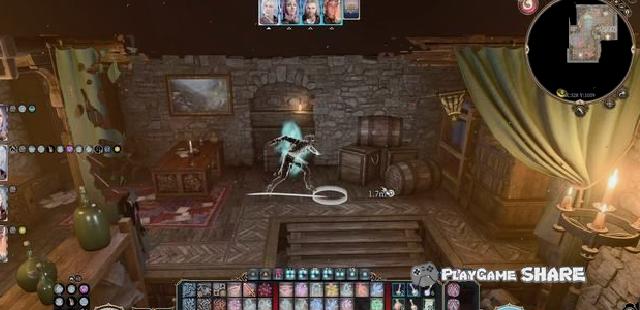
There are three entrances on the third floor.
One is the top of the building in the figure below, and the other is to fly up from the outside door on the second floor, and the third is to break directly.
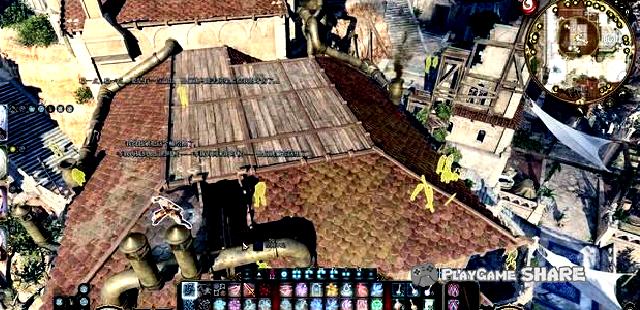
The NPC of the entire building after the battle will turn to hostile, and the task can be completed after completing the battle.
[Remarks] Close the doors and windows before starting to avoid being seen by the patrol.
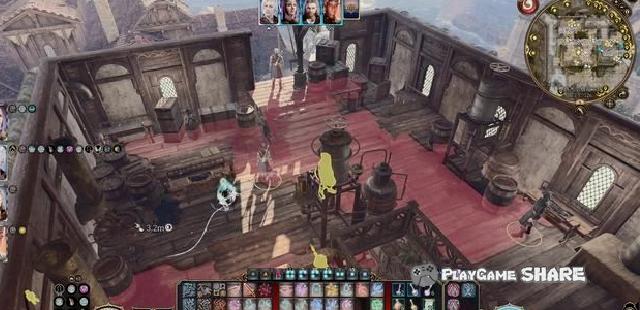
Line task: Find a clown Deri Person (1)
Looking for clown Derbes
Before entering Lvyon’s circus, there will be a simple test (or bribe) before entering.
Before triggering the task, it is recommended to talk to the merchants in the circus, and some shops will close after triggering the task.
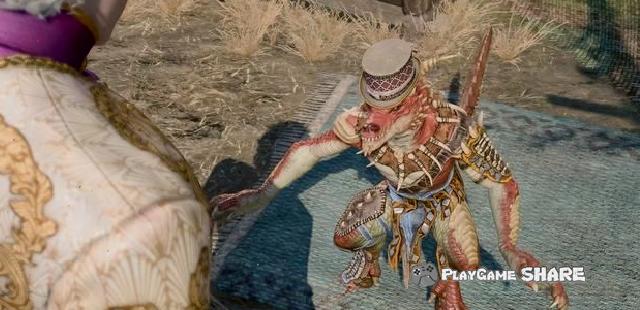
The stone ghost couples sell some "stone" related items and spells, and can also build a protagonist stone carving in the camp.
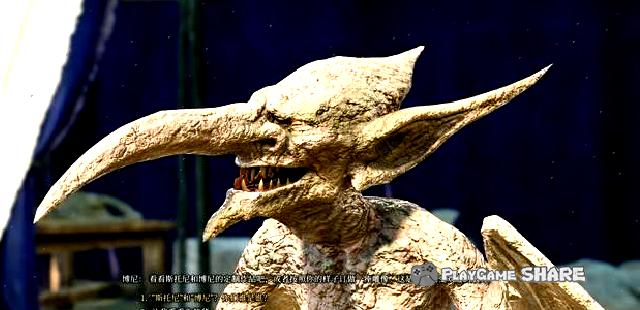
The displacement beast will break the cage. After talking with animals, the lock can be destroyed to avoid future battles.
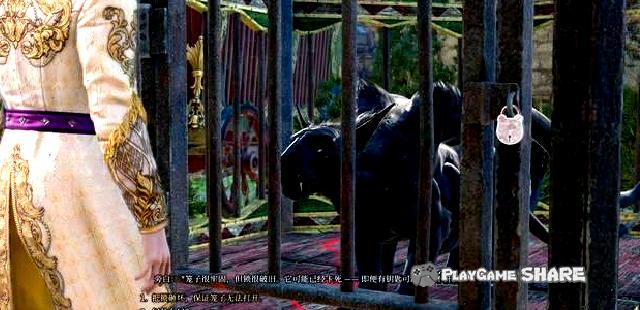
"Dahong" is through animal dialogue, giving it food to avoid fighting.
In addition, you can also carry a high-profile partner to trigger the dialogue in the tree essence, and use the verification to purchase mummy products.
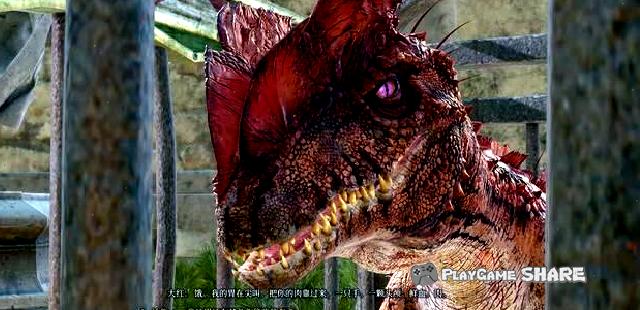
After that, the clown that performed on the stage will enter the battle anyway.
Except for the two monsters that are locked up by the cage, there are only four enemies, which will not be explained here.
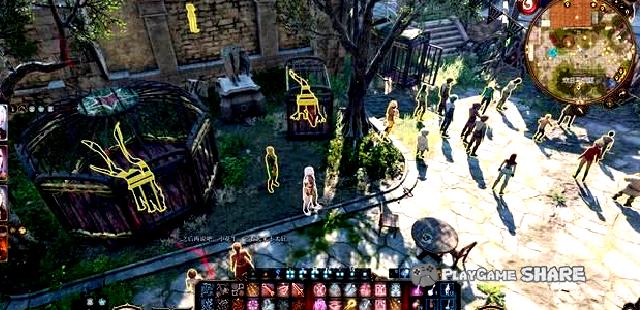
Then talk to the head of Lukeshus, she will let us help her find the missing clown.
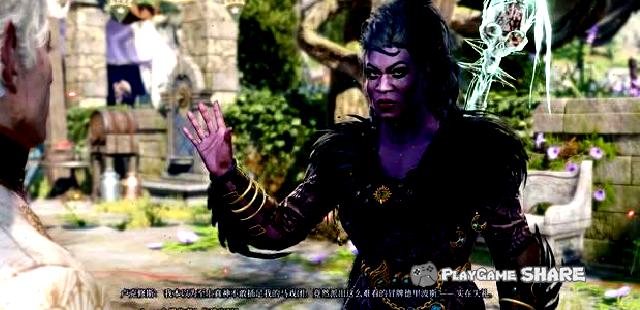
Of course, Duribos, kidnapped by cults, is naturally dead, and the "clown torso" can be found in the underground passage of the temple.

The merchants in the circus can stole the "clown broken hands" directly.
The subsequent tasks need to be completed in the city.
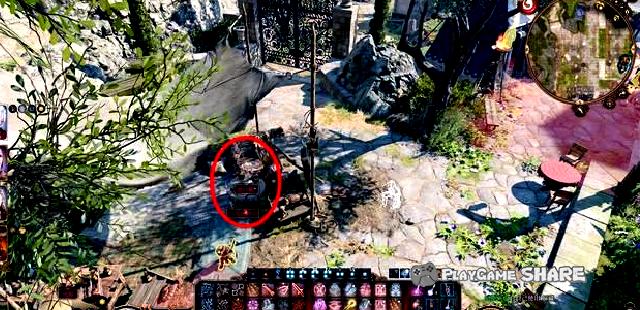
Line task: Find a clown Deri Person (2)
Clown Derritas (supplementary part)
From the "Balt Temple" transmission point of the sewer, it was triggered to find the clown’s head in a pile of corpses.
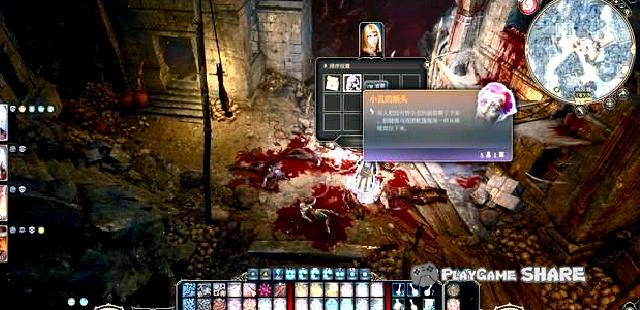
A copy of the "Rain Forest House" in Xiacheng District.
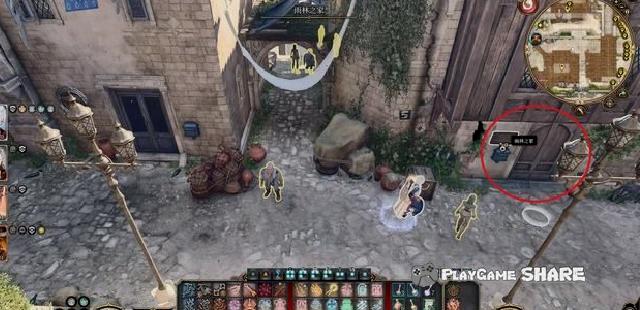
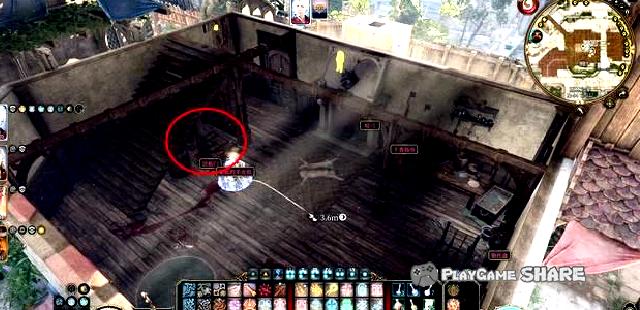
The same is the basement of the "Lavelyka House" in the upper right of the "Rain Forest House".
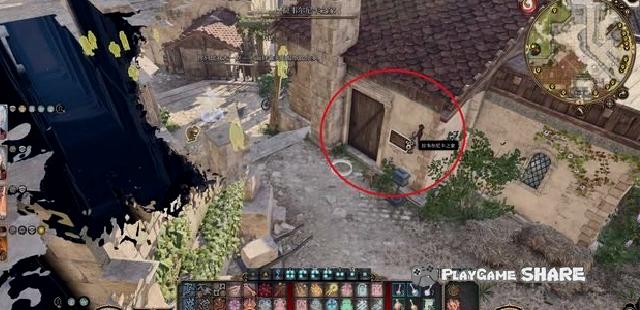
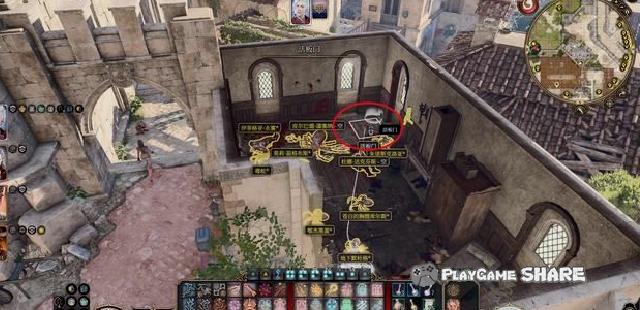
The basement of Limu House.
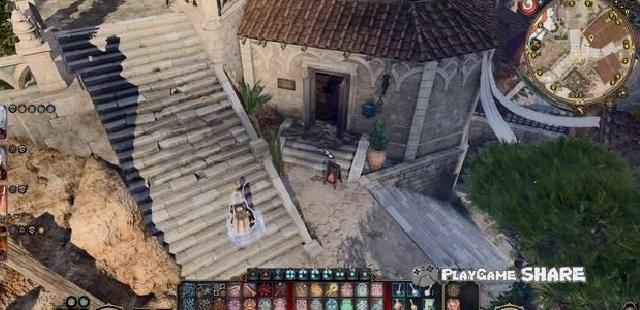
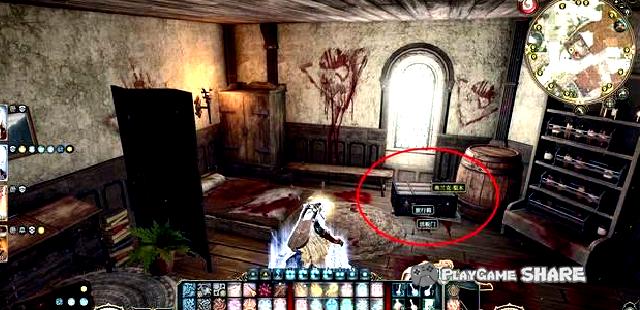
In the house near the door of the petrochemical lizard.
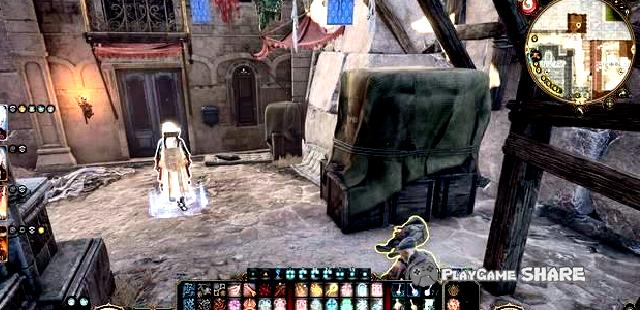
The figure below is a map guidelines (red dot position) except Lavinton.
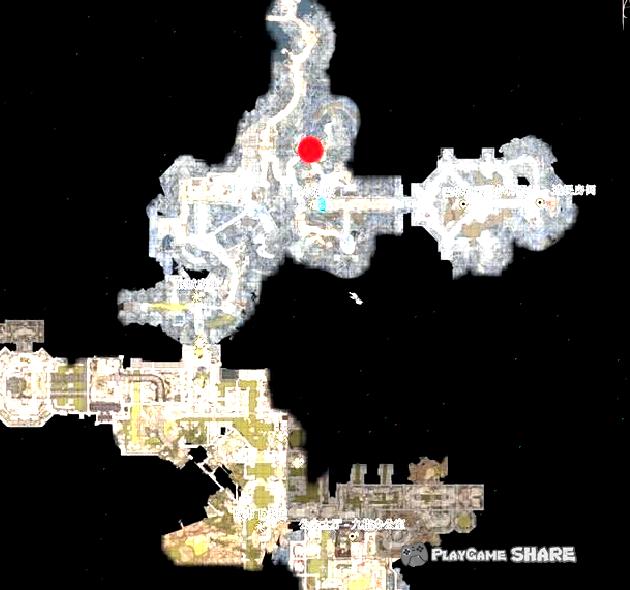
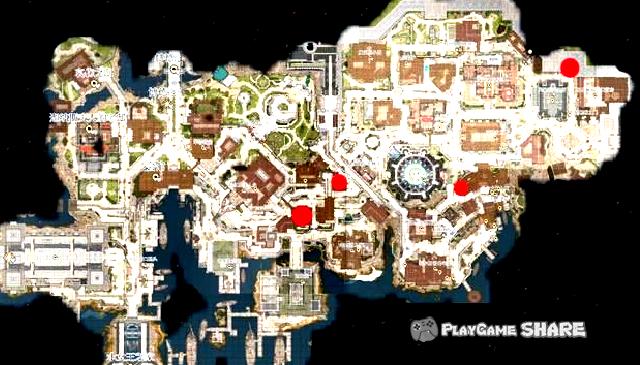
After finding all the broken limbs, let the characters who were initially accepted by the task can be used to return to the circus dialogue with all the broken limbs.
[Remarks] The reward equipment can be stolen directly from the NPC.
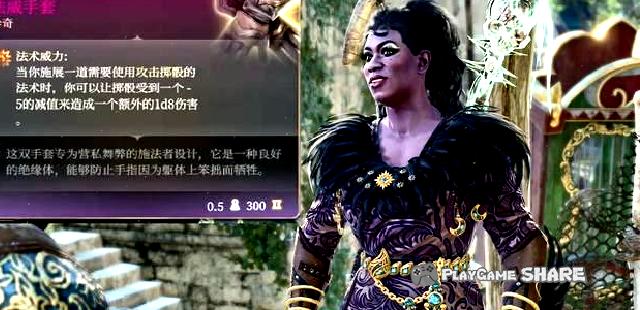
Line task: Find a letter of loss
Looking for the loss of letters
Enter the "Sword Bay Messenger Association" in Levinton, and after the dialogue, he took the task of looking for pigeons.

Go out of the side door of the "Love Temple" and climb the roof with the vine below.
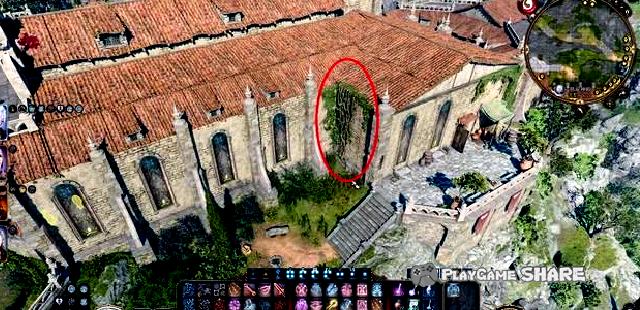
You can find a letter in the picture below the roof, and you can get another letter in the central wing cat’s nest.
You can get the cat to get an extra ring.
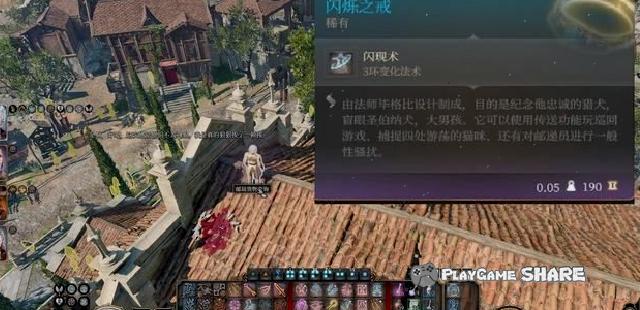
After returning to the delivery letter, even if he opened the letter and threatened him, he could only get additional 300 money.
[Remarks] There is a pass to enter the Flying Dragon Fortress behind the president.
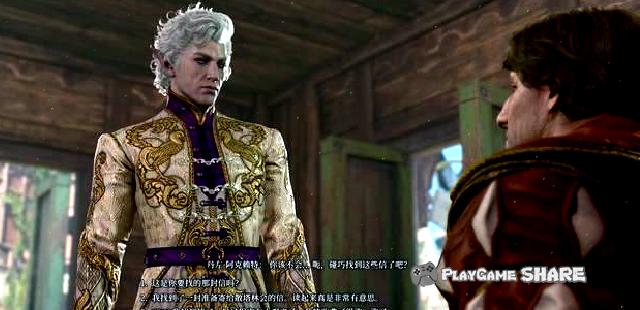
In addition, if you pass the animal dialogue in the first chapter, "scratch" is brought back to the camp, and a small event can be triggered outside the house.
It is affirmed to drive the wicked away, and it will continue to stay in the camp.
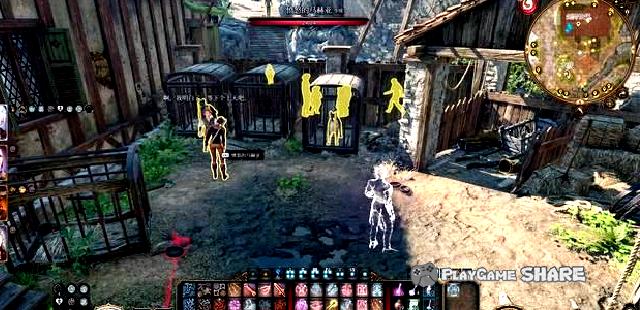
There is a spare key in the corner behind the Meeting Guild. Use it to reach the top door from the side door to view various documents and letters.
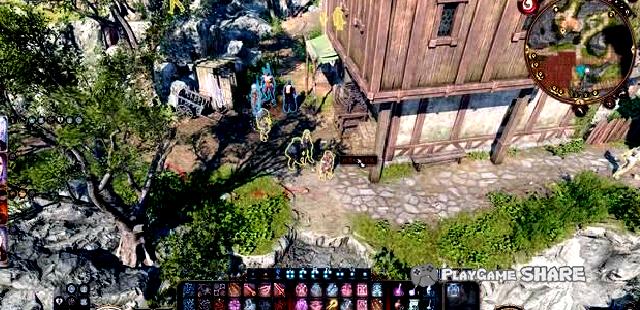
Branch task: Assist underground forces (1)
Assist underground forces
Triggered from the southwest beach of Lvavaton, it will pass a trap area.
It is necessary to use the DC30 to decide on the ventilation port, and there are many explosive traps on the ground. It is recommended to fly directly.
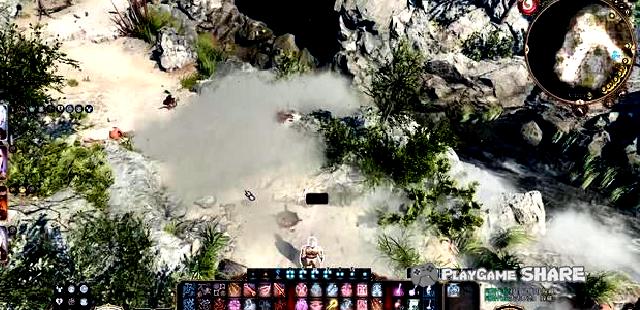
When you arrive at the entrance of the cave, you will encounter the lord of the Stone. Anyway, you ca n’t say anything, just ignore him.
There are also some traps in the cave, you need to pay attention.
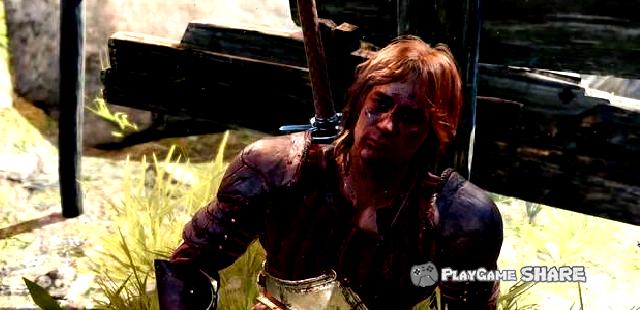
After passing through the cave, I encountered a stone lord and a nine-finger man. You must choose to stand in a team (otherwise to deal with the forces of the two parties).
[Remarks] The nine fingers are the local forces of the door of Bude. They can basically be regarded as the "Thieves Guild". The lord of the stone is the emerging forces that believe in the true God. The goal is to replace the nine fingers.
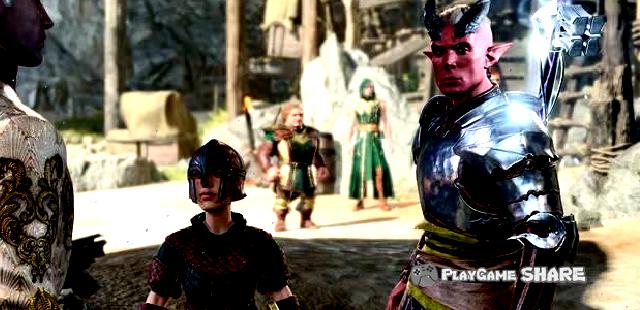
After completing the battle, you can find a log and two larvae on the stone lord’s boat.
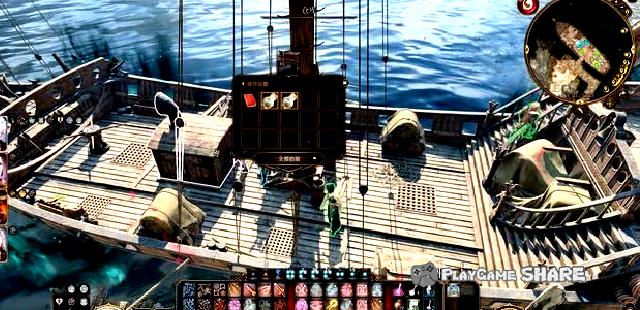
After lift the box trap in the cave, you can also get equipment, and you can find some files in the cave.
The mission then needs to be advanced after entering the city.
[Remarks] You can also hear some rumors next to the back door of "Xia Ruis’s caress".
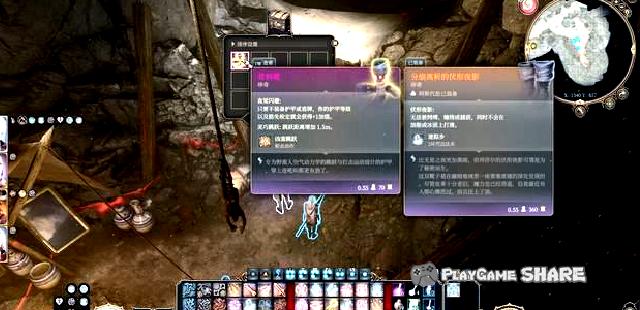
Branch task: Assist underground forces (2)
Later, unlocked from the small park in the north of the "Iron Guard Casting Plant" to enter the "restricted area", you can directly reach Minsk’s location without going to the sewer to find.
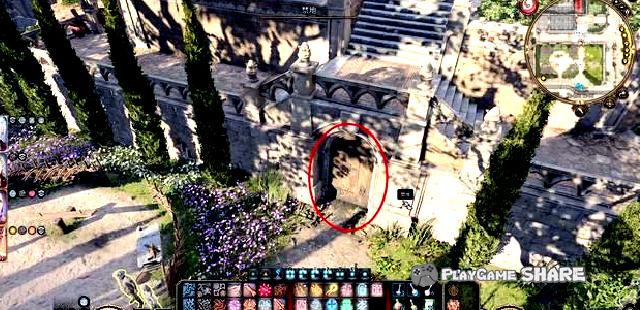
After entering the restricted area (gardener basement), step on the switch on the left and right sides of the room to open the secret road. After entering, it will trigger the plot.
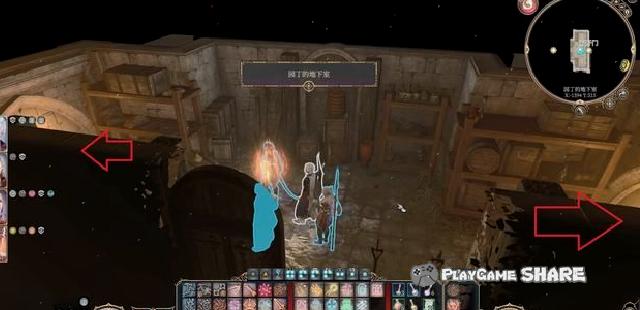
It was learned that San Talle would betray the nine fingers, rely on the true god forces and prepare to attack them.
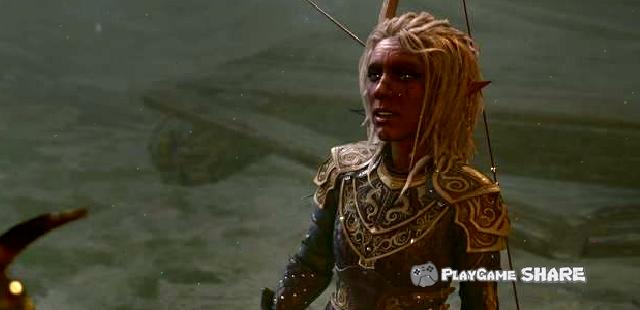
In the plot, you can avoid the perception of DC25’s perception test, and you can prepare a sneak attack.
[Remarks] Don’t forget to sneak and avoid the enemy who come to patrol first.
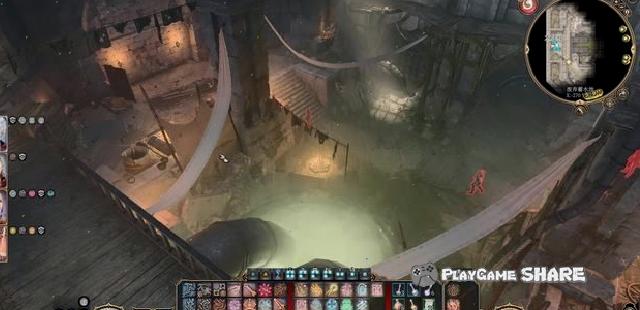
The attributes of Minsk are as follows. It is recommended to start "non-fatal attack" to avoid killing him. After all, we can use the power of the relics to protect him.
[Remarks] In case, there are still players who do not know that in most cases, only weapons and bare-hands can trigger this effect, and spells and drama will still be fatal.

After completing the battle, persuade the monarch to include Minsk into Majesty through the verification.
[Remarks] Some theft funds of Qingxuan House can be found from the San Talle leader for completing the branch task over there.
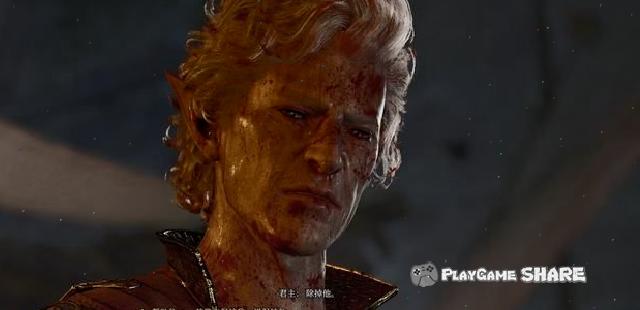
After finding his "partner" with Minsk, he can let him accompany.
He and Jahila will assist us in the final battle and find him in the camp.
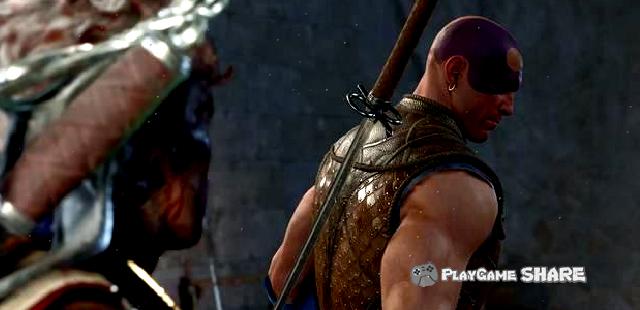
In addition, the interaction of the switch in the dense room and the below symbol can go to the sewer.
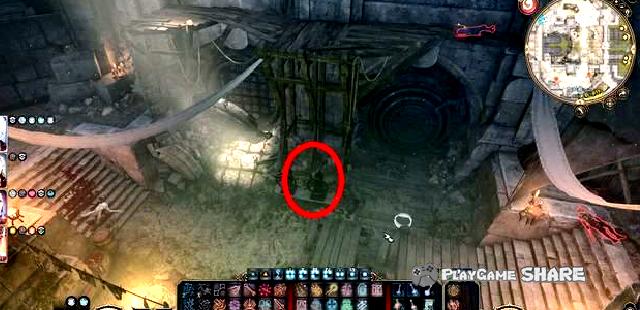
Conversely, if you enter from the sewer instead of gardener basement, you need to control the valve switch below.
The four switches from left to right are "water release", "water valve", "steam valve" and "emergency switch".
After turning on the valve, the valve will get the "full load" buff. Because the steam valve is full of fast load, the opening time of the two valves can be done.
[Remarks] If not, you can also try to stop using emergency stopping to maintain the "perfect level", but it is more convenient to walk from the basement of the gardener.
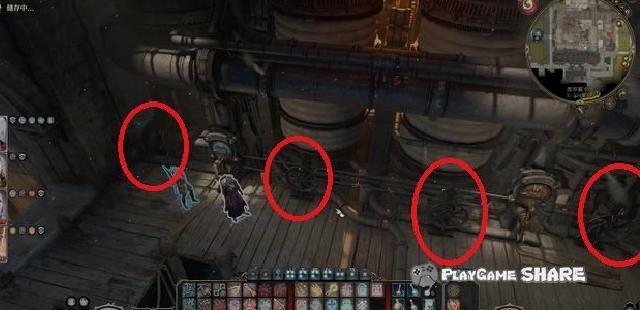
After learning the rebellion of Santarin’s hiding place, returning to the nine fingers can trigger the plot battle.

Killing the attack of the Santarin can complete the branch line to "assist underground forces".
Since then, the nine fingers and her subordinates will also assist us in the final battle.

Line task: Find “Library”
Looking for "Library"
After entering "Xia Ruisi’s caress", he talked with his mother Sang and learned that a first card was missing.

Go to the guest house, open the box on the second floor, and get the letter.
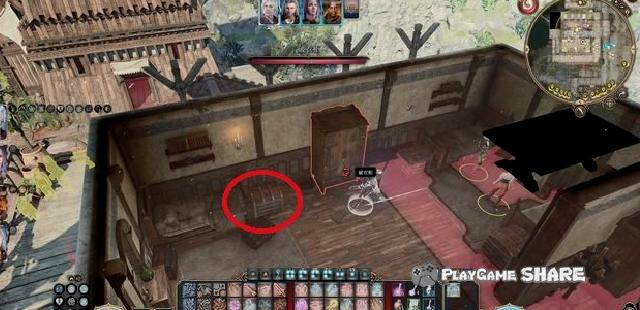
After climbing the ladder to the attic, you can open the wardrobe to enter the compartment with "Flower Type 10".
[Remarks] For the acquisition of the key, please refer to the line of this strategy "Looking for Clown Derbes".
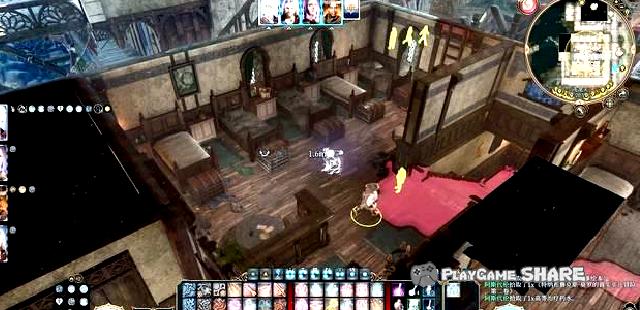
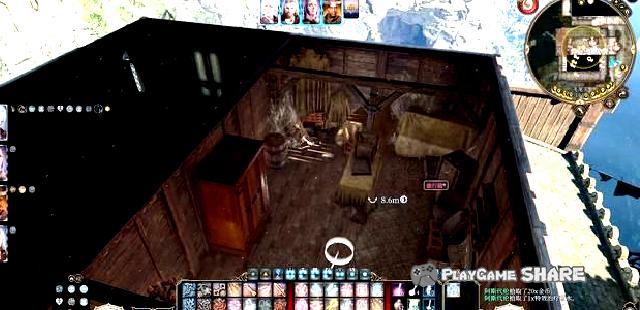
After reading the information, pick up the "blood-stained sheepskin paper" and get the way to enter the Balt Temple.
[Preparation] This document is also one of the important props of the "investigation murder" of the branch mission.
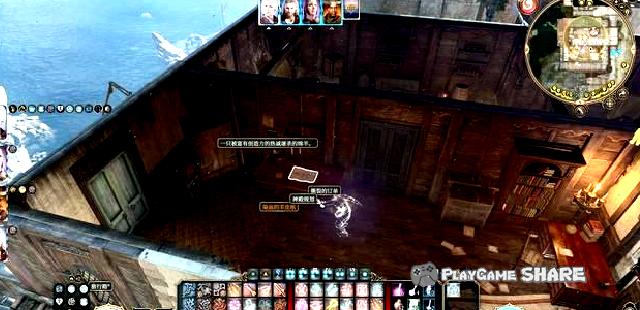
After the bed near the back room, I found the body and found the body of the bed and found Fei Yan.
You can use the necromancer to learn that her son can kill her in order to enter the Balt Temple, and he can also know his next goal.
After that, the task needs to enter the city before it can be completed.
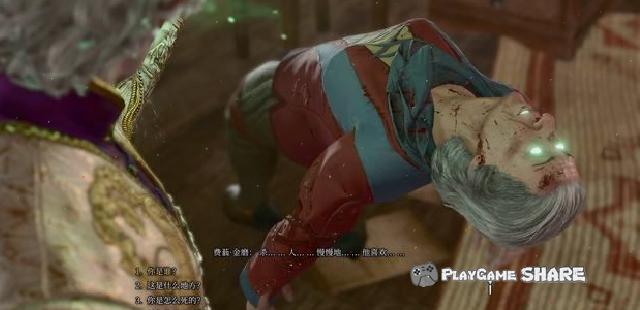
Branch task: High -level harmonicaist (1)
High-level harmonica
The weapon shop "Danserlon’s Ax" before entering the Flying Dragon Fortress can trigger the task after talking to the manager.
The necessary conditions for this task are as follows:
① Chapter 2, enter the end of the Light Hotel, not hostile to Jahila and drinking her "self-liquor".
② Chapter 2, successfully allowed Jahila to join the team (the hotel can also be completed).

Get the key after the conversation, open the door aside and go to the lower side.
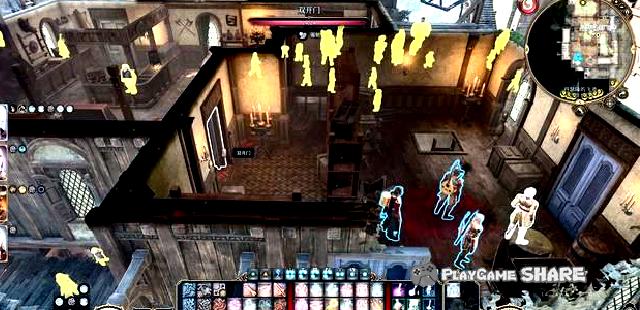
Triging the dialogue after getting close to the harmonors, and found that Jeracus seemed a little nervous during the conversation.

It turned out that the harmonies except Jerauds were deformation monsters sent by Olympic, and continued to talk after completing the battle.
If Jahila is not in the team at this time, she needs to return to the camp and talk to her to promote the task.

The next "Finding Minsk" part needs to be completed after entering the city.
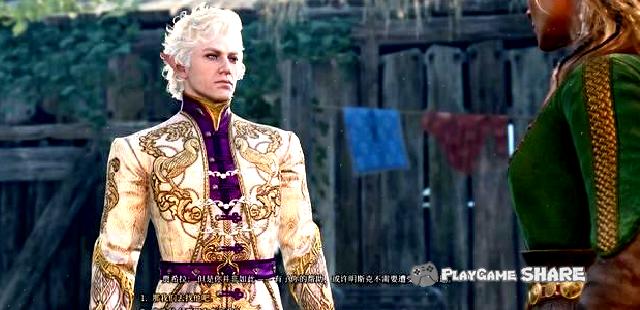
Side task: high -level harmonies (2)
After entering the Xiacheng District of the Gate of Bade, I found the nine-finger camp at the location near the river bay.
If the nine-finger members have been helped in the "Assistance for Underground forces" before the branch mission, you can enter it without verification.
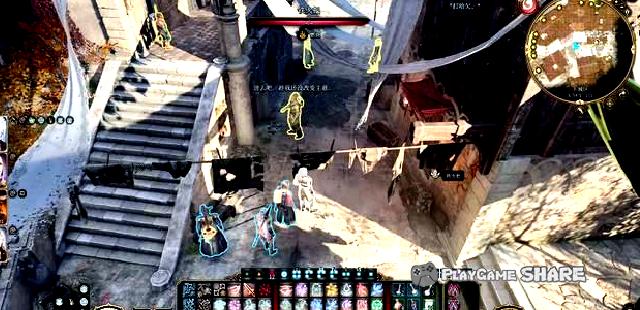
There is basically nothing to investigate in the camp. Go straight to the nine-finger office and find the plan of ambush stone (that is, Minsk) on the bedside desk.

Talking the plot after talking with Jien in the nine fingers. If the player has been facing the "Supreme God" before, she will welcome us here (otherwise it will be hostile).
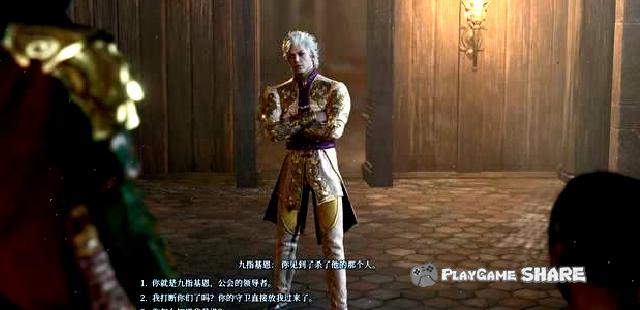
According to her, she had a relationship with the harp player Jahila. If Jahila had previously joined the team before, she could bring her to trigger the plot.
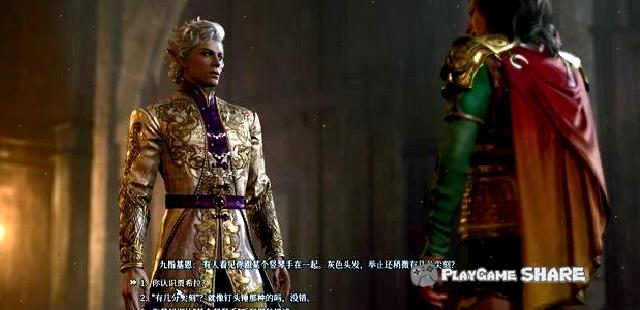
If the file had been found before, then Jahila was not bad. The nine fingers just wanted to tell Jahila not to try to go to Tomosk.
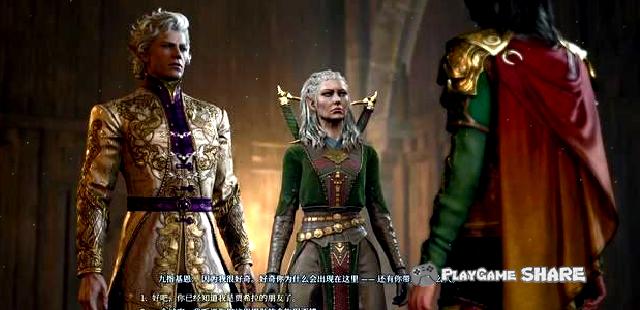
Go to the ambush location "Clear House" and go directly to the door.
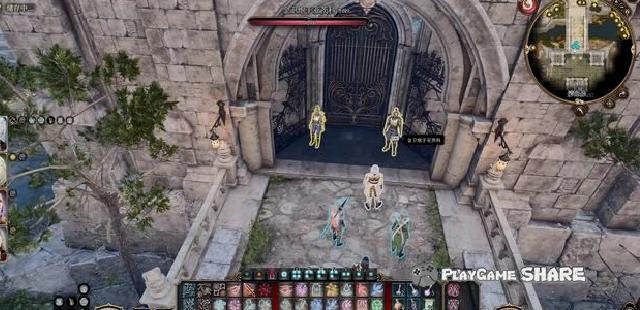
After talking to the idle manager, you can get a pass through the verification.
If there is no pass, you cannot enter the treasure house normally.

Another method to get a pass is to go to the second floor and enter the office of the "Chief Correspondent".
If the guards are discovered, they will actively use the alarm on the side.
Priority to lift the alarm can kill them "silently".
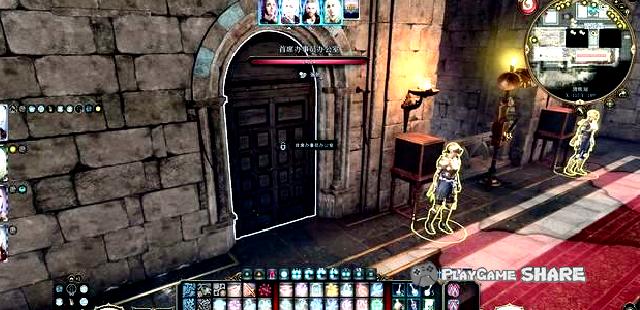
Another disobedient method requires flying and changing techniques.
Fly to the roof outside the door of Qingwu.
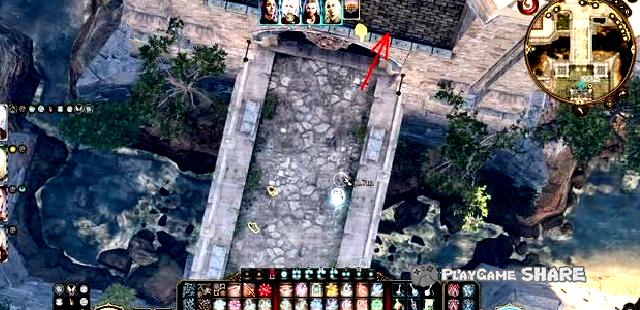
Go to the balcony in construction, and use changes in the position of the figure below to drill into the room of the officer.
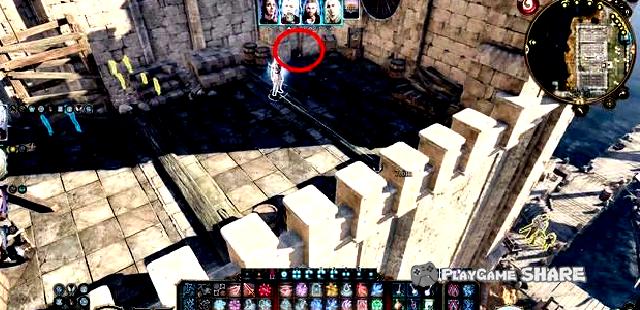
In addition to the pass, you can also get some documents, and you can return to the original road.
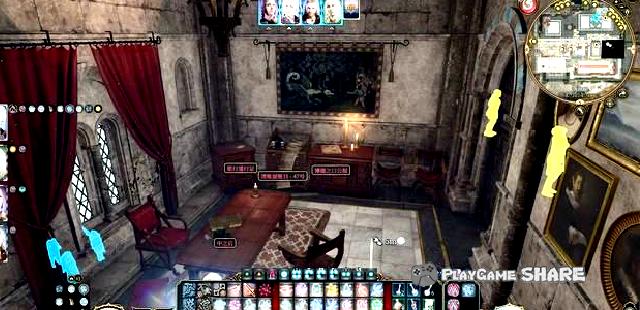
Branch task: high -level harmonicaist (3)
Use the pass to go down and enter the treasure trove after passing the level.
[Remarks] You can also open the door directly from the port, but the difficulty is higher than the above two, so it is not recommended.
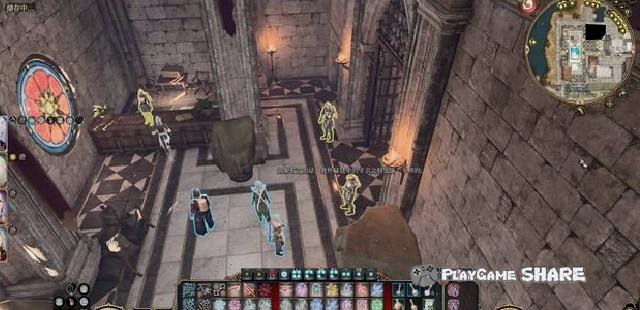
Forcibly through the iron door, the trap easily triggers the trap, the door is closed and sprayed out of the poison gas. The buttons next to the left counter can be lifted.
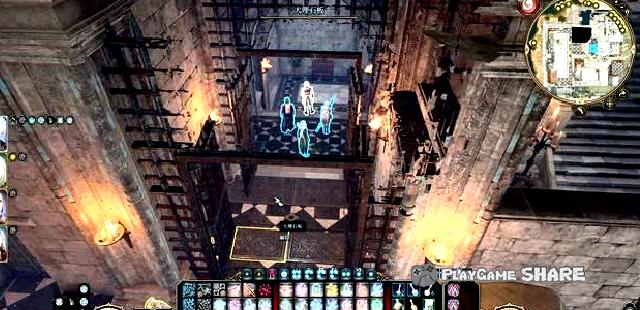
There are some simple safe in the treasure house. When you encounter the French formation, you will directly transmit the corridor, and you can avoid it with flight techniques.
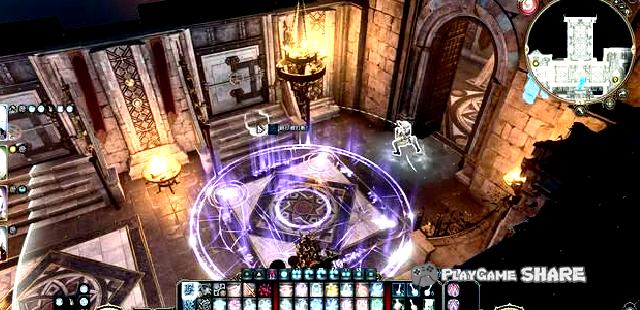
Open the password of the inner door in another room on the second floor, here you can step on the switch directly in order.

After entering the area next door, the plot triggered the plot, and it happened to encounter a scene of ambush Minsk.
But obviously the treasure chest monster cannot stop Minsk.

It is worth mentioning that even if Jahila triggered the plot in the team, Minsk would not turn into friendly.
The reason is naturally a deformation strangely controlled by Olin, and Minsk naturally believes in her.
After Minsk leaves to fight, it should be noted that there are eight invisible "Balto whip" in the area, scattered around the hall, and they are attached to asylum.
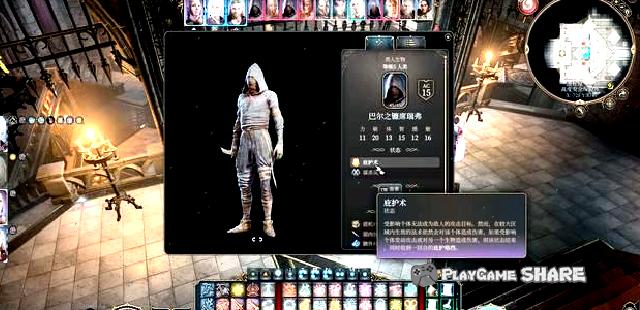
After completing the battle, talk to Raciss, and you can take the task of recovering the gold coin.
After the task, he will turn into a friendly relationship, and he can pry open various safe (DC30) in the area.
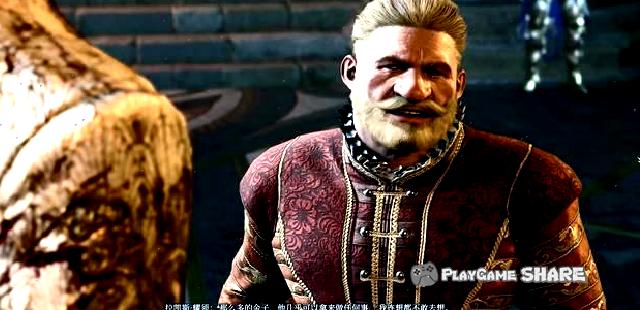
Back to the nine-finger camp again, she would say that we let us not intervene again, but also obtained a permission to enter the sewer.
The subsequent part of this task is updated in the part of the branch mission "Assist underground forces", please move to the relevant page to view.
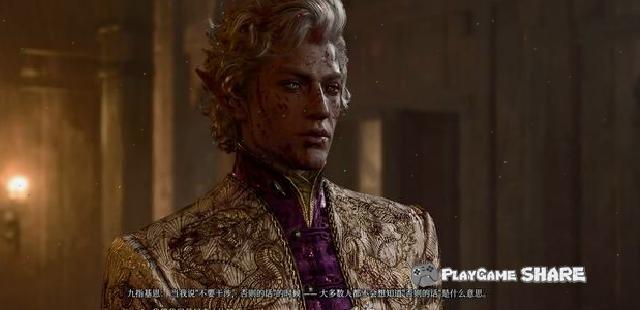
Triggering event: Levonton
Nabel’s performance
After entering the "small card installation" before entering the Flying Dragon Fortress, he will show a series of "performances" after talking to Nabel.
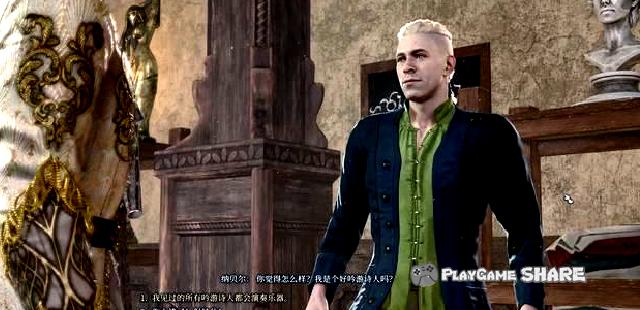
After watching the "performance" of all professions, he will give us a garbage amulet, but the performance is quite cheerful.
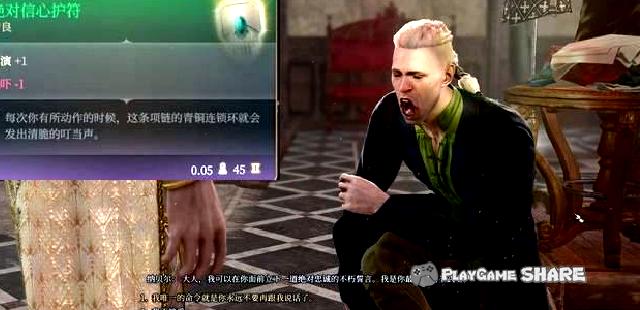
Huo Ci’s spirits
In the "Xia Ruis’s caress" bar and Holygen, she would remind her that she had a "super" new wine.

After receiving the wine glass and drinking, you will get BUFF, and later Holigan will also sell this spiritual wine and a amulet.
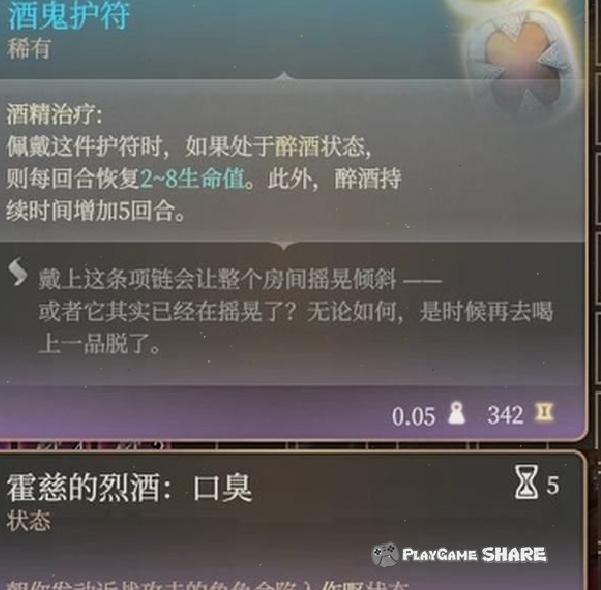
Giant Ling’s legendary equipment
In the circus, he can find the giant spirit of the "draw", and he is undoubtedly cheating.
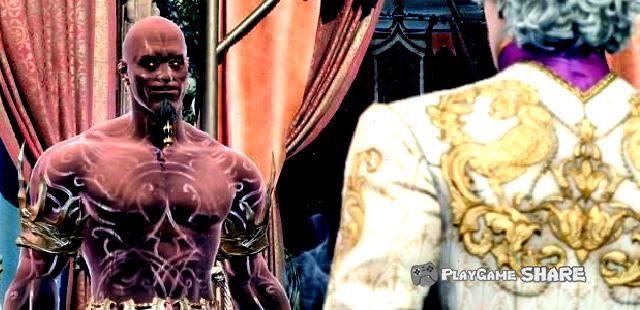
Take away the rings on it with theft and turn it again to win the jackpot.
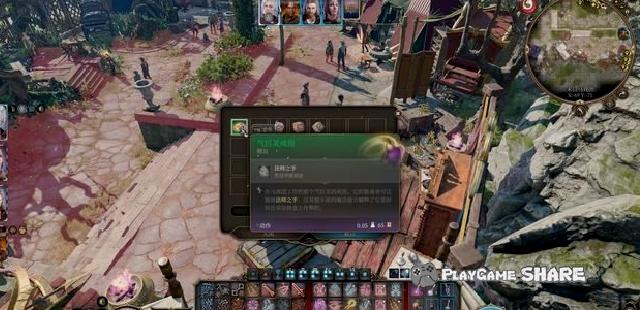
You can be transmitted to the hostile area, arrived at the end and open the treasure chest to get the legendary equipment
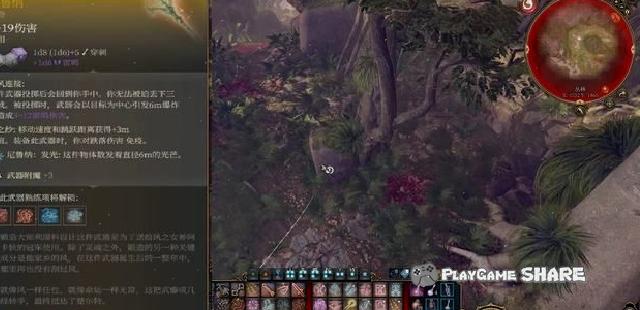
Freshman
When the "abandoned mill" is prying the lock into the basement, you can see the sleeping new life.
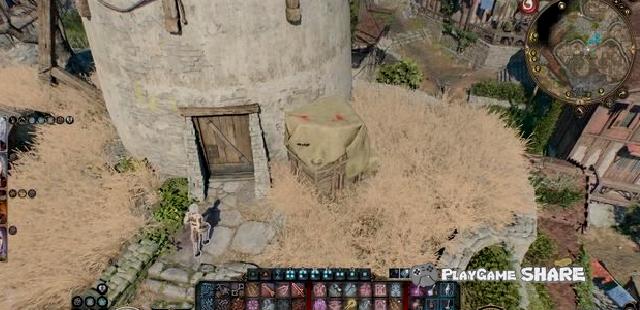
Hearing the monarch’s suggestion, sneak attack it can get larvae, wake up and assist it to get larvae.
[Remarks] Fresh corpses can be used in the branch line "investigation murder case". After assisting it, kill it to get two larvae.
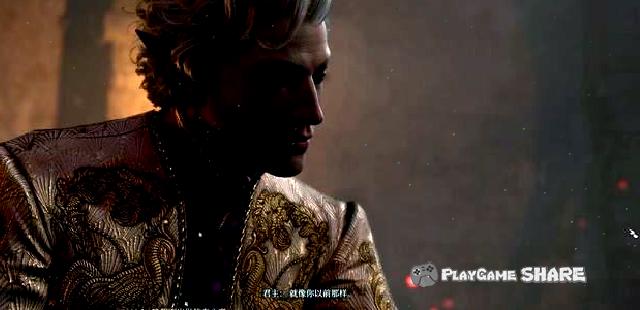
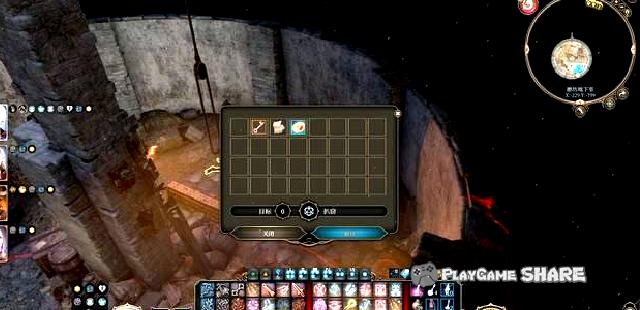
Regional General Examination: Xiacheng District (East)
18. Regional Overall -Xiacheng District (East)
Red mark-area connection point
①side waterway
② Flame Boxing Prison
③ Nine-finger camp
④ The monarch hides
⑤ Balm referee
⑥ Vampire House (on the wall)
⑦ Gothash’s old hiding point
Blue mark-task-related
① Clown limbs
② Secretist Karilion
③ Mummy clue
④ Suspicious toys
⑤ The residence of hope
⑥ Ghost Po Mutual Assistance Association
⑦ Find a daughter
⑧ Investigation murder
Roland’s miscellaneous shops (Nadchu, Gale, Roland task)
Green mark-event and NPC
① The basement of the sanctuary (stealing tribute)
② joke competition
③ Corporate coffin
④ Resurrection brother
⑤ Mermaid encounter war
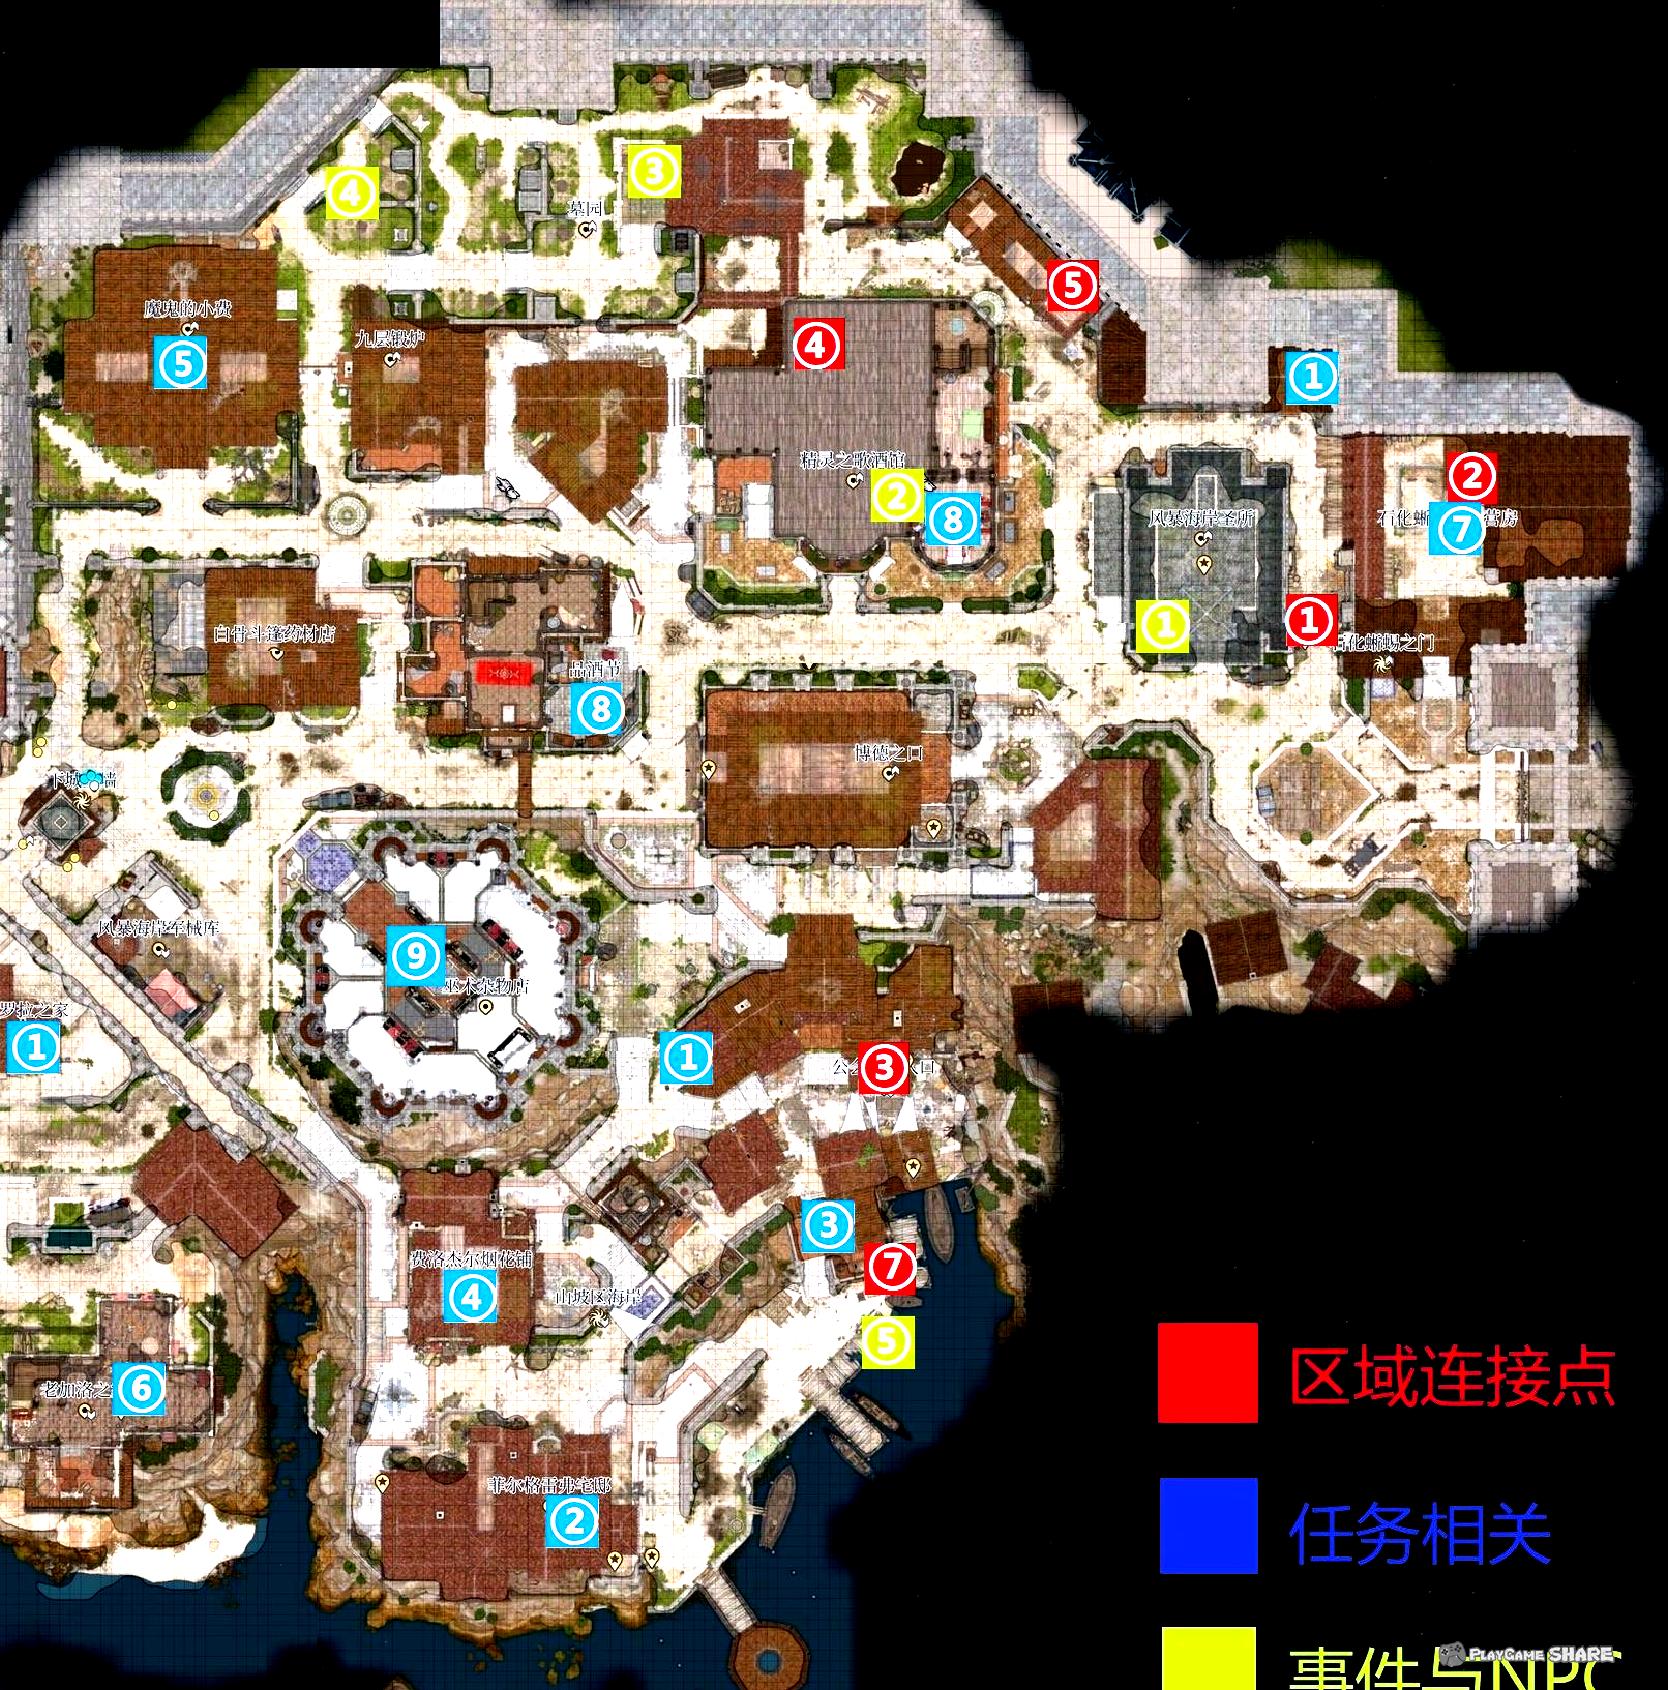
Regional General Examination: Xiacheng District (West)
19. Regional General Examination -Xiacheng District (West)
Red mark-area connection point
①side waterway
② gardener secret room
③ Steel Throne
④ vault
⑤ Ghost Po hides
⑥ The Temple of Shar
⑦ Deep in the Steel Guardian Factory
Blue mark-task-related
① Rescue the bard poet
② Save artist
③ Sad residence
④ Find the stolen gold coin (in the vault)
⑤ Clown limbs
⑦ Find the "Giant Beast"
Green mark-event and NPC
① petition house store
② Blood bomb (blood of explosion)
③ Balt believers encounter war
④ Nine-finger materials
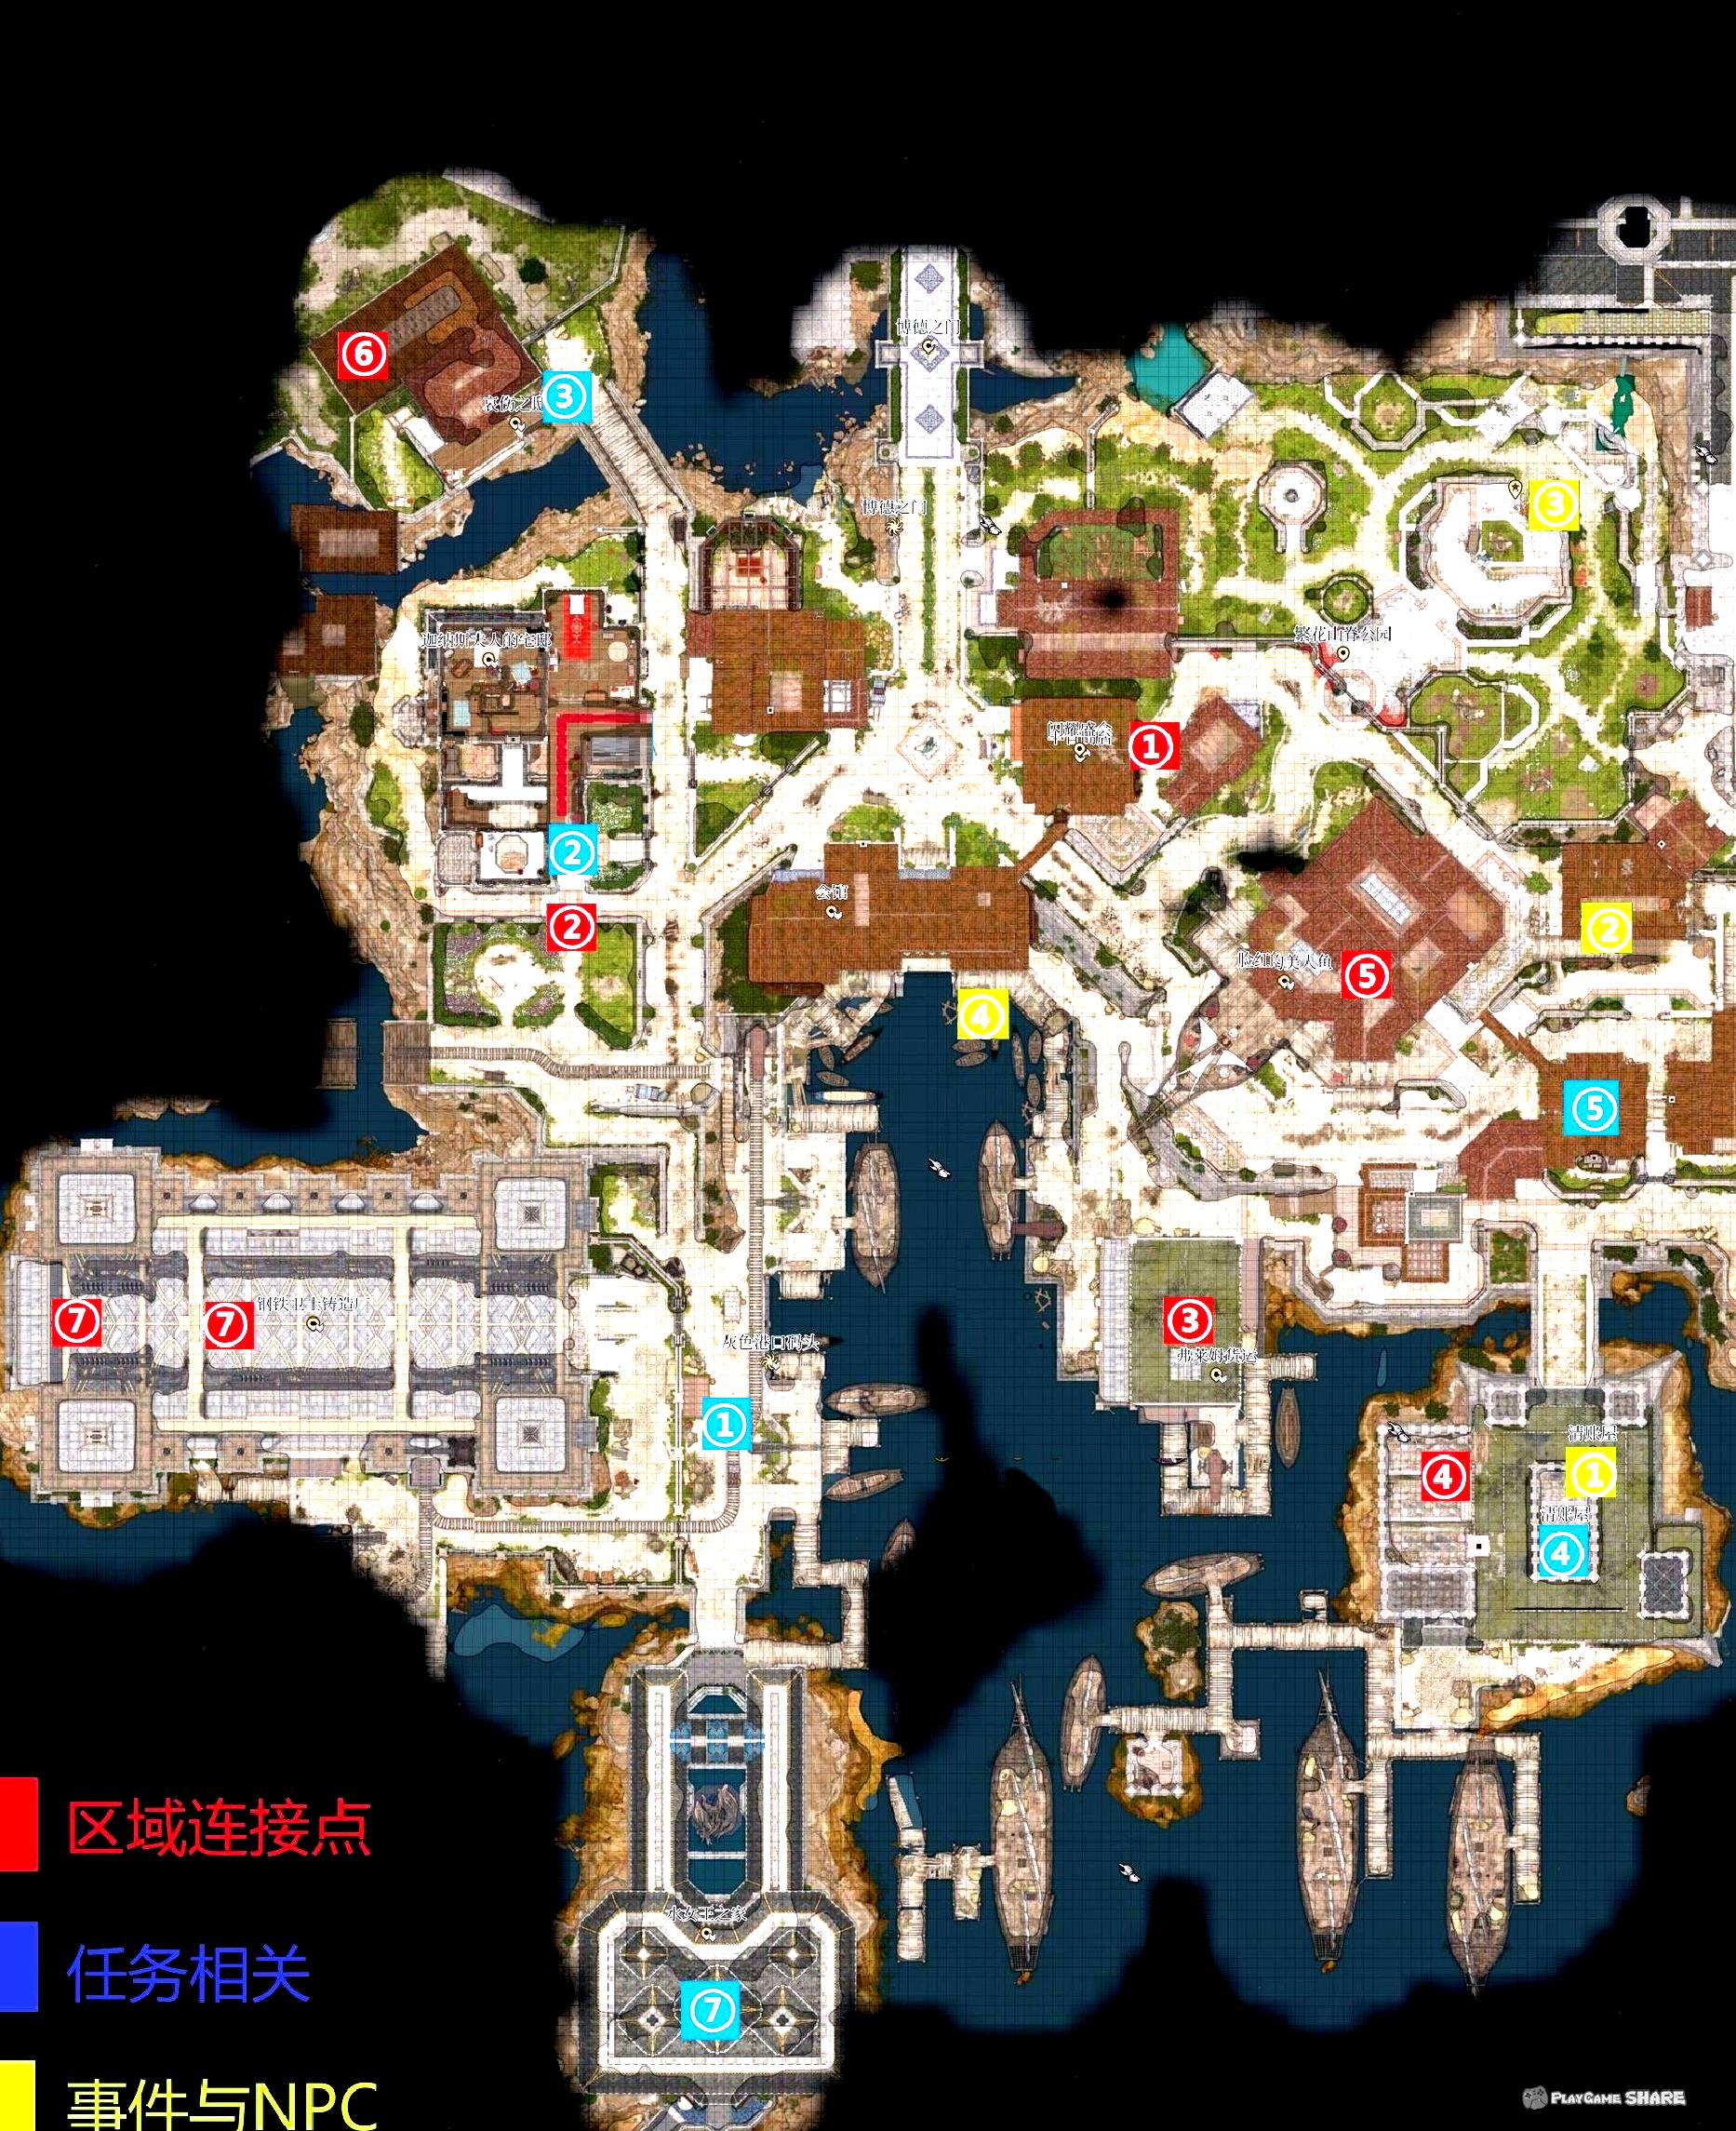
Line task: Book of Dead Spirit/Master Deep Water City
Book of Dead Spirit/Rebuilding Crown
This part of the branch line mission "Read the Book of Dead Spirit" or "Destroy the Book of Dead Spirit".
I found a bookman on the first floor of the magic grocery shop in Xiacheng District. After the conversation, he learned the list of precious books here.
[Remarks] You can also get the relevant information of the Naddonic Book in the branch mission "Lord Mummy".
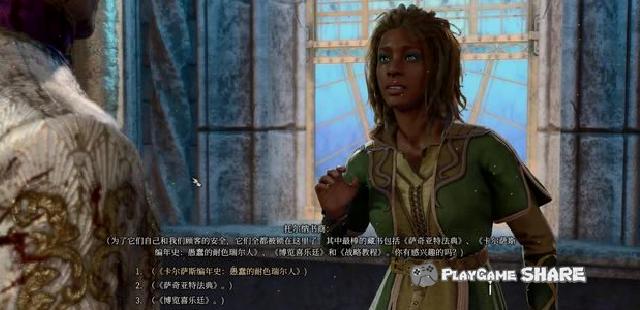
Enter the left room on the second floor of the grocery shop, and open the book on the book frame to open the portal.
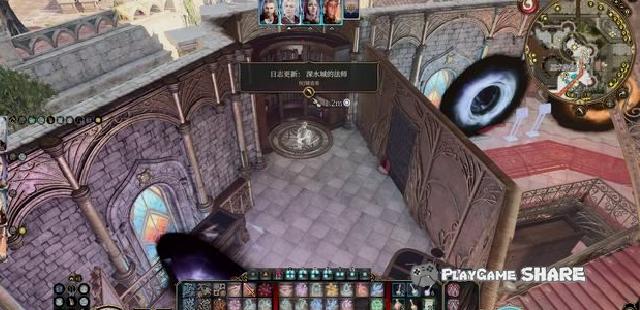
In the cellar cellar of the grocery store, you need to enter a specific door and lift the agency to open the treasure house.
The relevant literature path of the Book of Nadi is "Silver Hand → Plastic Energy → Wish".
Gal’s dujin data is "silver hand → protection → silver".

After reading related books, open the book of Nadi, and you can complete reading through the verification.
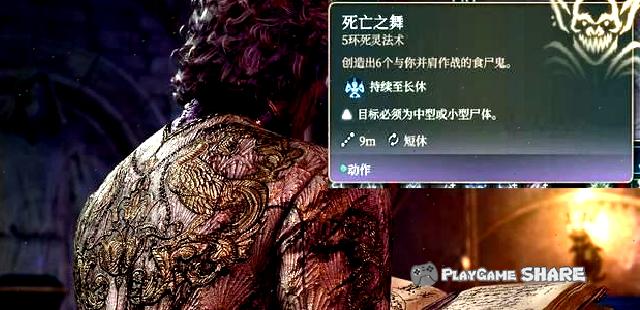
Give the corresponding books to Gal to read, and Gal can gain knowledge about the crown of Nedi.
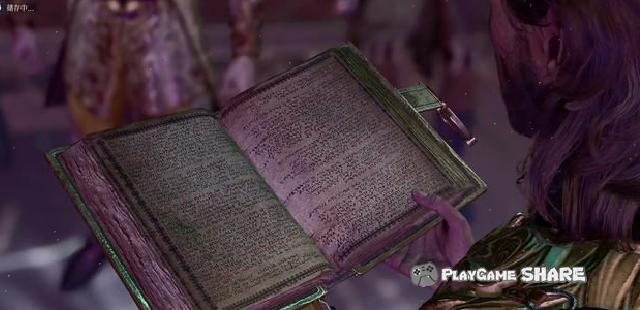
He proposed to let us recapture three color-resistant stones, and finally reconstructed the Crown to obtain divine power.
This is also a way to end.

Line task: Anti -ghost Mutual Aid Group (1)
Anti-ghost Mutual Aid Group
After entering Xiacheng District, you can see the advertisement of the "Anti -Ghost Mutual Aid Group" on each bulletin.
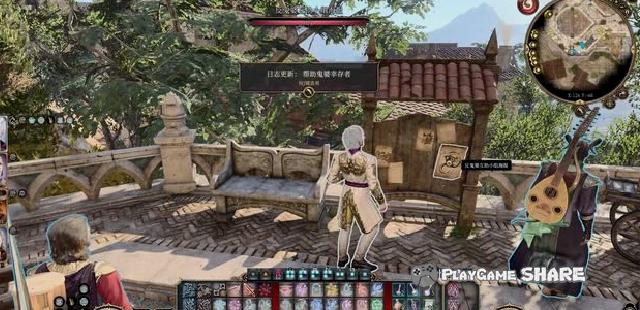
In addition, because the ghost mission and the tracing task are heavy, you can first go to Yan Boxing to take the "finding a daughter" branch task.
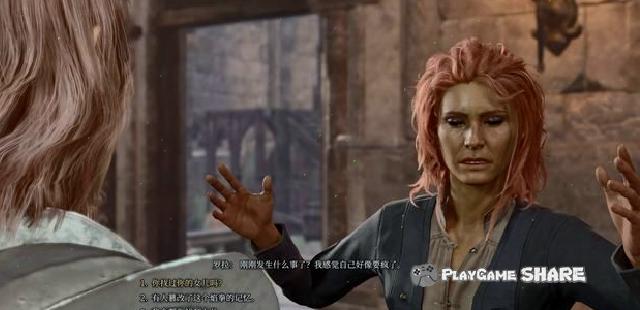
Go to the event location of the mutual aid group and find people to go to the building.
Check the document on the desktop to know the new location.

After entering the new place, the plot is triggered. If you complete the branch mission "Save Melena" in the first chapter, you can easily gain trust.

Melina seemed to be attacked by the ghost again, and this time she was cursed.
You can see the "curse doll" that can transfer positions in the house. Do not attack them, which will hurt Melina.

Use the scroll or the magic of the pastor to "lift the curse" to get it, and then enter the battle immediately.
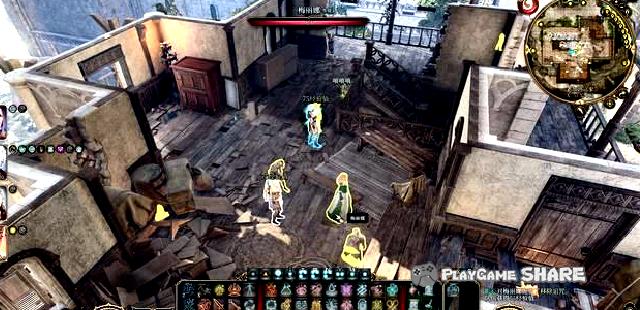
The enemy is a red hat of the dragon. After killing him, Melina will give some rewards.
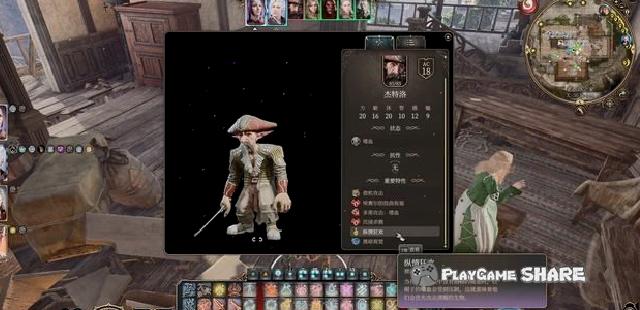
It should be noted that there are important clues to follow-up tasks on the safe on the wall on the first floor-ghost-wives disaster recipe.
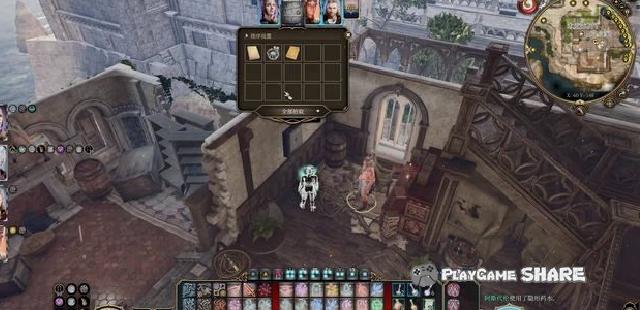
After talking to Melina, she learned that the girl took away the ghost was the missing girl.
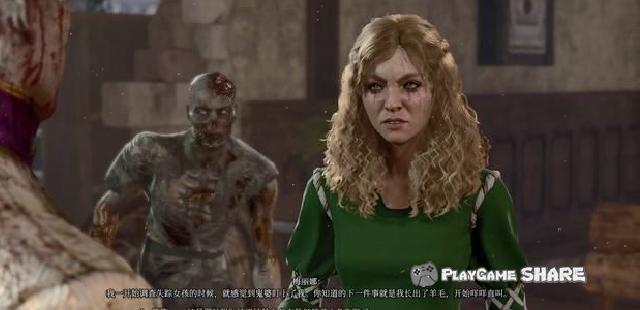
Line task: Anti -ghost -in -law mutual assistance group (2)
Going to the "Red Face Mermaid", after talking to Captain Greesley with the shopkeeper, you can end the tracing task in another way-kill the client.
[Remarks] This is actually the trap of the ghost.
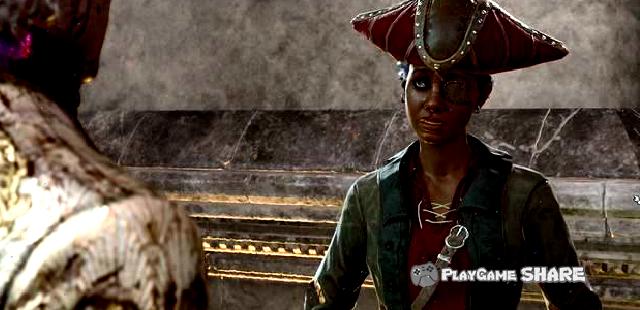
Ignore the captain and enter the basement from the door next to the bar on the first floor.
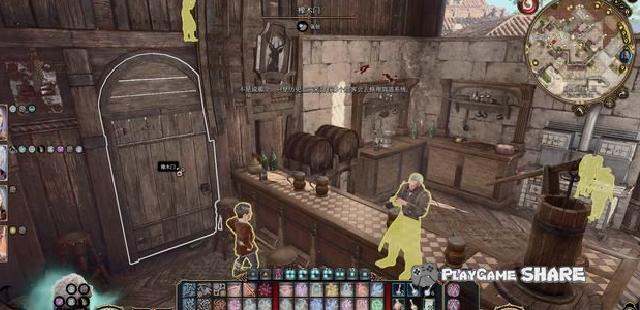
The marking wall of the basement is also a phantom, just walk in.
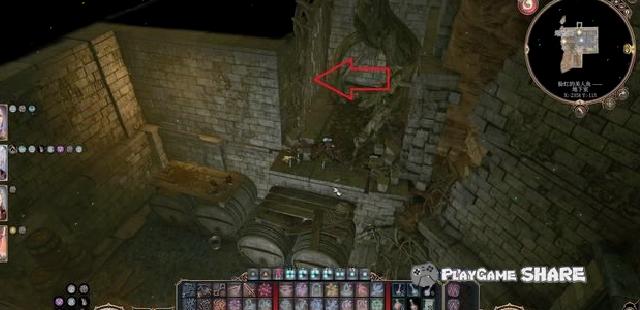
You can encounter the captain and controllers in the next area.
It is recommended not to cause fighting. After all, the captain is also controlled without a mask. You can restore your mind by killing the ghost.
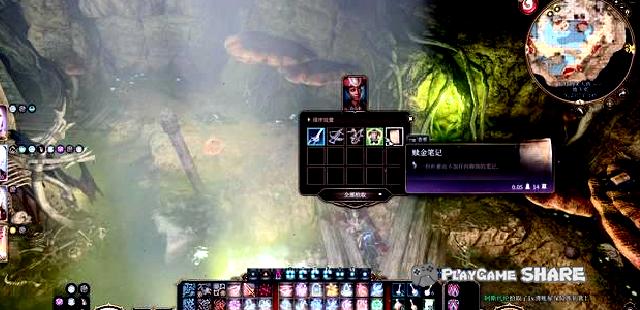
After opening the door into the next area, destroying white mushrooms and letting the ghost appear.
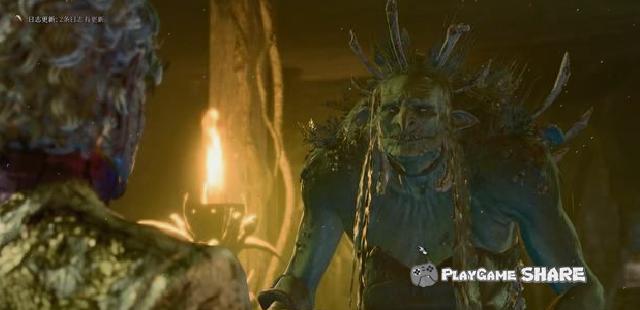
The attributes of the ghost have not changed much. The only difference is that she needs to kill the white mushrooms to cause her to harm her.
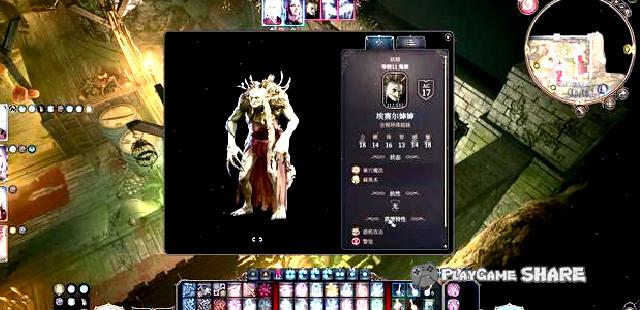
On the way, she will also call the controllers outside, ignoring the captain or setting her up, and the rest can be solved.
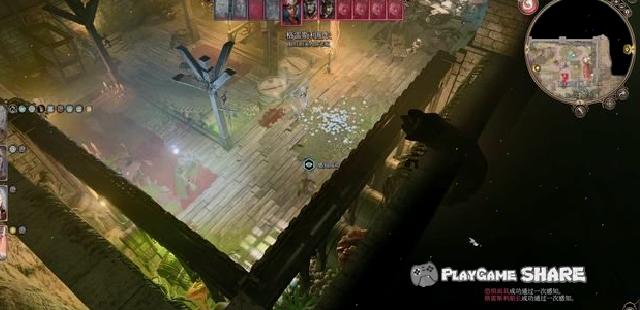
Before killing the ghost, don’t forget to throw her "ghost disaster" first, let her spit out the child.
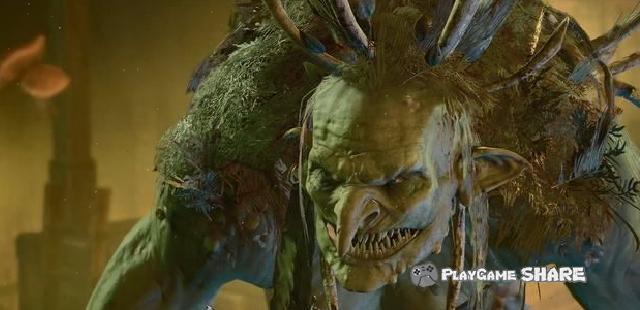
After completing the battle, you can return the child back.
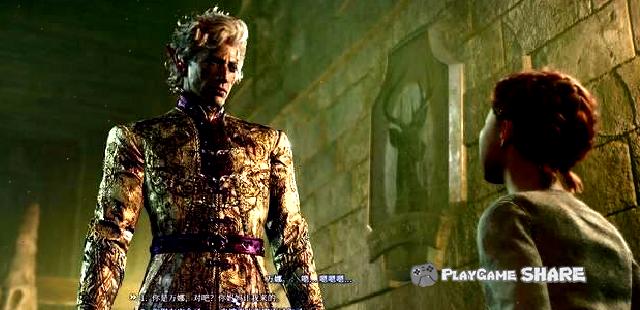
If she did not kill the captain in the battle, she would express gratitude to us so that it was convenient to carry out activities later.
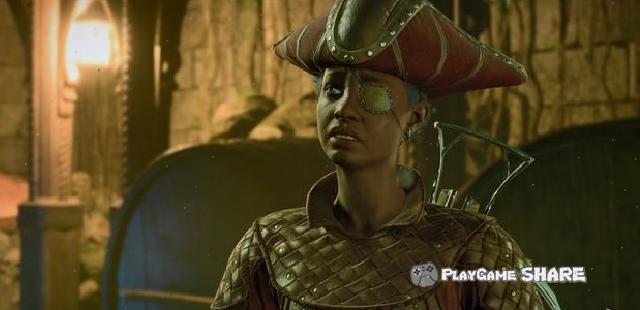
Back to Melina, you can get a reward of killing the ghost.
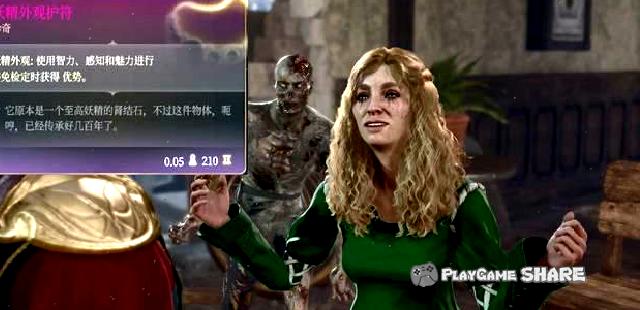
Following the guidance to find a girl’s mother can also get legendary equipment rewards.
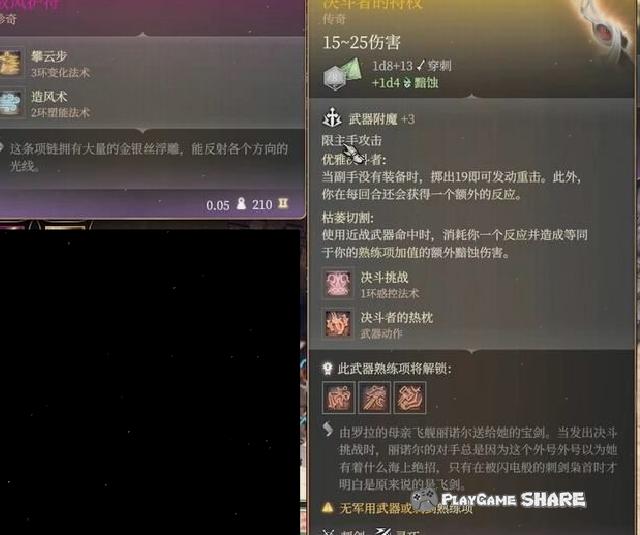
Line task: Lord Mumini (1)
Mummy Lord
You can find a large house without a door in the south of Xiacheng District. The picture below is one of the entrances (required).
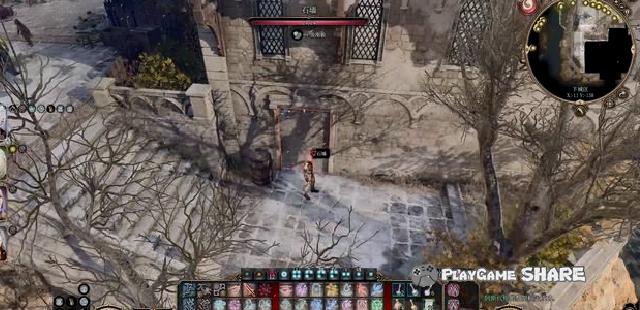
The recommended entrance is the balcony on the second floor. You can use the knocking directly. The disadvantage is that you need to have a verification after entering.
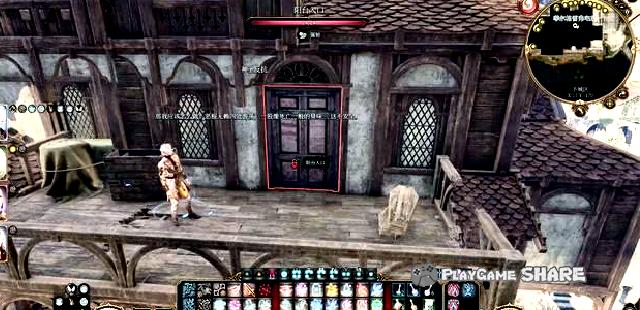
The picture below is the shore next to the mansion. From the marking position, it can be linked into the basement.
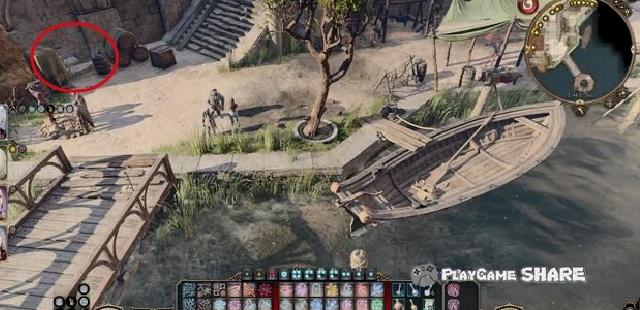
The owner of the mansion is a "secret surgeon".
If the player gets the Wing Book in the first chapter (the branch line "explores the cellar"), he will express his friendship and help us decipher the dead spiritual book.
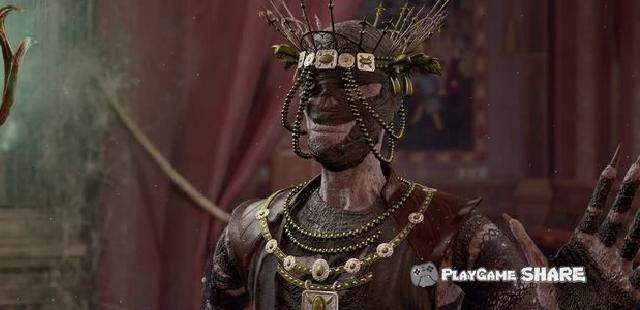
Just give money, 1500 is not expensive.
For details of the deciphering of the Naddonic Book, please refer to the magic grocery store of this strategy (Nadchu/Master of Deep Water City).
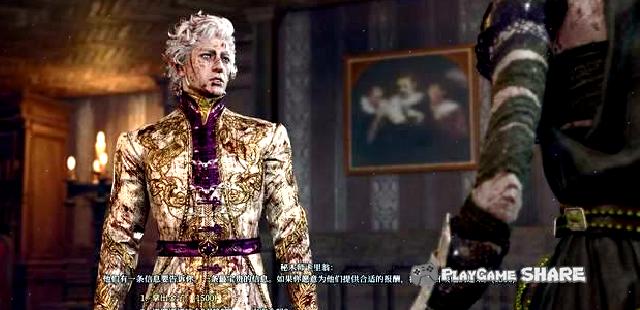
It is recommended not to fight it. Its necromancer threatens greatly and cannot kill it before finding the heart.
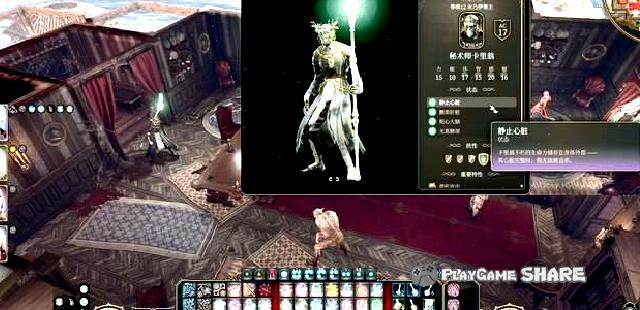
Branch task: Lord Mumini (2)
After taking over its task, starting to find goals, you can learn the details at the entrance of Xiacheng District to find the details.
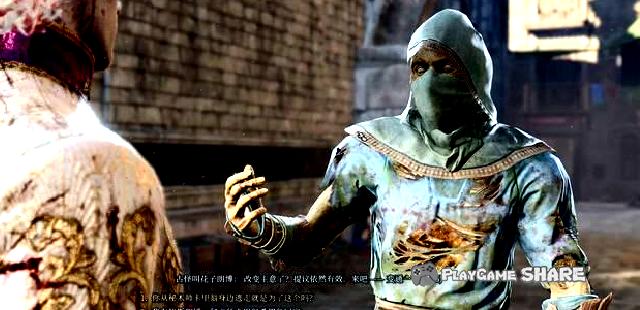
Find a "one-eyed" room in the south of the port, and open the wardrobe in the room to find Slangbo.
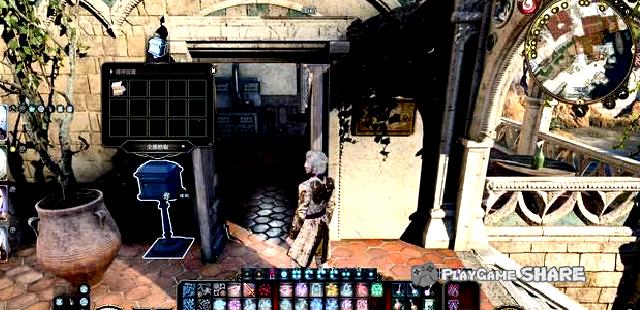
After the dialogue, the Slang Expo seeks our assistance, can kill it directly and take it back to deliver, or obey its suggestions, first find relevant information on the sewer.
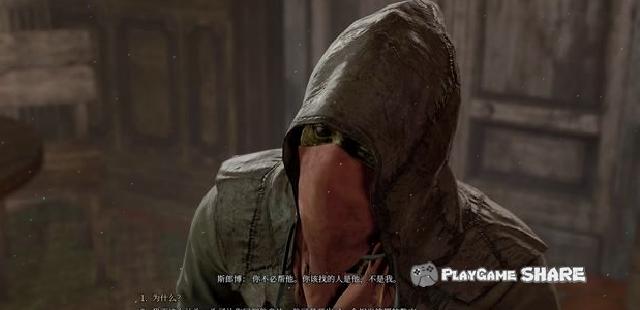
In fact, Mummy’s heart is in Slangbo’s body. After destroying the heart, you need to throw it on the ground first, and press the "CTRL key" to attack the bottle.
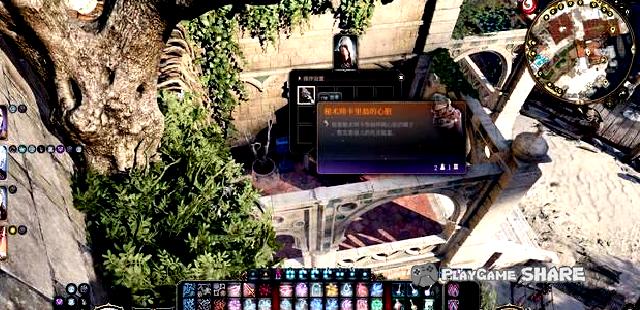
Do not take out the heart of Mumini, and keep the body of Slangbo to Mumini to get the "dispersion torch" reward on the left.
Destroyed the heart and killed the mummy and got the purple equipment on the right, and then opened the box behind Mumini to get another hand.
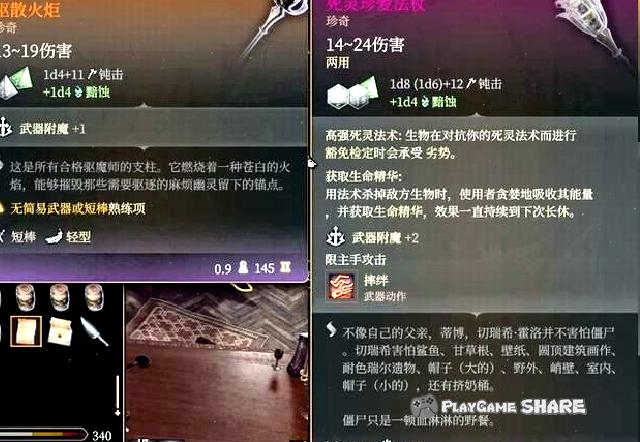
In addition, the house where Slangbo is located is likely to be one of the hidden points of Getash. After the living panel door on the balcony goes down, you can shoot the tidling rod boot mechanism.
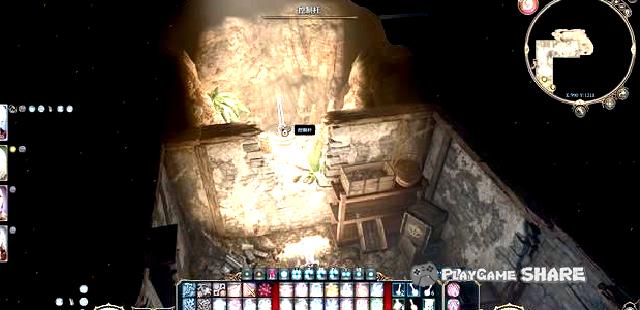
Gotash’s insurance library key can be obtained in the hidden area.
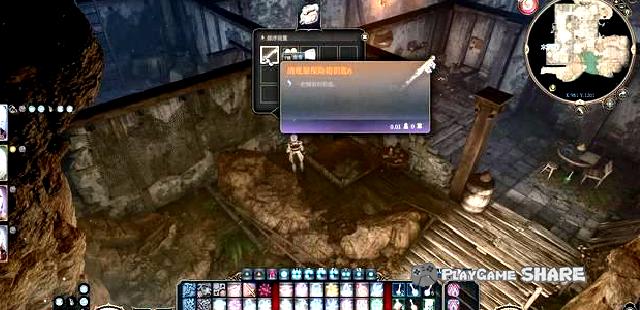
According to the list of Qingyuan House, the owner of the key is Gotash himself.

Line task: Lord Mumini (3)
In addition, the house where Slangbo is located is likely to be one of the hidden points of Getash. After the living panel door on the balcony goes down, you can shoot the tidling rod boot mechanism.
Gotash’s insurance library key can be obtained in the hidden area.
According to the list of Qingyuan House, the owner of the key is Gotash himself.
Go to the sewer of Xiacheng District, walk to the most inner side exit at the "Dishicheng Ruins" at the transmission point and enter the ancient room.
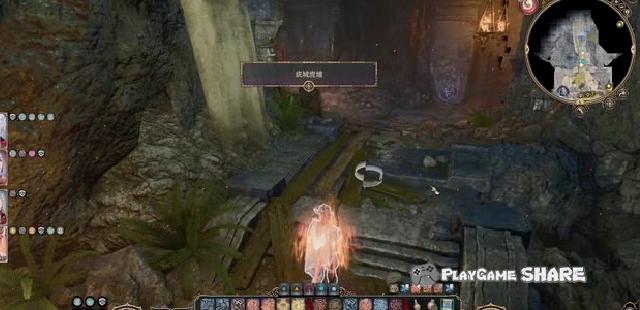
Many boxes can be seen in the ancient secret room, but opening any of them will wake the undeads wake up and launch an attack.
After completing the battle, find the location of the figure below (the left wall of the large pile of treasure chests), unlock or open the stone wall, and find two jars in mummy in it.
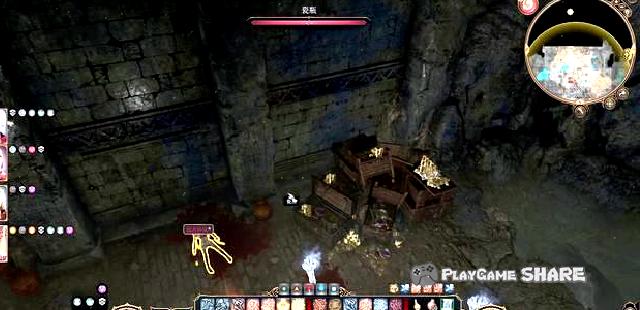
However, the heart is not here, and from the surrounding literature, you can also know that the heart is hidden in Slangbo’s body. This is why Mumini wants to find Slangbo.
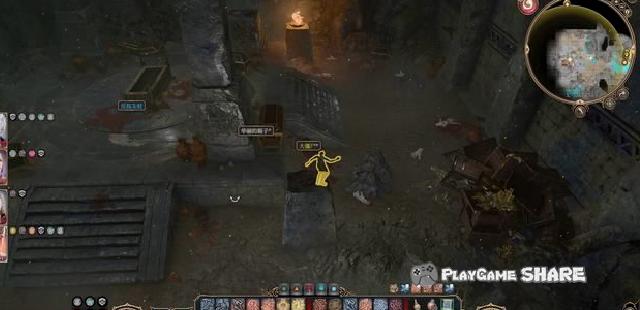
After leaving the ladder to leave or unlocked the door of the door, they finally arrived near the entrance of the "Dibuya Ruins".
After leaving the ladder, use light (or dark vision) to find the control lever to open the door.
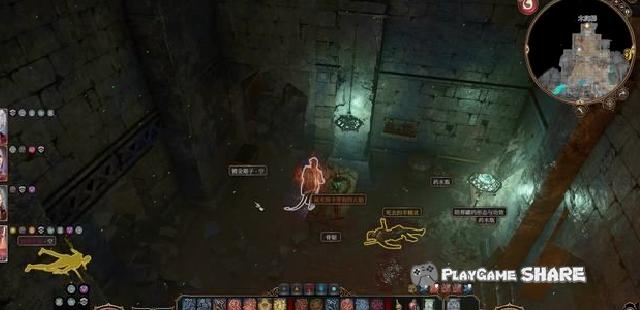
If Slangbo had been found before, he might be wandering on the street.
He can usually find him in front of Mummy’s house. After reading books in the ancient room, you can get the heart jar without killing him.

After defeating Mumini without killing Slangbo and getting a jar, you can get equipment rewards from Slangbo.
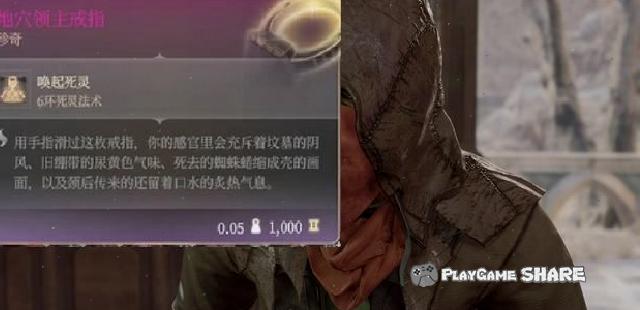
Branch task: stop publishing
Prevents publishing
The "winning mouth" of Xiacheng District can find many newspaper related information in it.
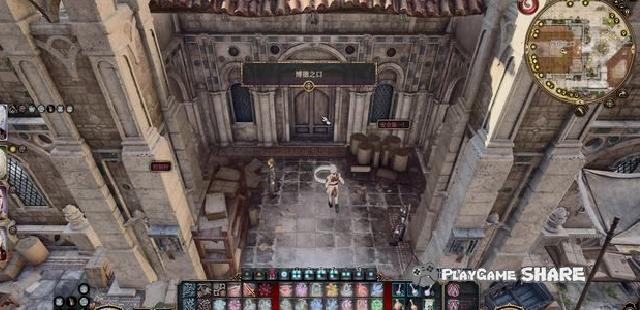
After talking to the chief editor Eitavad, it will be driven away from this area.
The editor-in-chief said that our "evil line" will be reported tomorrow, apparently he is Gotash’s loyal supporter.

Since then, it is recommended to jump all the way from the side to the top of the building.
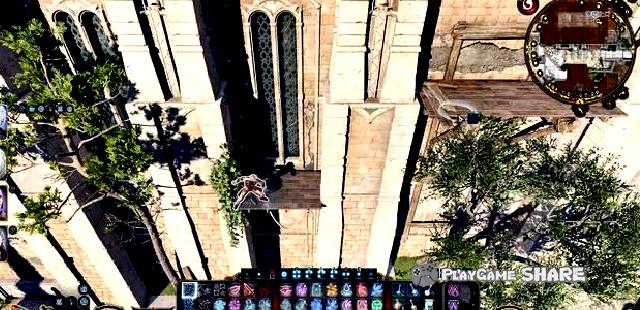
Find the roadblocks below on the top of the building. After destroying it, you can enter the downward elevation ladder.
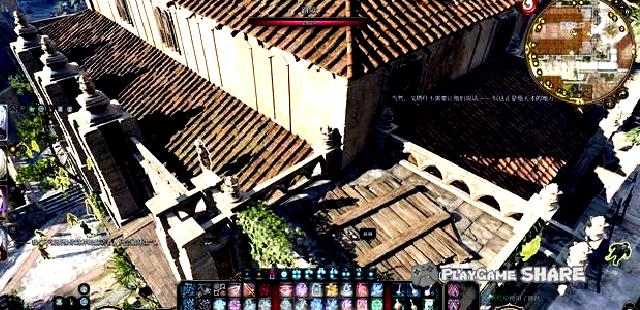
There are two steel guards underground, and they can easily solve them with a flash.
[Remarks] If there is no flash bomb, you can bypass the iron gate through the wall seam of the room at the end of the room.
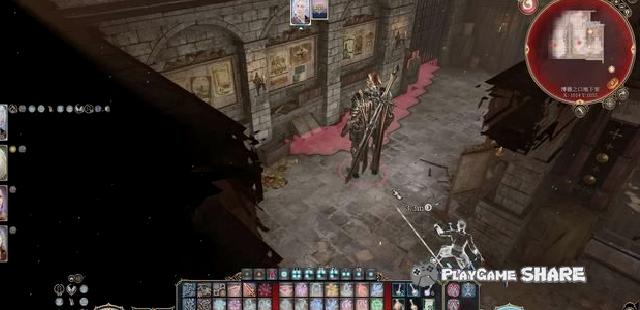
Entering the printing area, you can see the oversized printing machine in the center of the region.
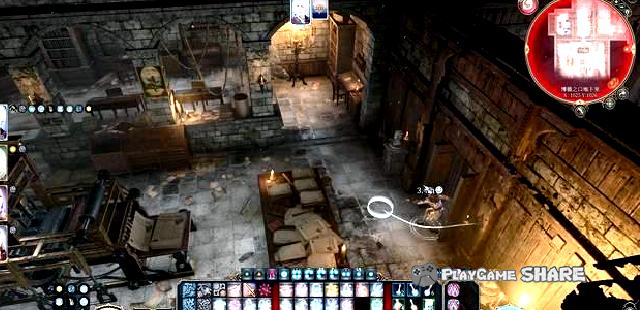
Dialogue with the printing machine, if the fairy in the moonlight lamp was released in Chapter 2, it will take the initiative to help.
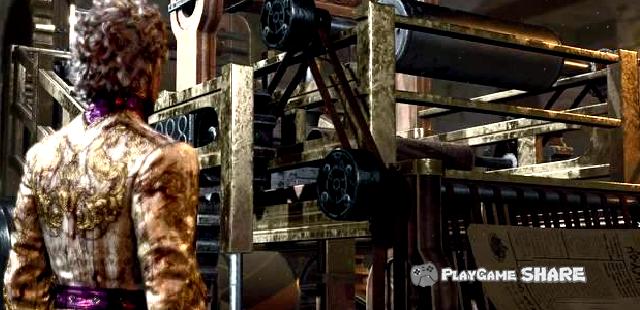
Find the target template in the trash can below, and take away the three negative templates in the area to complete the task.
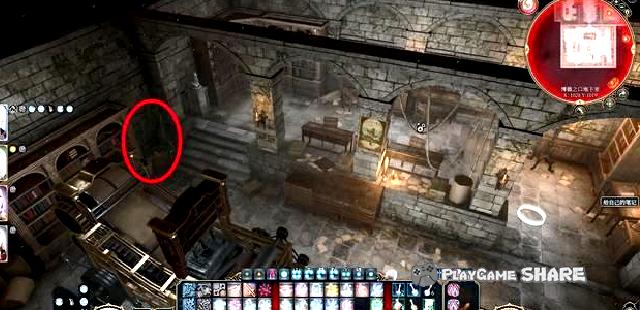
Line task: the residence of hope (1)
Hope
This task is related to the "Raphael Proposal".
After triggering the task, you can inquire about the "Devil’s Tip" shop owner in Xiacheng District to know the location of the residence of hope.
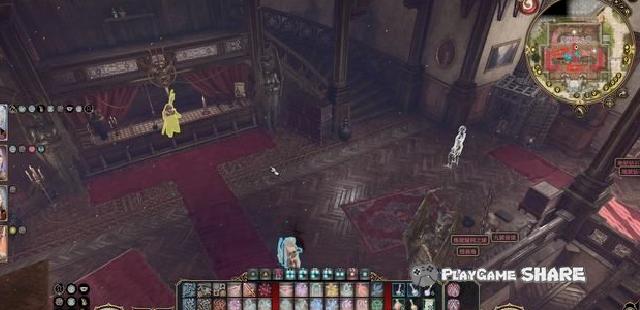
Go to the "Devil’s Tip" to the north of the city wall of Xiacheng District and go upstairs along the right stairs.
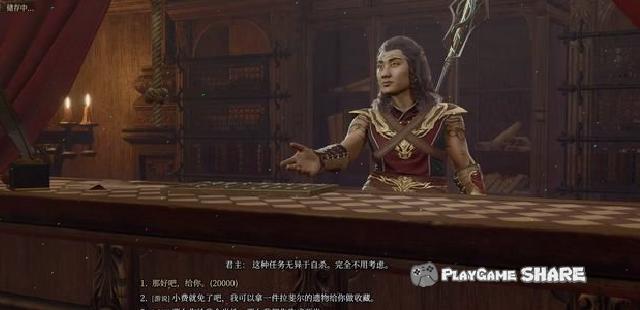
You can see the "hunger and thirst" on the second floor. If it is not lifted, it can only be entered through the round mode, or from the balcony outside the building.
The solution is relatively simple-stuffing a bottle of water or wine for it (camp supply items can usually be found in the supply backpack).
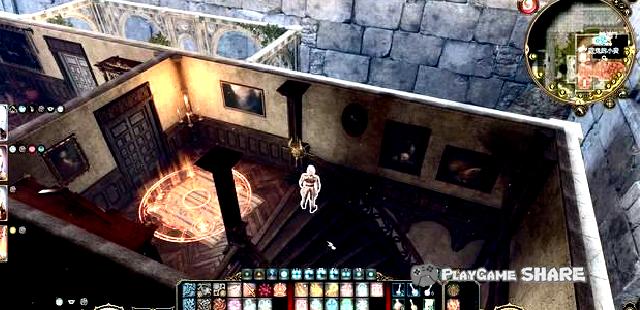
After entering the door, you can see the blood method on the ground.
The trigger array needs to place the corresponding items in a certain location, and the required items can be obtained in the three boxes of the label below.
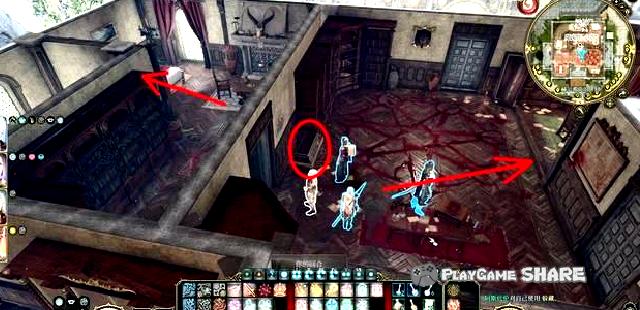
The required items are "Maln’s coins", "diamonds", "skull", "hell stone egg" and "burning incense".
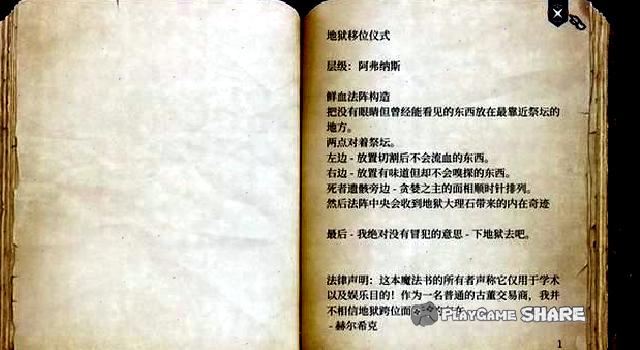
In addition to searching in the owner’s room, you can also obtain ritual supplies through transactions with the owner, theft and other channels.
[Remarks] You can also get the literature for rituals from the owner of the shop.

After completion, you can choose to enter the teleportation array and explore Raphael’s residence.
As long as you do n’t want the mansion to steal things, or take away the hammer of Orevus, it will not affect Raphael’s branch.
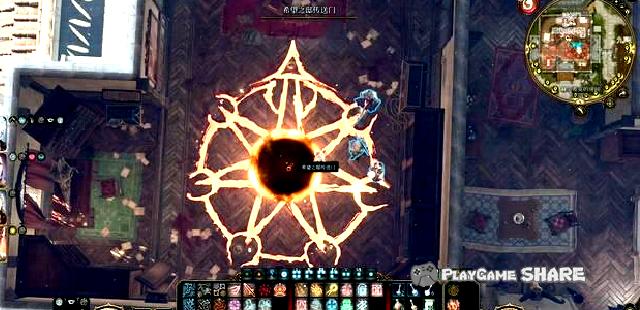
After entering the residence of hope, you can encounter a spirit name called "Hope" before entering the door.
I hope that we want to use Orevus’s hammer to relieve her restraint (the branch mission "rescue hope").
After the dialogue, you can get the "liability camouflage", and you will not be hostile to the personnel in the mansion when we are wearing this clothing.
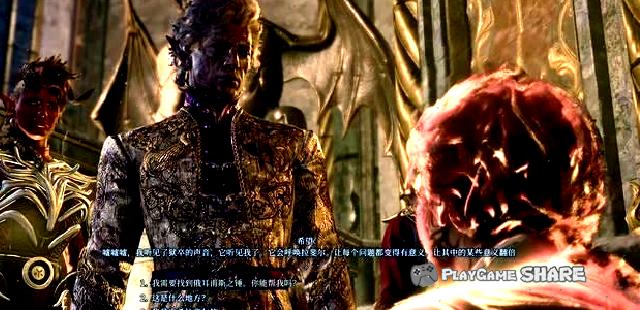
Line task: the residence of hope (2)
The picture below is the map of the residence of hope.
① Nubardin
② Orevus Hammer
③ Charm Demon, Raphael’s bedroom (connected for fork road)
④ treasure house
⑤ Prison entrance
⑥ Prison channel, outer cliff wall
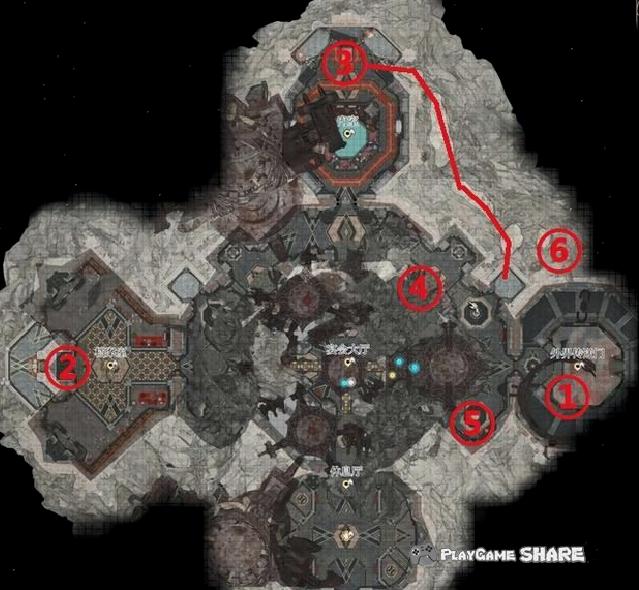
With Nurbadin, you can know that Gotus has previously sneaked into the residence of hope and stole the crown of resistance to Raphael.

From the outer balcony, you can use jump to sneak into Raphael’s bedroom.
[Remarks] The mark point in the figure below is one of the channels to the prison. After getting the hammer, it is recommended to go to the prison from this.
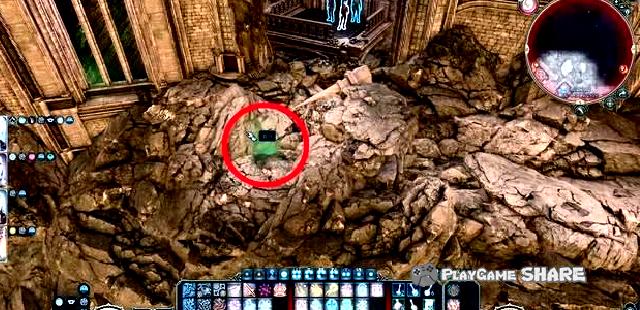
The position of the treasure house is as follows, and two judgments need to be passed after pressing the gem.
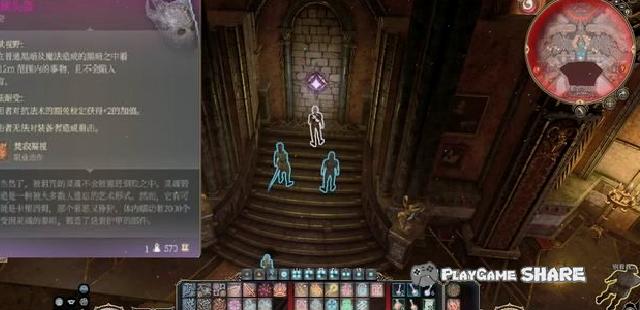
After entering Raphael’s bedroom, he will encounter his exclusive charm -Halep.
Harlerp will try to imitate the player’s body and tell the player to unlock the instruction position of the hammer after a fragrant scene.
[Remarks] Rejecting his/her invitation will enter the battle.
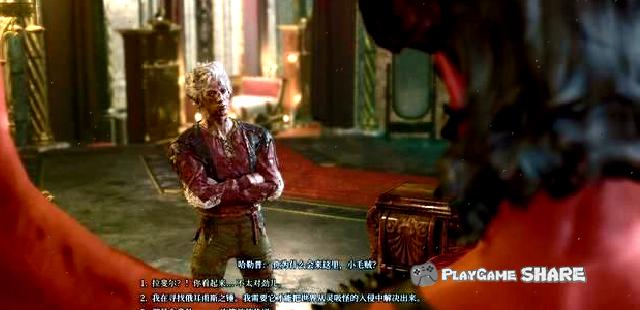
Press the button below the portrait to get Raphael’s notes. There is a pole be next to the light curtain to be lifted.
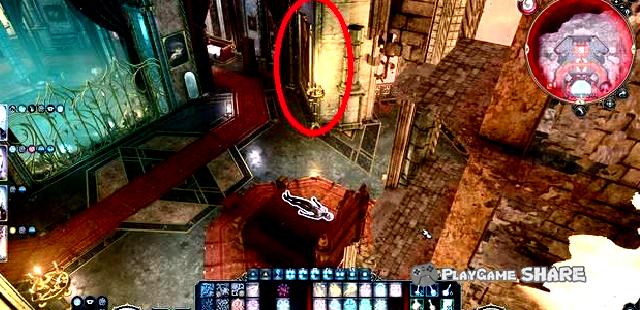
After entering the archives room, you can disguise visitors through "detecting ideas" when talking with the insurance manager.
However, even if it is disguised as a visitor, it is not very useful, and it still cannot take away the items inside at will.
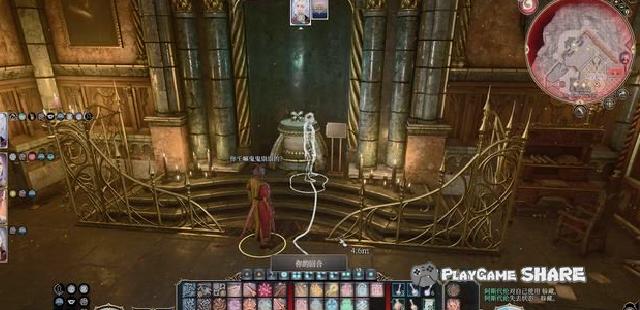
Valuable in the file room is the equipment on both sides except the hammer.
The necklace is physique 23 and gloves are strength 23. Both below the two have pressure plate alarm, which need to be perceived and lifted first.
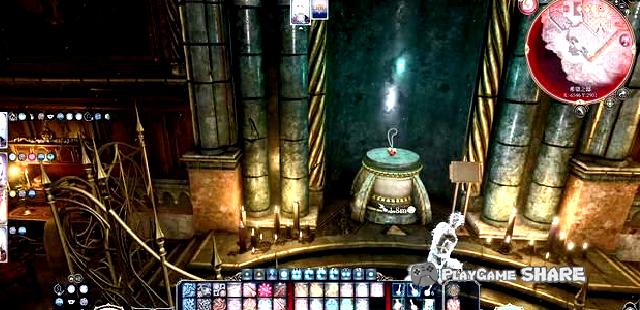
It was the same result when he was discovered and took away the hammer -Raphael returned, and then he had to fight Raphael.
If you don’t want to fight with Raphael, you just want to use two equipment to ask one person to talk to the custodian, and the other person sneaks the board and get the item (turn on the round mode).
[Remarks] Most of the NPCs in the mansion are anti-hidden, and the custodian will keep up with the latest players in the archives.
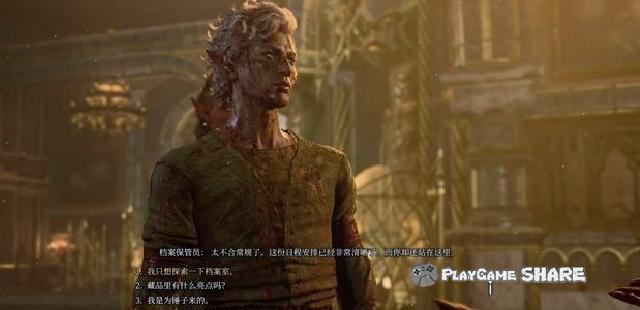
Line task: the residence of hope (3)
The following is the process of getting the hammer to rescue and defeat Raphael. For the process of not taking the hammer, please refer to the subsequent part of the "Raphael Proposal" of the branch mission.
[Remarks] It is suggested that at least one role in the team can lift petrochemicals, and at least 2 bottles of petrochemical "petrochemical lizard oil" in the backpack will be lifted.

After getting the hammer, the disguise will be forcibly lifted. Even if you take a few more clothing before, you will be forced to be lifted.
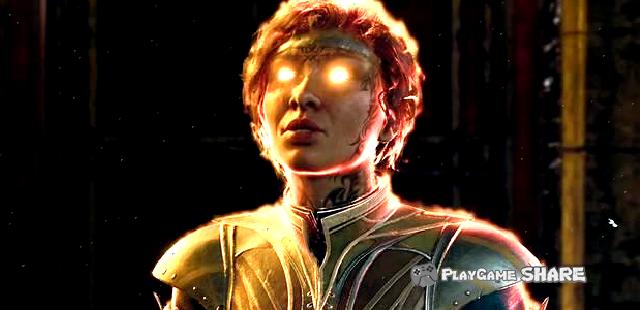
After opening the door, the alarm will be triggered. It is recommended to turn on the round mode. Sneak into the Raphael bedroom aside, and enter the prison channel along the cliff wall.
You can also open the right door and kill from the middle to the prison entrance on the other side.
[Remarks] If you don’t want to fight, you need to sneak through the situation of hidden, and you cannot stay in the enemy’s sight at the end of the round.
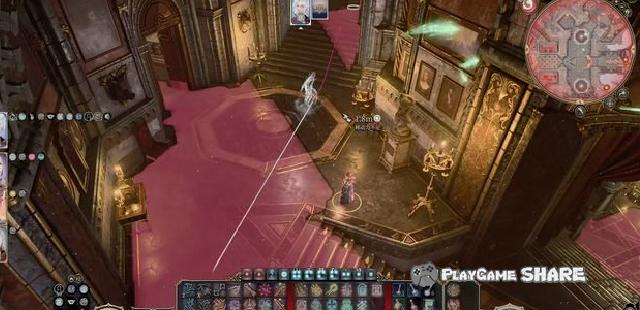
The rolling hell ball is as follows, and it will suffer high damage if it is hit or embarked on the flame.
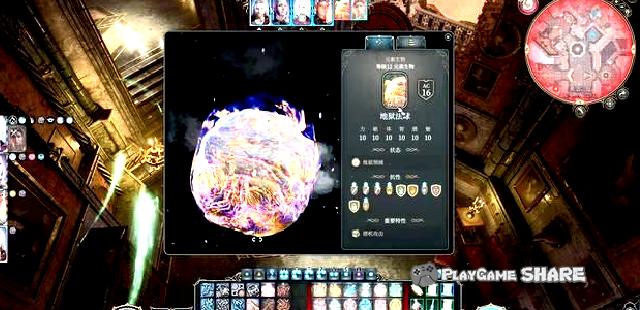
After entering the prison, you will be rescued after you need to defeat the surrounding enemies.
The most important thing to pay attention to is naturally the magic of the eye, and the strength of other enemies is not high.
[Remarks] It can also break the crystal during the battle, and attack with Orevis hammer will cause additional damage.
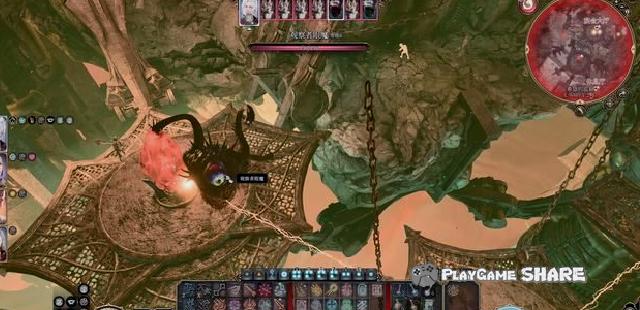
Later, I hope to join the team in the form of a follower and return to the entrance to find Raphael.
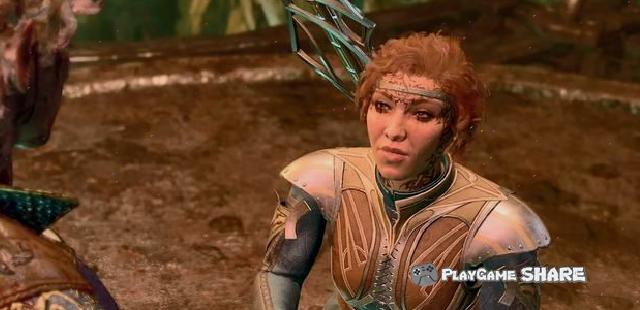
When he met Raphael, he talked to him. If he had not fought with the devil Eu Balu at the Saer trial site before, he could let him join us by lobbying.
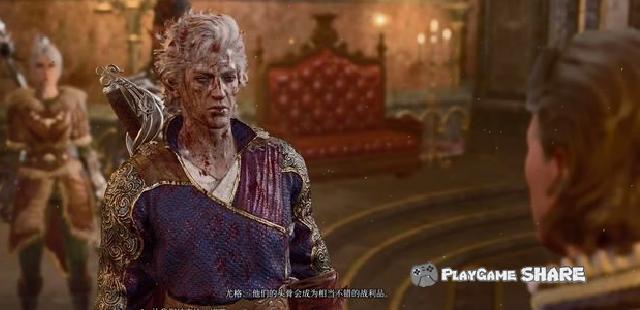
The attributes of Raphael are as follows, and you can give him Debuff by destroying the soul column of the green light around.
It should be noted that when the four soul columns are destroyed, he will be strengthened.
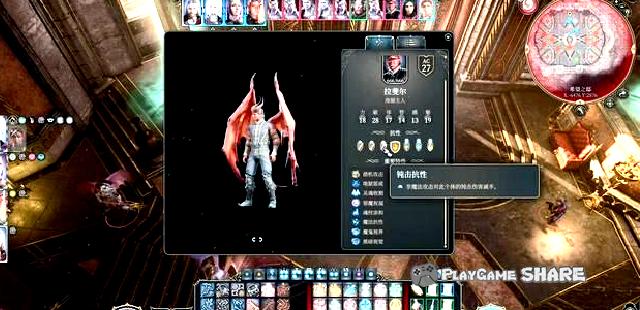
Raphael will be transformed after the battle lasts 3 to 4 rounds, and he will be strengthened when he kills the unit.
However, he is the demon body, and he can kill him with control techniques such as good and evil protection or monsters.
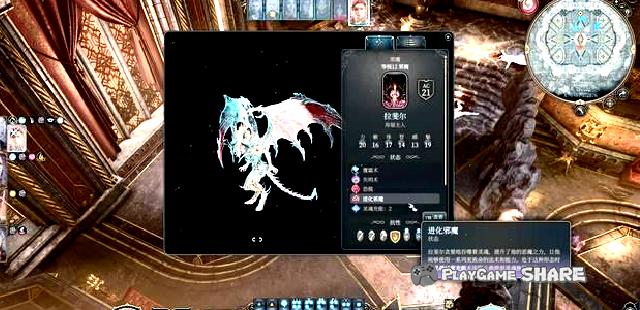
While completing the battle, the branch mission "rescue hope" and "Raphael’s proposal" were also completed, and the legendary equipment that hoped to give.
At the same time, she will also receive the assistance of hope, and she will assist us in the final wars (the task "convened allies").
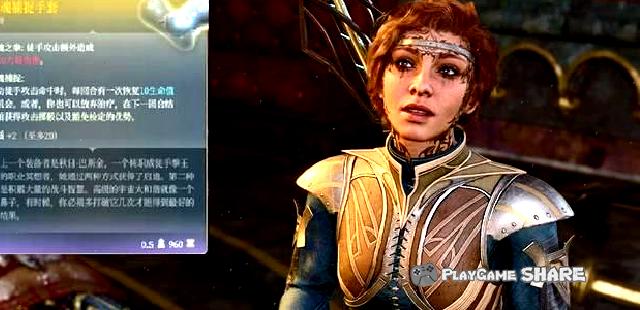
After returning, you will also receive the communication of the monarch. No matter what you speak, you will leave a pimple, but as long as you do n’t go to the astronomical world, you will not trigger the mission of the Geis Yankees.
[Remarks] Don’t forget to Nap Raphael’s armor before leaving.
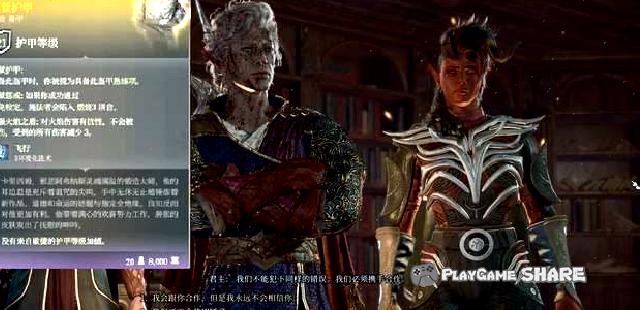
Line task: Dragon Ansu
Dragon Dragon (Rescue Duke Gao)
This task needs to complete the savior of the branch mission "The revenge of the iron hand dwarf".
Regardless of whether the Duke Gao is dead or alive, we can obtain information about An Su about "Guardian of the Gate of Bud".

Because after completing the front task, it is necessary to be hostile to Getash, players can start from the teleportation point in the south of the level, use the portal to the cliff from the bridge head, and enter the prison from the gap between the prison (see the "ally in this guide for details.(1)".
You can also put Gotash first, and swing up into the prison.
After entering the prison, you can find two "faucet torchs" in the following icon position, which can open the door to the lightning damage to them.
[Remarks] The prompts of this operation can be obtained after talking with the Duke of Gao (need to promise the Mizola proposal).
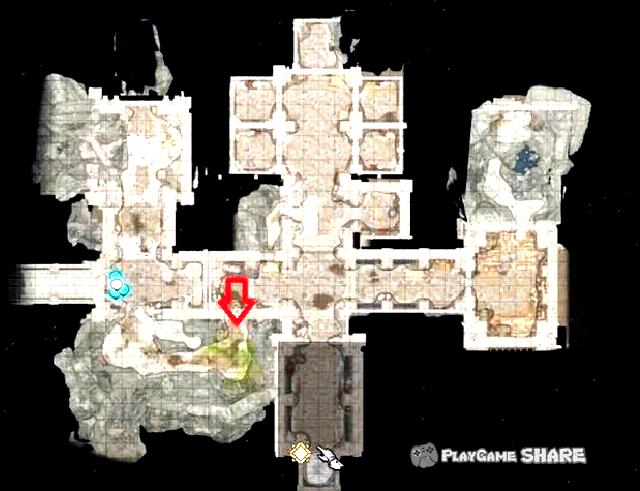
Seeing the dragon needs to pass the four trials of Bodian.
Between courage-refresh the enemy every round, and support 4 rounds and kill the enemy.
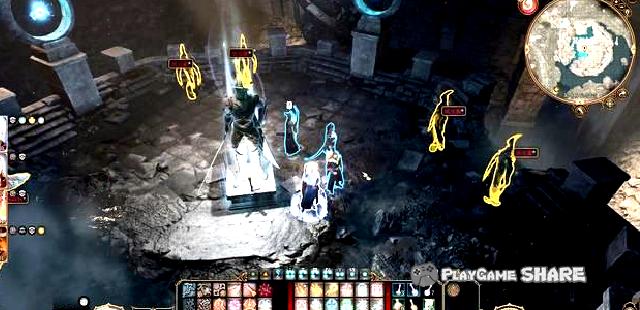
Between righteousness-use the mantra of the painting below and place it on the platform where the arrows are directed.
Looking at the surrounding paintings, we can know that men’s theft is to do good, and the judges have too much torture due to bribery.
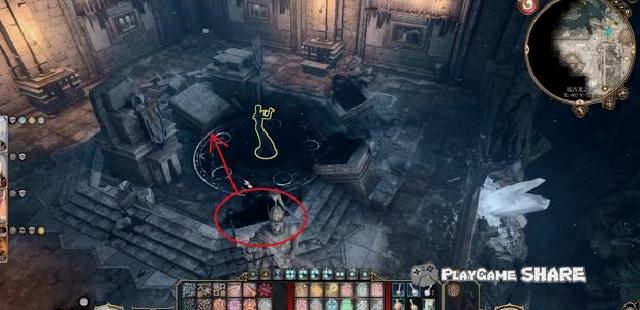
If there is Will in the team, you can get some prompts to talk to him.
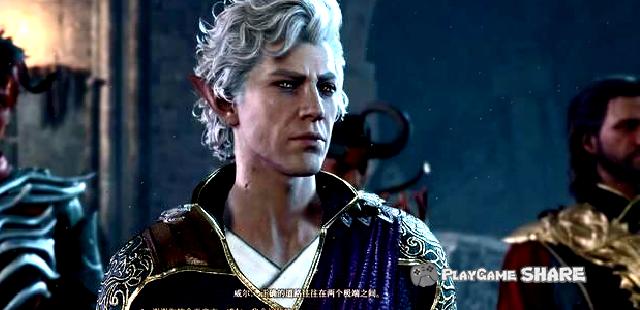
Between strategy-take the direction when entering the door, operate White according to the prompts below, and you can complete the death of Black in three steps.
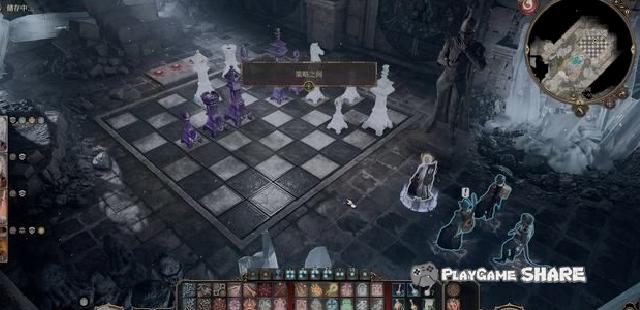
If there is Gal in the team, he will give guidance deeply in Sanlong Chess (chess).

Operate according to the prompts, or click any Black to see the operation corresponding to the prompt.
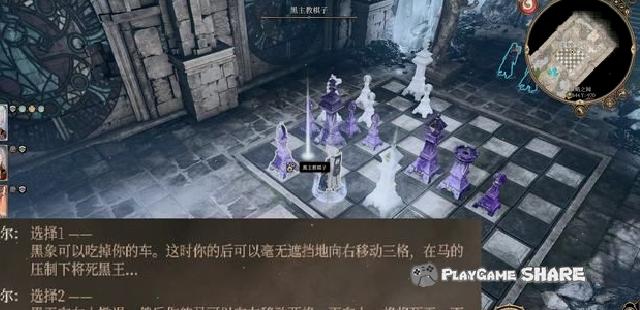
The final insight walked directly from the direction of the figure below.
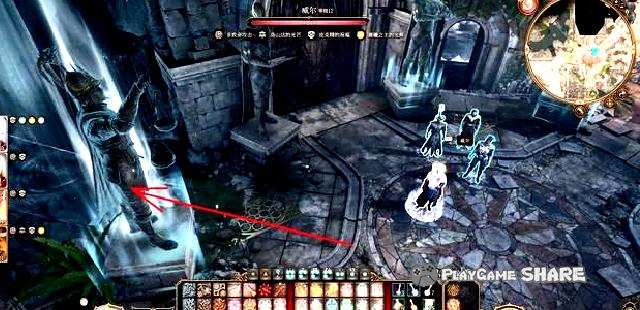
Between insight — Use "Monster Defining" to set up a flying book, check them and find the author who betrayed the concept of peace.
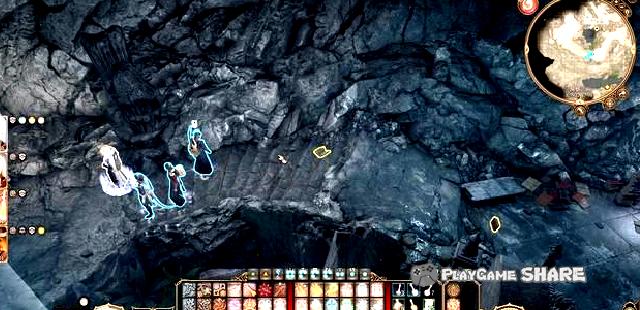
If there is Will in the team, you can get some prompts to talk to him.
Based on the prompts to kill "Solto" to complete, enter the room where Ansu is located.

An Su has already died, but its soul is still hovering here, triggering the dialogue after approaching.

It is learned that our allies "monarch" is actually the founder of Boddan, Bodian.
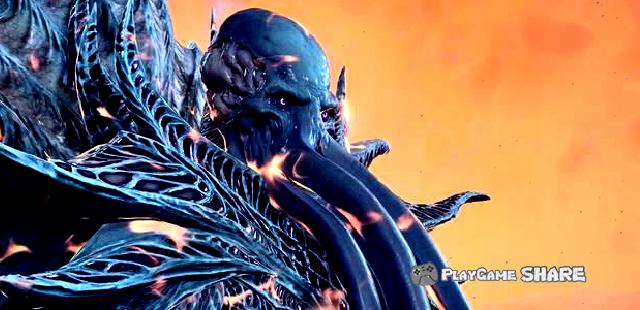
After entering Ansu, the picture below is the attribute of "Heart".
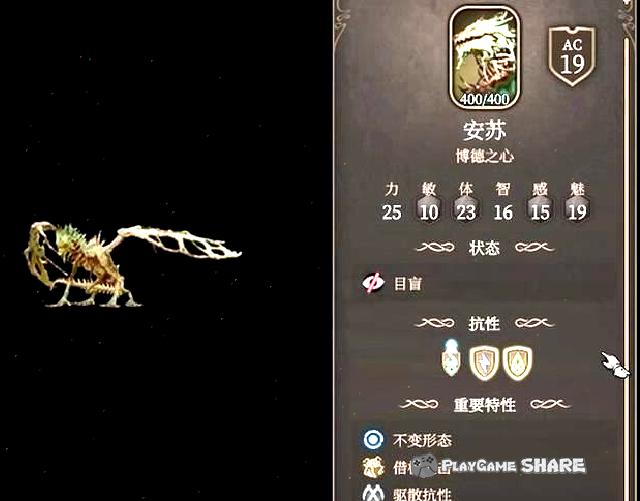
After the victory, you can get the legendary equipment "Bodian’s giant killer", and you can leave after picking up the "Bodian helmet" on the back of the table.
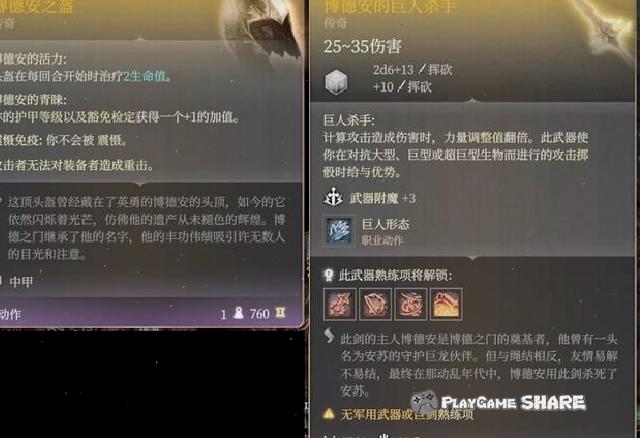
Talk to Bodian before leaving, you can know the historical stories between them.

Line task: Save the artist
Save the artist (the second half)
This task recommends that after completing the branch mission "Lord of Mummy" to complete it, or take the orange "dispersion torch" in the box behind Mumini.
Find the "Ganas Manor" in the west side of Xiacheng District, and enter the house after talking to the maid in front of the door.
Prior to this, the San Talin will redeem the "painter" in the first chapter.
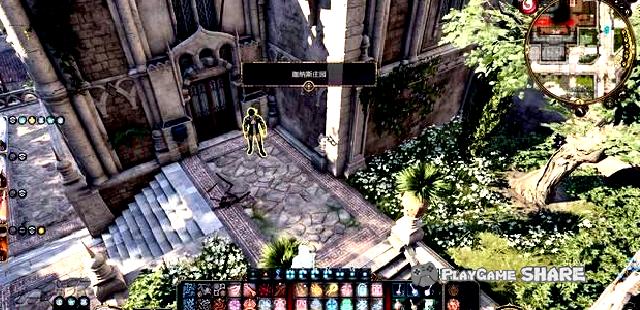
Affected by dead spirits in the house, there are "promoting narrow ghosts" everywhere.
Go straight to the east of the third floor to find the artist and his wife.
[Remarks] You can fly directly from the outside of the building to the balcony to avoid fighting.
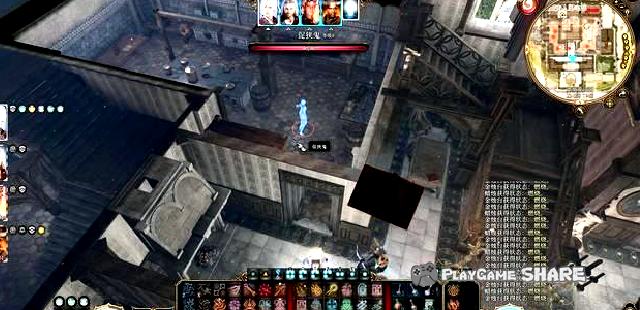
There are three enemies in the area:
① Promote narrow ghosts
② Pretend to be a torch. After the attack is destroyed, it becomes a narrow ghost.
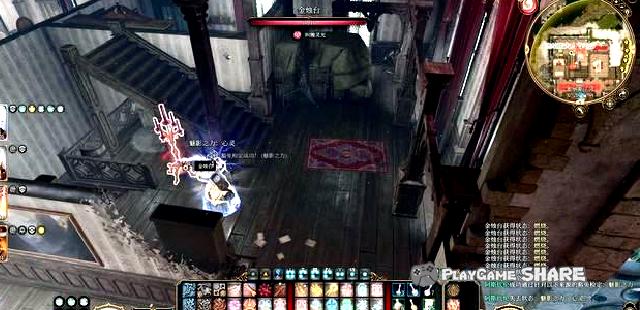
③ Curse the skull, there are high-level resolute (50), using the spell can be destroyed directly.
It is usually placed at the entrance of the stairs. After approaching, you will use thunder to hit the player to fly down the stairs.
[Remarks] You can get closer through stealth, round mode or jumping method (thunder has cooling time).
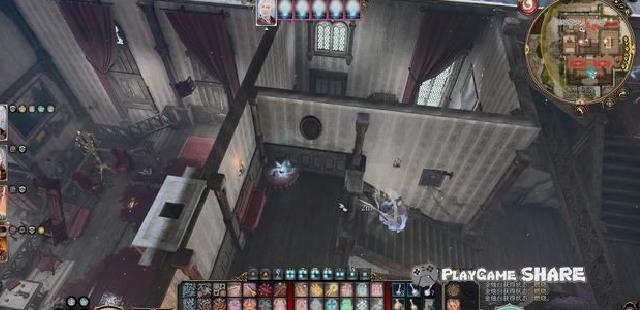
After finding the Oscar couple, I learned that Oscar was like "possessed" after something, and her home began to "haunted".
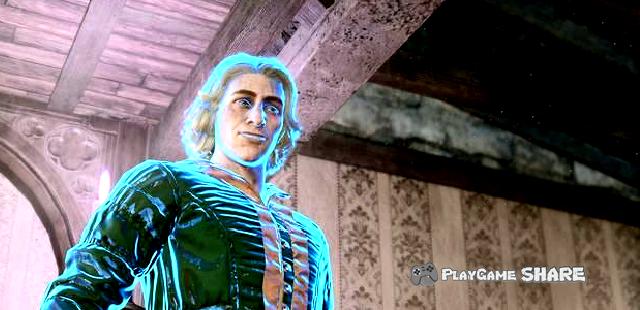
Go to the top floor, you can go all the way from the inside, or you can use flight techniques, fog change, etc. to the top floor balcony from the outside.
Place the labeling painting on the painting frame (synthesis) to open the door.
[Remarks] You can also pry the lock directly.
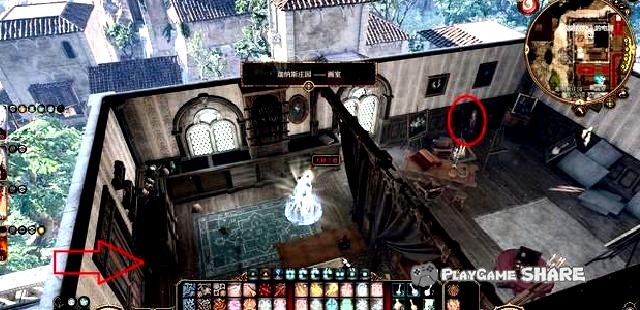
Use the "dispersion of torch" to the curse painting in the secret room, and then return to Oscar with the ghost.
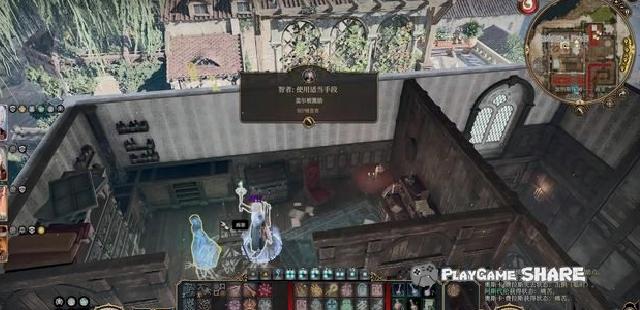
It turned out that Oscar used necromating in order to see him with his ex-girlfriend, all of which were "attached to the condition."
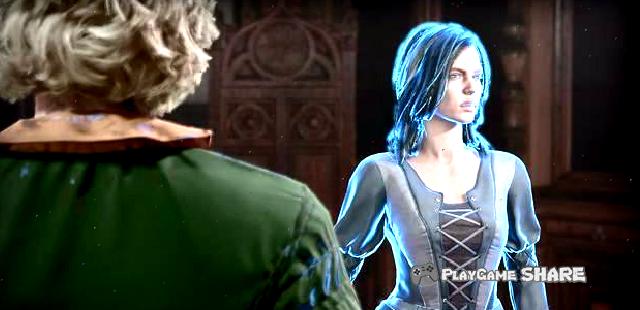
You can persuade the ghost through various means, and you can get it without fighting.
After that, Oscar will thank you, and you can get his painting "Hero of the Gate of Bade" with him to the top floor.
Regional Total Examination: Lower Waterway
20. Regional Overall -Lower Waterway
Red mark-area connection point
① Flame Boxing Prison
② Bookcover
③ Export of Nine Fingers Guild
④ A well cover near the door of Bade
⑤ Flem cargo gap
⑥ garden dense room
⑦ main brain position
⑧ Polishing Lizard Gate
Blue mark-task-related
① Rescue Orevus
② Assist underground forces
③ Balt Temple entrance
④ Mumini Kalion Church
⑤ Clown limbs
⑥ Olympic stones
/High-level harmonies/assisted underground forces
Green mark-event and NPC
① Arabel
② Solid skeleton
③ lower sewer valve
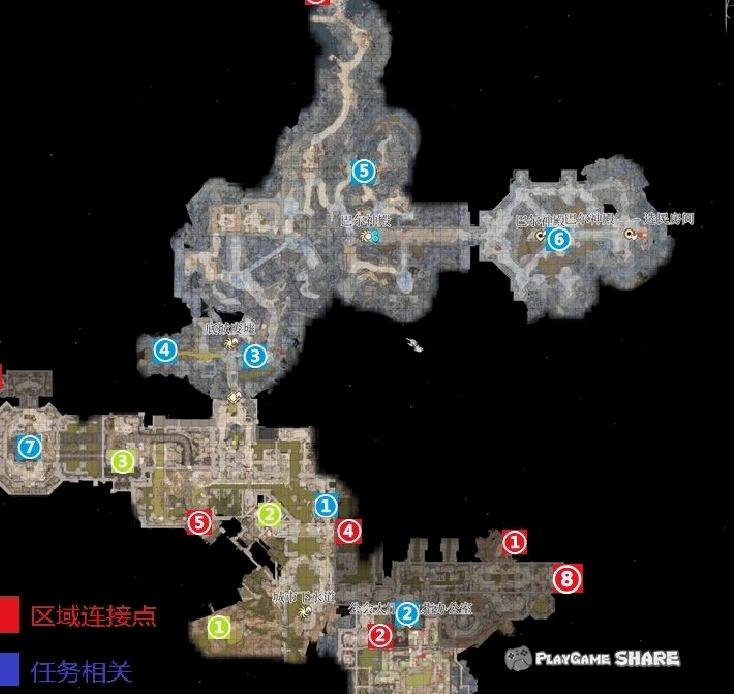
Partnership task: Asleen (1)
1. Asdon
Chapter One
After finding Astai Lun in the crash area, he usually triggers his related plots at the second long break.
He will confess his vampire identity to a player with a better relationship, and hopes that the protagonist can take him blood blood.
This plot will trigger twice. If you choose to refuse twice, he will dry the protagonist when he can’t bear it.
It can be avoided by verifying the blood of animals.
After that, you can encounter a "vampire hunter" for the first time near the tea room in Chapter 1. Through the verification, you can hide the sky and avoid fighting.
If you choose to fight, the Gur people will be dissatisfied in Chapter 3.
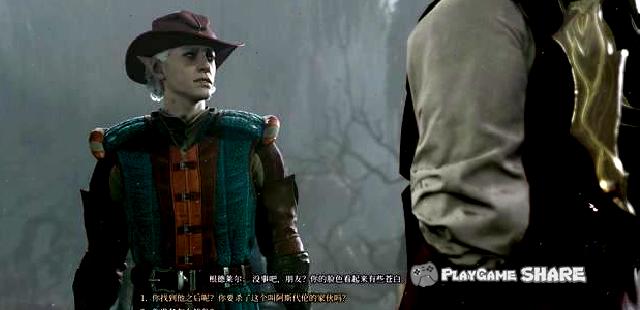
After that, the third chapter was found in the northeast of Levonton.
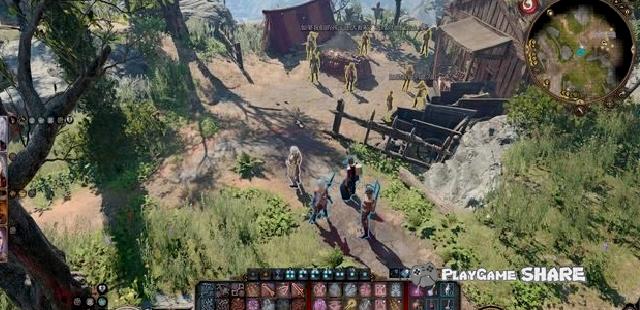
After the dialogue, they could promise them to rescue them.

From the "main wall of Xiacheng District", walk north to the city wall into the castle of Zael, the "former owner" of Asdon.
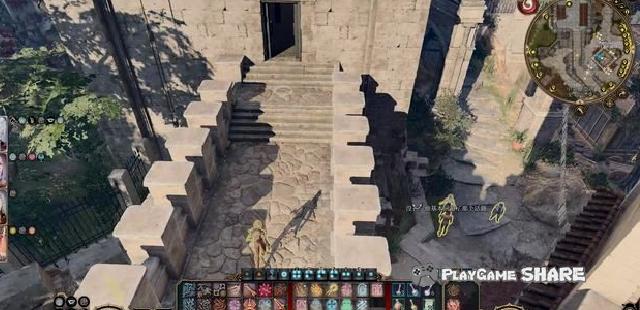
As long as there is asdonia in the team, it will not be attacked after entering the castle, and can also actively trigger some memory and dialogue.
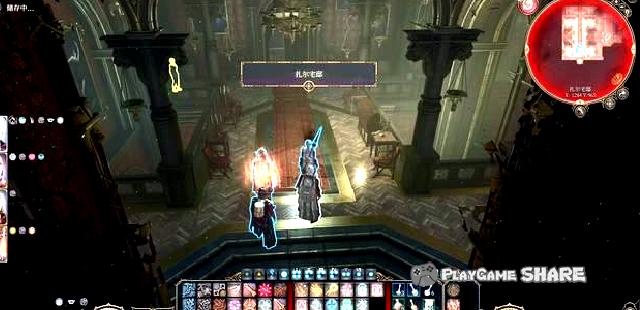
The blocked crime door needs passwords or coat coat rings to open, and temporarily leave to find clues.
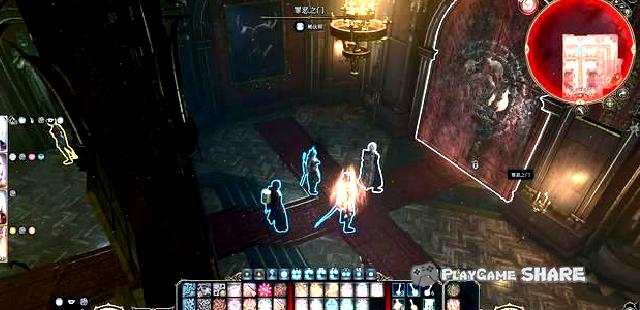
After entering the "Internal Laire’s Office", read the literature, and then passed through the fake wall to find the body of the werewolf, and got the keys in the room next door.
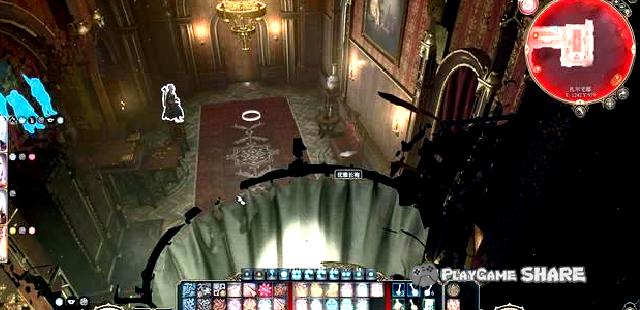
Be careful before entering the rooms in the lower level. There are magic of physical strength in it. It is recommended to open the turn mode single in.
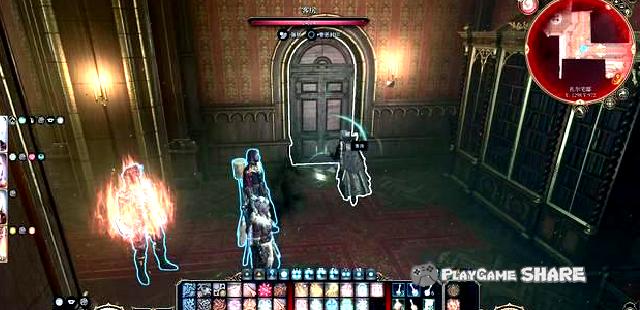
Afterwards, the Zakra dictionary was obtained in the wardrobe in the room and continued to find a ring.
[Remarks] There are also some equipment in the room.

Go to the lower level, just take the ring from Ge Di through lobbying, theft or fighting.
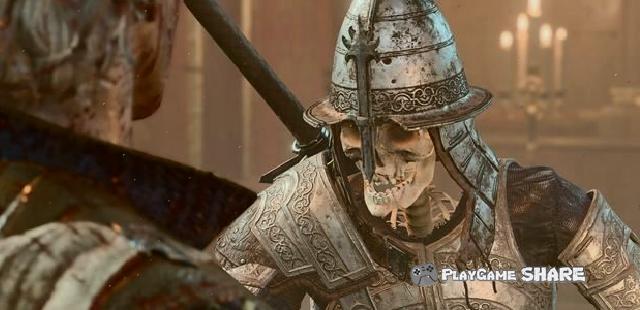
Partner task: Astai Lun (2)
After opening the door, the battle will be triggered. It is recommended to involve the companions first.
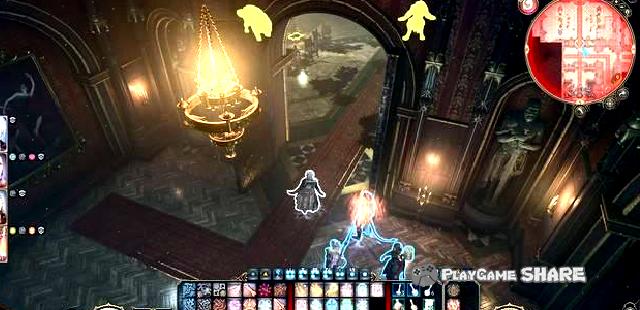
Then go down from the lifting ladder next to the housekeeper’s room to find the ceremony location.
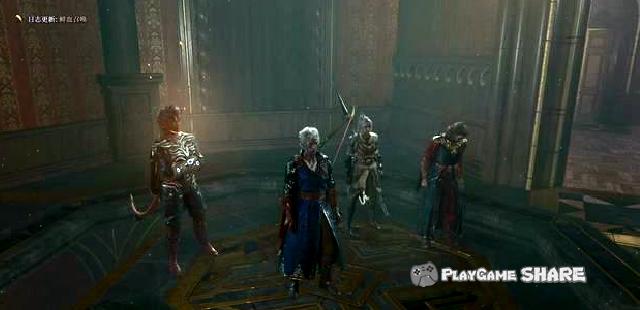
The door blocked by the light curtain also needs to be opened with a ring.
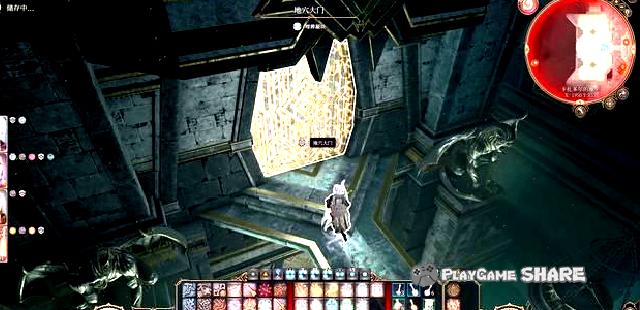
If you want to go to the lower layer, you need to let the upper teammates open the two-way portal, or the character below can use the knocking technique. At present, it is difficult to return directly to the top because of the viewing angle display problem.
[Remarks] Open the western door to enter the sewer and transmit it back.
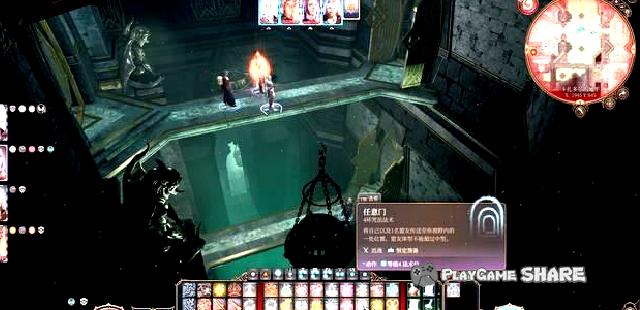
The west of the upper layer is Zar’s private room, and many literatures about evil rituals can be found.
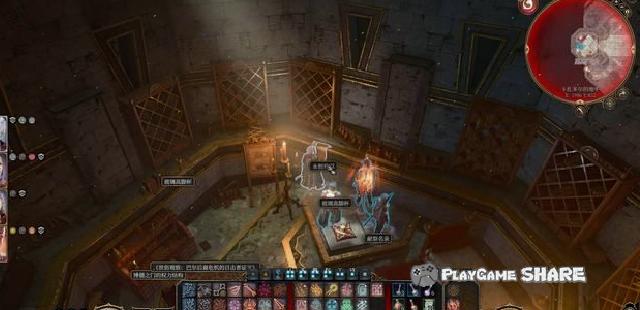
To go north, you can see the cells on the left and right sides, and the victims (including the Guer children) who have brought back from the Guerlon are detained. They are tortured after being converted into vampire derivatives.
After promising to rescue them, continue to move forward. Although they can be unlocked with knocking, the door can only be opened with Zael’s staff.
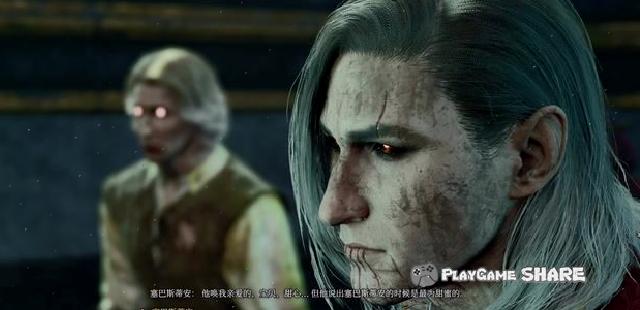
Go to the ceremony place and confront Zhal.
After choosing to help him, Asai Lun will lose his life, he usually chooses to resist.
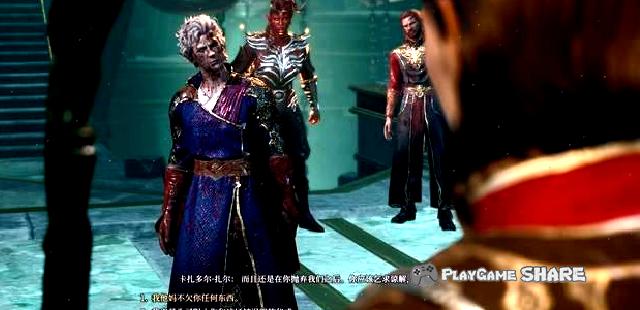
After that, he was fighting with Zar. After all, he was still a vampire. He could weaken him with more protection of good and evil and sacred attributes.
Zar will complete the ceremony after 7 rounds, strengthen it, and Asdon will die permanently.
[Remarks] Scope of spells may not be injured "sacrifice", and you need to pay attention.
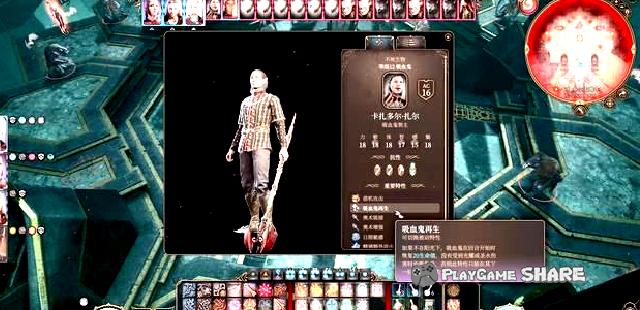
After completing the battle, pull Zael out of the coffin and make the final choice:
① Drain Zael and cancel this evil ceremony of sacrificing 7,000 derivatives.
② With the assistance of teammates, let Zar instead of Asdon as a sacrifice to make Astai Lun rise.
③ An interrupted on the way to Asdon’s ascension and will be permanently hostile to Asdon.
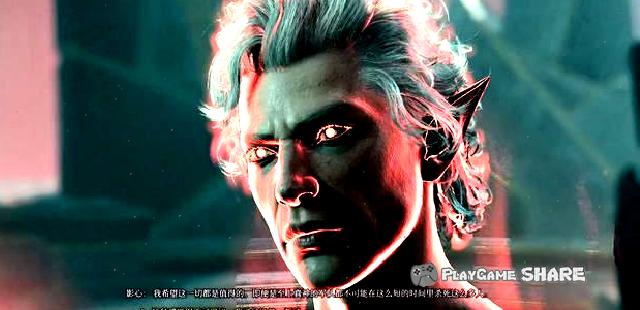
After the ascension, Asdown will be strengthened.
The previous blood-sucking characteristics will also be converted to "vampire supreme", the ability of blood-sucking ability is strengthened, and it can turn fog.
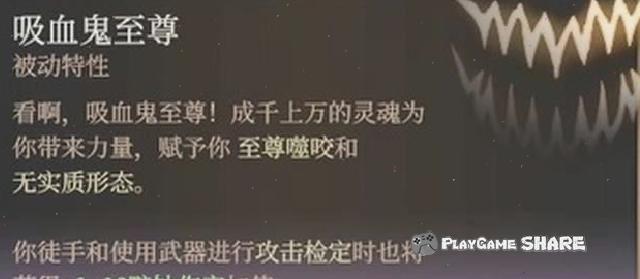
After that, the derivatives’ life and death were decided to let them go to the dark region through a judgment, and they did not live with human blood.
Destroying the staff or the elimination of prisoners will lead to the hostile of the Gurks.
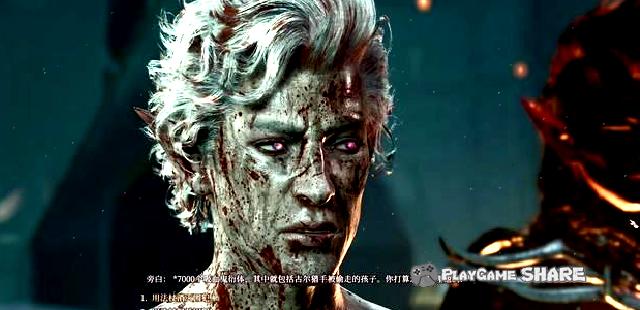
Whether you choose to release the derivatives, you will encounter the Gurks who come when they return.
According to the previous choices, if they let go of the derivative and tell the truth, they will express their gratitude and assist us in the final battle.
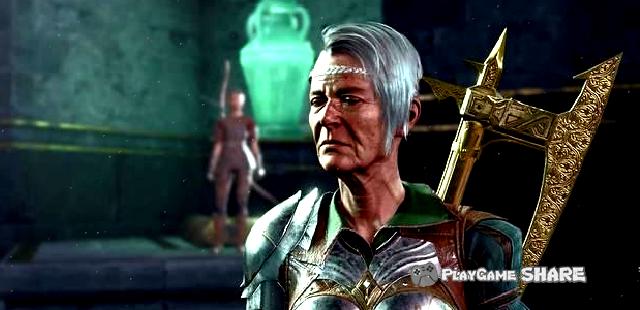
At the end of the story, if Astai Lun did not become a devil, he lost the larvae, and he would be affected by the sun again and returned to the shadow again.
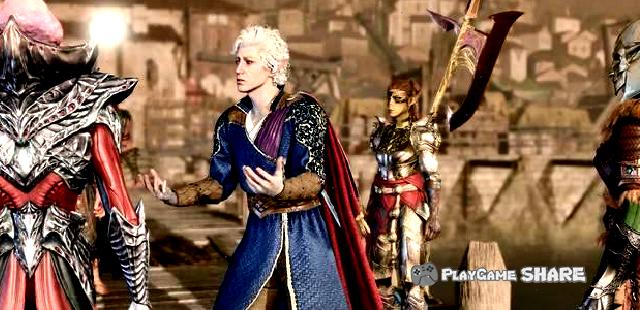
Partner task: Shadow Heart
2. Shadow Heart
Chapter One
In the sequence, we can see the shadow heart trapped in the warehouse, and find her from finding the keys from the hill next door to rescue her.
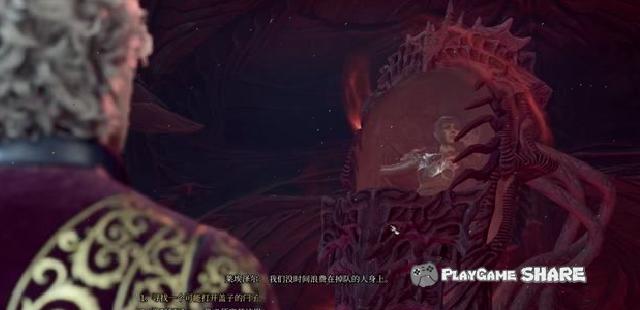
After the snail shell crashed, she can let her accompany her.
She can also get her relics when she is close to the ground camping ground.
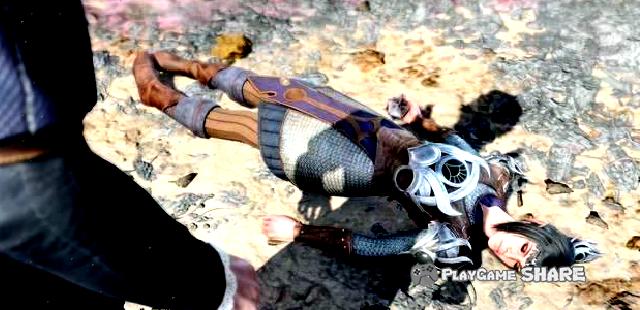
Chapter two
After entering the "Shar’s Trial", Yingxin will propose to complete Shar’s trial.
Please refer to the main line of this strategy.

Find the "Song of Dark Night" in Shar’s prisoner, and the main differences appear:
① Shadow Heart killed the "Song of the Dark Night", turned to a night judge, lost some feelings and obtained the legendary equipment "Sar’s Spear of the Night".
② "Survival of the Dark Night Song", Shadow’s Lost ‘favor, if the relationship does not reach a higher level, it will leave the team permanently.
[Remarks] Only by rescued the "Dark Night Song" directly in prison can the legendary equipment "Selne’s light spear".
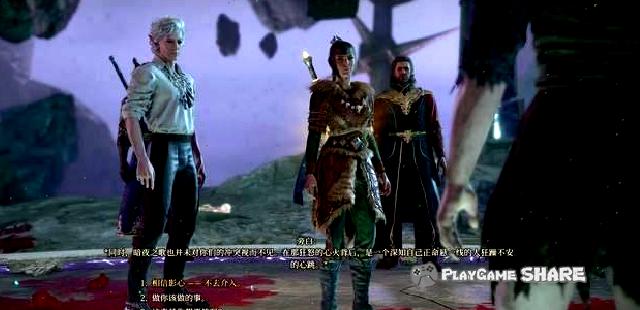
third chapter
Before entering Chapter 3, you need to talk to the two of Erin to learn about the life of Yingxin.
Go to the "sad residence" of Xiacheng District and trigger the plot after entering.
[Remarks] You can inquire about the clues in Lvyonton.
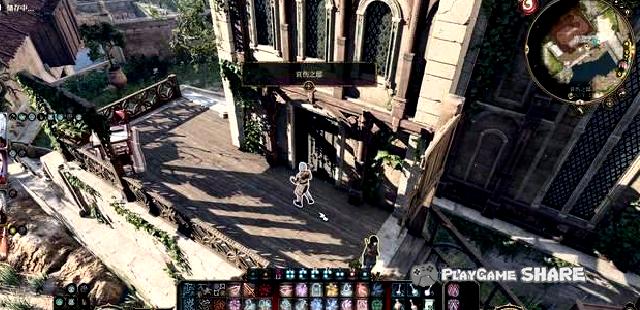
Enter the interior room, and open the dark door after detecting the switch of the icon below.
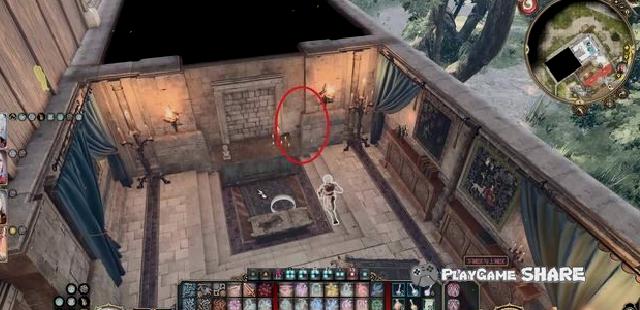
After entering the temple of Shar, make a choice:
① The shadow heart leaves the team permanently, and the player gets a BUFF of Shar.
② Enter the battle and kill the Shar believers.

The picture below is the attribute map of Vikonia.
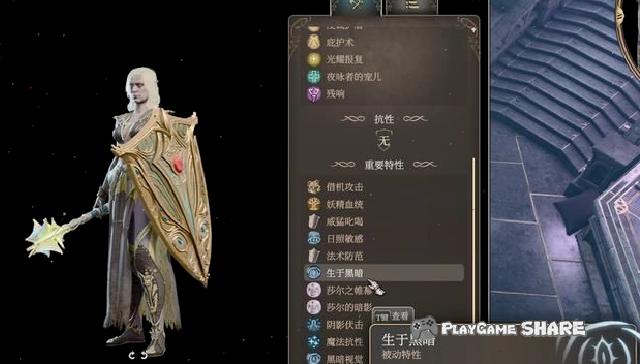
After completing the battle, you can search in the temple. The NPC named "Night Song" below is a neutral unit, and you can buy some items.
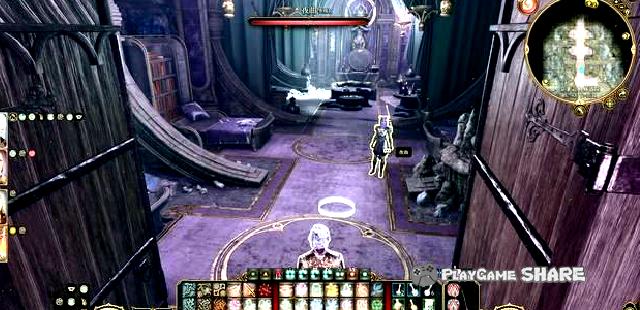
Finally, the parents who triggered the switch in the depths of the temple and found the shadow-hearted parents faced Sar.
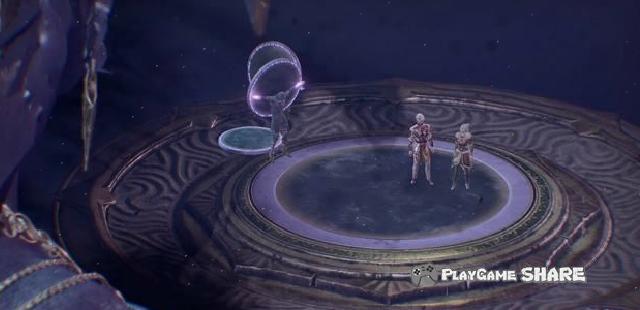
After choosing to refuse, Yingxin really came out of the shadow of Shar and re-survived as a believer in Selne.
In the final ending, Yingxin will embark on his own path and spread the belief of Serner (or Saer).
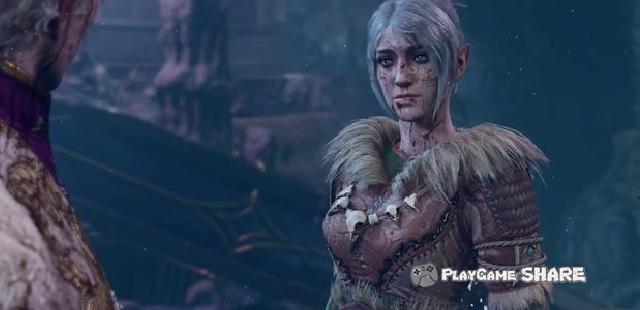
It is worth mentioning that in the temple, you can find a good "lost mirror", and you can use a knowledge held by the player to exchange.
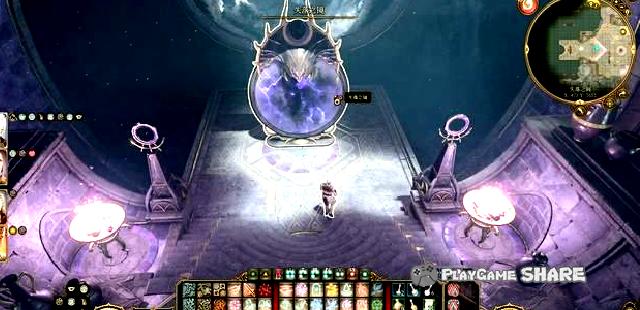
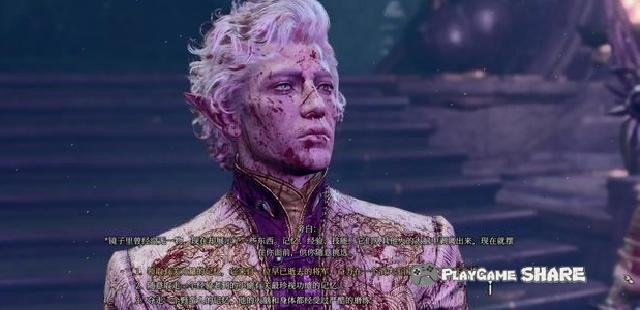
Partner task: Will
3. Will
Chapter One
Triging the plot near the Druid Camp, I saw the "Blade of the Border" Will for the first time.
After that, you can find him in the training area of the Druid Camp.
After several long breaks, Wil will be turned into devil by the demon Mizola.

Chapter two
Complete the branch mission "Mizola’s assets" and rescue Mizola from the nest to survive.
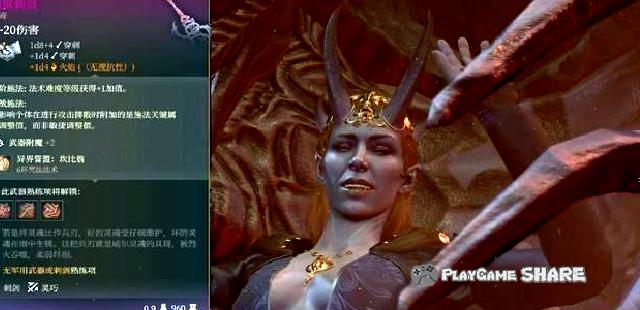
third chapter
When I saw Mizola behind Feilong Fortress, the important choice was triggered during the conversation:

①Well surrendered his soul in exchange for his father’s survival of "Duke of Gao".
② Will refuses the proposal, and the "Duke of Gao" will inevitably die (whether or not to enter the steel throne).
[Remarks] Duke Gao’s life is only related to this option.
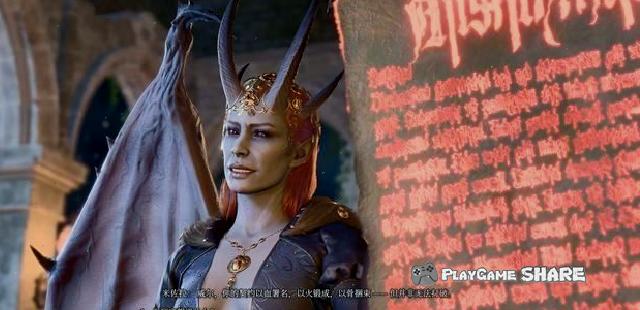
After entering the Iron and Steel Throne, you can know the relevant information of the guardian of the Gate of Bade: "An Su":
① When the Duke Gao survives, he talks with him and read the literature at the camp.
② When the Duke Gao died, he was talked about by the consultant Frehek when he was strolling in Xiacheng District. He could only relieve the misunderstanding and learn intelligence by judging.

Dialogue with Floque needs to complete the following three conditions:
① The first chapter, Wakin dormant her out of the fire.
② Chapter 2, the hotel has not been destroyed.
③ Chapter 3, Feilongguan Prison rescued her.

After completing the branch mission "Dragon Dragon", if the Duke Gao survives, he can choose Will’s final direction. According to the choice made by the player here, the ending of Wil (and Karch) will change.
[Remarks] Well and Karchk have special plots. See Kayak’s partner task part for details.

Partner task: Kakak
4. Carlkk
Chapter One
It is recommended to go to her after calling Will.
Go to the river north of the forest land and find her downstream, and use the power of larvae to know that she is innocent.
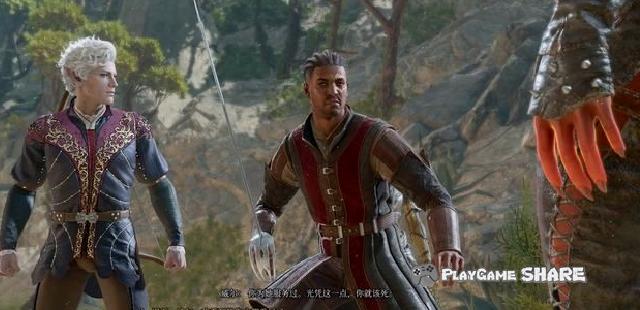
After that, she could complete her task on the road to promotion and defeat the demon hunter who hunted her.
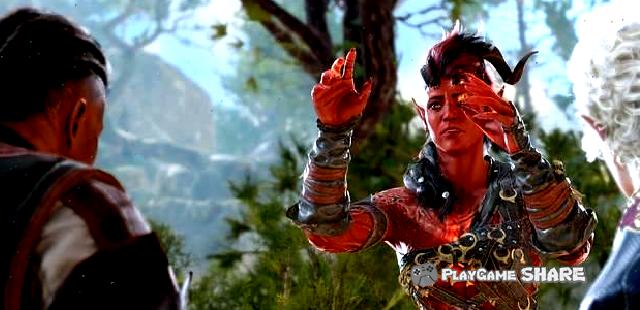
Back to Druid Lynch, talk to the blacksmith near drinking soup, and learned that she could use the hell iron to strengthen her engine.
[Remarks] No matter whether to complete the maintenance, Karika can use the "Hell Coin" to obtain a enhanced BUFF.
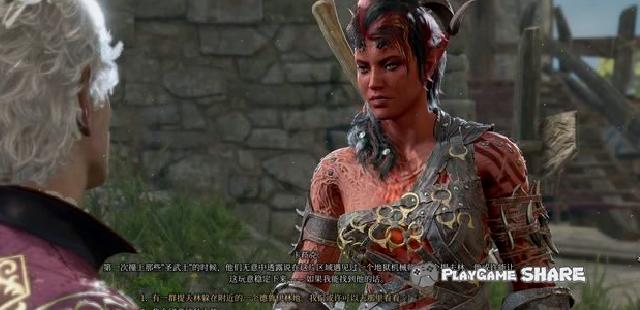
Chapter two
After entering the hotel, you can find a blacksmith again at the cow shed and strengthen the engine with the hell iron.
Although she has not lifted the crisis, she will not emit calories anymore after that, and can also conduct strategies.
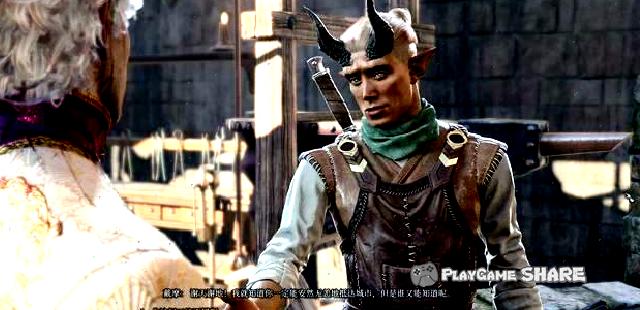
third chapter
After seeing Gotash in the nest of the second chapter, she would express her views. After taking her to see Gotash after the athlete ceremony, she would also trigger a dialogue.
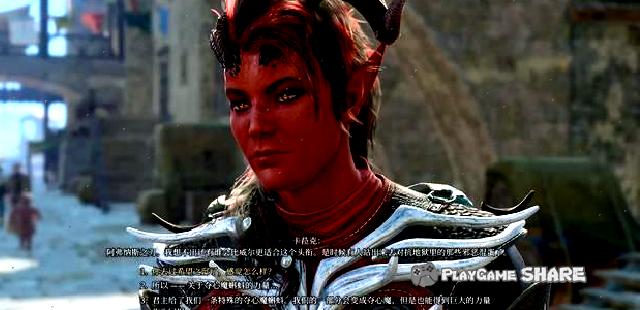
Once Gotash is killed, her revenge journey will end, and her future will only return to hell or die in the human world.
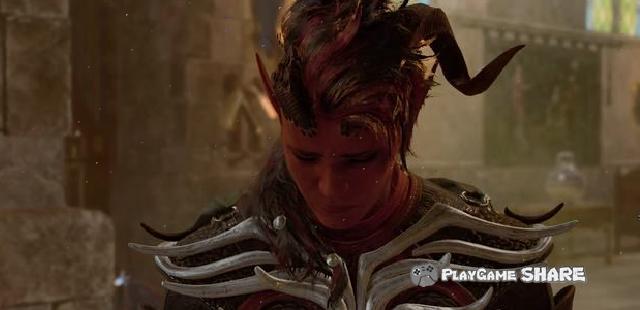
After returning to the Star World after the defeat of the main brain, she will take the initiative to make her become a devil and defeat the main brain.

Turning to the heart of the heart is the only choice for Karkk to survive in the human world.
In addition, if you want her to survive, you need to complete the partner mission of Will and Karchk (kill Getash together) before he will give up his soul and return to hell with Will as a border. Essence
[Remarks] Will needs to promise Mizola’s proposal and continue to survive as the "Blade of Hell" to trigger the conversation when the ending.
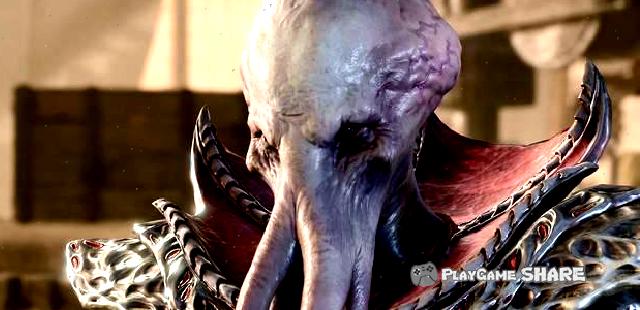
Partner task:
5. Gal
Chapter One
For the first time, he met him in the portal of the crash area and pulled him out of the portal through the test.
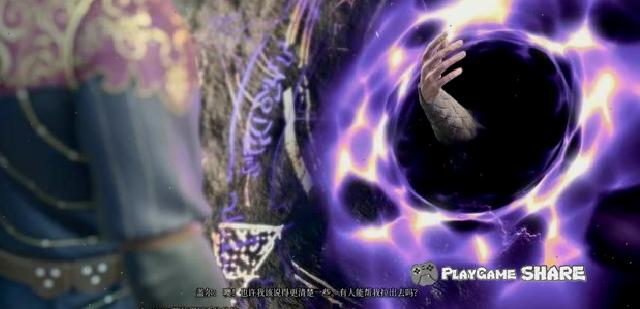
In the first chapter, a total of two "eating equipment" will be triggered, and it can be completed by delivering any magic items.
In the second incident, Gal would feel abnormal, and his core could not stabilize normally.
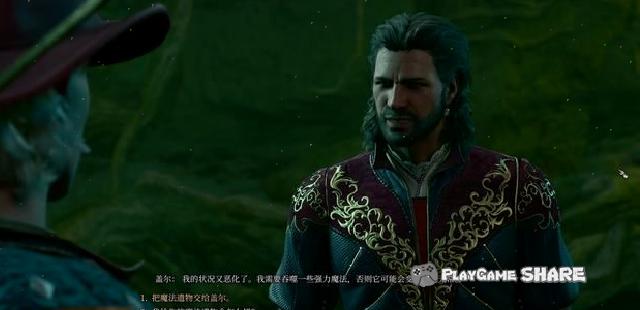
Chapter two
After that, he would encounter the magic old man on the way to the Yingying area (Chapter 2). After returning to the camp, he learned that the cause of Mistra and Galle was learned.

In the nest plot of Chapter 2, if Gal is in the team, he will make a blasting request for the first time, and the consent will end the game early.

third chapter
After entering Xiacheng District, go to the magic grocery store, and find the personal line of Will after finding the Bi Jiroure.
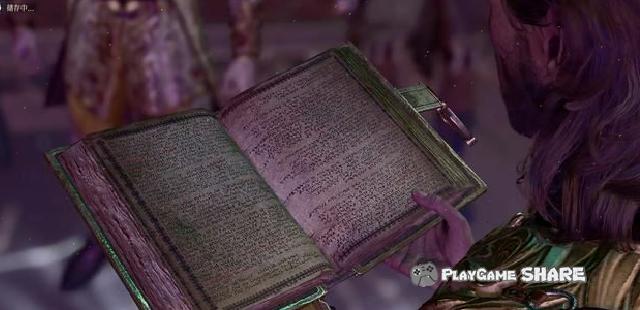
He said he wanted to capture the crown of Ryle, and used it to make him a god.
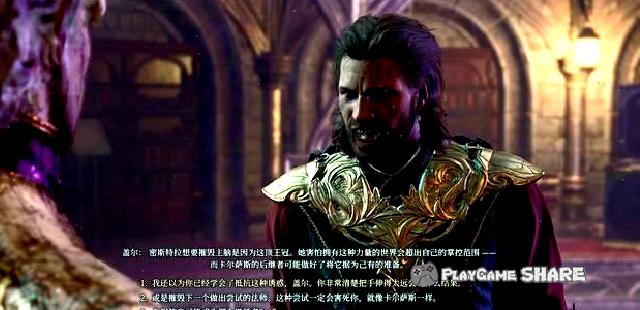
Afterwards, the magic old man was found in the camp, and this time Mistira’s voice was given to her crown.

Before the decisive battle with the main brain of the color resistance, Gal also made a blasting request again.
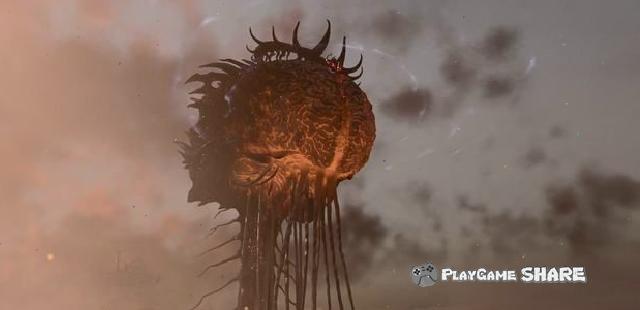
After completing the main line, Gal will leave us and go to find the crown of resistance to the water that falls into the water.
If Gall is used as the origin of the origin, you can see the follow-up of the Crown Crown and confront Mistra.

Partnership task: Leezel
6. Leezel
Chapter One
The first time I encountered Ledizel on the snail shell.
After entering the first chapter, she found a trap near the forest land and rescued her.
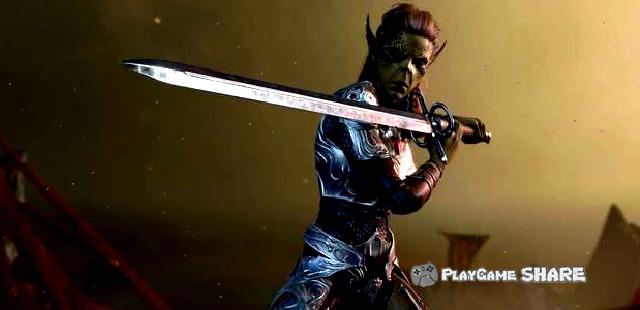
After entering the Druidi Land, he found the target NPC, and then went to the Pass to trigger the plot.
Regardless of the choice of fighting, or if it is concealed or not, you can get the specific location of the Geis asset-based nursery.
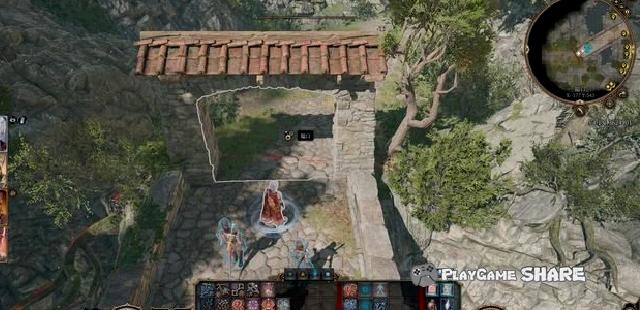
Go to the Geis Yankeli Relief, find a judge after a failed "treatment", and talk to the current Queen.
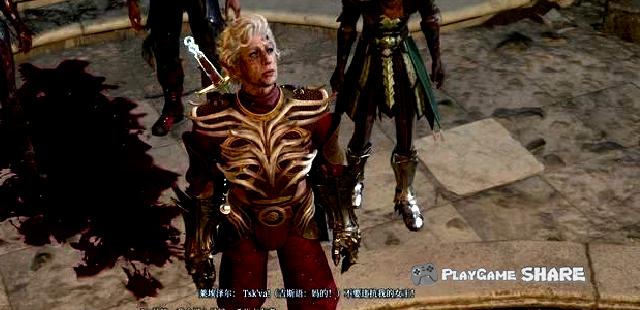
Regardless of whether to enter the relics to the star world, the end result is hostile to the current Queen, and after leaving the nursery, he saw the centurion Vols in the camp.

third chapter
After learning that the "lost prince" in the star world was Orevis, he asked about the relevant information of Orevus’s hammer before Feilongguan, and entered Raphael’s hope in Xiacheng District.

After obtaining Orevis Hammer, go to the sewer and inform Volt and get legendary equipment.
Finally, after the first battle with the main brain, he returned to the Star World, decided to assimilate Orevis, and decide which character is the demon:
① The death of Orevis, Ledizel would oppose it.
② Orevus survives, you can choose to leave Ledizel at the end, or follow Orevis (if he has not become a heartbroken).
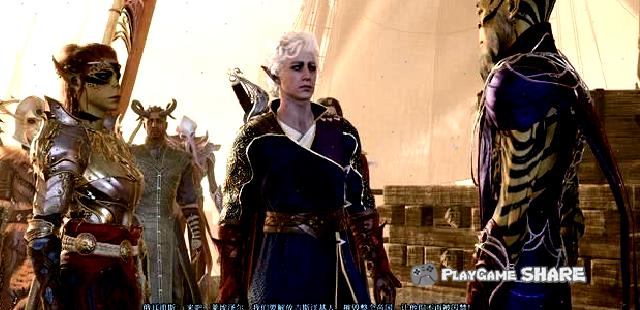
Summary of legendary equipment
1. Deformation biological mask
The DLC special code comes with its own, and the boxes in the camp are obtained.
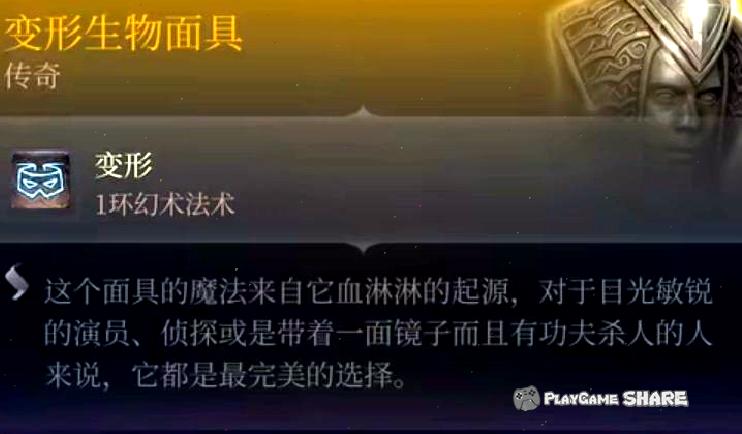
2. Luoshan Da’s blood
Chapter 2, the Red Monastery, go to the depths of the nurturing room after the ceremony.
Refer to the "Loshan Blood" process of this strategy.
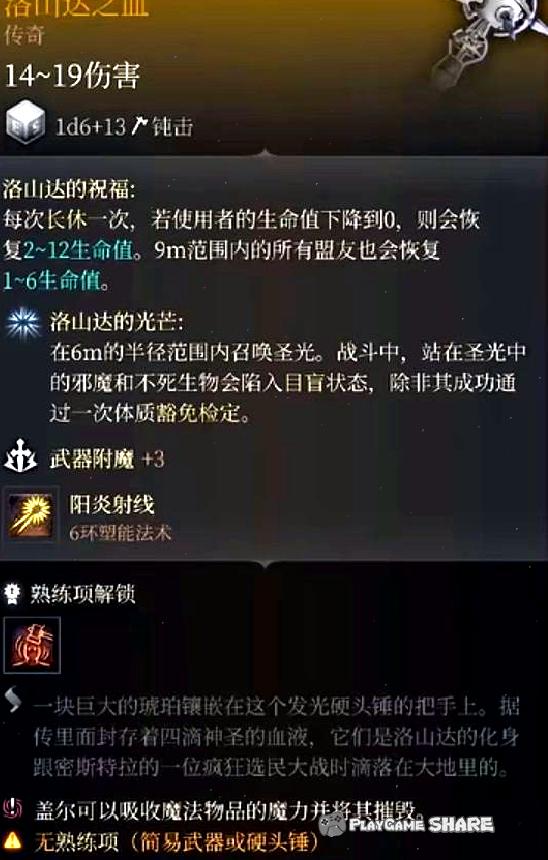
3. Caren’s dark night short spear/Shar’s dusk short spear
Chapter 2, after completing the trial in "Sar’s Trial", let Yingxin choose to rescue/kill the song of the night.
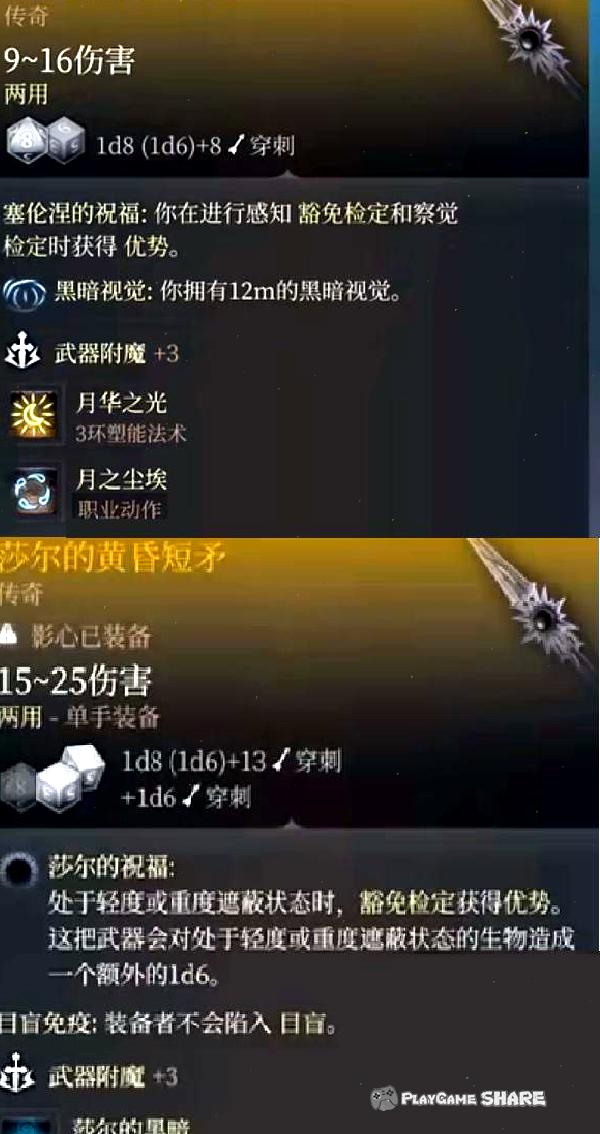
4. Guardian beetle
This is Mizol’s equipment. At present, there is no effective way to obtain except the modification of the equipment code.
It is said that after Talking with her proposal to refuse Mizola, she will tell the player that "will be rewarded after defeating the Supreme God", but the game has ended at that time.

5. Believers hard head hammer
Yingxin specially provided equipment, and the pastor selected "sacred intervention" for armed servants after reaching level 10.
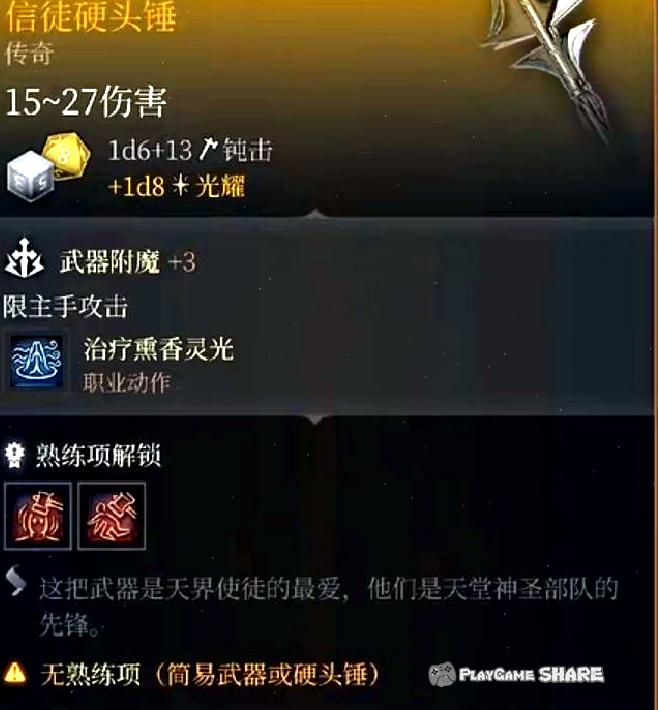
6. Vi Connia’s walking fortress
Chapter III, the "Sorrowful Mansion" in Xiacheng District defeated Victinia (Personal Line) in the Temple of Shar.
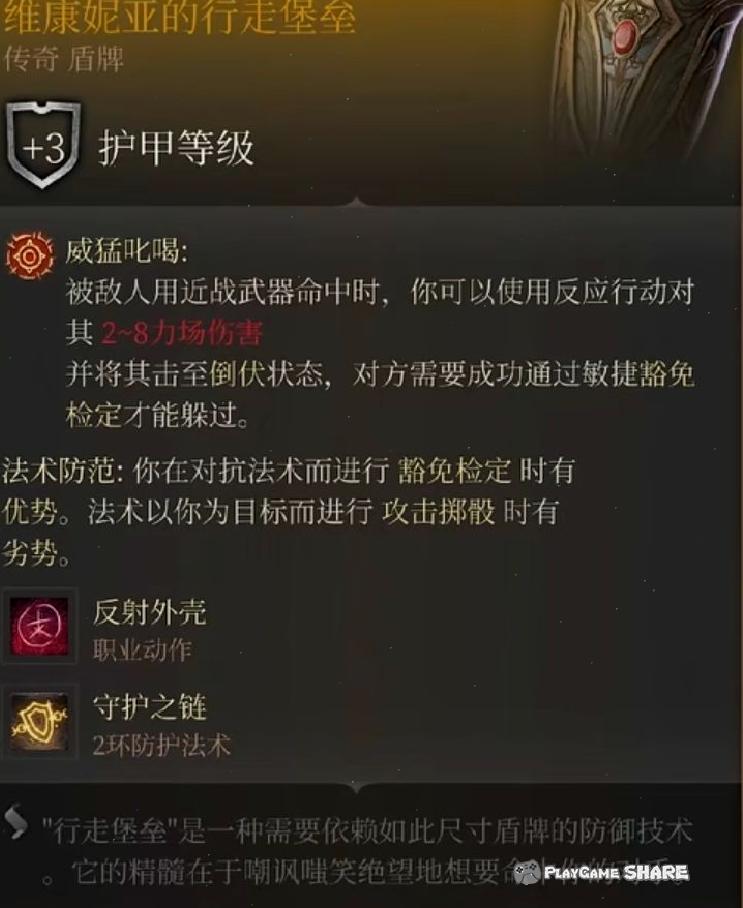
7. Dark Prison armor
Chapter III, defeated Raphael in the residence of hope.
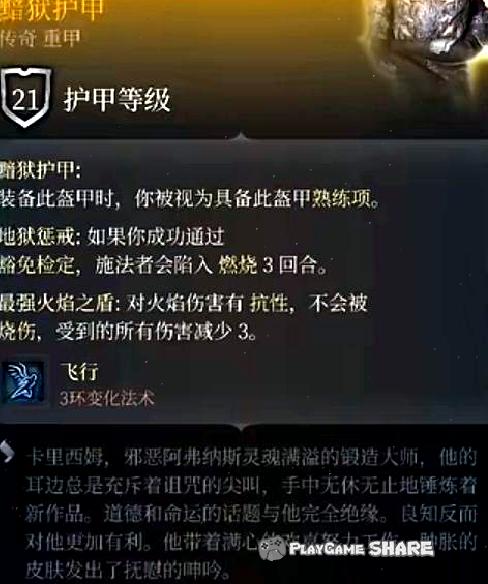
8. Bo’an Giant Killer/Bo won the helmet
In the third chapter, the branch process "Dragon Ansu" needs to go to Feilongguan Prison after completing the process of completing the steel throne and enter Ansu’s trial field.
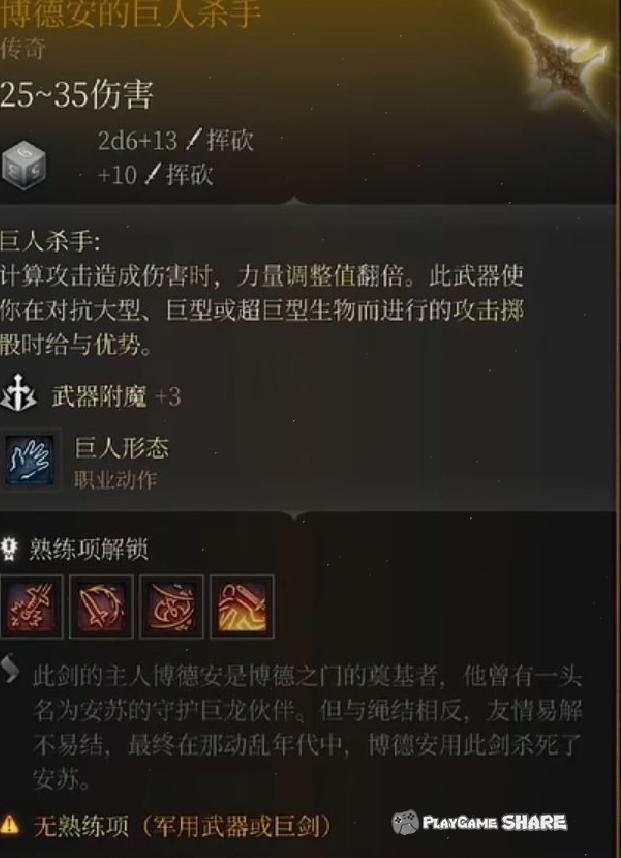
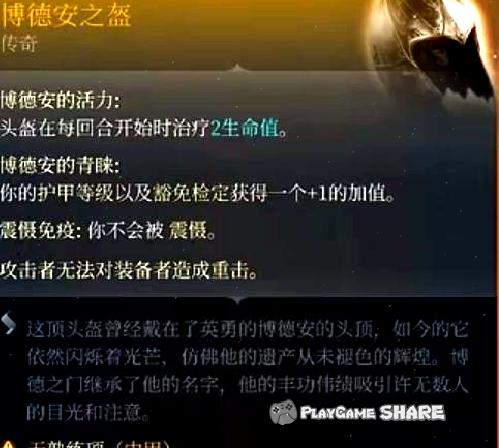
9. Russia’s Hammer
Chapter III, enter the residence of hope in the "Tips of Devil" in Xiacheng District.
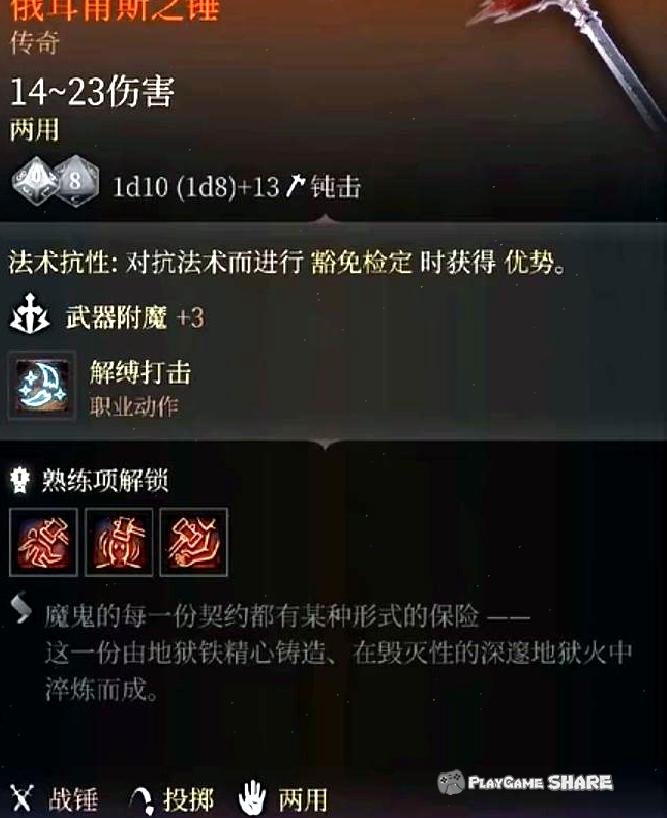
10. Forging God Vortex
In the third chapter, the deepest part of the steel guard factory defeated the four-foot machine to get it.

11. The privilege of the dueller
Chapter III, after receiving the task of looking for a daughter in the Yanquan Battalion of Xiacheng District, he completed the "Anti -Ghost Mutual Aid Meeting" by the branch line, and then found a girl’s mother to collect it in Xiacheng District.
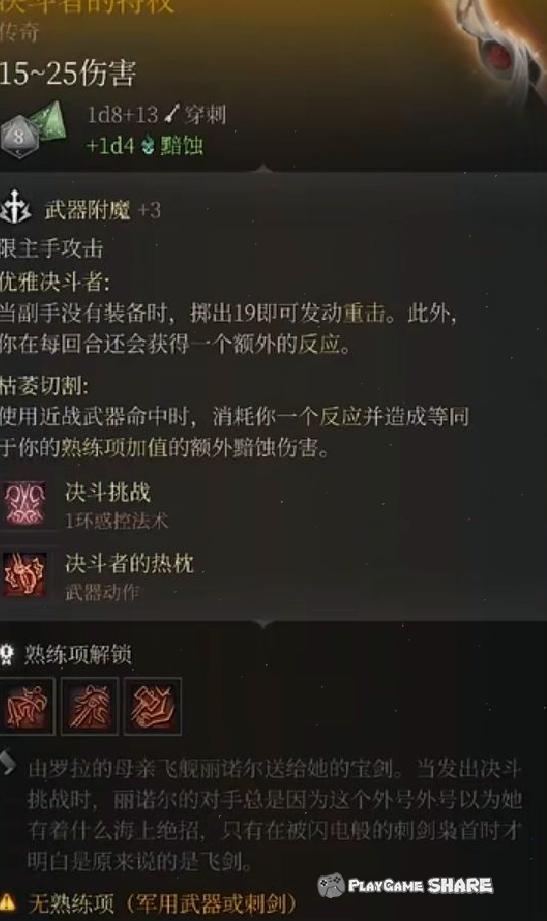
12. Marchhhki
Chapter III, send it to the top of the wizard tower, press the "O" key to switch to the perspective, find the foothold and jump to the lower layer to open the button on the platform (need "to know the invisible").
[Remarks] You can also see the lower level when you look out at the balcony, but you need to be injured.

13. Star Silver Sword
Chapter III, after completing the "Hope of Hope" by the branch line, find a centurion Vols from the sewer.
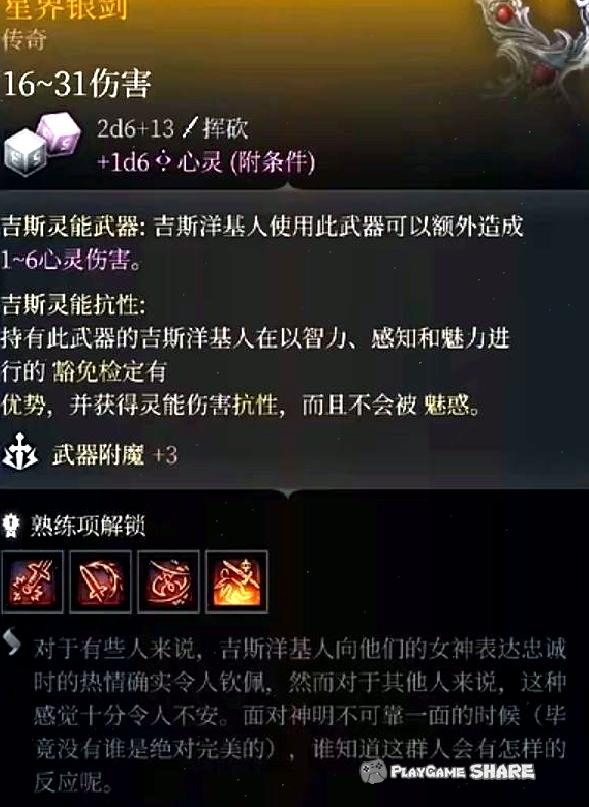
14. Scarlet trick/first drop of blood dagger
Chapter III, defeated the Olympic Olympics when completing the main line "Olympic Stone".
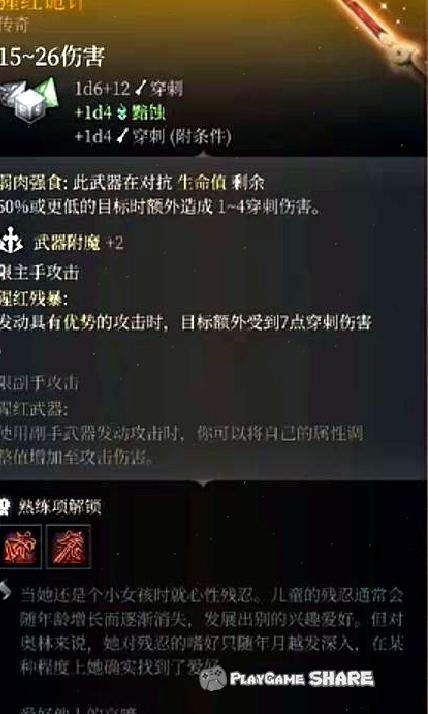
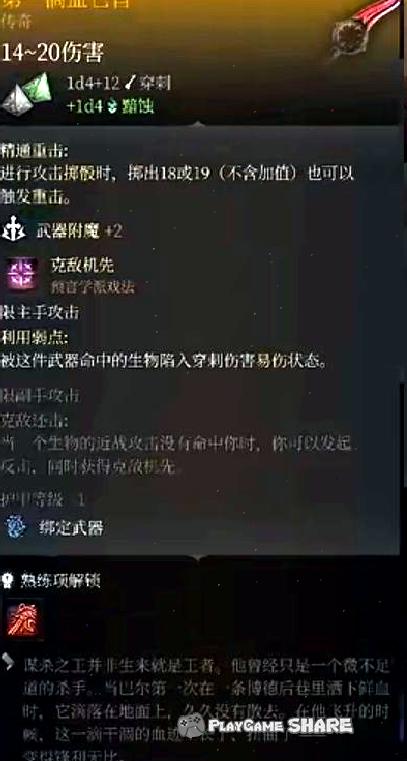
15. Soul capture gloves
Chapter III, rescued the hope when completing the "Hope of Hope", and after defeating Raphael, he received from the hope.
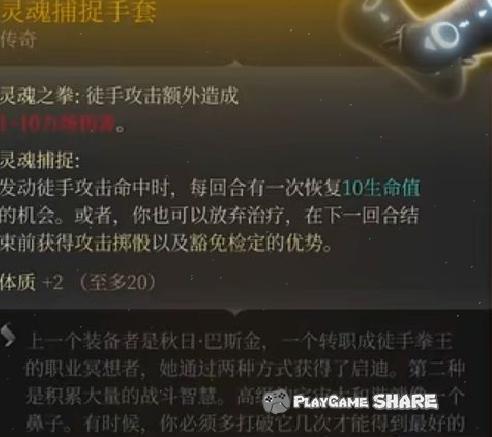
16. Nurina
Chapter III, the circus, stole the ring on the giant spirit and rotate the prize after being transmitted.